Sooner or later, there comes a time when a complete reinstallation of Windows, along with the drivers and applications used, becomes inevitable. Most users do this kind of manual reinstallation, which is very time consuming and not very enthusiastic. And this is not surprising, because you need to save important settings somewhere on the disk, and then remove all applications and the system from it (it is also desirable to format the disk, after copying all the necessary information from it). And only then it will be possible to proceed directly to reinstalling Windows, drivers and applications. Technically, of course, there is nothing complicated in this process - you know, click on yourself in the windows that open, agreeing with the settings, or changing them at your discretion, enter registration information, change discs in CD / DVD drives and perform other routine operations. However, it is, of course, a pity to waste time on such simple operations - it is better to try to automate this process. How? With the help of some very useful programs, which we will consider in this article. Broadly speaking, there are two options for solving the problem. You can use any program for full backup of hard drives/partitions - this backup creates a full disk image (a snapshot of the state of the disk - snapshot) containing operating system, systemic Windows registry, device drivers and installed apps, as well as service areas of the disk hidden from the user. From this image, you can quickly restore the disk, including the OS and installed applications, without resorting to their re-installation. Of course, provided that such an image was created immediately after Windows installation, all required drivers and applications, along with their settings, and written to a CD/DVD (or other media). And you can reinstall the OS and applications, but not manually, but automatically, using auto-installers specially designed for this purpose. Such programs remember the algorithms for installing the system, drivers, and various applications and generate a program script, which is then most often written to an autoloading CD / DVD. When such a disc is inserted into the drive, the autorun.exe file is launched, allowing the user to select the applications to be installed from the menu, after which it remains to click on the "Install" button and all selected programs will be installed. In both cases, a fresh operating system with the necessary applications will be installed on the computer.
Full disk redundancy
When restoring information from disk images, all applications and the system are restored at the same time. Moreover, drivers and application settings are also restored (unless, of course, the backup was carried out after the corresponding changes in the system). However, this deletes all information from the disk - so a separate disk must be allocated for the system and applications. If a HDD only one, it makes more sense to split it into at least two logical ones - the first one is for installing the OS and applications, the second one is for placing user data. This will allow you to easily "reinstall" Windows by restoring it from a full image, and user documents will remain safe and sound, since they are located on a different logical drive. If you have three logical disks at your disposal, then this is even more pleasant, because on the third one it will be convenient to store archival copies of working materials, an image of the system disk and software distributions. Of course full copy disk is best done immediately after installing the OS with drivers and applications with settings. This will provide the fastest "reinstallation" option in the future, although of course nothing really terrible will happen if you forget to install or configure a couple of applications before creating the image - then you just have to install or configure them manually each time. It is safest to store the resulting image on external media- for example, an external hard drive or a USB flash drive (unless, of course, the archive file is relatively small), even better if both there and there (for insurance, because media also do not last forever). It is also possible to store a system backup on DVDs, since the corresponding programs are usually able to divide large archives into several files that together make up the original archive. True, creating such a multi-volume archive will take much more time than when backing up to a hard disk. When backing up to removable media, you can make this media bootable and then a separate boot disk is no longer required. Among the solutions of this plan, Acronis True Image Home, Paragon Drive Backup Personal and Norton Ghost are considered the most popular among the general user - the first two solutions were even recently awarded TopTenREVIEWS 2009 Gold and TopTenREVIEWS 2009 Silver, respectively, which is not surprising at all. Acronis True Image Home is deservedly recognized by experts as one of the most feature-rich and reliable applications for Reserve copy data. Paragon Drive Backup Personal is slightly inferior to the Acronis solution in terms of functionality (Table 1), but for home users this is completely unprincipled. It is difficult to say which of these programs is better in terms of creating full disk images - both of them do an excellent job with the task and are quite easy to learn, and they also have a Russian-language interface with help, again in Russian. So it's more of a matter of taste. As for Norton Ghost, this solution is considered the main competitor of Acronis True Image in the world and generally works just as well (although somewhat slower), but it is not Russified, and therefore will not suit all users.Table 1. Functionality of disk/partition backup programs
| Programs/Functions | Acronis True Image Home 2009 | Paragon Drive Backup 9.0 Personal | Norton Ghost 14.0 |
| Supported OS | Windows XP(SP2, SP3), Vista | Windows 2000/XP/Vista | Windows XP/Vista |
| Interface | Russian speaking | Russian speaking | English speaking |
| Supported file systems | FAT16/32, NTFS, Linux EXT2/3, Linux ReiserFS | FAT16/32, NTFS, Linux EXT2/3, Linux ReiserFS, Linux Swap, HPFS | FAT16/32, NTFS, Dynamic Disks, Linux EXT2/3, Linux Swap |
| Disk/partition redundancy | |||
| Backing up folders and files | |||
| Backing up custom app and email settings | |||
| Supported redundancy options | Full, incremental and differential | Full, incremental and differential | |
| Cloning hard drives | |||
| Archive storage | On any supported media and in the "Security Zone" on your hard drive | On any supported media and in a bootable archive capsule | On any supported media |
| System Restore | From emergency boot disk and boot recovery | From a rescue boot disk or from a boot archive capsule | From a rescue boot disk or using the internal recovery environment |
| Archive compression ratio | |||
| Archiving process priority | |||
| Password protection of the archive | |||
| Adding comments to the archive | |||
| Dividing the archive into parts | |||
| Archive integrity check | |||
| Executing Pre/Post commands when creating an archive | |||
| Excluding folders and files when backing up disks/partitions | Ancillary exclusion system files, specific folders and files | Exclusion of auxiliary system files | |
| Full/partial expansion of an archive | |||
| Accessing data from the archive | |||
| Creating a bootable (rescue) disk | |||
| Ability to safely perform potentially hazardous operations | + |
||
| Integration with Google Desktop and Windows Search | + |
+ |
|
| Additional tools | Guaranteed destruction of confidential information, removal of traces of work on the computer | Performing basic operations with disk partitions (creating, formatting, deleting, etc.) | Optimization of data stored in archives, remote control in the local network |
| The presence of a task scheduler |
Acronis True Image Home 2009
Developer: AcronisDistribution size: 88.1 MB
Spreading: Shareware Acronis True Image Home is a world-famous backup and recovery solution. The program allows you to create exact images of a hard disk and/or its individual partitions containing all the data stored in the reserved area (including OS and installed applications), as well as back up any data specified by the user. These can be separate folders and files, Email(file archive emails and settings for MS Outlook and MS Outlook Express) and user application settings. It is possible to create full, incremental and differential archives. Functionality is provided for excluding auxiliary system files (pagefile.sys, hyberfil.sys), as well as specific folders and files from disk/partition archives. If you wish, it is easy to use the Acronis Instant Protection tool, with which you can immediately after the first launch of the program create backup its system disk and Master Boot Record (MBR) and schedule future backup operations. It is possible to clone disks, during which the size of partitions can be increased - automatically or manually. Implemented tools for automatic backup according to a user-defined schedule. To simplify the search in archives, integration with Google Desktop and Windows Search is provided, thanks to which you can search the contents of archives without opening the Acronis True Image Home application (by entering the file name in the query field of the corresponding search engines). System recovery is performed from an emergency boot disk, which is easy to create right in the program environment. There is also a "Startup Repair" feature that allows you to boot your computer without loading the operating system and initiate the data recovery process in background after restoring the operating system, even if the system and boot files. A special Try&Decide mode allows you to perform potentially dangerous operations, such as installing programs or opening e-mail attachments, without putting your computer at risk. You can store images on any supported media, including hard drives, network storage devices, FTP servers, CD/DVDs (CD-R/RW, DVD-R/RW, DVD+R (including dual layer), DVD +RW, DVD-RAM), ZIP, Jaz, etc. In the absence of a special device for storing backups, the program allows you to save them on your hard drive in a specially created "Security Zone". The latter is a hidden service partition on the hard drive, inaccessible to both the operating system and others. Windows applications and therefore completely protected from accidental damage. The program (there is a Russian-language version) can be downloaded and used completely free of charge for 15 days, after which you will need to pay 499 rubles. The program is accompanied by a very detailed and colorfully illustrated Russian-language documentation. The modules of this package are located on seven tabs: " start page, Backups, Jobs & Log, System Protection, Try&Decide, Utilities, and Search. start page gives access to all the features of the program. Tab Modules "Backups" allow backup and restore. On the tab "Assignments and Journal" concentrated toolkit for viewing scheduled and completed tasks, and on the tab "System Protection"- viewing data on backup of certain components. Tab Try&Decide is designed to switch the computer to trial mode, in which a safe temporary workspace is created on the disk (approximately the same as when using virtualization programs). This mode is useful when using dubious programs and performing risky actions, because when working in it, you can not worry that certain operations may damage the operating system, programs or data. After the implementation of virtual changes, they are applied to the real system or the changes are discarded. Tab "Utilities" contains modules with which it is easy to clone a hard drive, add a new hard drive to the system, and also guaranteed to destroy personal data and confidential files and clean the system from traces of the user's work. And on the tab "Search" there are tools for searching backup archives. From the perspective of our article, copying disks / partitions and application settings (tab "Backup copies") is of interest - both functions work under the control of the wizard, and therefore their use does not cause difficulties. The first possibility provides the creation of a complete disk image, from which it will then be possible to restore the system and applications. It is best to store such an image on an external hard drive or on a USB flash drive. To create a disk backup, you will need to click in the sidebar on the "Backups" tab, activate the "Create" mode and specify the "My Computer" option as the type of data to be backed up, which creates an image of an arbitrary set of disks / partitions.
This will launch the Backup Wizard, and then you will only need to follow its instructions - specify the disk to be backed up and the location for storing backups, set that a new archive should be created, and the backup itself should be complete.
If necessary, you can fine-tune the backup settings. For example, it is easy to exclude any folders or files from the archive (this makes sense if system drive there are user folders and files that are not required to be included in the archive). In particular, you can set a ban on adding specific folders to the archive or prohibit adding certain types of files (their type is set using standard wildcards accepted in Windows). In addition, it is allowed to use Pre/post-commands - that is, commands or batch files that will be automatically executed before and after the backup procedure. It is also easy to change the archive compression level, set the desired process priority, etc.
At the final stage, a summary of the created task is displayed. The backup process is started by clicking on the "Proceed" button. The progress of the task is shown in a separate window.
Restoring a disk from an image is performed in the "Recovery" mode ("Backups" tab). Since at the output we need to get fresh Windows along with applications (we assume that there is only one system disk), we will have to start the computer from a boot disk - such a disk must first be created using the appropriate wizard ("Create bootable media" operation on the "System Protection" tab "). To do this, we install the program's emergency boot disk into the drive and in the BIOS we define CD-ROM as the first boot disk. After the reboot, we get into the Acronis shell. First of all, you should select a backup copy and set the recovery method to "Recover disks or partitions". Then determine the recovery items by enabling the checkboxes not only for the disk image itself, but also for the MBR master boot record, without which the system boot will not be restored.
After that, a disk is selected where the selected image will be restored - it can also be a data disk, about which the program will politely warn you. Naturally, all this data will disappear after recovery. When finished, you can change the priority of the restore process, specify the email address to which a notification will be sent when the restore process is completed, and so on. The result of the operation will be the appearance on the disk of a fresh OS, along with installed applications. User settings backup allows you to save and, if necessary, restore user settings (but not executable files) of popular applications. To create such an image, you need to activate the "Create" mode (the "Backups" tab), select the "My programs" option, define the list of applications, the image storage location and the backup method. The program itself will determine the location of folders with settings for each of the applications and reserve them. You can store images with settings on any supported media. In the same way, you can back up email (that is, a file archive of emails and settings for Microsoft Outlook, Microsoft Outlook Express and Windows Mail) by selecting the option "My email" on the "Backups" tab.
Paragon Drive Backup 9.0 Personal
Developer: Paragon Software GroupDistribution size: 96.1 MB
Spreading: Shareware Paragon Drive Backup Personal is an established backup and recovery solution. With it, you can create backup copies of the operating system with all user settings and applications, as well as backup user-specified folders and files. The program provides tools for creating incremental and differential archives. It is possible to exclude auxiliary system files from the archive (pagefile.sys, hyberfil.sys). Disks can be cloned with the ability to automatically resize partitions to match the size of the new hard disk. Disks and partitions can be backed up both with and without restarting the computer (in this case, you need to change the program settings). The process of disk backup and copy operations can be automated using the built-in scheduler. System recovery is usually performed from an emergency bootable CD - such a disk is included in the delivery, but can also be created by the user directly from the program. In addition, recovery operations can be performed by booting the computer from a bootable archive capsule (there are two boot options - Linux and DOS). The resulting images are stored explicitly on local and network drives, USB devices or Fireware, or in a bootable archive capsule - a highly protected area of the hard disk, visible only in Paragon Drive Backup and designed for storing backups. It is possible to burn backup archives directly to CD/DVD/BD discs (or save them to ISO-format images for subsequent recording to optical discs). A functionally limited demo version of the program, which does not allow recovery from a rescue disk, is operational for 30 days, the cost of the commercial version for users in Russia is 490 rubles. The program is accompanied by sufficiently detailed Russian-language documentation. The application modules are located on four tabs: "Basic archiving tasks", "Advanced archiving tasks", "Restoration tasks" and "Utilities". Tab "Basic Archiving Tasks" includes tools for creating disk/partition backups and backing up individual files and folders. Tab "Advanced Archiving Tasks" provides obtaining differential archives of the selected partition and allows you to create an increment to a file archive or partition archive. Tab "Recovery Tasks" Responsible for performing recovery of disks, partitions and individual folders and files. And on the tab "Utilities" modules for a number of auxiliary processes are combined: managing an archive capsule, creating and checking a rescue disk, checking the integrity of an archive, and working with backup archives as with ordinary folders to view their contents and copy the necessary files. From the point of view of the task considered in the article, we are interested in the capabilities of the "Basic tasks of archiving" and "Recovery tasks" tabs, which include functionality for creating full images of system disks and then restoring a system with applications from them. Creating a backup copy (as well as restoring data from it) is not difficult, since it is completely controlled by the built-in wizard. True, by default, the operation will be performed with a system reboot (this is required for the solution to obtain exclusive access rights when processing data). You can avoid rebooting if you use Paragon Hot Processing technology, to connect which you need to look in the settings (Tools => Settings), activate the "Hot Processing Options" section and connect the above technology. In fairness, it should be said that this operation can also be performed in the process of creating an archive - however, only in extended mode.
To create an archive of a system disk, you need to open the tab "Basic tasks of archiving", click on the line "Back up a disk or partition" and specify the disk to be archived.
After that, you should determine the type of archive location and, if you select a local or network drive, also specify the specific drive and folder to which it will be written. And that's all - you can proceed to the final stage of the reservation. If more fine-tuning of the backup parameters was required, then this should have been done in advance in the program parameters (Tools => Settings => Copy settings). For example, here it was easy to adjust the compression level, divide the archive into volumes, exclude folders or files corresponding to a certain mask when forming the archive, set up sending notifications of the completion of the operation by e-mail, etc.
Then the program will prompt you to check the archiving parameters and when you click on the "Next" button, it will inform you that the wizard has completed and that all changes have been made only virtually, and to actually create the archive, you will have to start the process by clicking on the "Apply" button - not in the window wizard, but in the main program window. Without a doubt, for novice users, this approach will be more reliable, while the rest can easily refuse virtual operations through the settings.
The progress of archiving is displayed in a separate window.
The "Recover disk or partition" task (the "Recovery tasks" tab) is responsible for restoring a disk from an image. The technology for obtaining an updated system disk is traditional. First, we boot from the boot disk - you need to create it first by calling the Rescue Disk Creation Wizard from the "Utilities" tab, you can also use the included Rescue Disk. As a result, we get to the Paragon Drive Backup shell, where you will need to select a backup copy, and then the disk to which the data should be restored. Upon completion of the operation, a disk with a fresh OS and installed applications will be received.
Norton Ghost 14.0
Developer: Symantec CorporationDistribution size: 89.2 MB
Spreading: Shareware Norton Ghost is a widely used backup and recovery solution. Allows you to back up disks and partitions, including system ones (that is, along with the system, applications, drivers and application settings), as well as back up individual files and folders. Images can include both all files (full images) and only changed ones (incremental and differential archives), and thanks to integration with Symantec ThreatCon, incremental backups can be started when a certain specified ThreatCon threat level is reached. It is allowed to exclude areas of auxiliary system files (pagefile.sys, hyberfil.sys) from the backup copy. The possibility of optimizing the data stored in archives is provided, which allows to reduce the amount occupied by them to some extent. Implemented functionality for cloning disks with automatic adjustment of partition sizes. You can carry out the backup process manually or automatically - using the built-in task scheduler. To simplify the search in the contents of the archives, integration with Google Desktop is provided. You can create virtual disks from snapshots by converting recovery points to VMWare Virtual Disk (.vmdk) or Microsoft Virtual Disk (.vhd) formats and performing operations on them. System recovery is usually performed from the emergency boot disk that is included in the delivery, you can easily create such a disk using Norton Ghost (Task => Create Recovery Disk command). In addition, it is possible to restore the system using the internal recovery environment (a kind of bootable archive capsule) - that is, without a bootable CD (LightsOut Restore technology). Created images can be saved to local and network drives or USB or Fireware devices. Backup to CD/DVD, FTP, or network-attached storage devices (Network-Attached Storage, NAS) is possible. The demo version of the program is free and works for 30 days, but it has functional limitations - in particular, it is not allowed to create virtual disks and clone hard disks, it is impossible to restore the system using LightsOut Restore technology, it will not be possible to create a rescue disk, etc. The cost of the commercial version is $69.99. The program comes with a very brief help - of course, in English. The solution requires the Microsoft .NET 2.0 Framework to run. The program modules are located on five tabs: Home, Status, Task, Tools and Advanced. Via tab Home access to all the main features of the program, which is quite enough for novice users. On the tab Status displays the state of the computer in terms of the presence / absence of backups for each of the disks / partitions. Tab task includes the most important features of the program (launching the backup manager, restoring disks/partitions from backup files, etc.). On the tab Tools merged additional utilities: disk space optimization manager, disk cloning module, virtual disk creation utility, etc. Tab Advanced(like Home) provides access to the program's functions, but in an expanded version, and it is designed for advanced users.
From the perspective of our article, the "Run or Manage Backups" and "Recover My Computer" commands from the Home tab are sufficient. The first will ensure the backup, and the second will allow you to restore data. Both commands lead to the launch of the corresponding wizards, which will control the entire process. If desired, the same operations can be launched through the menu. To create a backup of the system disk, you will need to click on the Run or Manage Backups command. Here it should be said that when creating the first archive, the technology will be somewhat different than with subsequent backups - in our opinion, this is not particularly convenient, although it is a matter of taste. So for the first time, you need to specify what exactly will be carried out during the first backup - that is, whether the entire computer or individual folders and files will be archived and determine the location for the archive, after which the backup process will immediately start. By default, a computer backup here means a backup of the system drive from which the boot was made, and a backup of documents - a number of basic folders (the "My Documents" folder, Internet Explorer bookmarks, etc.). Naturally, it is easy to change the name of the disk and the set of folders with documents at your discretion. When starting a backup for the second time (as well as all subsequent ones), clicking on the Run or Manage Backups command will open a window with a list of previously created backups.
To obtain a new archive, you will need to click on the Define New button, then select the archive option - for example, in the case of backing up a disk, highlight the Back up My Computer line and specify other backup options: select a disk, determine whether the archive will be full or it should include only changed files and etc.
Regardless of the time in which the backup is started (the first one or not), its progress will be displayed in exactly the same way - Windows restart is not required.
The "Recover My Computer" command is responsible for restoring a disk from an image. Since we assume that the system disk has stopped loading, we will have to boot from the emergency boot disk - it is included in the delivery. Let's get into the Norton Ghost shell, where you should already specify the previously created disk image and start the recovery process.
Hello everyone again in my god!
Preparatory actions
Before installing a new OS from a flash drive or other media, you first need to take care of two important aspects.
First, these are the files you need. Reinstalling the operating system will completely destroy all files on your C drive. Therefore, everything you need must be transferred either to another logical partition of the hard drive, or to a blank or USB container. This applies to directories such as the desktop, my documents (plus any subdirectories) and the " Downloads". This is done on any OS that is on windows xp , that on newer versions.
Secondly, you need to make a backup copy of the drivers. Otherwise, then you will have to search for them all over the network again, and you don’t need to waste time, do you? You can do this with a program such as Double Driver. You can download it by this link.
By the way, there you will also find instructions in Russian, which describe in detail how and what to do.
Place the saved drivers on another logical drive, for example, under the letter D, or on removable media, so that you do not download them via the Internet later.
This is almost all that needs to be done before the demolition of the operating system. On my own behalf, I would recommend that you also rewrite the saved passwords from social networks and from Wi-Fi, otherwise you will have to restore them later, and this is a waste of time.
Distribution entry


This stage is divided into two options. Or you will install windows 8, or any other version, from a USB flash drive, or from a blank. In any case, you need removable media with at least 4 gigabytes of free space. Next, you need to download the distribution itself. It is better to use beta versions. It's legal and safe. I give you link on windows 10. Also, on the network you can find other distributions using a search engine.
Now we will take the method of creating a bootable USB flash drive. Download the UltraISO program here from here. It is installed on any version of Windows, so you will not have problems during the installation process.
Open the software, click on the button " Trial period". You will see the main interface of the program. Click on the tab " file”, in the drop-down list, click “ open» and choose the downloaded distribution kit of the operating system. Then insert the media into the USB port. In the program, click the "" tab, then " record image of hard disk". Since you are going to install the OS from a USB flash drive, choose it. Click the button " formatting". As soon as the process is completed, click on the word " write down". All you have to do is wait for the end. The bootable flash drive is ready!
If you decide to install Windows from a disk, the steps are exactly the same, but when choosing a media, you select an empty disc, which you must first place in the PC drive. If the media is empty, then you do not need to format anything, go straight to recording.
BIOS setup
This is an important aspect of the entire OS installation process. You must be extremely careful, as the BIOS is one of the most important software parts of your laptop. Now I’ll tell you how to set up booting from removable media through bios. First, you reboot your machine. As soon as the screen turns on, you need to hold and hold one key or combinations thereof. On each laptop they are different, so I give you a sign by which you can navigate.


If everything is done correctly, this window will appear in front of you.


Select the tab " Boot", then go to the line under the number 1, press" enter"And in the list that appears, select the line that begins with the letters USB-HDD. This is if you install Windows from a USB flash drive. If from a disk, then select the line CD-DVD. Next, press the F10 button. The laptop will reboot and start booting from removable media.


OS installation
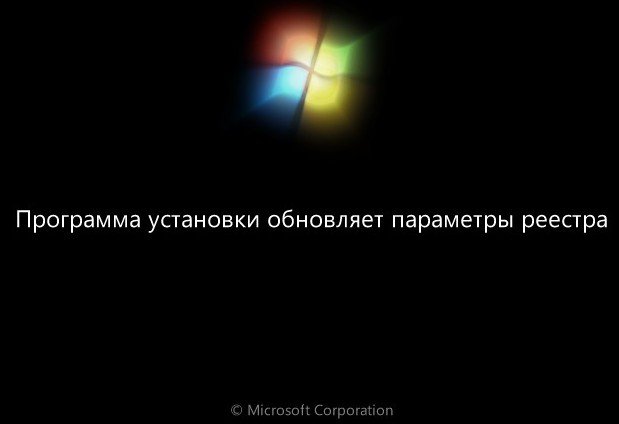
If you did everything right, a black screen should appear in front of you, with this inscription.


If you see something different, repeat the BIOS setup, most likely you did not save the results of your adjustments.
If everything goes as expected, press any key. A window like this should appear.


This is if you put the seven instead of whist . In other versions, the interface will be slightly different, but the principle of all actions is absolutely the same, so you will not get confused. Check the box to the left of the inscription " I accept the agreement” and click the next button. Choose the full installation type, not upgrade. It's much smarter. I read many articles about this, experts advise to always do the installation from scratch.


A window will open to select a local drive. You click on the partition where you previously had an operating system. Next, you need to completely clean it. To do this, select the button Format". This process can take from 10 minutes to an hour. It all depends on how much space local disk, on which you will install the OS and how many files are on it. After formatting, it will be absolutely clean. Click " Further».
Now it remains only to wait for the completion of all processes. It takes quite a lot of time. It all depends on the power of your laptop and the speed of reading data. You can drink tea during this time, since you don’t have to do anything special yet. The whole process is automated.


As soon as the computer goes into reboot, you will need to set up booting from the hard drive through bios. I described how this is done above, only now in the line under the number 1 you substitute the value with the letters HDD. Don't forget to save your changes with the button F10. The laptop should reboot, loading from the hard drive will begin.
Completion of installation and configuration


This is the final step. After the reboot, the system will prompt you to enter a username. Write whatever you like. Then you can set a password. Decide for yourself here. I use a computer alone and I do not need it. Then choose the recommended security settings, set the date and time, set up the network and enter the Wi-Fi passwords.
To get started, reinstall Double Driver and install the drivers from a pre-made copy. Then restart your computer. Next, you should check the system for updates. This is also an important aspect, perhaps new service packs have been released. Also, I recommend that you install antivirus programs. Perfect fit Avast, Panda Cloud Antivirus or AVG Antivirus FREE
Conclusion
That's all, you have learned how to install the operating system yourself. Everything you need can be downloaded online. The process will not cause any particular difficulties if you do everything according to the instructions. In extreme cases, you can use the numerous videos in which this process is clearly shown. Here is one of them
Most importantly, do not interrupt the installation process! Otherwise, you will have to start over. The worst option - you can damage the software part of the computer!
After installation, you will feel the difference between the previously installed OS, which was littered with unnecessary files, and the fresh version, which will not slow down. I will give you one more useful advice. Store everything required files not on the logical drive where the system is, but on another. This will allow you to avoid situations when information after formatting can no longer be returned.
And on the OS section, let there be drivers, browsers, archivers and antiviruses. They still have to be reinstalled after the demolition of Windows. Let it be better to delete them immediately when formatting. Otherwise, then they will have to be uninstalled manually, and this is quite a long time.
On this I say goodbye to you, my dear readers. Share the link to the article with your friends in social networks, as the information is useful and may be needed by everyone. Subscribe to blog updates and always be the first to know about new tips and instructions! See you soon!
Friends, many letters come with the question of how to properly reinstall or update the Windows 7 operating system and what is the actual difference between these two concepts.
Letter #1. Please bring clarity to a vague question for many than reinstalling Windows 7 different from the update and which is better to prefer? The operating system 7 I have installed behaves extremely unstable, it takes a long time to load, many programs have stopped installing, sometimes errors of this kind occur, for example, some system file or dynamic library is missing. Rolling back with a restore point a significant amount of time ago did not help. I do not want to reinstall again, as many programs are installed. In your comment, you said that you need to restore system files, put things in order at startup, optimize Windows 7, or, as a last resort, update or reinstall Windows 7, but unfortunately I have not heard anything about the latter.
I would like to know first:
How to actually carry out this update or reinstall the operating system and what will happen to my personal files on the system partition, will they be lost?
Secondly: they say that the update is launched only from a running operating system. Is it so? After all, in XP it was possible to run an update even when the system did not boot at all. Thanks in advance, Pavel.
Reinstalling Windows 7
To make everything clear to you, I will guide you through the process of updating my operating system, and then I will show you how to reinstall Windows 7 in two ways and you will see everything with your own eyes, but first I will still explain to you what an Update is and Reinstalling Windows 7.

What is a Windows 7 update?
this is a system installation over the old one, that is, you insert a disk with the Windows 7 distribution kit and start the system installation right in the running seven, but in the installation menu you choose not a full installation, but an update. What does she give?
First of all, damaged system files will be replaced, working system files will not be replaced, with your own personal data: installed applications, documents, music, nothing will happen, all your programs will start and all your household on all disks will remain untouched. Also, user accounts will be transferred without changes, all this will be done by the tool - Transfer Tool Windows Data(very important files, it's still better to transfer them manually). I also want to say that you will have to re-enter the product key, select the language, region, set the time, and so on. A warning. If you have unlicensed Windows 7, then after the update you will have a window in the lower right corner of your desktop with a warning that your a copy of Windows is not genuine.
- Another frequently asked question is how does Data Transfer Tool work? When updating Windows 7, temporary folders of your data will be created containing information about user accounts and settings, your email, files in the Favorites folder, personal files and user folders - music, images, videos, as well as settings for installed programs . As your system is updated, all data will fall into place, and temporary folders will be deleted. When upgrading, the data transfer tool does not allow the user to select files to transfer, but when reinstalling, you can choose what you want to transfer (details later).
Will the update solve all your problems related to the operation of Windows 7? In most cases Yes, but unfortunately no one can guarantee a 100% result here. In my opinion, if possible, it is better to delete and re-format the partition with a poorly functioning operating system, after transferring all important files to other hard drive volumes or USB portable media, and reinstall the system with all programs again.
- Note: Windows XP has the same update mechanism and can be run both in a running operating system, and in cases where you cannot log into Windows XP due to problems, then you can boot from the XP installation disk and select setup menu option, . Be aware that unfortunately there is no such possibility in Windows 7 and the update can only be carried out in a working operating system.
What is reinstalling Windows 7?
Reinstallation is a complete replacement of all operating system files, that is, formatting a partition with an unstable system and installing Windows 7 again. Naturally, all your files and the system itself from the disk (C:) will be deleted. In order to transfer all your files from your system drive (C:), you will need to use Windows Easy Transfer, but it will no longer work automatically, as in the case of an update, but we will use it ourselves and we will also choose what we need to transfer from the old system to the new one.
- Now the question arises: What is the difference between reinstalling the system and installing it again? Friends are here. When reinstalling Windows 7, if you wish, you can use the File Transfer Tool, since you already had the system installed once, but when you simply install the system again, install the system on the new partition you created hard drive. In short, I don’t know how to explain it even more clearly!
What can I say, let's first update my Windows 7 together, and at the end of the article we will reinstall the system using the file transfer tool, it has also been working with errors for me lately and you will see with your own eyes, and then select what you need.
Windows 7 update
Paste installation disk from Windows 7 to the drive, if you do not have autorun, click setup.exe.

Before updating, we can connect to the Internet and download the latest updates from the official Microsoft website
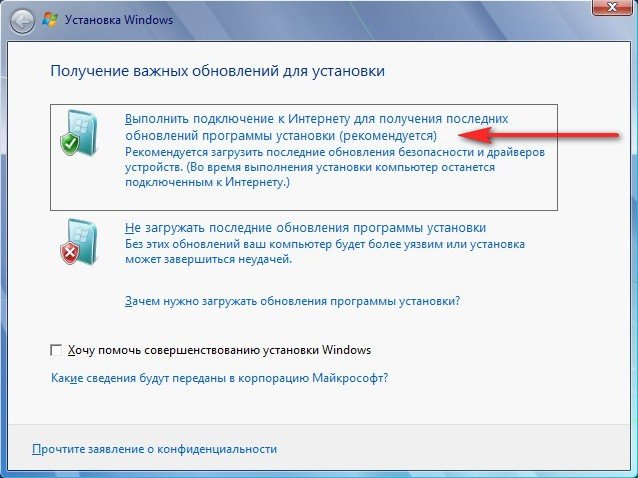
Choose Update
Compatibility check

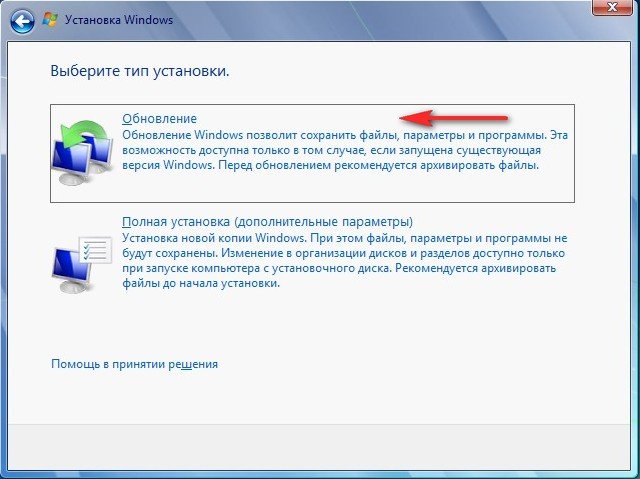
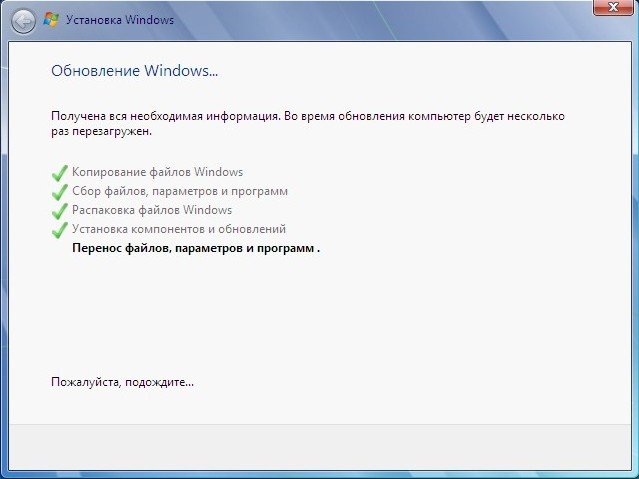
copying Windows files

Collecting files, settings, and programs, Unpacking Windows files, Installing features and updates, Transferring settings and programs files

The computer restarts.
In this place, you need to boot from the hard disk, and not from a bootable USB flash drive or boot disk with Win 7.
Update registry settings
Enter the key

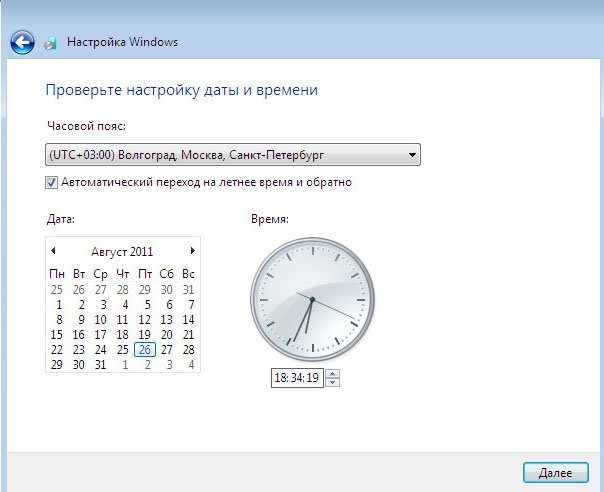
We set the time
The update process has been completed, the accounts have been saved

I have all the files in place, all programs run.

Reinstalling Windows 7
Now let's find out what Reinstalling Windows 7 is. According to the rules, we will reinstall Windows 7 on the same disk on which the old operating system is installed. If earlier Windows was installed, for example, on the partition (C :), then you also need to reinstall it on the partition (C:) and NOT on any other partition (otherwise it will be the installation of the second operating system). All your files on the partition (C:) will be replaced by the files of the newly installed operating system. Windows systems 7.
- First of all, we will launch the Easy Transfer tool, which will copy all our personal data from the Windows 7 partition to portable media or another hard drive partition, then boot from the installation Windows disk 7 (how to set in) and install the system again. Immediately after installing Windows 7, we will launch the Easy Transfer Tool and copy back all our files, in the end we will get with you a new operating system and all our data: music, documents, personal folders, and so on.
- Note: You may ask: Can't run the installation new system directly from a running Windows 7 and not climb into the BIOS. Answer: This method is given at the end and we will also consider it.
Let's now see what the Data Transfer Tool will transfer from our files, launch it.
Start, write in the input field Data transfer tool
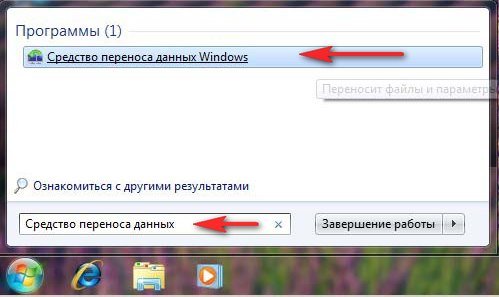
In this window we see detailed information we will now choose which files we can transfer from the old operating system to the new one.

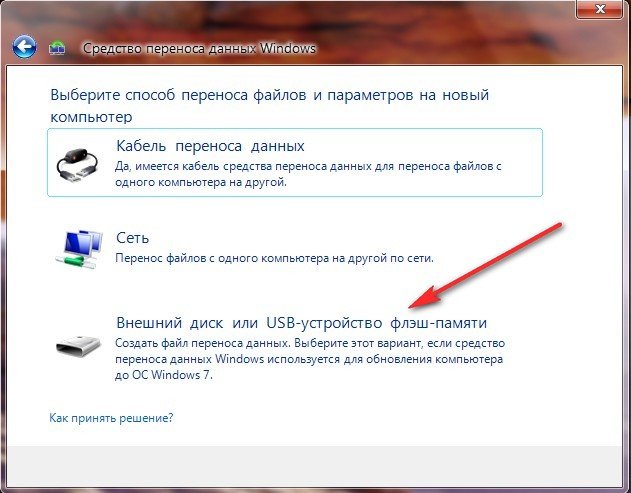
The data migration tool suggests us to use:
- Data transfer cable - a cable specially designed for this purpose, which still needs to be bought, is used to transfer files between two computers, in principle we do not need this, because we have one computer.
- Network - transferring files over the network is also not our option.
- External disk or USB flash drive. What we need. If you don't have much data, you can even use an 8GB or 16GB flash drive. By the way, if you don’t have a USB flash drive or a portable USB drive, you can use another partition of your hard drive for storage, like me.
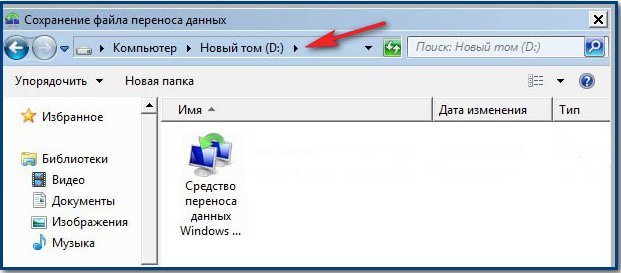
So you have selected External disk or USB flash drive, and I have a partition on the hard disk (D:).

We select This is my source computer, that is, the data needs to be transferred from it.

There is an analysis of data that can be transferred to a new system, in paragraph Usernames and General items, click Settings, and also, if you click Advanced, then a complete picture of what the Data Transfer Tool will include in the archive will open.

Please note that the folders of both users of the operating system and personal data are included in the archive, this is correct. But we definitely don’t need to transfer the data located on all partitions of the hard disk, except for the system (C :), since we will be reinstalling Windows 7 located on (C :) and the reinstallation process in our case will only affect system partition(WITH:). Uncheck all hard drives.


However, if you decide to transfer data from all partitions, then you can leave the checkboxes unchecked, just keep in mind that the data transfer file in this case will take up a very large volume ..
What else should not be included in the archive that the data migration tool will create? For example, you can not include the C:\Program Files folder, it will be more reliable to install all programs again after reinstalling Windows 7.
So click Save, you can assign a password


File transfer is in progress. On disk (D:) a migration file is created with the extension (MIG)

Now it's the turn to reinstall Windows 7, insert the installation disk with the seven into the drive and reboot, at the beginning of the installation it is better to click on the Disk Setup button and select Format the partition with the previous Windows 7, but in general the whole process step by step, starting from changing the priority boot device in the BIOS and before installing the operating system itself, is described in our article.
I think you did it and installed the system, now let's use our Data Transfer Tool again.
Choose This is mine new computer(requires transferring files and settings to this computer)

Your external hard drive with the data transfer file should already be connected.
I, in turn, specify the hard drive partition (D :), the transfer file is located there.


We can click Settings and select files to transfer to the new system manually, as we have already done with you, or simply click Transfer.

The transfer is completed, we can see the report, as well as make sure that all your files have been transferred to the new system.
- The contents of the folders in the "Library" section: documents, videos, photos, music, etc.
- Installed programs, and with them browser bookmarks, and others convenient settings to which you are already accustomed.
- All files on desktop.
- Drivers for printers, scanners, graphic tablets and other equipment.
Even if you don’t remember that you have something valuable stored in these sections, it may later turn out that you completely forgot about an important project that quietly “hung” on the “Desktop”, and now it is irretrievably lost. Therefore, take care of protecting all your data from deletion. Next, we will tell you about ways to save information when reinstalling the OS, including in cases where the system is damaged and many functions are not available.
Ways to reinstall Windows while saving data.
Let's start with how easy it is to reinstall Windows 10 without losing data. There are two options:
- use the option "Return the computer to the initial state"- then nothing will be lost, including installed programs;
- use the "Start over" function - in this case, you will save photos, documents, music, etc., but lose programs.

Whatever you choose, be sure to do the following first:
- transfer hardware drivers to disk D or a USB flash drive (for this purpose, a special program is useful that places all drivers in an archive, for example, DriverMax);
- save the most important projects to a flash drive or external hard disk (nothing is insured against technical failures);
- remember where your licenses and software keys are stored, because programs may require you to re-enter them. This will be an unpleasant surprise if you planned to quickly reinstall Windows and get down to work, for example, in Adobe Illustrator. First, make sure that you have everything in stock, and only then proceed to reinstall the OS.
Now let's move on to the most important thing. If you chose the "Start over" option, do this:

If you chose "Reset PC", then do the following:

Now let's reinstall Windows 7 without losing data:

Thus, everything will remain at your disposal, including installed applications and bookmarks in browsers.
How to save files from desktop
The methods are fair and the same for both Windows 10 and 7. They are as follows:
- You can insert a USB flash drive, create a “Desktop” folder on it and drag everything that you see on the “Desktop” into there.
- In order not to forget or miss anything for sure, you can do otherwise: insert a USB flash drive, open "Computer" - "Disk C" - "Users" - "Your_username" -Desktop and transfer the last folder to the drive.
How to save files from drive C
Now let's talk about the unpleasant situation when you would like to reinstall Windows 7 with data protection, but the system is already so damaged that you do not have access to its functions. In this case, you can still save the information stored on drive C, and only then safely install new Windows. So here are two ways:
- If you know a little about the physical design of a PC, you can remove the hard drive and insert it into another computer, and then copy everything that is there.
- If you cannot dismantle the hard drive, then you need to download a special boot record for emergency system recovery. Such a package is offered by antivirus developers, for example, Dr. Web (distributed for free on the official website). The distribution runs through BSVV and offers, among other things, virus cleaning. The only inconvenience for those who worked only on Windows is that the Linux interface will unfold in front of you. Don't be scared: just immediately press Ctrl+Alt+T and enter the command in the window that appears: locate win. The system will find the folder with Windows, open it and copy everything you need to a separate medium.
What to do before reinstalling Windows
Now you know how to reinstall Windows in any state without losing data. Summarizing the article, I would like to briefly formulate the procedure before the procedure:
- Save all files from the "Desktop" and from the "Libraries" section.
- Make sure you don't lose license keys from important programs.
- Archive and save your hardware drivers so you don't have to search for them online.
- Connect to the internet via a local connection or Wi-Fi to avoid interruptions. If you are using a USB modem, then set it to automatically connect - during the reinstallation process, the system will reboot and you will not be able to manually establish a connection.
Now we will see how to reinstall Windows 7 without using a disk, flash drive and BIOS. When working on a computer, users are faced with the need to reinstall Windows 7 for some reason.
In some situations, the user has no choice: the operating system is malfunctioning, it needs to be urgently reinstalled, but there is no way to do this in standard ways. Let's consider the possible situations in more detail.
To install the operating system, a computer uses a disk drive or USB connector into which an optical disk or USB flash drive is inserted into which Windows is written. To boot from these devices, you must enter the BIOS settings.
Installing Windows 7 without a disk, flash drive and BIOS
Usually, Windows 7 is installed with DVD disc or bootable flash drive. To select a bootable media, you must enter the BIOS or boot menu (boot menu). But bad luck, it may happen that it will be impossible to fulfill these conditions.
For example, the computer is broken optical drive or there is no drive at all on the device, then we will not be able to use the DVD. How to reinstall Windows 7 without a disc?
Nothing, there is a fallback: create a bootable USB flash drive. And if there is no flash drive available, and the system needs to be urgently reinstalled? How to reinstall Windows 7 without a flash drive?
Some users have difficulty entering the BIOS because they do not understand what to do there in order to correctly select the correct drive to boot Windows.
Even in this seemingly hopeless situation, there is a conclusion. We will try to reinstall Windows 7 without a disk and flash drive from the Desktop, without entering the BIOS.
In order for us to succeed, the following conditions must be met:
- the computer must have a working Windows 7 installed, which must be reinstalled;
- we need an image of the Windows 7 operating system from which we will reinstall the OS.
There are two ways to start Windows installation:
- Unpacking the system image in the ".ISO" format using an archiver, and then running the "Setup" file as an administrator.
- Performing a Windows installation from a virtual drive.
In the first case, the Windows 7 disk image file will be unpacked to a folder on the Desktop, and the user will start the system installation from this folder.
To use the second method, you need to install a special program on your computer - a virtual disk emulator, for example, free program Daemon Tool Lite. The program creates a virtual drive on the PC, which the system detects as a regular physical CD/DVD/Blu-ray drive. Using a virtual drive, the operating system is installed.
Reinstall Windows 7 without disk and flash drive
In this article, we will analyze the instructions for installing Windows directly from a running operating system. We will use the Daemon Tools Lite program, which must first be installed on the computer.
Before you start installing Windows, save important data to a USB flash drive, external hard drive, etc., because when you reinstall the operating system, all files will be deleted to the "Windows.old" folder. Advanced users will be able to get the files of the old system from there until this folder is deleted from the computer.
To start installing Windows 7, click on Windows image 7 Right-click, select "Open With" first, and then "DAEMON Tools Lite Agent".
The Windows 7 installer window will open on your desktop. Click on the "Install" button.
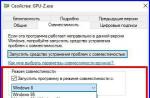
In the "Receive important updates" window, you are prompted to select one of the options:
- Connect to the Internet to receive latest updates installer (recommended).
- Do not download the latest installer updates.
We need to reinstall the operating system and updates can be installed later. Therefore, you should choose the second option, refusing to download the latest updates, so as not to delay the installation process of Windows 7.

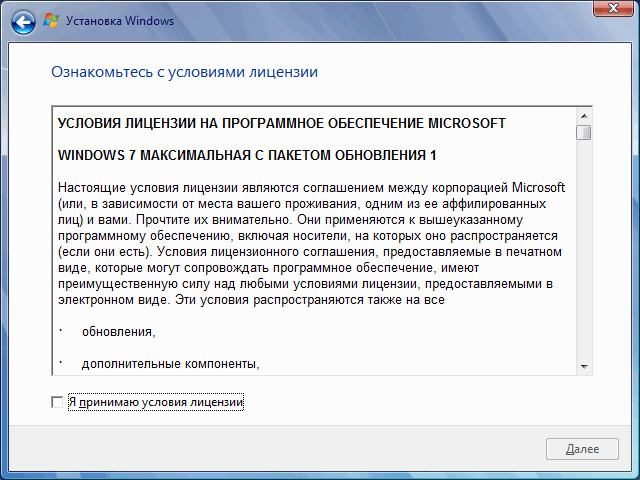
In the "Read the license terms" window, check the box "I accept the license terms".
The Select Installation Type window offers two options:
- Upgrade - Upgrade the system over a previous installation while keeping files, settings and programs.
- Full installation (advanced options) - installation of a new system with the removal of all data from the previous copy of Windows.
We need to reinstall the operating system, so we choose the full installation type.

In the "Select a partition for installing Windows" window, the partition where the system will be installed is selected. The system will be installed to the partition where the previously installed Windows was located.
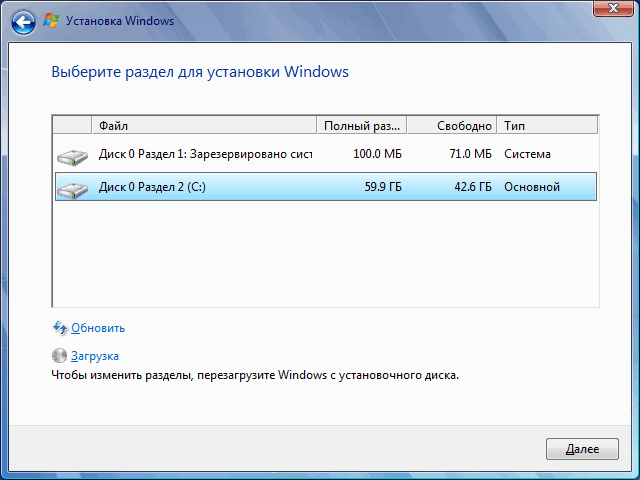
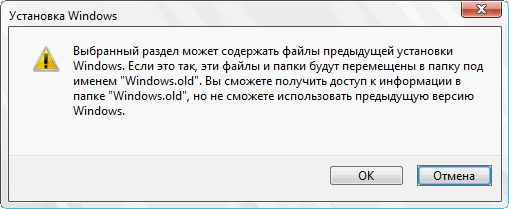
A window will open warning you that the selected partition contains files from a previous Windows installation. This data will be transferred to the "Windows.old" folder, the user will be able to access files from this folder until it is deleted from the PC.
Agree, click on the "OK" button.
The Windows 7 installation process begins, during which the computer will restart several times.

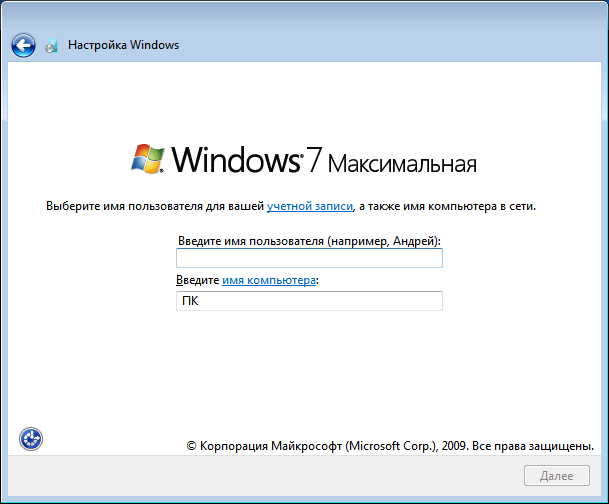
At the final stage of the installation, you will need to select the country, time, currency and keyboard layout.

Choose a username for account.
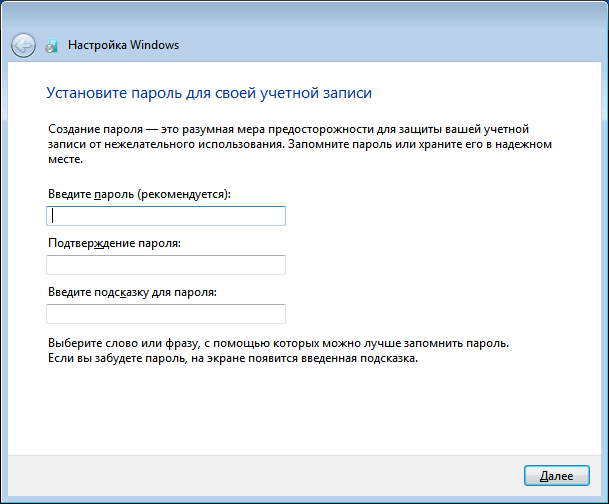
Enter the password for the account. If you are not using a password, leave all fields blank.
You can skip entering your Windows product key by activating your operating system later.

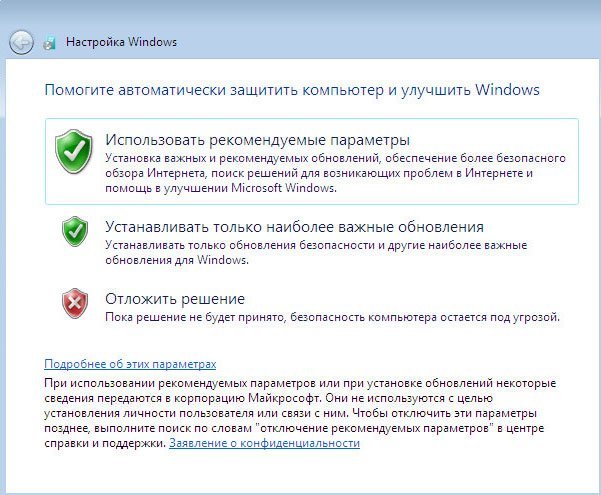
Select the options for receiving updates:
- Use recommended settings - install important and recommended updates.
- Install only the most important updates - Install only security updates and other most important updates.
- Postpone decision - do not install updates yet.
Click on your preferred update option.

In the "Check the date and time setting" window, select the appropriate options according to your location.

In the "Select the current location of the computer" window, you must select the network location options:
- Home network - the computer is at home.
- Work network - the computer is at work.
- Public network - the computer is located in a public place.

After completing the settings, a “clean” Windows 7 will start on the computer, installed instead of the previous system.

Deleting the Windows.old folder in Windows 7
The files from the previous version of Windows are left on the computer in the Windows.old folder. They take up a lot of space on the system drive, so they should be removed.

We will remove junk files using the built-in Disk Cleanup tool.
Go through the following steps:
- Press the "Win" + "R" keys.
- In the "Run" window, enter the command: "cleanmgr" (without quotes), press the "Enter" key.
- The program estimates the amount of space that can be freed up on the C: drive.

- In the Disk Cleanup (C:) window, click on the Clean up system files button.

- The utility will again estimate the amount of disk space available for freeing.
- In the window that opens, check the box next to "Previous Windows installations", and then click on the "OK" button.

- In the warning window, agree to the permanent deletion of these files.
- Wait until the data is deleted from the computer.
Open the "C:" drive in File Explorer to verify that the "Windows.old" folder has been deleted and the disk space occupied by the previous version of Windows 7 has been freed up.
Article Conclusions
If it is impossible to use standard methods to install the operating system on a PC, the user can reinstall Windows 7 from a running OS. In this case, the reinstallation will take place without using a DVD disk or a bootable USB flash drive with Windows, without entering the BIOS or Boot Menu (boot menu), from the computer desktop. After installing a new system, you must remove the files left over from the previous copy of Windows.
Reinstalling Windows 7 without a disk, flash drive and BIOS (video)