Often, installing the Windows operating system from a USB flash drive is the only possible solution for owners of devices (netbooks, nettops, etc.) where there is no floppy drive, and external USB drives, although they are most widely used in the consumer electronics market, are still not available for everyone. ... In addition, this method is largely justified and has a number of advantages (compactness, reliability of data storage, high read speed) even in comparison with the traditional installation method with a CD / DVD drive.

So, in order to install Windows on a nettop or laptop (netbook) without a floppy drive, or if you just want to have a distribution kit with a particular release of the operating system always at hand, you will need to write a bootable USB flash drive. One of the simplest, and most importantly, working options is to burn a bootable USB flash drive using the UltraISO program.
Despite the fact that the program belongs to the category of shareware, the free (trial) version of UltraISO (Russian version) is quite suitable for creating a bootable USB flash drive with an operating system, you can download the program.
Next, as an example, consider the process of creating a bootable USB flash drive for 64-bit Windows 8.1. Please note that the method described here is only suitable for Windows 7 and Windows 8 operating systems, for Windows XP this process is slightly different.
Download and run the program, a window like this will appear, select "Trial period ..." here.

The main program window will open, in the menu select: File → Open,

after which we find the image file with the .iso extension (or it may be different: IMG, MDF, NRG, etc.) in Windows Explorer (it is assumed that we already have a virtual image of the operating system on the computer's hard disk) and click " Open".

At the next stage, select the menu item "Boot" → "Burn the hard disk image ..."

A window like this will appear (if you have not yet inserted a USB flash drive, now is the time to do it).

Here you need to pay attention to the item "Recording method", UltraISO developers recommend choosing USB-HDD +. It is worth explaining here that the recording method proposed by the program at this step, namely: USB-HDD, USB-ZIP, USB-HDD +, USB-ZIP +, USB-HDD + v2, USB-ZIP + v 2 - these are the modes of emulation of the corresponding devices. For example, the main difference between the USB-HDD method and USB-HDD + is that when using the extended mode (USB-HDD +), the bootable flash drive will be more likely to be compatible with the BIOS of a particular computer (laptop), etc., rather than when using a basic USB-HDD. In turn, USB-HDD + v2 will ensure the compatibility of your bootable flash drive with almost any, even a very specific BIOS, so we recommend using it immediately.
Also note that when using UltraISO, there is no need to format the USB flash drive in advance, the program will do everything by itself, the only thing is, before you insert a USB flash drive and start recording, make sure that there is no information important to you on it. However, after you click "Write", the program will warn you about it with this message.

We are waiting for the end of the recording process, upon its completion we get a universal bootable USB flash drive with which we can easily install the Windows operating system (in our case Windows 8.1) on any computer, laptop, nettop, etc.

The actual process of installing an operating system from a USB flash drive is no different from that through a disk, however, in order for everything to work, you must correctly set the boot priority of devices in the BIOS of your computer.
User question
Hello.
I have a 1500GB external USB hard drive that's about half full. Can I make it bootable for installing Windows 10 without formatting or deleting data from it?
Hello.
If everything is done carefully, then yes, the data on it will not be lost and you can install the OS from it.
Below in the article I will show how this can be done using the example of one of your own disk (used to store various software). I draw your attention to the fact that if you do some actions differently than shown in my example, you can lose data on the HDD ...
STEP 1: connect ...
And so, turn on your laptop (PC) and connect your external HDD to the USB port (preferably to USB 3.0 - then all operations will be much faster). Also, I cannot but recommend to disconnect all other disks and flash drives from the USB ports of the computer. (this will help to avoid various errors when writing ...).

STEP 2: creating a new partition for Windows
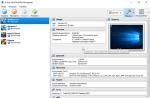
Next, we need to run disk management(click Win + R, and enter the command diskmgmt.msc in the open line, see the screen below)... This software is built into all the latest Windows XP, 7, 8, 10.

In Disk Management, you should see all connected drives to your computer. We need to find the external drive that we connected to the USB port.
Next, select one of the partitions on this external HDD ( approx. : in most cases, the external drive has one partition - and there is nothing to choose from ...), click on it with the right mouse button and select the function shrink volume(the bottom line: we will "take" a little space from this section and create a new partition for Windows, where we will write the boot data).

Then, in the settings, specify the size of the new partition (I recommend choosing a figure of 20-30 GB).

Then you will see that a new unaligned black area has appeared on the disk (on which there is nothing yet). Right-click on it and create a simple volume.

Next, specify the FAT 32 file system, set the volume label (can be any) and format the partition ( Important! Only this newly created partition is formatted, not the whole disk. Therefore, all data on other partitions of this disk will be intact).

STEP 3: making this section active
Now we need not forget about one very important thing - to make our new section active... Active partitions are used to host the OS bootloader (if you do not do this, then almost certainly you will not be able to boot from it).
By the way, only one partition on one physical hard disk can be active. If you have several hard drives, then each of them can contain only one active chapter.
And so, the easiest way to do this is to simply right-click on the desired section in disk management and select a function. Unfortunately, this feature is often greyed out and unavailable ...

Alternative option
First, you need to run Command Prompt as administrator. To do this, just open the task manager (Ctrl + Shift + Esc), create a new task through the file menu, and use the command CMD(example below).

- diskpart;
- list disk (you will see a list of connected physical disks);
- select disk 3 (instead of 3, specify your disk number on which you created the new partition);
- list partition (view all partitions on the selected disk);
- select partition 3 (instead of 3, specify your partition number (the one that you created in the previous step)).

Now that we have selected the drive and partition - just use the command active(if everything went well, a message will appear that this section has been marked as active).

By the way, if you go to "My Computer" - you will see a blank new disk (example below).
STEP 4: write to the Windows 10 OS partition
To get started, we need an ISO image with Windows 10. If you don't have one, you can create it using the following instructions:
Now about how to write bootable media correctly.
Option 1
Just copy all files from the ISO image to our new partition. This can be done using a regular archiver, the same 7Z (the best archivers :).
The method, although convenient, but personally, I still resort to specials. utilities (more on this in option 2).
Option 2
Use the program WinSetupFromUSB(in more detail about her :). Please note that you need a version not lower than 1.9 (I will show my example just in it).
You need to run this utility as administrator (to do this, just click on the executable file with the right mouse button and select it, see the example below).

- first you need to click on the opening of the advanced options window (see arrow-1, Advanced options);
- enable display of drives connected to USB (see arrow-2);
- select the section that we are special. prepared in the previous steps (be guided by the size);
- specify the ISO image of the file with Windows 10;
- start recording.

Please note that the program should warn you that you have selected an external drive and it is too large. Just agree.
(Important! There should be no warnings about disk formatting! Just look through the message that there are no words formate or erase, delete ...).

After ~ 10 minutes, if everything went well, you will see a message that the job is done (Job done). So the disc is ready!

STEP 5: check if it works
In general, if you did everything exactly step by step, as shown above, then when you boot your laptop (PC), you only need to enter Boot Menu(boot menu), select an external HDD and start installing Windows 10 (see example below).

If your disk is not displayed in the boot menu, first of all you need to go into the BIOS settings and check if the ability to boot from USB devices is enabled (the USB Boot parameter should be set to Enabled, see the example below). Typically, this setting can be found in the BOOT or System Configuration sections.

Note: the instructions are relevant for relatively new computers (laptops) that support UEFI.
That's all for now, additions on the topic would be helpful ...
Break a leg!
How to install Windows 7 from a SATA HDD, or create an installation hard drive connected via Serial ATA.
This article describes how to create an installation HDD, or SDD, from which you can later perform a so-called "clean" (with disk formatting) installation of Windows 7.
Windows XP x86 SP3 was used as a pre-installed operating system. Similarly, you can create an installation HDD from newer versions of Windows (I have not tested this). And the installed OS was Windows 7 Professional x64 SP1.
Numerous methods of installation from HDD described on the Internet usually use a USB flash drive or USB HDD for this purpose, but we will go the other way, because nothing like that was at hand. And in general, why not install the system by connecting the installation HDD via a faster Serial ATA?
How did I come to this life? After purchasing a new SSD, on which Windows 7 x64 SP1, previously downloaded from the Internet, was to be installed, it turned out that neither a flash drive, nor a DVD drive, nor even a USB HDD was at hand. A 32-bit Windows XP was installed on the computer, and everything said that I was waiting for a boring and long installation of Windows 7 over the network. However, in the days of Windows 95, a clean installation of an OS from an HDD was common, and I decided to check if everything had changed so much during this time?
creating a bootable HDD;
copying files of the Windows 7 distribution kit to it;
using the installation HDD for its intended purpose, for installing the OS;
disabling the installation HDD.
C: \> dir / a // view the contents of the current directory;
C: \> cd c: / WINDOWS // switch directories;
C: \ WINDOWS> cd \ // go to the root of the C: drive
C: \> d: // move from C: drive to D: drive
So the line
X: \ Sources> bootsect / nt60 c: / mbr
means that the command bootsect was executed while in the X: \ Sources> directory
1. Create a bootable HDD.
1.1. Partitioning and formatting the disk
It is not necessary to use the entire disk for this. It is enough to allocate on it a separate section of about 4 gigabytes.
Open Control Panel -> Administrative Tools -> Computer Management
In Storage -> Disk Management, select the disk from which we want to create the installation HDD. You can split it into two sections. The first one for installation. It is very useful to call him right away. For example superHDD and assign a letter to it. Another is for Windows distributions, which can then be copied to the installation section, depending on which version of Windows you need to install.
We format the partition for installation in NTFS format and mark it as active. Thus, after performing this procedure, our HDD installation partition should have the inscription Healthy (Active, Primary Partition) in Disk Management.
1.2. Alternative way
An alternative way to create a bootable disk is to use the DiskPart command, a tool for managing disks, partitions or volumes using scripts or commands entered from the command line.
Open the Window console (cmd.exe) and type there diskpart
advertising
DISKPART>
list disk // View the list of disks, find the one you need.
select disk // Select the disk to format.
clean
create partition primary
list partition
select partition 1
active // Mark the section as active.
assign letter = s // Assign a letter to the drive. I have S.
exit
In Windows XP, the diskpart tool does not yet have a format command. , we use to format the disk in NTFS format, for example, c: \ windows \ system32 \ format.com.
Format s: / fs: ntfs
1.3. Updating the main boot code for partitions
After the disk is formatted and the partition is marked as active, you need to update the main boot code of the partition. At this stage, the first trouble awaits us. The bootsect program used for this from the Windows 7 x64 distribution cannot be executed in x86 with the message - is not a valid Win32 application. So I had to take it from the 32-bit version. It is located in. \ Boot \ bootsect.exe
Links to these files were in the article
As if installing the OS is not something difficult, and my opinion is that it is enough to be friends with the computer and have two more hands in addition to the head - one right and the other left. To install an OS on a computer, you need a bootable disk or bootable USB flash drive.
But what if there is neither one nor the other, the optical drive is not working, or you have a netbook? After a little reflection, I remembered that I have an external usb pocket for HDD and a free old HDD 2.5 \ '\' is also there. In general, if you have a pocket hard drive, you can make it bootable accordingly.
For this purpose, there are utilities that can be used to do this, but I decided to use the standard Windows tools.
There are a lot of descriptions and videos on the network, but, unfortunately, there is one problematic point, which the authors for some reason omit. Well, okay, I'll start in order.
Before working with a disc, be sure to transfer and save the necessary information from this disc to another medium.
All settings will be carried out using standard Windows 8.1 tools. There may be some differences from previous Windows releases, but if there are, they are not significant.
First of all, I want to note that making an external HDD bootable is much more convenient. I divided the disk into two partitions, one is the Windows distribution, the other is for my needs.
1. We plug in the usb pocket and go to Disk management.
Attention! All data on the disk will be destroyed!
If you have Windows 8 installed on your PC, 1 right-click: Start / Disk Management;
If Windows is earlier versions, open the Computer Management console: Start / Control Panel / Administrative Tools / Computer Management / Expand Storage Devices / Left-click Disk Management.
See screenshot:


2. Choose an external HDD. Be extremely careful, if you mistakenly select another disk, all information will be destroyed.
In my case, this is Disk 1. As you can see in the screenshot, the disk is divided into two volumes (partitions):

3. Delete disk partitions:


4. Create new disk partitions. One for the distribution kit, the second will remain for your needs:
Right-click on a free disk space, in the context menu, select the command Create simple volume:

5. In the window that appears, the Simple Volume Creation Wizard, press the button Further:
Specify the volume size of 4404 megabytes and click Next. Please note that the size is indicated in megabytes. And since 1 gigabyte is equal to 1024 megabytes, then 1024 × 4.3 = 4403.2 megabytes we get for the distribution section (my weight is 4.18 GB, for example);


In this dialog, you need to format a new partition (FAT 32), press Further then Ready:

6. After that, you need to make the created section active (do not forget, because the computer will boot from this section), for this:
Right click with the mouse, in the context menu, select the command Make a section active.
To a confirmation request, we answer YES.

The external HDD looks like this:

7. In the same order, we format the second partition on the disk, best of all in NTFS, but do not make it active.
Copying Windows to an active partition of an external HDD
Copying a Windows distribution to a bootable external HDD is pretty straightforward and easy.
From a bootable DVD:
Open the installation DVD in Explorer, select all folders and files, and copy to the active partition of the external HDD;
From ISO image:
By and large, an ISO image is a kind of archive. So you can open it with any archiver. You can also open an ISO image through Total Commander or Daemon Tools. Well, if you have Windows 8 or 8.1 installed on your PC, then open it with Explorer. Select all folders and files, and copy to the active partition of the external HDD;
That's it, your external HDD can act as bootable media. It is enough to reboot and set the USB HDD as the boot priority in the BIOS (depending on the BIOS type).
- When you turn on the laptop, press F2 to enter BIOS;
- Go to the tab Boot;
- V Boot Priority order install USB HDD;
- We press F10, and then OK.
If it didn't work, then check out this article.
Save your changes and start installing Windows.
As you can see from the text, preparing an external HDD for installing Windows is quite simple. And my description will not be complete if I do not talk about one problem, which for some reason is rarely written about on the net.
Making the hard disk partition active
When I divided the hard disk into two volumes, for a reason unknown to me, none of the disk partitions could be made active. This function was not available in the context menu.
The active partition is the partition from which the computer boots.
There are two ways to make a section active:
- Using the Computer Management console. We have already considered this method, but, unfortunately, for a number of reasons, the Make section active command is not available. The solution to this problem is also not difficult. Remember how to prepare a bootable USB flash drive from the Command Prompt.
- Using the Command Line, through the utility diskpart... The second method is a little more complicated, but more efficient. You just need to do all the operations carefully and slowly.
Installing the active partition using the command line
1. Connect an external USB HDD;
2. Click on Start / All programs / Accessories / Command line... Right-click and select Run as administrator.

3.
In the window that opens, write the command diskpart and press the button Enter... A prompt will appear for working with the utility - DISKPART>;

4.
Enter the command list disk and press the button Enter... You will see all disks installed on your computer;

5.
We select the disk with which we will work. To do this, enter the command select disk 0, where "0" is the disk number in the list, ie. for my external drive there will be a command select disk 1... Click the button Enter, the message Selected disk 1 appears;

6.
Next, you need to find all the partitions on the selected disk. Enter the command list partition and press the button Enter.

7.
We select the section with which we will work. Enter the command select partition 1, where 1 is the number of the section in the list, i.e. for the section that we make active. Click on Enter, the message appears Section 1 selected.

8.
We mark the selected section as active, for this enter the command active... Click the button Enter, the message appears DiskPart: partition marked as active.

That's all. Good luck.
The method is simple, convenient, but it has some limitations and is not the most convenient: to write each image, you need to use the utility again, just copying the ISO to a USB flash drive is not enough. What if we could just copy ISO images to a bootable USB flash drive with any systems, LiveCDs and utilities and they were automatically available for download? - this can be the Easy2Boot utility, and the drive can be in the NTFS file system and boot in both UEFI and Legacy systems.
This manual details how to use Easy2Boot (not to be confused with the paid EasyBoot program from the creators of UltraISO) in conjunction with RMPrepUSB (and without this utility). To some, the method may seem complicated, but in fact, it is even simpler than some, just follow the instructions and you will be pleased with this opportunity to create multiboot USB drives. See also: ,
The instructions further describe the basic steps for writing a bootable drive using Easy2Boot, in fact, there are many nuances in using the utility, which are scattered on the official website and sometimes you have to read carefully what's what. But for most applications, the steps below will suffice.
Preparing images for UEFI booting with Easy2Boot and the boot process
By default, we can boot from a flash drive only in Legacy mode. The following mechanism is proposed for booting into UEFI:

The boot itself in EFI mode (disabling Secure Boot in BIOS may or may not be required, depending on the image itself and the presence of the rEFInd boot loader, which is not written by default) looks like this:

How does it even work? After "Changing the E2B partition" in the first step, your imgPTN image is mounted on the USB flash drive, as a result, as if nothing else is located on it - i.e. we boot as if "directly" into the image. Accordingly, the flash drive ceases to be multiboot (although all the data on it remains).

To restore the drive to its original state, open the e2b folder on the USB flash drive and run the RestoreE2B.cmd file as administrator.
Additional Information
Some additional information, which I will try to update as new information becomes available, and, as I mentioned, there are a lot of nuances in the program:
- If in the folder with the image file (the format is not important) you place a file with the same name, but with the extension .txt and the contents in one line title MENU ITEM NAME, then your name will be displayed in the menu for this file.
- There is a file in the _ISO folder on the flash drive E2B_Editor to edit the background, colors, and other boot menu options.
- By using \ _ISO \ SUB_MENU_Maker.cmd you can add your own sections in the Easy2Boot main menu.
- The MPI Tool Pack includes the Split WinISO utility for splitting Windows image files into several files for placing large images on a FAT32 flash drive.
- If you are using an external hard drive or a USB flash drive, which is defined in the system as a local drive, and not a removable drive, then when installing Windows 10, 8.1 and Windows 7, you may be informed that there are no drivers. The imgPTN imaging method solves this, but can potentially cause data loss on the drive.
Easy2Boot video instruction
Everything below was written to use the previous version of Easy2Boot, and as far as I can tell, this method should still work, so I'm not removing it from the instructions. Also, if you have your own findings on using the utility, I will be glad to comment.
Easy2Boot early drive creation method (continues to work)
The files below were checked by VirusTotal, everything is clean, except for a couple of threats (which are not) in Easy2Boot, which are related to the implementation of work with the installation ISO images of Windows.
We need RMPrepUSB, we take here https://www.rmprepusb.com/documents/rmprepusb-beta-versions (the site is sometimes poorly accessible), download links are closer to the end of the page, I took the RMPrepUSB_Portable file, that is, not an installation one. Everything works.
You will also need an archive with Easy2Boot files. You can download it here: http://www.easy2boot.com/download/
The process of preparing a multi-boot Easy2Boot flash drive

Unpack (if portable) or install RMPrepUSB and run it. Easy2Boot does not need to be unpacked. The flash drive, I hope, is already connected.
- In RMPrepUSB check No User Prompts
- Size (Partition Size) - MAX, volume label - any
- Filesystem and Overrides - FAT32 + Boot as HDD or NTFS + Boot as HDD. FAT32 is supported by a large number of operating systems, but does not work with files larger than 4 GB.
- Check the item "Copy OS files from here", specify the path to the unpacked archive with Easy2Boot, answer "No" to the request that appears.
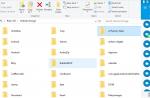
Don't quit RMPrepUSB, you will still need the program (if you quit, that's okay). Open the contents of the flash drive in Explorer (or another file manager) and go to the _ISO folder, there you will see the following folder structure:

Note: in the folderdocs you will find documentation in English for menu editing, styling and other features.
The next step for creating a multiboot flash drive is to transfer all the necessary ISO images to the necessary folders (you can use several images for one OS), for example:
- Windows 10 - in _ISO \ WINDOWS \ WIN10
- Windows 8 and 8.1 - in _ISO \ WINDOWS \ WIN8
- Antivirus ISO - in _ISO \ Antivirus

After all the necessary images have been transferred to the USB flash drive, in RMPrepUSB press Ctrl + F2 or select Drive - Make All Files on Drive Contiguous from the menu. When the operation is complete, the flash drive is ready and you can either boot from it or press F11 to test it in QEMU.
Fixing media driver error when booting from USB HDD or Easy2Boot flash drive
This addendum to the instructions was prepared by the reader under the nickname Tiger333 (his other tips can be found in the comments below), for which many thanks to him.
When installing Windows images using Easy2Boot, the installer often gives an error about the missing media driver. Below is how to fix it.
You will need:
- A USB flash drive of any size (you need a USB flash drive).
- RMPrepUSB_Portable.
- Your USB-HDD or flash drive with installed (working) Easy2Boot.
To create the Easy2Boot virtual drive driver, we prepare the USB flash drive in much the same way as when installing Easy2Boot.
- In the RMPrepUSB program, check the "No User Prompts"
- Size (Partition Size) - MAX, volume label - HELPER
- Bootloader Options - Win PE v2
- Filesystem and Overrides - FAT32 + Boot as HDD
- Click the "Prepare disk" button (all data from the flash drive will be deleted) and wait.
- Click the Install grub4dos button, answer No to the PBR or MBR request.
- Go to your USB-HDD or Easy2Boot flash drive, go to \ _ISO \ docs \ USB FLASH DRIVE HELPER FILES. Copy everything from this folder to the prepared USB flash drive.
Your virtual drive is ready. Now you need to "introduce" the virtual drive and Easy2Boot.
Remove the USB stick with the drive from the computer (insert the USB-HDD or Easy2Boot stick, if removed). Run RMPrepUSB (if closed) and click "run from under QEMU (F11)". During Easy2Boot boot, insert your USB flash drive into your computer and wait for the menu to load.
Close the QEMU window, go to your USB-HDD or Easy2Boot stick and look at the AutoUnattend.xml and Unattend.xml files. They should be 100KB each, if this is not the case, repeat the dating procedure (I did it only the third time). They are now ready to work together and the missing driver problems will be gone.
How to use a USB stick with a drive correctly? I'll make a reservation right away that this flash drive will only work with a USB-HDD or an Easy2Boot flash drive. Using a USB stick with a drive is quite simple:
- During Easy2Boot boot, insert your USB flash drive into your computer and wait for the menu to load.
- Select the Windows image, and at the Easy2Boot prompt “how to install” - select the .ISO item, then follow the instructions for installing the OS.
Problems that may arise:
- Windows again gives the error about the missing media driver. Reason: You may have inserted a USB-HDD or flash drive into USB 3.0. How To Fix: Move Them To USB 2.0
- The counter 1 2 3 started on the screen and keeps repeating, Easy2Boot does not load. Reason: You may have inserted a USB flash drive too early or immediately with a USB-HDD or Easy2Boot flash drive. How to fix: turn on the USB stick with the drive as soon as Easy2Boot starts downloading (the first boot words appear).
Notes on using and modifying a multiboot flash drive
- If some ISOs do not load correctly, change their extension to .isoask, in this case, when you launch this ISO from the boot menu of the flash drive, you can select various options for launching it and find a suitable one.
- At any time you can add new or delete old images from the flash drive. After that, don't forget to use Ctrl + F2 (Make All Files on Drive Contiguous) in RMPrepUSB.
- When installing Windows 7, Windows 8 or 8.1, you will be asked which key to use: you can enter it yourself, use a trial key from Microsoft, or install without entering the key (activation is still required afterwards). I am writing this note to the fact that you should not be surprised at the appearance of a menu that did not exist before when installing Windows, it has little effect.
For some special hardware configurations, it is best to go to the developer's official website and read about how to solve possible problems - there is enough material there. You can also ask questions in the comments, I will try to answer.