Cut Scene Editor Guide
Introduction
The following guide will walk you through the steps of setting up basic cinematic scenes in CryEngine 2.
Creating a new cut-scene
Before you start
- Create a new layer in the layers panel, name the new layer "cinematic".
- To create a new scene, first open the TrackView panel via View->Open View Panel->Track View.
After opening TrackView, click on the icon Add Sequence.
Name the cutscene "example", then click OK.

After you have created a new scene, it's time to set the properties for this particular scene, click on the icon Edit Sequence.

In the window that appears Sequence Properties, check the following boxes: 
Check Disable HUD, this will disable the standard player interface, Disable Player will hide the player when playing the scene, 16:9 includes a widescreen scene effect, and Non_Skippable means that if the player hits the space bar to skip the scene, it will continue to play, EndTime was adjusted and the duration of the scene became 15 seconds.
The first element to be added to the scene is scene node. It allows us to switch cameras.

However, cameras not added to the scene cannot be selected. Next, we need to add a camera, in Rollup Bar select Camera and place it on your level.

|
|
| Essence Camera in the Sandbox 2 editor. |

Next, we will select the scene to use this camera, double click on the timeline on frame 0 to add a key, once the key is added, right click on the key to open "Key Properties", click on the dropdown and select only that added "Camera1";

Select a camera to add its track to the cutscene, then click the icon Add Selected Node in trackview.

The camera should appear in the TrackView as shown below.

In this example, we will add a person with a simple walking animation.
For characters in cut scenes, use AnimObject, is used instead of AI entities for performance reasons, as well as AnimObject, the AI system will not conflict with the cutscene system.

Select AnimObject in Rollup Bar and holding down the left mouse button, drag it into the perspective window.
Replace the standard rectangular object with the character model by selecting AnimObject, and in the section Entity Properties(in Rollup Bar), click the folder icon in the field Model.

Find a file objects/characters/human/us/nanosuit.


The cutscene will look like the screenshot below.

Next, we'll choose an animation for the character. Double click on frame 0 to add a key to the animation track, then right click on the key, a window will appear key properties, then click the drop down list and scroll down, and select animation "relaxed_walk_nw_forward_slow_01", also check the box loop animation to make the animation repeat forever, and check the box Root not move, so the animation will not move and will disappear after playing.

Keyframes in cut scenes
The next step is to create keyframes for the character to walk forward, now the character is walking in one place.
First, make sure the character is selected and set the cutscene slider to position 0, and click the button record in the cutscene editor window.

In the perspective window, move the character to the desired home position at frame 0, this action will record the position and add a position key for the character, then move the cutscene time slider to the last frame by 15 seconds, you will notice the keyframes appear at frame 0 , and on the current frame 15, until the record button is released, you can move the character to the desired end position. If you move the time slider now, the character will walk between two points, for a more natural walking animation, adjust the end position.
Camera animation
Now that the character is walking, we want the camera to follow him and pan around his walk.
To see what is visible in the camera, right click on the "Perspective" label to bring up the viewport configuration drop-down menu, then select "Camera->Camera1", now you are viewing the scene through "Camera1".

At the beginning the camera is locked and you will not be able to move it, just like a standard perspective window, to unlock the camera, uncheck Lock Camera Movement.

This is for security purposes so that the user doesn't accidentally move the camera thinking it's a perspective window, the buttons on the cutscene window should also be disabled.
Now we are ready to animate the camera, to do this set the time slider to frame 0 and make sure the camera is selected and the button pressed in the cutscene editor, adjust the viewport as you wish.
Then, move the time slider in the cutscene editor by 5 seconds and position the camera as you wish, repeat the same steps at 10 and 15 seconds.
Click the "Record" button again to avoid accidental camera animation, if you now move the time slider back in the cutscene editor, you should see the camera animation along the new path and the character walking.
Now, we need to return the perspective window, to do this, right-click on the inscription "Camera1" and select default camera.

We will see an overview of the scene with images of the camera and character path splines.

Scene playback
If we just go into the game by pressing "Ctrl+G", then the scene will not play, because we must first create the logic using the flow graph.
First, we need to add an entity that will contain a flow graph, a flow graph can be contained in a character, we have it AnimObject, however, using a concrete entity is safer, since it is very difficult to accidentally remove a flow graph from it, so we will use AreaTrigger.
Select AreaTrigger and drag it into the viewport, then rename it to "cine_example_FG", next we will create the flow graph, click on the "Create" button in the Flow Graph section.

A window titled "Enter Group Name for the Flow Graph" will appear, name the group "cinematics", it's very useful to have all the flow graphs associated with cinematic cutscenes in it.

By choosing AreaTrigger, click the button open to start working on the flow graph for this scene.

The editor will open flow graph, make sure you select the newly created flow graph to start working on it.

In this example, we will simply run the scene as soon as the player enters the game, for this we will add a node Misc->Start.
Right click on the gray box to add a new knife and select node start, it will work as soon as the player enters the game.


When both nodes are added we will connect them to set the logic, just click and hold on the port with the blue arrow and drag it to the green input port StartTrigger.

Next, we need to choose which cutscene to play, double click the left mouse button on the node Animations:PlaySequence, in settings Inputs on the right, click the ellipsis to open Select Sequence, select the cutscene you created, and click the OK button.

The flow graph will look like below.

Testing
If you enter the game by pressing "Ctrl + G", the scene will automatically start.
Scene ending settings
In this scene, we will create the illusion that the character in the scene is the player, so at the end of the scene we want to hide the character, in the cutscene editor we can do that. Open the cutscene editor and select the entity AnimObject, double click in the track event to add a keyframe at 15 seconds, then right click on the keyframe, a window will pop up key properties, in the drop down list fire event select Hide.

This action will hide the character when the scene reaches the last frame, however, if you scroll the scene in the cutscene editor, the character will disappear in the whole scene, so we need to add an event unhide to frame 0, double click again in the track event to add a keyframe, then right click on the keyframes, a window will pop up key properties, in the drop down list fire event select unhide.

Now the character appears and disappears as it should.
For the complete illusion, we need to make the player start/continue where the "actor" left off. Currently, the player will start where they transition into the game, which will give the illusion of an abrupt transition.
First we need to know the final position of the character, scroll the timeline in the cutscene editor for 15 seconds, then we need to link this choca.
In this case, it is useful to use TagPoint that is not visible when playing, select TagPoint and place near the character, rename TagPoint in "cine_character_endpoint".

To get proper alignment to the character, use the tool Align Selection, select TagPoint and then click on the icon Align Selection, then click on the character, this action will move TagPoint to the correct position.

Next, let's add logic in the flow graph so that the player starts from this point, open flow graph and select the flow graph, then right click on the gray part of the window, and add a node Entity:BeamEntity.

Since we want the player to move to the point, so add a node Game:LocalPlayer

Last, we need to add a node that will link the position TagPoint with the player, it's nod Entity:EntityPos, add it.

Connect the nodes in the flow graph as shown below to assign TagPoint per node Entity:EntityPos, select TagPoint in the viewport and then click on the title of the node Entity:EntityPos and choose Assign Selected Entity.

Now that the scene is complete, the player will start from position TagPoint.
Adding a full screen effect
For this scene, we'll add a fade out of the dark at the start, then a fade out into the dark at the end, and finally a fade out of the dark when the player takes control.
open flow graph and select the flow graph you are going to work with, then right click and add a node CrysisFX->ScreenFader.

Select the newly created node CrysisFX->ScreenFader and set the value 4 in parameters FadeInTime and FadeOutTime.
Then, duplicate the node CrysisFX->ScreenFader by right clicking on it and select Copy paste, repeat this action several times so that there are three nodes in total Screenfader.
Then, we will add AreaTrigger to trigger the fade logic in the cutscene via the flow graph.
Add AreaTrigger in the viewport and rename it to "cine_FadeOut_DT"; DT- This Dummy Trigger (dummy trigger ) which is used to send the event from the cutscene to the flow graph.
In the track event for "cine_FadeOut_DT" add a keyframe at 11 seconds, then right click on the keyframe, a window pops up key properties, in the drop down list fire event select leave.

Then, open flow graph, then right-click on the gray part of the window and select Add Selected Entity. This action will add AreaTrigger to the flow graph.

When all the necessary nodes are added to the flow graph, it's time to tie all the logic together, set up the flow graph as shown in the image below.

Just click and drag the output of the nodes to the input of the corresponding nodes to make the connection.
Consider the options for creating these same cut-scenes.
Chamber of Secrets.
So, as promised, I will write an article about cut scenes. If something is not clear, ask in the comments. Let's start with the fact that you need to download and install the patch https://yadi.sk/d/_Xp_Ua_33Hzy2s without it nothing will work. To begin with, we need to come up with some kind of video in our head, and I will explain using my own example. The scene will be like this: Harry and Ron approach an incomprehensible room, they go in there, Ron asks "What was that?" and suddenly two big crabs come out. The boys yell "noooooooo" and then they start to run away, and the crabs follow them (they will have to increase their speed here). Still, they run into some room where it's safe and Ron says "fuh, it's gone."
So, let's add everything we need to the map: two crabs, Ron and Harry, arrange the map as it should, that is, make rooms and start.
1. In general, you must first specify FOR EACH HERO, your name in the cut scene. To do this, open the harry property and select the cut scene tab and write "Harry" there. Next, open the property of Ron, again open the Cut Scene and write "Ron". We do the same for crabs, we write "Crab1" and "Crab2", although in fact you can give any names.
2. We go into the game folder, open the system, then CutScenes and copy any file, erase everything inside it and set the file name in English.
3. Here the most difficult begins. So, remember, ANY CUT SCENE starts with the string "" (Square brackets are required). I think this phrase is translated as "scene". After we have written this phrase, we press Enter and we move to another line. All subsequent lines and phrases will begin with the words "line", i.e. line_0, line_1, line_2. In general, you will understand now. So we write:
Line_0=Capture Harry line_1=Capture BaseCam line_2=Capture Ron line_3=Capture Crab1 line_4=Capture Crab2
What does it mean capture? Capture- this is the capture of a target, i.e. we must capture all the characters that are moving with us ( ATTENTION: Capture BaseCam is always written, this must also be remembered, i.e. the base camera (BaseCam) must always be captured so that it can work in the cut scene).
4. We return again to the editor and we must find the object CutCameraPos (Navigation Point, UWNavigation Point). We put the camera somewhere on top and open its properties, open the Cut Scene tab and write any name for the camera. I gave the name "Cam1". Let's add a CutMark object and position it between Ron and Harry, name it "E2". Then we open our text document again and write line_5=BaseCam Target FlyTo E2, i.e. this means that our base camera will be directed to CutMark with the name E2 (Target is the target it is aimed at). The next line will be line_6=BaseCam FlyTo Cam1- this line indicates which item will shoot what is happening.
5. Next, we need Harry and Ron to approach the room at the same time. To do this, add two CutMarks and put them near the room, then specify the names for each, for example "CutMarkHarry", i.e. this is the place where Harry will reach, and "CutMarkRon" is the place where Ron will reach. We return to the text editor again and write:
Line_7=Harry RunTo CutMarkHarry * line_8=Ron RunTo CutMarkRon
Walk To- go to something, well, RunTo - run. That is, it all means that Harry goes to his CutMark, and Ron to his. The asterisk means that the subsequent action is executed at the same time as the action on which it is written, i.e. Harry and Ron will run at the same time.
6. Now we put the second camera to the right of the first one, it will point to the entrance to the room and again we indicate its name (Cam2). We will also add two more cutmark in the room, the boys will go there and indicate the names of the names (CutMarkHarry1 and CutMarkRon1). Let's put cutmark, our second camera will look there (E3 is the name of the camera). We return to the Text Editor and write:
Line_5=BaseCam Target FlyTo E3 line_6=BaseCam Cam2 FlyTo Cam2
This means that our base camera is now the second one we have installed and that it is looking at our CutMark(E3). Next we write:
Line_11=Harry WalkTo CutMarkHarry1 * line_12=Ron WalkTo CutMarkRon1
I think everything is clear here.
Line_13=Ron TurnTo Harry * line_14=Harry TurnTo Ron
TurnTo- turn to something or someone.
7. Replicas will follow. Ron should say "What was that?". In order to listen to the sounds you need to download the patch https://yadi.sk/d/hlyZDt4gvVVrG/HP2/UPDATES , and all Ron's lines can be downloaded here https://yadi.sk/d/YeXxT8N43LPrAi . PC_Ron_DuelSnake_06 - What was that? So the phrase would be written like this:
Line_15=Ron talk PC_Ron_DuelSnake_06
For conversations, you can use Talk or Say, This is the same
8. Now the animations. Harry makes an animation that doesn't understand anything is called talk_dontKnow.
So we write:
Line_16=Harry animate talk_dontKnow
Harry animate- this means that Harry is showing the animation. All animations can be downloaded here https://yadi.sk/d/hlyZDt4gvVVrG/HP2/UPDATES .
9. Also before Ron asked "What was that?" the camera showed Ron up close, for this the coordinates are used:
Line_15=BaseCam FlyTo Ron z=27 x=40 y=10 line_16=BaseCam Target FlyTo Ron z=27 x=10
The same goes for Harry.
10. Then we should have crabs, and before that we need a short period of time, we use the Sleep 1 command - this means that nothing will happen for one second, you can write two or three instead of one. 11. Create another camera Cam3 and CutMark E4:
Line_21=BaseCam Target FlyTo E4 line_22=BaseCam FlyTo Cam3
Then we need the crabs to come out, turn to the boys and release their rage, for them we create cat marks that they will walk on and give them names CutMarkCrab1 and CutMarkCrab2:
Line_23=Crab1 WalkTo CutMarkCrab1 * line_24=Crab2 WalkTo CutMarkCrab2 line_25=Crab1 TurnTo Ron * line_26=Crab2 TurnTo Harry line_27=Crab1 animate roar * line_28=Crab2 animate roar.
In general, to the end to describe too long. I wrote all the main commands.
Attention!!! That's not all. When you have given a title to a text document that is written in ENGLISH, you must put the object on the map cut scene, open its properties, select the tab cut scene and in the FileName line, specify the name in English that you gave to the text document. Don't forget to click Build all and save.
After completing the steps, you need to write:
Line_33=Release Harry line_34=Release Ron line_35=Release BaseCam line_36=Release Crab1 line_37=Release Crab2
Release means to release, i.e. if Capture is a capture, then Release is the other way around. I hope everything is clear, good luck to everyone) If something is not clear, ask.
The Unreal Engine 4 editor contains several tools for creating cinematics and regular cutscenes. These tools allow you to set up the movement of objects, cameras, particles and characters, set up post-processing, as well as assign events that will fire in Blueprints, thereby producing any additional action on the scene.
All these tools allow you to create not only a high-quality cut-scene, but even record a full-fledged video, advertisement, cartoon or a short film.
Instruments

The sequencer editor allows users to create in-game cutscenes through a multi-tracking editor similar to matinee. By creating Level Sequences and adding tracks, the user can define the look of each track, which will determine the contents of the scene. Tracks can contain animations (for animating characters), Transforms (to move objects in the scene, such as a camera), Audio (for adding music or sound effects), and other types of tracks .
Creating Level Sequences
Level Sequence is a container for your cinematic scenes and must be created in order to work in the sequencer editor. You can create Level Sequence and directly place it on your level by selecting the appropriate option on the toolbar in the tab Cinematics, an example is shown in the picture below.

This will add it to the level, after which it can be selected for further adjustment on the panel Details, like Matinee Actor. On the panel Details(below), you can determine where Level Sequence will be automatically played after the start of the level, the playback speed of the sequence, where the sequence should be looped, and so on.

Level Sequence differs from matinee that is a self-contained asset, and you can place sequences inside other sequences. For example, you can create a sequence that contains animated characters, cameras, etc, and at the same time it is part of another, larger sequence.
Another way to create Level Sequence is to click on the button in the content browser Add New and choose Level Sequence In chapter animation. This will create a sequence but not place it in the level.

Adding tracks to a sequence
When Level Sequence created and the sequence editor open, you can start creating your cinematic.
![]()
Above, we have a freshly created and empty sequence.
First of all, you need to add a track type, which you can find in the drop-down menu after clicking on the button Add.

From the drop-down menu, you can select several types of tracks, as well as add an ector to the sequence ( Actor To Sequencer). Option Actor To Sequencer allows you to add any Hector that you have chosen at your level.
As a rule, if your sequence has characters, animals, creatures or something like that that will animate and move, then you should have a Skeleton Mesh for them, which you should add to the sequencer. For example, below we have there is a Bear Skeleton Mesh that we placed on the level. When it is selected, we can click on the button Add in the sequencer and select Actor To Sequencer, which will add it to the sequence and give us the ability to control it through the sequencer editor.


Depending on the type of track created, sub-tracks may be added, after which it may not be possible to add new sub-tracks.
Below we have selected a sub-track of the animation and applied the animation of our skeleton bear mesh for playback.
Possessables vs. Spawnables
The sequencer is very similar to the Matinee in that it uses " possessables“, this means that the actor exists in the level and the sequencer owns it in order to apply the changes made to it through the sequencer.
As shown in the bear example above, you can place a skeleton mesh in a level and add it to the sequencer, then inside the sequencer you can add an animation track for the skeleton mesh and apply different animations to it to play them in the scene. Now we "own" the skeleton mesh and it exists for what was to do what it is told through the sequencer. The sequencer also includes another form of manipulation that calls " spawnables“, this means that the object we own does not exist and the sequencer will spawn the object when necessary and determine its life cycle.
So when is it beneficial to use " spawnable" an object? Since the sequencer owns and spawns the object, it is not tied to a defined level. Anything that counts as " spawnable" can be used in any level, you can create a scene and use this " spawnable» object repeatedly in another scene without re-creating it.
Read Creating Spawnables for full understanding.
Create scene keyframes
If you are familiar with external animation tools, then you may be familiar with the concept of using keyframes to control content. In a nutshell, if you're unfamiliar, a sequencer allows you to manipulate your content by adding keys (called Keyframing) at the specified properties at the required points along the timeline. When these keys are reached in the timeline, the properties you specified for each keyframe are updated to reflect those changed values.
The sample scene below shows adding movement by adding transform keyframes to the skeletal mesh of the actor.
You can add a keyframe by selecting a track and clicking Enter or by clicking on the button for adding a keyframe for each track.

Some settings on the panel Details Actors can be keyframed directly by clicking on the add keyframe button for each setting.

Above, keyframe buttons are shown for current focal length and Aperture settings in Cine Camera Actor.
The sequencer plays your scene based on the range between green (start) and red (end) markers.

Above, our content contains 2 shots that end at frame 600, but our sequence is extended to 1000 frames, which ends up with empty space.
You can drag the start and end markers to fill the area with your content, or use the option that specifies the area that contains your content. You can find this option in the sequence settings drop down menu and enable Keep Playback Range In Section Bounds.

Special viewport
The sequencer allows you to use a special viewport to make the editing process easier.

The Cinematic Viewports makes it possible to see how the scene will look better, to select it, click on the button viewport.
Cinematic Actors
On panel modes In chapter Cinematic you will see 3 Cinematic ector that you can use to create your cinematics.

You can drag any of them onto the stage and add them to the sequencer, or drag them into the sequencer, which will make them spawnable.
Camera Rig Crane
Camera Rig Crane Actor can be used to simulate movement, which is used in standard film production.

You can add a camera to an ector Camera Rig Crane then manipulate the movement of the crane from the panel Details and values Crane Controls. These values affect the rotation, yaw and arm length of the crane. These values can be keyframed by the sequencer, allowing you to adjust them during your cinematic.
Camera Rig Rail
Camera Rig Rail Actor is a spline-based tool to which a camera can be attached to create a path for movement.

You can select each point of the spline and change the tangents to produce the path that the camera will follow. The camera attached to the crane can rotate independently of the crane, you can set the camera rotation on the panel Details. This value can be keyframed for later manipulation from the sequencer.
Cine Camera Actor
Cine Camera Actor— similar to the vector of a regular camera, however, additional camera settings are available.

Cine Camera Actor(black camera) and default camera (blue camera) are shown above.
Cine Camera Actor contains settings for following the Hector, cinematic settings (aspect ratio, Super 8mm, 35mm VistaVision, etc.), lens and focus settings. When using a regular camera everything is fine, but in order to achieve a more cinematic effect, use Cine Camera Actor.
Recording a sequence
One of the tools you can use to speed up your asset creation process is Sequence Recorder to record gameplay (or Level Sequences) which allows you to create new assets.
Add a new entry, select an actor and click the button record to start recording. When you stop recording, a new asset will be created Level Sequence, which you can later use in existing or future sequences.
Movie render settings
In the sequencer, you can choose whether to render your sequence as a set of frames or as an entire video file; is chosen Render Movie Settings.

This will bring up the Movie Render Settings window where you can define how your scene will be rendered.

Click the button Capture Movie to start recording your scene.
Thoughts on workflow
Now that you have a basic understanding of how the sequencer editor works, you can consider how you will use the tool, as there are several ways to create content. Whether it is the creation of one sequence for everything about everything, or the creation of one large sequence that will include many other sequences; The sequencer gives you several ways that you can use to create your cinematics.

Like other panels and editors, Sequencer is divided into components. This page describes each window, option, and control of the sequence editor.
Toolbar
Below is a description of each of the buttons, from left to right as they are located on the toolbar.
| Icon | Description |
| Saves the current Level Sequence. | |
| Saves the current Level Sequence under different names. | |
| Search for the asset in question in the Content Browser. | |
| Opens the Video Render Settings window, which gives you the option to render the sequence as a video or as a set of frames. | |
| Opens a menu of main settings that determine the functionality of the sequencer. | |
| On/off options Key All. With this option and with the option enabled auto key, determines if all settings are written to the keys for the track when the changes are made, or if only the settings written to the key are changed. | |
| On/off various Auto key options. By default, this option is disabled, but can be set to Auto key All or Auto Key Animated. | |
| Enable/disable snap to grid for the keyframe window depending on the snap settings. | |
| Allows you to set the snap interval time. | |
| Opens the Curve Editor which allows you to customize the location of the animation keys in key frame window. |
Sequence Breadcrumbs
Depending on your workflow, you can create multiple Level Sequences as separate scenes, and arrange these scenes in a new level sequences, they will play in sequence, creating one big sequence. From this large sequence, you can move to each of the added sequences by double-clicking on them while in key frame window. The image below shows Level Sequence entitled shot_06 inside another sequence called Master.

We can click on Master to return to the main sequence containing our shot_06 and other sequences.

Add/filter tracks
Button Add allows you to add a track or Actors from your level to the sequencer to create cinematics later.

When the Hector at your level is selected, click on the button Add, then select it from the drop-down menu. If you have not selected Hector before, you can select him from the section Choose Actor.
Below are the available tracks that you can add to the sequencer; Click on the track title to view an example.
| Track | Description |
| Add Folder | You can add folders containing your tracks to organize your workspace. |
| Audio track | Adds a master audio track that is used to play sounds. |
| Event track | Adds an event track that can be used to trigger a blueprint (currently only in Level Blueprint). |
| Camera Cut Track | Allows you to switch between cameras associated with the sequencer to create perspective. |
| Shot track | Allows you to add Level Sequence as " shots"which may contain Takes, which can change input/output |
| Play Rate Track | Adds a track that can be used to manipulate the playback speed of the sequence. |
| Sub track | Adds a sub-track that can contain other sequences. This is useful for creating multiple copies of sequences so that different users can work without changing the original sequence. |
| fade track | Adds a track that allows you to control the fade in/out of the sequence. |
| Level Visibility Track | This track can be used to write to a key and change the visibility of your level. |
Option filter allows you to filter Track Window only for Hector that were added to the sequence from the level.

Timeline
The time bar shows the playback speed of your sequence with Green (Start) and Red (End) markers. The current time of your sequence is indicated by a timeline marker that you can move by left clicking along the entire timeline.
You can right-click on the timeline to specify a new start/end point from the context menu shown below.

Your sequence will continue to play from the start marker to the end marker, even if your content doesn't fill the entire timeline (or goes beyond the end marker). AT General Options there is an option to keep the content inside the section boundaries, which will prevent white space from appearing in the sequence.

Track Window
In the window tracks you can specify what types of actions will be performed during your sequence.

Above, there are tracks Camera Cuts to change camera angles during a sequence, Cine Camera Actor shows the scene, and two Skeletal Mesh Actors characters in our scene.
The sequencer is context sensitive and allows you to add sub-tracks (where available) for each track which will give you additional options. For example, in the picture above, we have added a track CameraComponent to our Cine Camera Actor, which gave us the ability to add an additional sub-track to adjust the camera settings in our scene if we wanted to bring them in.

You can also add keyframes from the Tracks window to specify parameters at specific points in the timeline.

Click the button + or click Enter while the track is highlighted.
Keyframe Window

The keyframe window is where you can adjust the content of each of your tracks. You can adjust any keyframe you've added, trim/split or narrow in/out of a section, as well as a few other options that are available from the drop-down menu when you right-click (illustrated below).

Above, right-clicking on a transform track keyframe gives us the ability to change the key's interpolation type, as well as other parameters that can be adjusted in the Properties drop-down box, which updates based on the type of content you're right-clicking on.
Below, right-clicking on an animation assigned to an animation track and selecting settings gives us the ability to change the animation we just applied, as well as change its settings, such as start/end offset, as well as playback speed and others.

Keyframe Window Navigation
The following describes the buttons and methods used for navigating the keyframe window.
| Team | Description |
| Right click and move | Allows you to move around the keyframe window. |
| ctrl+ mouse wheel up/down | Zoom in/out in the keyframe window. |
| Home | Reset the keyframe window zoom. |
| - and = | Zoom in/out by 10% |
| , and. | Move forward/backward between nested keyframes. |
| Left click and move | Creates a selection area around frames. |
| Left click on key | Key selection |
| Right click on key | Display a context menu where you can specify key settings. |
| Middle mouse button | Create a key at the position of the mouse cursor. |
| Enter | Select the key of the selected track at the current time. |
| ctrl+g | Set sequence time/frame. |
| I | Specify the beginning of the selected section. |
| O | Specify the end of the selected section. |
Playback control
The playback control buttons can be found in the lower left corner of the sequencer editor, they are similar to those used in any media player; due to the layout of the anrial, they have the same icons as the level's main viewport. When using the Cinematic Viewport , the playback controls will appear inside the viewport.
Standard playback controls:
| Button | Description |
| Set the start position to the current position indicated by the time marker. | |
| Jump to the starting playback position. | |
| Jump to the previous key of the selected track(s). | |
| Jump to the previous frame. | |
| Play/pause the Level Sequence from the position of the time marker. | |
| Jump forward a frame. | |
| Jump to the next key of the selected track(s). | |
| Jump to the end of the playback. | |
| Set the end playback position based on the time marker. | |
| / | Toggle between looping the Level Sequence while playing. |
The playback control buttons inside the cinematic viewport are similar in functionality.
Or use live action footage.
The earliest video games known for their use of cut scenes as an extensive and integral part of the game were Portpia Renzoku Satsujin Jiken from Enix, released in 1985, and Maniac Mansion from LucasArts Entertainment, created by Ron Gilbert and released in 1987, which was also notable for several other innovations. Since then, skits have been a part of many video games, especially in the RPG genre.
Scenes are sometimes also referred to with other terms like cinematics or in-feature cinema. Cut scenes made from a video file are sometimes also referred to as full action video(Full Motion Video, . For example, scenes in Wing Commander IV used full sets and "named" actors such as Mark Hamill and Malcolm McDowell to portray the characters.
However, many gamers enjoy live-action cutscenes due to their often poor production values and out-of-the-box action. Cut scenes in the real-time strategy game series Command & Conquer especially noted for the often exaggerated acting performance.
Live action scenes were popular in the early mid-1990s with the beginning of the era
Increasing graphics quality, cost, critical feedback, and the need for professionals to better integrate cutscenes and gameplay graphics soon led to an increase in the popularity of animated cutscenes in the late 1990s. However, for cinematic effect, some games still use live cutscenes; an example of this is Black, which shows an interview between Jack Kellar and his investigator, filmed with real actors.
Animated scenes
There are two primary technologies for animating cut scenes. In-game scenes rendered by Rendering on the Fly using the same Graphics Engine as the corresponding game. They are often used in the genre stealth, For example Metal Gear Solid, Splinter Cell as well as genres RPG and , Spider Man and The Legend of Zelda, among many others.
Pre-rendered scenes animated and presented by the game's developers, able to fool the full array of technologies computer generated images (CGI), hand-drawn animation or panel art in the style of a graphic novel. Video game series final fantasy, developed by Square Co. , noted for their pre-rendered cut scenes that were first introduced in Final Fantasy VII.
In newer games, which can take advantage of complex programming techniques and more powerful processors, in-game scenes are rendered on the fly and can be closely integrated with gameplay. Scripted cutscenes are also used, which provides the benefits of cutscenes without taking away interactivity from the gameplay. Some games, for example, give the player some control over the camera during cutscenes, such as Dungeon Siege ,Metal Gear Solid 2: Sons of Liberty and Kane & Lynch: Dead Men. Others require keystrokes during cutscenes to continue successfully, as in Sword of the Berserk: Guts Rage, Resident Evil 4 or Shenmue 2.
"Interactive Cinema" is also making a comeback, as seen in in the US and Canada) from Quantic Dream, where the whole game deals with real-time cutscenes that progress depending on the player's actions.
Decisions are an integral part of the game's story, and players are constantly dealing with scenes in some way.
Interactive cut scenes
Interactive cutscenes deal with the computer taking control of the player's character, while buttons are shown on screen, requiring the player to press them in order to continue or catch up in the action, as in "Quick Time Events" from , Sword of the Berserk: Guts" age, Resident Evil 4 God of War I and II, Tomb Raider: Legend, Marvel: Ultimate Alliance and sometimes criticized for lack of warnings when they should happen, often forcing the player to play the event over again.
Another type of scene is where the player gets to choose from at least a few character dialogue, examples of which are in KOTOR and Mass Effect.
No skits
Recently, there has been a trend in video games to avoid the cutscene entirely. This was popularized in Ubisoft's 1998 Assassin's Creed game and also allows the player to retain control of the character during "cut scenes". This is intended to add more immersion to the game, although it requires more effort on the part of the developer to make sure that the player will not be able to interrupt scripted actions that occur instead of cutscenes. Spider Man for
I said that we screwed the Lua language to our game for scripting various scenes. However, after using it for a while, we realized that sometimes writing such scripts turns into rather difficult to read and difficult to debug code.
And we thought about the visual approach. In this article I will talk about our acquaintance with the visual scripting tool for Unity - "uScript", about its capabilities and talk about our experience.
Yes, on the screen above - the real script and diagram.
Introduction.
So, let's first look at what happened. Below is a real script that creates two characters on the screen, draws a simple dialog, gives the user a choice of 2 options, and branches off at that point.LUA script source
vhs.HUD(0) vhs.SwitchZone("street") local c1 = CharacterGfx() c1.create("c1", "char_big") c1.mirror(0) c1.setpos("n_2") c1.animate( "f_idle") local c2 = CharacterGfx() c2.create("c2", "char_black") c2.mirror(1) c2.setpos("n_3") c2.animate("f_idle") c2.preset("opp_lmb ") char.animate("idle") char.mirror(1) char.setpos("n_1") c1.say("I need your clothes, your boots and your motocycle") c1.wait_bubble() c2.say( "Yep!") c2.wait_bubble() char.animate("f_idle") char.mirror(0) vhs.ShowMultiAnswer("Try to catch me! (run away)", "No way! (start fight)", "") switch_answer ( case 1: vhs.BlackScreen("You are not fast enough to run away. So Have to fight!") vhs.StartFight(77,7) end, case 2: vhs.StartFight(77,7) end, )
In game it looks like this:

In principle, there is nothing wrong with the script above. But imagine that you have not 1 branch, but two. Imagine that you need to check some game parameters and branch the script based on them. This can become obscure very quickly.
It was at this point that we badly needed visualization.
After looking at a few unity plugins, we settled on uScript. It is very powerful, flexible, and at the same time easily extensible. In addition, it creates a minimal performance impact, because. at the stage of saving schemes, it immediately compiles them into C#, i.e. for Unity, a script compiled in such an editor is not very different from a script written by hand on sharps.
Let's immediately give a screen of what the above LUA script has turned into. (image is clickable)

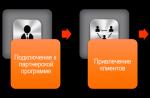
It looks a little cumbersome, but it is immediately clear. When, who and where is created, what does it do, and most importantly, branching is visible.
For example, in our case, the player can choose 1 answer from two possible ones. In game it looks like this:

And on the diagram it looks like this:

And you can immediately see what happens when you choose answer #1 and answer #2. And if there are more such branches, then the more the scheme will not lose visibility.
uscript principles.
Let's quickly go over what the circuit consists of. Actually, the main modules (in uScript terminology they are called “nodes”) are an event (a script or chain usually starts with it), action and variables.
Action "it has an input (usually 1) and an output (s). For example, the simplest action has 1 input and 1 output. And some thread of the condition block will already have two outputs, for example.
Variables are connected at the bottom of the block. A triangle means that the variable will be written (output).
For example, in this example, we create a character (using the "Create char" block), and then set its mirroring to "true" (using the "Mirror" block):

By the way, all variables can have names (in our case, "c1"). And all variables of the same type with the same name will be synchronized within the same script (scheme). Those. the example above is exactly the same as this one:

This is done to save you the trouble of dragging links across two screens.
In addition, if you check the “expose to Unity” box, the selected variable will become public and will be visible to other scripts (both visual and your handwritten). Arrays are also supported.
A little practice.
All the modules that you see on the diagram are self-written. And they were written in 1 evening. Let's take a look at their code.Let's look at something very simple first. For example, an action called "Start fight". It starts the fight (in fact, calls the game logic method) and takes two parameters - the fight ID and the opponent's ID.

Code for it:
Public class uScriptAct_StartFight: uScriptLogic ( public bool Out ( get ( return true; ) ) public void In ( int opponent_id, int fightdata_id) ( MainGame.me.StartSimpleFight(opponent_id, fightdata_id); ) )
Just? Highly.
Now let's make it harder. Let's say we want to play some animation. And we want to have two options. One - immediately, and the second, which will start only when the animation is played to the end.

On the right, you can see the block configuration block where you type in the values. The block has 3 input parameters - CharacterGfx (directly the character to which we play the animation), Animation (name of the animation) and Mirror (the need for mirroring). And the block has two exits: Out (exits immediately) and Finished (only when the animation ends).
At the same time, the “Mirror” variable is an enumerator with the “yes”, “no” and “do not change” parameters, which is presented as a dropdown list in the properties window.
The code didn't become much more complicated:
Using uScriptEventHandler = uScript_GameObject.uScriptEventHandler; public class uScriptAct_CharacterPlayAnimation: uScriptLogic ( public bool Out ( get ( return true; ) ) public event uScriptEventHandler Finished; public enum BooleanSet ( NoChange = 0, True, False ) public void In ( CharacterGfx ch, string anim_name, BooleanSet mirror) ( ch. PlayAnimation(anim_name); if (mirror != BooleanSet.NoChange) ch.SetMirror(mirror == BooleanSet.True); ch.OnAnimationEndedCallback += () => ( if (null != Finished) Finished(this, new System. EventArgs()); ); ) )
Another moment. In all the blocks above, the output (Out) was called immediately after the execution of the block code.
What if we want to make an asynchronous action? For example, loading a scene. And so that the execution of our visual script is suspended until the scene is asynchronously loaded.
It's just as easy to do. Instead of a line
public bool Out ( get ( return true; ) ) which was the "script is always ready to exit" flag, we write:
public event uScriptEventHandlerOut; thereby saying - "Out is now a handler, and not an ever-true boolean" number.
And further in the code, at the moment when you are ready to continue the execution of the script, you need to call this handler in exactly the same way as you did with Finished in the previous example:
if (Out != null) Out(this, new System.EventArgs());
You don't have to write the code yourself.
Everything that I have given above was written by us in order to collect everything you need in one convenient place. But this is often not necessary. There is a thing in uScript called "reflection". What this really means is that uScript automatically scans your scene and pulls all the objects out of it, as well as their public methods and parameters that it can reach. and provides access to them.For example, this is how the reflection block on the GetComponent() method of the camera on the stage looks like:

(at the bottom you can see the "properties" block, where all method parameters are set)
Findings.
We definitely liked the tool and we will continue to use it. In general, some people manage to write entire games with it, but this is already too much.We don't know yet how deep we can use it. For example, we have not yet decided whether to rewrite the logic of quest triggers from our lua-oriented to visual.
But for scripting cut-scenes and dialogues, we will definitely use it.
Of the minuses, I can single out only one (which is a consequence of the plus) - as I wrote above, uScript converts visual schemes into C # code. Therefore, each modification of the circuit will require recompilation of the project.
Otherwise, I strongly advise you to take a closer look at this tool if you want to script such logic. Also, as far as I know, this tool is actively used for writing AI.
By the way, if you need it specifically for scripting the behavior and interaction of objects on the scene (for example, collision triggers, etc.), then take a closer look at PlayMaker. It is more focused on the event model.