How to recover an unsaved document in Word
Long and painstaking work on a document can be undone by one careless click of a button or a system failure. However, unsaved documents can be restored, and in various ways. All you need to do is follow the steps described in the instructions below.
1. Did you mistakenly refuse to save the document and close it? Do not panic. Restart your computer immediately to prevent data from being overwritten. Open Word and you will see a list of unsaved documents on the left. Select the most complete or latest version of the document, copy the data and save it.
2. If the previous method did not work, check if you have autosave enabled. To do this, select " " - "Options" - "Save". Specify the frequency of automatic saving. Additionally, you can specify the function Reserve copy to save data until the last change. Follow these steps to protect yourself from future losses.
3. If Word “does not see” a copy of the document, you need to find it manually. At 7 in Word, click "File" - "Open" - "Username" - AppData - Roaming - Microsoft - Word. All temporary files and editor backups are stored here. Click on “Date modified” so that the list starts with the most recent copy, select it and click the “Open and Restore” button.
4. In another version, to find out the path to temporary files and autosave, select in Word " " - "Options" - "Location". Double-click on “found automatically saved” to go to the folder and open the drop-down list to find out the entire path to the folder. In Word 2007, this feature is available after clicking the button Microsoft Office and go to " Options" - "Saving».
Note: If one of the folders is hidden (for example, AppData), click " Organize" - "Folder Options" - "View"" and select the option " Show hidden files, folders and drives" Now you can open any hidden folder through Word.
5. You can use the search to identify temporary or backup copies of documents. To do this, press the combination Win keys+ F and enter in the search bar the desired extension * .tmp for temporary files * .asd for backups. Specify the search area - “ My computer". Search filter: select the date the document was modified, for example, the current date. Open the found files in Word through “Open” - file type “all files”. Save the recovered data.
6. Sometimes Word saves temporary files with names starting with a tilde ~ . If the search for extensions from the previous paragraph did not produce results, change the parameters to ~ *. * Find a document with your title by selecting sort by type.
7. If none of the options work, there is a small chance to restore the document special programs. One of these is EaseUS Data Recovery Wizard Free. During installation, do not select the disk on which you will restore data, otherwise the remaining files may be overwritten.
Please note that files with the *.asd extension are deleted when the editor is closed correctly, but are saved if the system crashes. Therefore, if you mistakenly close the program without saving, you are unlikely to find this copy of the document. In this case, the step described above will help - enabling the backup function of Word settings. Take the time to set up, specifying the autosave frequency and enabling other useful functions. In many cases, it is much easier to prevent data loss than to recover it later.
Recover documentWord
possible in several ways. Here we will look at how to find, create backup copy And How recover unsaved documentWord. If Word document was never saved, it is difficult to restore it, although Word tries to save it when it crashes.
To recover an unsaved Word document, first, you need to play it safe and configure Word to save the document. Let's consider several ways.
Autosave in Word.
How to setup autosave in Word During work and other ways to save a document, see the article "Saving a document in Word".
Recover documentWord, if autosave is configured. Close Word, then open it again. A dialog box appears on the left side of the Word window asking you to open the document that was saved during the failure. Click on the title of this document. The latest version of the document that is saved will open. Only the most recent, unsaved changes will be lost.
Even if the autosave function is configured, you can manually save the document more often by clicking the “Save” button.
BackupsWord.
Backups inWord are needed to save the document in the last saved version, i.e. no recent changes. Every time a document is saved, be it on a PC or on an external storage device (disk, flash drive, etc.), the backup copy will be updated.
Where are backups stored?Word.
Backups are stored in the same folder as the main document, only with the “wbk” extension. For example, “Copy. Article.wbk.”
Tune Word to create a backup copy on a laptop (PC). For example, we work in a Word document that is located on a flash drive, external drive, on the network, etc., i.e. The document is not on the laptop (PC), it is on external media.
Click on the “Office” button in the upper left corner of the Word window. In the window that appears, click on the “Word Options” button. In the window that appears, click the “Advanced” button. In the “Save” section, check the box next to “Copy deleted files to this computer and update when saving them.”
When you save a Word document on a flash drive, another removable device, it will automatically update and save a copy on your laptop (PC).
To create backupsWord, for documents that are on a laptop (PC), click on the “Office” button. In the window that appears, click on the “Word Options” button and select the “Advanced” section. On the right side of the dialog box, in the “Save” section, check the box next to the words “Always create a backup copy.”
How to open a backup inWord.
Click the “Office” button and select the “Open” function. Then, in the “File Type” section, select “All Files”. Select the folder in which you saved the backup. Now, click on the arrow in the words “Views” and select the “Customize” command.
In the “Name” section the name of the backup will be written like this. "Copy of the title of the document." And in the “Type” section it will be written “ Backup document Microsoft Word" We find our document and double-click on it with the left mouse to open it.
If you need to open a backup copy in order to work in it, as in a regular Word document, then save the document using the “Save As” function, write the name of the document, indicate the location where to save it.
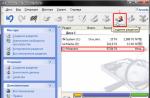
In Word 2013, when we click the “Office” - “Open” buttons? On the right side of the window that appears, at the bottom of the list of documents, click the “Recover unsaved documents” button.
How to find a Word document.
If the Word document crashed, we didn't find it in the folder, let's find it first. Click on the “Start” button at the bottom left of the monitor.
In the “Start Search” line, write the file name in full or in part.
If not on the list the required document, you may have written the file name incorrectly. Click the “Show all results” button. An advanced search window will appear where you can enter additional information to search for the document.
We specify either a specific folder, or “Everywhere” - it will search in all folders. If our document was on removable media, mobile device(flash drive, external drive, etc.), then before searching, connect this removable device to the computer. And in the search conditions we indicate “Removable disk...”. We indicate the date of creation or the date of modification, or do not indicate the date. You can specify the name of the author, the keyword that was specified when saving the document earlier (if you saved the document before), etc. We indicate all the information that we remember, the more and more accurate the information, the better. Click the “Find” button.
If there is no result again, click the “Search by file contents” button.
When you find a document, you can simply open it and save it in the desired folder. You can right-click on the document name and select the “Open storage location” function - the folder in which this document is located will open.
How to recover a deleted document inWord.
If you delete a document, you can find it in the Recycle Bin (a folder on your computer desktop). Look there.
If you find a document in the trash, then right-click on its name and select the “Recover” function. But, you must know which folder it will be restored to. Documents from the Recycle Bin are restored to the same folder from which they were deleted. P.e. you need to know which folder they were in. Or restore the document, then find it by searching.
Search for temporary Word files.
If searches yield nothing, you can look for temporary files. Click the “Start” button. In the line “Start search” we write *.TMP (in English letters). If there is no result, click the “Search everywhere” button. Then, you can click the “Advanced Search” function. How to search with advanced search is described above.
Some temporary files have names starting with a tilde (~). They may not appear in search results. Then write this name in the search bar. ~*.* Press “Enter”. If the document is not found, then click “Advanced Search”.
If a document is closed due to a failure, then the next time you open this document, Word tries to automatically restore the document. On the right, in the damaged Word document that opens, document options will be offered. You need to select the required document.
Force a Word document to open you can do this. Click the “Office” button, then click the “Open” function button. The Open Document dialog box appears. At the bottom right of this window, click the “Open” button (this button with an arrow). Select the “Open and Repair” function.Word has a special “Thesaurus” function that will help you find words that are similar or opposite in meaning, translate the word, select reference materials, etc. Read the article about this feature "
Find and recover an unsaved Microsoft Office 2010 document (or view previous version) is possible thanks to the function of autosaving the file at specified intervals. This applies to all documents created in Microsoft Word, Microsoft Excel and Microsoft PowerPoint.
You will need
- Microsoft Word, Microsoft Excel and Microsoft PowerPoint.
Instructions
Instructions
Probably each of you has ever encountered the problem of a lost file. You worked hard, created a document, edited it for a long time and even saved it. Or you spent a long time searching the Internet for a file with your favorite song or an interesting book, successfully downloaded it, and your browser confirmed the end of the download. But where is the file saved?! There are several options for finding a lost document or file.
You will need
Computer running operating system
Sponsored by P&G Articles on the topic "How to find a saved file" How to create a portable program How to save flash games How to clear the cache in opera
Instructions
First, you need to remember the file name or part of the name. If you can’t remember the file name, it doesn’t matter. Remember at least the date or time period when the save was made.
To start the search, right-click on the Start menu button. It is located in the lower left corner of your Windows desktop. Select “Open Explorer” from the context menu that appears. The system will open a window for you to search for your files. In the left part of the window that opens, select the folder in which to search. To search across all drives, select the Computer folder. Next, pay attention to the upper right corner. There you will see a small field with a magnifying glass on it.
If you remember the file name or part of the name, feel free to enter it in this field and press the “Enter” key on your keyboard. The system will search for files with similar names and display a list of results in the same window.
If you couldn’t remember the name of the saved file, try searching by the date it was saved. To do this, left-click on the field with a magnifying glass. In the drop-down menu, select “Date modified”. The system will show you a calendar for the current month and some standard search patterns such as “Yesterday”, “Earlier this year”, etc.
To enter a date, simply left-click on it. If you want to enter a date range, click on the first date in the range and, while holding down the Shift key, click on the second date in the range. The system will highlight the specified range in color and display its results in the search window.
And finally, if you are looking for a file created using one of Microsoft applications Office, the algorithm is simpler. Use the File menu of the appropriate application. In this menu there is a section “Latest documents”. Take a look at this section and you will definitely find your saved creation there.
How simple
Many of us prefer not only to watch movies, read text, listen to music on the Internet. I would also like to download this to my computer or laptop. But where to find downloaded files can be somewhat difficult in some cases.
Although many are gradually abandoning this idea, realizing that any information can be found on the Internet again and again. But, firstly, the Internet is not yet available everywhere. Secondly, Internet access is not always cheap or free. Thirdly, you just want to have your favorite files on your PC or laptop. I want it, and that’s it.
Therefore, the task of downloading is relevant. It seems like it was downloaded, but where did it all go, where can I find the downloaded files? The problem has arisen.
Let's look at 3 (three) ways to find downloaded files from the Internet on your computer:
- using Explorer, which is available on computers with the Windows operating system,
- via "Search"
- using the "Downloads" folder that is found in every browser.
Let's start searching for files using Explorer. This method is suitable for those who have the Windows operating system installed on their computer.
1 Explorer for searching files downloaded from the Internet
Open Explorer. In Windows 7, Explorer is located next to the button:

Rice. 1. Downloaded files from the Internet are located in the “Downloads” folder in Explorer
There is a “Downloads” folder in Explorer (1 in Fig. 1). If you click on it, then in this you can see downloaded files from the Internet.
2 “Search” line to search for the downloaded file
On a computer, the “Search” line can be found, for example, in Windows 7 in the “Start” menu.

Rice. 2. “Search” line to find the downloaded file
1 in Fig. 2 – click “Start”.
2 in Fig. 2 – in the “Search” line you need to enter the name of the file downloaded from the Internet.
3 in Fig. 2 – file search results.
If the file name in “Search” is entered more or less reliably, then it is very likely that the file will be found as a result of the search.
There is no doubt: searching for a file by its name is a convenient service on your computer. But who remembers the name of a file once downloaded on the Internet?
I will take the liberty of saying that most users do not remember it. In addition, files downloaded from the Internet may have strange names that are impossible not only to remember, but even to understand, some kind of gobbledygook. Therefore, we move on to the next method of searching for a file on your computer downloaded from the Internet.
3 “Downloads” folder in different browsers and how to change it
A browser is usually used to access the Internet. Using a browser, users access social networks and visit various sites. Therefore, files from the Internet (pictures, songs, videos, etc.) are most often downloaded through a browser. The browser has a “Downloads” folder in which you can find downloaded files from the Internet.
Below we will look at how to find the “Downloads” folder in browsers Google Chrome, Mozilla Firefox, Opera, Yandex Browser, Internet Explorer, and also how to change the standard folder for downloading downloaded files to a convenient folder.
So, we will look for downloaded files in the browser, in the “Downloads” folder. To do this, you usually need to go to the menu of any browser and find the “Downloads” option there.
1 in Fig. 3 – in the Google Chrome browser, in the upper right corner, click on the menu button “Settings and Google management Chrome."
2 in Fig. 3 – a menu will open in which you need to click on the “Downloads” option.

Rice. 3. Downloads folder in Google Chrome browser
By clicking on the “Downloads” option, we will see the downloaded files.
How to delete download history in Google Chrome?
To delete something unnecessary, just click on the cross next to the irrelevant file:

Rice. 4. Downloaded files in the “Downloads” folder in Google Chrome
In the browser settings there is a “Personal Data” tab, and in it there is a “Clear history” button. This way you can quickly delete the history of downloaded files over a period of time:
- in the past hour,
- for yesterday
- over the past week,
- for the last 4 weeks, for all time.
This deletes the list of files downloaded from using Google Chrome. The files themselves remain on the computer.
How to change the Downloads folder in Google Chrome
By default, in the Google Chrome browser, files are saved in the following folders:
- Windows Vista/Windows 7/Windows 8: \Users\<имя_пользователя>\Downloads
- Windows XP: \Documents and Settings\<имя_пользователя>\My Documents\Downloads
- Mac OS: /Users/<имя_пользователя>/Downloads
- Linux: /home/<имя пользователя>/Downloads
To change the Downloads folder, open Google settings Chrome (3 in Fig. 3). At the end of the settings page, click on the “Show” button additional settings" and in the additional settings we find the option "Downloaded files" (1 in Fig. 5).

Rice. 5. You can change the location of downloaded files in Google Chrome
If you click on the “Change” button (2 in Fig. 5), the “Browse Folders” will open. In this review you can
- use the slider (3 in Fig. 5) to find the desired download folder,
- or create a new download folder (4 in Fig. 5).
After selecting a new download folder, do not forget to click on “OK”.
Screenshots are provided for Google browser Chrome 55.0.2883.87.
- To do this, in the “Downloads” folder, you need to right-click on the file icon (but not the link). On either touch screen hold your finger on the file icon a little longer. A context menu for the file should appear that contains a list of all valid actions for that file.
- From this menu, you should click the “Save As” option (for example, maybe “Save Picture As”).
- The “Save As” window will open, in which you need to find a folder to save the file from the downloads in another location. Instead of a folder, you can select Desktop. Although you need to understand that cluttering the desktop on your computer with files downloaded from the Internet is not a good idea.
- Once you have decided on the save location, you can change or leave the file name the same.
- Now that the file storage location (folder) and file name are determined, click the “Save” button in the “Save As” window.
- You can make sure that the file is saved in a place where it can be easily found later. To do this, find the file in a new location. You can check that it opens and everything is OK with it.
- You can now remove the duplicate of this file from your Downloads folder.
Where are the downloads in Yandex Browser?
Yandex Browser has the same engine as the Google Chrome browser, so the settings of these browsers have a lot in common.
In Yandex Browser, in the upper right corner, click on the “Yandex Browser Settings” menu (1 in Fig. 6), and in the menu that appears, click on the “Downloads” option.

Rice. 6. Downloads in Yandex.Browser
Open “Downloads” and see the downloaded files. Move the mouse cursor to the downloaded file and click on button 1 in Fig. 7, or you can right-click (right mouse button) on the file. A list of operations that can be applied to the downloaded file will appear. For example, you can delete the file (2 in Fig. 7).

Rice. 7. What can you do with downloaded files in Yandex Browser
Screenshots are shown for Yandex browser version 17.1.0.2034.
How to change the Downloads folder in Yandex Browser
To change the standard Downloads folder in Yandex Browser to another folder, you need to open “Settings” (3 in Fig. 6).
Then on the settings page, click “Show additional settings” and there find the “Downloaded files” option, which has the same as for the Google Chrome browser (Fig. 5).
Opposite the “Downloaded files” option, click on the “Change” button and select the appropriate folder to save the downloaded files.
Downloads folder in Mozilla

Rice. 8. Downloads in Mozilla
Folder Mozilla Downloads looks like a down arrow (1 in Fig. 8). You can click on this arrow and a drop-down menu will appear.
2 in Fig. 8 – By clicking the “Show all downloads” option, we will see all the downloaded files in the Mozilla browser.
To change the default Downloads folder in Mozilla to a different folder,
click “Open menu” (1 in Fig. 9),
then “Settings”, the “Basic” window will open.
You can click on the “Browse” button (2 in Fig. 9) and select another folder so that the downloaded files are saved in it:

Rice. 9. Change the “Downloads” folder for downloaded files in Mozilla
Screenshots are provided for Mozilla browser version 50.1.
Downloads folder in Opera

Rice. 10. “Downloads” folder in the Opera browser
To find downloaded files in Opera:
1 in Fig. 10 – click “Menu” in the upper left corner of the Opera browser,
2 in Fig. 10 – open “Downloads”.
How to change the download folder in Opera
To change the download folder for downloaded files from the Internet, click “Settings” (3 in Fig. 10). Then, in the “Downloads” tab, opposite “Download folder”, click on the “Change” button and select another folder to upload the downloaded files.
Screenshots for Opera browser version 42.0.2393.137.
Where are the downloads in Internet Explorer?

Rice. 11. Downloads in Internet Explorer browser
To find downloaded files in Internet Explorer:
1 in Fig. 11 – click “Service” in the top menu,
2 in Fig. 11 – click “View downloads”.
Screenshots for Internet browser Explorer versions 11.0.9600
What can you do with the files in your Downloads folder?
Video version of the article “Where to find downloaded files from the Internet on your computer”
I was working in the program and saved the files I needed somewhere, how can I find them? The fact is that similar situations arise for me quite often, and I lose important information, and then I have to restore it for a long time.
Answer
If you work in Windows XP or Windows 2000 , then most often the files are saved in the following folder - c :\ Documents and Settings \ Name \ My Documents , Where Name- the name under which you log in.
If you have worked with applications MS Office, then you can try to find the files as follows: With:\ Documents and Settings \ Name \ Application Data \ Microsoft \ Office \Latest files . Log in and view all the files in this folder.
Also read about storage periods for documents in details.
When working with others software applications Auto-saving of files occurs in folders with the name of these applications or the name of the manufacturers of these applications (for example, for the Fotoshop program, the folder is Adobe, and in this folder the application files) at the following address: c :\ Documents and Settings \ Name \ Application Data\ folder, with the name of the application in which it was developed or the name of the manufacturer's company . Enter the folders and view all the files in it.
If you have used all the methods described above and were unable to find necessary files, don't despair - there is another radical possibility. You can search for files using the search engine built into Windows. To do this, click Start, then Search and in the menu that opens, select For Files of Folders. In the window that opens, in the field Search for files or folders named enter the file type, for example:
- *.doc - all MS WORD files will be selected using this mask,
- *.xls for - MS Excel,
- *.jpg - for graphic files (for example, if you worked with a digital camera).
You can set additional search parameters by clicking on the inscription Search options and in the menu that opens, you can refine the search by indicating, for example, the date of modification or creation. To do this, check the box Date. You don’t have to select the search file type mentioned above, but simply click on the checkbox Type and indicate the type of file you are interested in.
This operation was described for Windows 2000. For Windows XP it is somewhat different. Click Start, then Find, Further Files and folders. In the left part of the window that opens, select Files and folders. After this, use either the file type (see above) or configure additional search parameters ( Date, File Type etc.) in the window that opens.
Try never to work from a floppy disk...
If you store your files on a floppy disk, do not work with these files directly from the floppy disk. Before you begin, copy them to HDD, and after finishing work, replace the old file on the floppy disk with a new one from your hard drive. As practice shows, the quality of floppy disks has dropped recently, and you can easily lose all your work along with the file. If you have important information, then work with flash disk, they are not very expensive now. In addition, when you work from a floppy disk, no one can guarantee that the program you are working in does not create temporary files on the hard drive.
If you write files to floppy disks, make at least 3 copies. The author of these lines has more than once witnessed how out of three floppy disks, two successfully failed.
Try not to open letters that come from unfamiliar recipients.
They sent you a letter, but don’t rush to open it. First, make sure that the letter came from a known addressee. But even this is sometimes not a guarantee of safety. First you need to check the letter antivirus program. If you don't have verification incoming mail“on the fly”, copy the file to your disk and scan it using an anti-virus package.
Even if it is a harmless photo or a Word or Excel document, it can contain very nasty viruses that will “help” you lose all your information forever.
Do not work with files over the network without informing the owner of the computer whose files you are working with.
You found a file on the Internet, opened it and are working with it. You've worked hard and are looking forward to a well-deserved rest. Click Save file and….. the machine freezes, and you realize that all your work is irretrievably lost….
How to prevent this? Once you have opened the file over the network, do the following. Ask the owner of the computer on which you found the file not to turn off the machine yet, or simply save this file to your computer.
Be careful, 90 percent of our computer problems are our own fault!
Computer power outages, critical errors that occur in the system, unintentional closing - all this leads to the fact that an unsaved Word document (doc or docx) may be lost. But almost any data can be recovered; the main requirement is to know the methods and be able to use a PC. The methods presented below are sorted by difficulty: from the simplest to the most complex. It is recommended to apply the options in order of priority.
Option 1: Automatically recover a Word document
To text Word editor built-in feature automatic recovery document. If a system failure occurs that results in a forced reboot of Windows, the program itself will offer to return the lost information. It looks like this:
Comment. Text editor Word provides an automatic recovery option only the first time you start the program. When you reopen the utility, nothing will be offered. Don't miss this chance.
If the user did not save the Word document before closing, then you can try to force open it again. There is an important detail here: the method will not work if the user has created new document Word, typed the text and saved it. Algorithm:
- Create and open a blank sheet;
- In the upper left corner, go to the “File” section and click open;
- A window pops up in which you need to select “Open and restore”:
The most controversial method, since the effectiveness leaves much to be desired. In most cases, nothing happens to a clean file.
Option 2: Source file
Despite the lack of saving, it could remain in the system original file Word (doc or docx). To find it, we use the following algorithm, consisting of two steps:

A list of files whose names match the entered keyword will appear. If the document is found, open it and view the contents.
Comment. This method is the simplest, but not ideal. The chance that the original document will remain on the computer after a critical error is extremely small.
Option 3: Autosave folder
Word program (especially latest versions) quite smart. So, if the user did not change the standard parameters, then Every 10 minutes the document is automatically saved in a specially designated folder, which is called reserve. The folder is hidden, so it is not certain that searching using the method described above will help, so you will have to check the contents manually. For this:

You can find the last saved file in the directory. The appearance may differ depending on the version. In Word 2010 the folder looks like this:
There is an alternative to this method. It consists of the following:

A few notes:
- The method is only relevant if automatic saving of Word data is disabled;
- You can restore a document in this way only after a forced shutdown of the system (voltage drop, critical error, etc.);
- In order for a file to be added to a folder, the user must work with it for some time;
- Unsaved files are presented in .asd, older versions (before 2010) of Word do not see this format.
That's it system methods are ending. Now let's talk about recovering Word information using third-party software.
Recovering a document using third-party programs
The method presented below will allow you to return a lost file from your device even in the most difficult situations: accidental deletion without placing it in the recycle bin, damage by a virus, formatting, etc.
In this case, recovery is performed third party programs, downloaded from the Internet ( It is advisable to check for malware with an antivirus). Here are some specialized applications:
- 7- Data Recovery. Among the advantages, multifunctionality should be noted: there are five options for recovering lost data. Despite the presence of the Russian language, the program is quite complex for inexperienced users;
- Active Undelete. The most universal utility that works with everyone file systems, OS and supports most external devices. The interface is quite simple and perfect for beginners;
- Wondershare Data Recovery. Powerful program, capable of recovering any files both from a computer and from external media;
- . Currently the leader in the Word file recovery segment.
Comment. The resources of all utilities are limited; if a large amount of data was written to a disk or flash drive after deleting an unsaved file, then you should not expect a positive result.
In order to restore Text Document Word in .doc or .docx format is ideal latest program Wondershare Data Recovery.
The entire stage of working with the application consists of 3 steps:

Perhaps, no experienced user of a personal computer will find it difficult to find this or that directory on the computer in order, for example, to resolve some issue. Modern computer games are installed exclusively where the user himself indicates, but often people neglect this and do not even look at the installation path of the game. It should be noted that basic information about the game will be stored exactly where the user specifies, but the settings are usually located in a different directory (separate from the game).
Installation path for digital copies of games
More and more users are purchasing digital copies of games, that is, special license keys that provide access to games on certain services (Steam, Uplay and Origin are considered the most popular today). For digital copies of games, the directory where they are stored and where they are downloaded will be different from the case when the user installs the game from disk. For example, if the user uses the Steam service, then the download will be directly to the folder C:/Program Files/Steam/steamapps/ “user login”. Some of the already installed games are stored here, and the other part may be in the folder C:/Program Files/Steam/steamapps/common. Whatever service is used, the path will always be the same, but with one difference - instead of Steam there will be either Uplay, or Origin, etc.
When installing from a CD, the path will look different. Usually the game is installed in the folder C:/Program Files/“game name”. Naturally, this path will only exist if the user did not change the standard settings in the operating system itself and did not change the directory during software installation.
Where are saves, settings and other game data located?
As for settings, saves and other information, in Windows XP the path to them will be as follows: C: / Documents and Settings / “user name” / Application Data / “game name”, and in Windows 7 and Windows Vista: C :/Users/"username"/(AppData)/(Roaming)/ "game name". It is worth noting that the user cannot change the path to settings, saves and other data (only move, but this may affect performance), which means this path is suitable for most users.
Instructions
To start the search, right-click on the Start menu button. It is located in the lower left corner of your Windows desktop. Select “Open Explorer” from the context menu that appears. The system will open a window for you to search for your files. In the left part of the window that opens, select the folder in which to search. To search across all drives, select the Computer folder. Next, pay attention to the upper right corner. There you will see a small field with a magnifying glass on it.
If you remember the name file or part of the name - feel free to enter it in this field and press the “Enter” key on your keyboard. The system will search for files with similar names and display a list of results in the same window.
If you could not remember the name of the saved file, try searching by the date it was saved. To do this, left-click on the field with a magnifying glass. In the drop-down menu, select “Date modified”. The system will show you a calendar for the current month and some standard search patterns such as “Yesterday”, “Earlier this year”, etc.
To enter a date, simply left-click on it. If you want to enter a date range, click on the first date in the range and, while holding down the Shift key, click on the second date in the range. The system will highlight the specified range in color and display its results in the search window.
Finally, if you're looking for a file created using one of the Microsoft Office applications, the algorithm is simpler. Use the File menu of the appropriate application. In this menu there is a section “Latest documents”. Take a look at this section and you will definitely find your saved creation there.
The main purpose of any computer is storing and processing information. But if there is too much information, then the problem arises of finding the folder or folder you need right now. file. So where and how to look?
Instructions
Click the "Start" button to open the main menu and go to "My Documents". Check if what you are looking for is there file.
Call the service menu by double-clicking on the hard drive field C: or D: to display its root directory and select Documents and Settings.
Enter the directory by double-clicking on the Documents and Settings field and specify the folder with the user name.
Open the folder by double clicking on the folder field and check if what you are looking for is there file.
Select the program used to create the desired file and select “Save As” from the “File” menu of the program window. This will open the default folder used by the program to save created documents.
Return to the main Start menu and go to My Computer to locate the folder of the program used to create the desired file.
Call the service menu by double-clicking on the drive field C: or D: to display its root directory and select the Program Files folder.
Open the folder by double-clicking on the folder field and select a file or folder that may contain the file you are looking for.
Open a file or folder by double-clicking on the folder field. Check if what you are looking for is there file.
Check the contents of the "Cart". Often accidentally deleted files are found there.
Return to the main Start menu and go to Search - the main tool for finding lost files or folders.
Many inexperienced computer users cannot find a file downloaded from the Internet. It seems that the file was downloaded successfully, but where exactly is unclear. You can try to find it by opening all the folders in a row, but this way you can spend a year of your life without finding anything. So, what to do? Where are files saved on the computer? Where to look for them then?
Where are files saved in the browser?
But, let's figure it out gradually. Let's look at the procedure for searching for files using the most popular browsers.
If you use Internet Explorer, then even before downloading the file, you can save the document to a location convenient for you by clicking “Save As”. After which, a new window should open in which you need to select the required folder and click “Save”. If you just clicked save and have no idea where the file was saved, then go to your browser settings, and then to “View downloads.” As a result, a list of downloaded files will open, from which you need to select the one you need.
The process of saving a file in the Opera browser is similar to the previous one. To search for a previously downloaded file, you need to find “All downloads” in the left functional panel and click on it, after which a list of all downloaded files will open, and all you have to do is find the one you need.
With the Firefox browser, things are somewhat more problematic. The problem is that when saving a file, it does not ask you to specify it for saving, and sometimes it is difficult to find it. To find the required download, follow the following menu chain: "Tools">"Downloads", and then find the required file in the window that opens.
If you are an ardent supporter of the Google Chrome browser, then you can find the just downloaded file in the panel below, or go to “settings” and select “downloads” and look for it in the list.
It is also worth knowing where downloaded files are saved via the Torrent program. The file is saved in my documents or in the download folder, but the file storage location can be changed by going to the program settings.
If you have not changed the settings in the browser or torrent, then the files are saved by default in the folder at D:\Users\Username\Downloads.
Where are temporary files stored?
Many people are also interested in the question: where are temporary files saved? The location of the temporary files depends on what kind of files you are looking for.
Temporary program files are saved to the hard drive where the operating system is installed. That is, you need to open, for example, drive C, then go to the "Documents and Settings" folder, then to the "Username" folder, then to "Local Settings", and finally to the "Temp" folder (For Windows XP) or first drive C, then “Users”, then the “Username” folder, then “Local Settings”, and “Temp” (for Windows Vista and 7)
If you are interested in the location of the browser’s temporary files, then you should search for them in the chain drive C:\users\Username\Local Settings\Application Data\Browser name.
If all attempts to find a file are unsuccessful, but you remember at least part of its name, then use the standard Windows search.
In all Windows operating systems, up to the recently introduced Windows 8, the screenshot was saved only to the clipboard. The clipboard is RAM. Typically you use the clipboard when you copy and paste something somewhere else. For example, by selecting text and pressing Ctrl+C, you place the selected text on the clipboard. Later you can paste this text anywhere you want.
The same thing happens when you press a key. Print Screen. The Windows operating system takes a screenshot (a picture of everything that's happening on your screen). Once the screenshot is taken, the operating system places it on the clipboard.
After this, the screenshot is available to the user. It can be inserted into any program that can work with images. In order to insert the resulting screenshot, just use the usual key combination Ctrl+V or the “Paste” command from the context menu.
The most commonly used program for saving screenshots is Paint. It is installed with the operating system and is available in the Start - All Programs menu. You can also launch it using search or the Run menu, which is launched using the Windows key combination + R.
In this case, we need to remind you that, in addition to simply pressing the Print Screen key, you can use the Print Screen+Alt key combination. If you use this key combination, you will get a snapshot of only one active window, that is, the window that is at the very top and with which you are working. Naturally, screenshots taken using the Print Screen+Alt combination are saved in exactly the same way. After taking a screenshot, it is placed on the clipboard, after which you can paste it anywhere.
How Print Screen is saved in Windows 8 operating system
Everything works exactly the same. But there is one feature here: in addition to the old Print Screen and Print Screen+Alt key combinations, Windows 8 has another one - Windows+Print Screen.
The Windows+Print Screen key combination automatically saves the screenshot to Libraries\Images\Screenshots. So you immediately get ready file, and you won't have to launch Paint to save the resulting screenshot.
may be lost in many situations. For example, a document may be lost if an error occurs that causes the Word works, if the power was turned off while editing or the document was closed without saving changes.
This article describes steps you can take when trying to recover a lost document.
Notes
Finding the original document
| 1. | Click the button Start and select Find. |
| 2. | Select an item Files and folders V Assistant on the left side of Microsoft Windows Explorer. |
| 3. | In the field, enter the name of the file you want to search for. |
| 4. | On the list Where to look select My computer and press the button Find. |
| 5. | If there are no files in the results pane, continue with the following steps to find all Word documents. |
| 6. | Enter *.doc in the field and click the button Find. |
Finding Backed Up Word Files
If you select the option, you can find a backup copy of the document.To view the value of a parameter Always create backups, do one of the following: To find the backup file, do the following:
Try to force a file recovery in Microsoft Word
If the option is selected Autosave every, Microsoft Word creates a temporary automatic recovery file containing last changes included in the document. Each time you start Microsoft Word, it searches for Automatic Recovery files and displays the files found in the Document Recovery panel.To find a parameter Autosave every, do one of the following: You can try to force restore the document when you open it. To do this, do one of the following:
Recovering automatic recovery files manually
To search for automatic recovery files, follow these steps:| 1. | Click the button Start and select Find. |
| 2. | Select an item Files and folders V Assistant |
| 3. | In field Part of the file name or the entire file name enter *.ASD . |
| 4. | In field Search in select My computer. |
| 5. | Click the button Find. If files with the ASD extension are found, follow these steps: |
| c. | On the list File type select value All files *.*. |
| d. | find and select the file A.S.D.. |
| e. | Click the button Open. |
| f. | Restart your computer. |
| g. | Launch Microsoft Word. |
Finding temporary files
If the file cannot be found using the methods described above, try restoring temporary files. To do this, follow these steps:| 1. | Click the button Start and select Find. |
| 2. | Select an item Files and folders V Assistant |
| 3. | In field Part of the file name or the entire file name enter *.TMP . |
| 4. | In field Search in select My computer. |
| 5. | Click the caption. |
| 6. | Select an item Specify date, indicate dates WITH And By |
| 7. | Click the button Find. |
| 8. | On the menu View select item Table. |
| 9. | On the menu View select item Arrange icons and click the item Changed. |
| 10. |
Search for files ~
Some temporary file names begin with a tilde (~). To find these files, follow these steps:| 1. | Click the button Start and select Find. |
| 2. | Select an item Files and folders V Assistant on the left side of Windows Explorer. |
| 3. | In field Part of the file name or the entire file name enter ~*.* . |
| 4. | In field Search in select My computer. |
| 5. | Click the caption When were the last changes made?. |
| 6. | Select an item Specify date, indicate dates WITH And By, defining the period of time that has passed since the file was last opened. |
| 7. | Click the button Find. |
| 8. | On the menu View select item Table. |
| 9. | On the menu View select item Arrange icons and click the item Changed. |
| 10. | Browse the search results to find files whose modification time matches the time the document was modified. |
Recovering damaged documents
Word tries to automatically repair a damaged document if it detects damage. You can try to force restore the document when you open it.To do this, follow these steps: