If you like to take pictures of your loved one with a camera Samsung Galaxy S5, S6 or other smartphone, you probably know that it is not always possible to take a photo of normal quality. Unfortunately, the cameras in the top gadgets also do not yet reach full-fledged point-and-shoot cameras.
The tips below are more suitable for beginners and amateurs in photography, but from my own experience I know that 90% of smartphone owners can be classified as such.
1. Don't use ZOOM. In modern smartphones, using even the most minimal zoom leads to a sharp deterioration in picture quality. Noise appears on it and sharpness is lost. If you want to photograph an object closer, approach it. If this is not possible, take photographs without zoom; in the end, the fragment you need can simply be cut out from a large photograph. And remember, the closer the object is, the better and more detailed it will be in the picture.
2. Keep your smartphone lens clean. Try not to scratch the lens of your gadget, and also rub it with a cloth before taking photographs.
3. Take multiple photos. Even professional photographers always take several photos, take them as an example.
Often you can get blurry photos due to poor focusing or the slightest twitch of your hand while shooting. When taking a series of photos, you can always choose the best shot and delete the rest. Especially considering that the Galaxy S3, Note 2 and Galaxy S4 have excellent burst shooting capabilities.

4. Lighting. Normal pictures can only be taken in good lighting. If you decide to have a small photo session with your friends, it is better to do it during the day and on the street. Don't forget also, if the light source is in front of the lens, turn on HDR mode.
But you should not take pictures in the open sun or in deep shadow, and also try to avoid contrasting light transitions.
5. Set the “resolution” and “image quality” parameters to the highest. Don't skimp on photo size if you want maximum quality.
6. Make the most of your camera. In the camera settings of Samsung Galaxy smartphones there are quite a lot of different settings for all occasions. Feel free to use them.

For example, when shooting close-up, switch to “macro” in the “focus mode” tab. Sometimes it is useful to manually set the white balance.

Also pay attention to the “Story” tab. Depending on the situation, try to choose the item that suits you. For example, " night mode"Automatically increases ISO to maximum, and makes for better visibility when shooting at night.
7. Edit photos. In Photoshop and others graphic editors You can smooth out the noise a little, adjust the brightness/contrast, and add beautiful effects.
8. Try not to shake your hands when you take pictures. This is very important, especially in latest models Samsung, such as the Galaxy S6, which uses a fairly long shutter speed by default for better post-processing.
9. Use third party applications cameras. Fortunately, this can be done on Android. Typically, third-party cameras, such as Camera 360 for example, have a large number of options that are hidden in standard application. This is especially true for Nexus smartphones, where camera settings are always very limited.
10. Practice. Read literature on photography, practice it yourself. Understand how optics work, what exposure, ISO, aperture, shutter speed are. After all, even the most expensive DSLR will not turn you into a pro, and on the contrary, a real photographer will get good pictures from a smartphone. An example is the interesting article "
02.09.2017 Frank 12 comments
Is it possible to improve the front or rear camera in a Samsung Galaxy, Lenovo, Meizu m3 note 3 pro, xiaomi redmi 4x, lg k10 2017 running on android 6.0.
These are the questions I get asked most often. If your smartphone or tablet has a bad camera, then there are some things you can improve.
Overall, the camera feature is now being added to many devices ranging from mobile phones.
Just to get good image quality, you need a DSLR camera, although you can achieve really good results easily if you apply the right settings.
To begin with, it’s worth explaining the relationship between matrix size and image quality and refuting the myth about the number of megapixels, which quite often is not a determining factor in quality when shooting.
It happens that a phone camera with 2 megapixels produces much higher quality than a matrix with 12 megapixels.
Firstly, the more megapixels, the larger the picture you will get and the better the lens, the better the image quality.
Another issue is the camera control software that comes from the manufacturer and manages it all.
You can "strengthen" software for better image quality. Get acquainted with programs that improve the quality of the built-in camera.
Settings to improve the webcam in a smartphone or tablet

In order to improve the quality of photos taken with your cell phone, there are a few important issues to keep in mind.
Lighting - try to keep things well lit - the weaker the lighting, the more “noise” will be visible in the picture, and if your phone is equipped with an LED flash, then it’s good to turn it on.
Although the built-in flash can't illuminate the entire subject, it can always help a little (LED flashes are more of a marketing ploy than a powerful flash tube).
Contrast - this parameter should be considered when photographing indoors, where there is artificial lighting - thanks to it you can preserve natural colors.
Digital Zoom – Definitely avoid using this option as nothing ruins image quality more than digital zoom.
Image stabilization - Some phones offer digital image stabilization, which you shouldn't trust entirely.
Auto focus - should be used when there is a problem with sharpness when trying to capture objects.
ISO - Noise in images is often the result of overusing ISO settings that add artificial light from low light - higher ISO settings can produce clearer photos in low light.
Improve the camera using the engineering menu

I am often asked how to improve the camera using the engineering menu? I’ll tell you how to enter it, but don’t count on super improvements, and not every smartphone will be able to run it.
NOTE: if your smartphone or tablet runs on a Qualcomm chipset, then there may not be an engineering menu, but on those that use MediaTek processor it will be for sure.
To open the engineering menu, enter the command: *#*#3646633#*#*. If this code does not work, try another one: *#*#4636#*#* or *#15963#*.
NOTE: on Xiaomi smartphone You need to click on the “Kernel version” parameter several times in a row.
Using the engineering menu you can make some changes and check the sensors and perform component testing.
If the code does not work, you can try using the MobileUncle Tools or MTK Engineering applications - you can download them from the play market.
After logging in, you should be interested in the “Camera” option - setting various parameters.

After the transition, the settings will open.

The engineering menu is preferable for experienced users and should be used very carefully so as not to create tragic “miracles”.
Programs that improve captured video

If you already have a video shot, but of poor quality, then you can also improve it using computer programs.
Movavi Video Editor is a powerful yet simple video editor. When using it, the following tools will be available to you: trimming video edges, rotating, adding audio, effects, filters and others
vReveal is a great assistant if you like to shoot videos using your phone. Then, most likely, you get a video that is far from ideal.
vReveal has quality enhancement technology to improve the quality of video files and clips.
Video Enhancer - this program can increase video resolutions. You can significantly improve the quality of photos or videos using Video Super Resolution technology.
Using frame detailing technology, you can increase the resolution to the HD standard.
NOTE: all programs have a drawback - they are paid, and I could not find worthy free analogues. Good luck.
12 thoughts on “How to improve the camera quality on a smartphone or tablet”
What do you want to do?
Answer
Whether there is a camera item depends on the smartphone manufacturer. If he doesn’t provide for this option, it means it doesn’t exist or maybe he introduced his own code for the camera.
Answer
Thanks for the information maybe about Chinese planets on Android 6.7
Answer
On my UleFone Gemini pro in engineering menu there is no “camera” item
Where can I get it? What should I do?
Answer
There is also no Camera item.
Answer
Thank you, dear Yaroslav! I haven’t yet shot a video especially on my phone for myself, but I want to shoot it in New York. So to say, if I click on the video camera, I will see it and then I want to marvel, because I know that it will be in the gallery: I will go to the Camera, there I have a camera on the photographs that I took, and in the VIDEO camera and I will de Is the video camera painted over? It’s just that if I captured a video from the Internet, it went to Zavantazhenie, but where would the video go that I captured on my phone?
In recent years, smartphones have performed well in terms of photography. Previously, the South Korean manufacturer provided too many unnecessary functionality, but lately pre-installed application The camera provides interesting, convenient and useful options. This year's flagships are equipped with a high-quality camera, which in the right hands can work wonders.
New camera app
Application Camera on Galaxy S8 Not much has changed compared to previous devices, but it has still been updated to make it easier to use. The new layout puts the camera's most sought-after features front and center. For example, you can now zoom when taking photos by simply moving the shutter button from left to right. Thus, with one finger you can both take pictures and change the size of the image.
What each camera mode can do

Swiping to the right in the camera interface allows you to open different shooting modes. Among them are available following:
Bixby Assistant in the Camera app

Along with these smartphones, Samsung introduced a new digital assistant called Bixby, which is not quite ready for use yet. However, it is with the camera that the assistant already works; we are talking about a function called Bixby Vision.
You need to click on Bixby button on the body. Point the camera at an object or landscape and the assistant will display related images and links to purchase the specified items. Bixby Vision works with a variety of items, including cosmetics with stickers and electronics from famous brands. Sometimes the assistant gets things mixed up.

Bixby is included in the camera app, motivating users to use it frequently, just as a physical button on the body motivates users to make frequent voice requests. If you find its work useful for comparing what you see in stores with your own eyes with what you can find on the Internet, you can activate the “Quick Launch” option in the camera settings.
Using focus manually
Do you want to master the bokeh effect on ? Open manual settings by swiping left next to the camera shutter button and select Pro shooting mode. Here, click on the “Manual Focus” option and move the cursor until you achieve the desired effect. You will see green lines in the viewfinder that indicate what the camera is focusing on. After this you can take photos.
Activating Quick Launch
By default, Fast Startup is enabled initially. You need to quickly press the power button on the right side of the case twice to launch the camera application. You can use this option even when the screen is off. If you accidentally disabled this feature, you can return it in the camera settings.
Galaxy S8 smartphones have larger screens compared to the previous generation devices, so reaching the farthest edges is not easy. For this reason, the shutter button floating on the screen increases the convenience of photography. You can enable it in the camera settings, it is located two lines below quick launch cameras. When enabled, the camera interface will show a floating button that can be placed anywhere in the Camera app.
Shooting video before taking photos
In the camera app settings, turn on Motion photo to record a short video before taking a photo.Quickly switch between cameras


The button for switching between cameras is located at the top of the application interface. You can also switch with a simple upward gesture in the viewfinder, which is convenient to do with one hand.
Use photo filters
At the bottom of the camera interface, where the shutter button is, swipe left to open effects. You can also get here from the “Face Masks” menu. There are many different filters available here, some suitable for landscape photos, others for selfies.Face smoothing
The front camera resolution of the Galaxy S8 is 8 megapixels, which is quite a lot. The aperture is f/1.7, there is autofocus, so you can safely use this camera to photograph yourself and your friends. If you're not completely confident in your beauty, you can use the beautification modes built into the camera app to hide imperfections. Click on the icon that looks like a person with long hair to reveal different beautification options, like smoothing the skin, adding artificial lighting, or brightening the eyes.
Wide-angle selfies
To take wide-angle photos with the front camera, you need to swipe right on the area next to the shutter in front camera mode, just like opening the filter on the rear camera. Wide-angle selfie mode is similar to panoramic shooting in the rear camera, you need to swipe the viewfinder from left to right to take a photo.Use face masks
Samsung has built a feature into the Galaxy S8's camera called Face Masks; It's not the same as Snapchat filters, although it works almost identically. You can use them in the front camera on yourself or in the back camera with other people. Unfortunately, they cannot be used in conjunction with other effects; only one filter can be applied at a time.At the time of buying smartphone one of the most important selection criteria is camera specifications devices. Progress modern technologies has reached the point where a mobile phone camera can compete with a camera. And given the fact that modern people use their phones more often than any other device, the phone camera has a lot of responsibility.
Sometimes in the hands of different people the same smartphone takes different photos, the objects in the photographs differ from each other. Most people are confident that the more megapixels a camera has, the better the photo quality; in fact, this does not entirely correspond to reality. As a rule, the matter is camera settings. Number of megapixels indicates the size at which photographs can be printed without compromising quality.
To get a high-quality photo you need set up the camera correctly. These settings include white balance, exposure, focus and ISO. Also, to improve the quality of photography, it is necessary follow a few simple rules.

Keep your lens clean
The first thing you need to do before creating your next photo masterpiece is to wipe the camera lens with a cloth; fingerprints or some debris from your pocket often remain on it. A clean lens will definitely make your photo clearer, sharper and more vibrant.

Pay attention to the light
Good photographs can only be taken in normal lighting. Even a novice photographer knows that the light should not hit the camera directly, but should illuminate the subject well. It follows from this that it is better to arrange photo sessions during daylight hours. But you shouldn't take pictures in the open sun.
Focus objects
In order for this or that object to be the center of attention, it is enough to designate it by touching the phone screen, wait until the camera selects the object and take a photo. This way, you can place emphasis on the photo, highlight the main thing and blur the unimportant.
Don't use ZOOM
Using very minimal zooming (bringing the subject closer) significantly degrades image quality. The objects in the photo lose sharpness and clarity, the picture becomes blurry, and sometimes you can even see large pixels. To bring an object closer, it is better to simply approach it. If this is not possible, then take a photo without zoom, and then cut out the desired area.
Use flash on rare occasions
Most professional photographers don't use flash at all. Flash spoils color reproduction, distorts colors, and highlights unnecessary details. Moreover, it should be avoided when portrait photography. All skin imperfections using flash will be in the spotlight.
Experiment with settings

It is impossible to unambiguously answer the question in what position you need to set the smartphone settings in order to get perfect photo. The best advice in this case is to experiment with ISO, change white balance, try macro photography, and generally speaking use all those settings, which your smartphone allows you to change.
Don't be afraid to change settings from minimum to maximum and vice versa. For example, in shots that contain both very light and very dark areas, try using the built-in HDR mode.
If the lighting is insufficient, objects in the photo cannot be seen, increase ISO.
By changing, you can get colder or warmer tones.


Change clarity, sharpness and saturation, so you can make the photo more realistic or vice versa.
Check the resolution, most smartphones allow you to select photo resolution. The higher the resolution, the better the quality of the photos.
Don't forget about automatic photography. No wonder they call it smartphones smart phones, they can easily select the necessary settings to improve image quality.
Take advantage of multi-shot shooting
Multi-part shooting will allow you to capture the right moment. When you hold down the capture button, the camera will begin capturing a series of frames until you remove your finger. Then you can select the best frame and delete the rest.
Photo editors will correct the shortcomings
A huge variety of specialized applications that will help correct the shortcomings of a finished photo can be downloaded from PlayMarket. There are all the same settings as the phone camera, only you can apply them on a finished photo. You can spend not a single hour processing a photo and experimenting with filters. The most popular applications are Snapseed, VSCOCam, Pixlr Express, Adobe Photoshop Express, free and easy to use.
Try photographing the same object from different angles, experiment with your phone camera settings, use editors, and soon you will be able to amaze your friends and family with miracles photos taken on a smartphone.
The camera interface during shooting looks, on the one hand, ascetic. On the other hand, it provides ease of management and even a certain flexibility in adapting to the needs of a specific user. You can start shooting by pressing a button on your camera or video camera (let me remind you that once upon a time, to record video, you had to switch to video recording mode, now you can do everything right away). The Mode button allows you to select the main shooting mode, which is displayed at the top of the screen. A square with a preview of the last photo taken is displayed in the lower right corner. In the upper right is the shooting mode selected automatically (in this case, the camera is closed, there is not enough light, so the night shooting mode is turned on). The button in the upper left corner is designed to switch between main and front camera(for those who like to take selfies and video calls). The two icons on the left are customizable by the user. And the gear in the lower left corner, traditionally, turns on the settings mode.
The settings menu looks, at first glance, intimidating due to the large number of sections. But it’s not difficult to understand them - there is absolutely nothing here that is inaccessible to the average user. Continuous shooting means that if you hold down the shutter button, the phone will take pictures at machine gun speed (their number is limited to 30 frames). The image stabilization feature is useful. I recommend leaving it on at all times, even though using it results in slightly more energy consumption. You won't really notice the difference, but it's worth knowing. In general, an increase in energy consumption is typical for any additionally activated functions. Therefore they are disabled by default. Face detection makes it easier to focus when shooting portraits by automatically detecting faces in the frame. The third icon in the second row enables the ability to release the shutter when you touch the screen anywhere. In this case, focusing will be performed on the image to which the finger is pointing. Activated audio focus means that as your subject gets closer, the audio recording volume will increase accordingly.

The "Effects" section is a set of simple filters that there is no point in using before shooting, since, if necessary, everything can be added later. The flash has three shooting modes: on, off and auto mode, in which the camera itself determines whether it needs a flash. Given the capabilities of this camera, you can safely leave the flash off in the vast majority of cases. HDR mode allows you to use the so-called high dynamic range, which I will discuss a little later. The self-timer delay timer allows you to select a period of 2, 5 or 10 seconds after which the photo will be taken. Typically used by photographers to take self-portraits with a tripod. Its use on a phone is questionable, since securing the phone is quite difficult. But in some cases it may be useful.
I also recommend always turning on location tags, then the GPS coordinates of the image will also be recorded in the file with the image. This will allow you to view pictures linked to a geographic map when using various services (for example, Google Photos). Very convenient for telling friends about trips and attractions. "Storage" allows you to choose where the pictures will be saved - in internal memory phone or memory card. Activated function"Image Review" shows the photo or video immediately after it was taken. I recommend disabling this option; it often hinders rather than helps and creates unnecessary delays in shooting. An interesting “Remote Viewfinder” feature allows you to connect to your phone via NFC or Wi-Fi Direct and control shooting from another device. The “White Balance” and “Exposure Value” items are rather relics of the past - I recommend not touching them at all, since the automation works great now. “Grid” places a grid on the viewfinder screen; this can be convenient, for example, for dealing with “cluttered” horizons. " Voice control"is a function for surprising friends. And it allows you to take pictures without touching the screen with your hands. Just say one of the words: take a picture, take a picture, smile or take a picture. To record a video, you just need to say: “record video.” Ukrainian language is not supported, if the system settings are Ukrainian, then commands will need to be submitted in English. Finally, "Reset" returns all settings to their original settings. It’s worth adding that any two settings icons can be dragged to the left panel for quick access to them while shooting.

The resolution of the images reaches 5312x2988 pixels. Honestly, in the era of cheap memory, it’s not clear why it should be lowered, unless someone might need a mode with an aspect ratio of 4:3 rather than 16:9.

Metering control is useful for advanced users. For most cases, it is better to use the default center-weighted, which evaluates the exposure of the entire frame as a whole.

The video resolution in the Samsung Galaxy S5 reaches UltraHD (or 4K), at which the frame size is 3840x2160 pixels, unimaginable just 2-3 years ago. At this resolution, however, image stabilization does not work. If you need a stable picture, it is better to use traditional FullHD.

Selecting a video recording mode opens up a wonderful world of experimentation for the user. The limitation for MMS can be considered a relic of the past - in this mode, the video duration is limited to 20 seconds, and the file size is 245 kilobytes (frame size 176x144 pixels in the now forgotten 3GPP format). Slow motion and fast motion allow you to speed up or slow down the video. And the "smooth motion" mode means shooting with increased frequency frames, which really makes the picture clearer and movements smoother. All this is noticeable to the naked eye.

The selective focus shooting function is one of the most recent and has appeared in the last year. For example, in HTC One The M8 uses a separate second camera for this. The Samsung Galaxy S5 was able to get by with one, with almost the same result. A series of photographs are taken with different focusing, which allows you to choose from the finished frame which plan to highlight - the foreground or the background. As you can see, this effect requires some conditions: the object in the foreground should be no further than half a meter, and the object in the background should be no closer than one and a half meters from the shooting point.

Basic shooting modes. As a rule, I advise everyone to use automatic, but this is one time when it is worth knowing about other options. For example, “retouching” during photography makes the face more beautiful, removing all sorts of small pimples and evening out the complexion. I don’t know how the “Snapshot, etc.” mode is deciphered, but it allows you to take a series of pictures, with which you can then work real miracles: select facial expressions in a portrait from different frames, delete objects that accidentally appear in the frame, take pictures with overlapping images. The “Panorama” and “Virtual Tour” modes are worth a separate discussion, I will definitely return to them.

Dual-sided shooting allows you to use both cameras in the frame at once. And, thus, create postcard pictures, where the “brand” is your photo. The “mark” can be moved around the screen and its size changed. Finally, the "Download" item allows you to open the corresponding section in the Samsung application store.

In fact, it is of little use: at the moment there were only four free applications in the section.

This is what processing a photo taken in the “snapshot, etc.” burst mode looks like. You can automatically select best photo series. Choose the most pleasant facial expression in a series of photographs (finally, your girlfriend will like her photographs). A beautiful effect can be created by processing “motion photos”, which creates a blurry image symbolizing speed. “Corrector” will allow you to remove objects accidentally included in the frame (useful when shooting against the backdrop of monuments and landmarks in very crowded places, which, of course, include all shooting sites popular among tourists). Finally, the panoramic shot is self-explanatory, its essence is clear from the name. It is worth saying that smart automation itself determines which effects will be available in a series of shots. It is impossible to force them to be created. But editing a series is available not only after shooting, but also at any other time in the image editor. In addition, you can often apply different effects to one series and not be limited to just one. Overall, this section is an excellent area for experimentation. Interesting for both beginners and experienced users.

Photo editing functions
The built-in image editor in the Samsung Galaxy S5 also embodies absolutely every function that I have ever seen before. And this main reason, which makes no sense to reduce the resolution of images when shooting and select image filters in advance. All editing options are divided into five sections. The first one deals with the basic, but very important and necessary, options for cropping, rotating, and resizing images (for example, to send by email).

The second section allows you to control the brightness, contrast, and saturation of the image. Change color temperature and make other changes to the color palette of the photograph.

The third section presents a large selection of filters. There are exactly two dozen of them in total. Instagram lovers can feel the freedom.

The fourth section is intended for adjusting images of people (on the issue of shooting girls). Modern means editing on phones allows you not only to get rid of the red eye effect (by the way, if you don’t take pictures with a flash, as I advise, then the red eyes will have nowhere to come from).

Finally, the fifth section is devoted to all sorts of decorations of varying degrees of usefulness and artistic expediency.

The real pampering is contained in the “sticker” subsection. This is all more likely for children or teenage girls. Severe geeks are clearly not suitable, although adding a mustache or ridiculous “nerdy” glasses to someone will be very appropriate in some cases.

The most useful section, in my opinion, is related to the choice of frame.

They can be curly. Even, I would say, “very curly.” What do you think of this subsection of masks?

Here is such an unusual mask in the shape of a bicycle. You can choose the background color. In my opinion, such art would be appropriate when creating some kind of graphics for presentations. Why not?

Shooting examples
You can download all these pictures in the original resolution of 5312x2988 pixels in a separate gallery.
Pay attention to the pictures taken indoors:


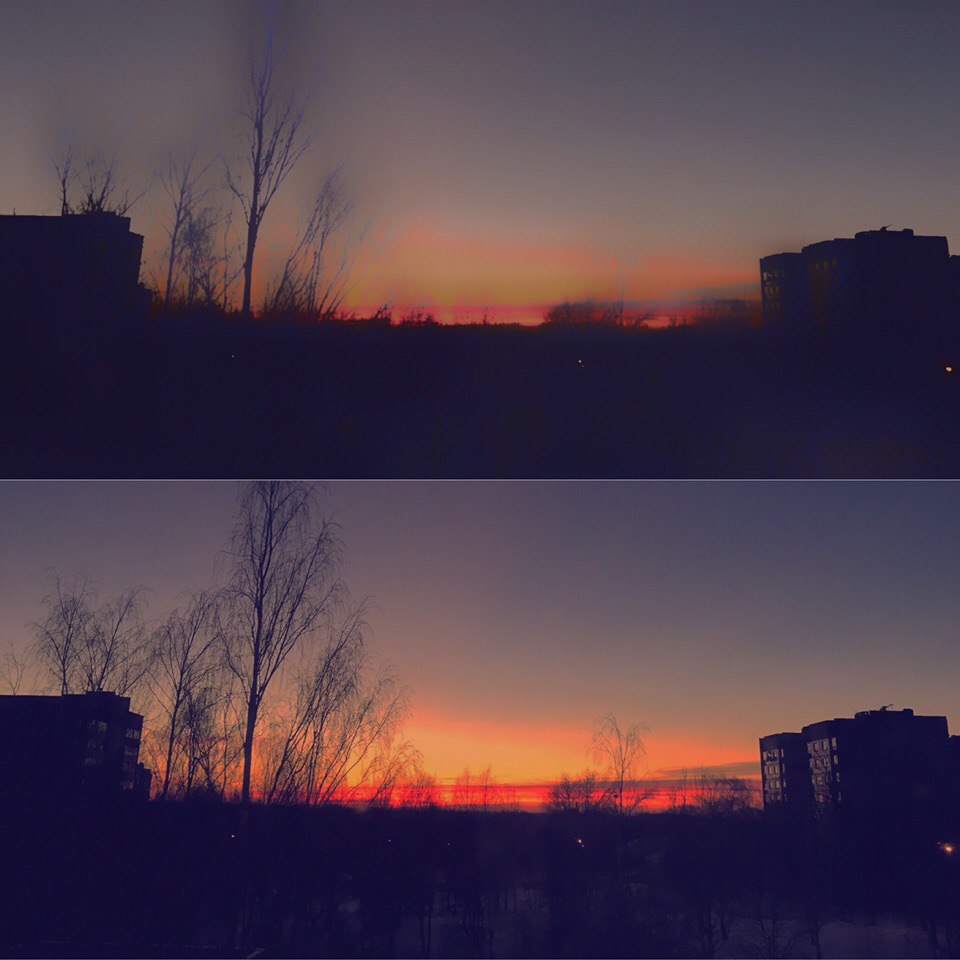
Or these pictures taken at dawn and sunset:


Here’s an example of a “postcard” shot taken with two cameras at once:

Examples of shooting in HDR
The visual demonstration of the HDR feature never fails to impress. HDR is an expansion of the dynamic range of an image. Essentially, the camera takes several pictures at different exposures and then combines them using a special algorithm. As a result, we see well-developed detail in both shadows and highlights. A dozen years ago, to take such a picture you needed a tripod and several frames taken with different exposures. And then processing the resulting images into special program. Today, all this is done automatically by the telephone. This technique is especially effective when shooting in low light conditions, or where there are sharp boundaries between light and shadow.

One more example

You can view fragments of these images in original resolution:


And again, fragments of these pictures in original resolution:


Here's a good example with backlighting. This photo was taken while exiting the underground passage. In the center there is a column on which a poster is pasted (in fact, it was the subject of the photo). To the right and left of the column are passages that create strong backlight to the right and left of the center of the frame. In any other situation, the camera's automation should go crazy. But the Samsung Galaxy S5, as you can see, copes well with the situation. Below you can see fragments of the photo in real resolution, and if you wish, you can download a file (the link will open in a new tab) with the original photo.


Shooting panoramas
In the Galaxy S5, the panorama function is implemented with an A plus. This is the first time I have come across a camera that can take a panorama of more than 360 degrees. That is, in one picture, the same objects are depicted on the left and right sides. The picture itself in its original resolution (click on the picture to see it in full) has absolutely insane dimensions of 18,976 x 1,440 pixels, and the file takes up 12.6 megabytes.
This is what fragments of this image look like in original resolution:


Another example of a panoramic photo (click to enlarge and see it in real resolution)
Shooting video
One of the advantages of the Samsung Galaxy S5 camera (and a consequence high performance) is the ability to record video in 4K resolution (3840x2160). Since YouTube already supports this resolution, you can see a minute-long video of an airplane taking off recorded in this resolution. And watch it, for example, on your TV with 4K support. Well, or on a high-resolution monitor.
Another video. This is the center of Warsaw, and even if you don’t have 4K resolution on your monitor, you can still appreciate how high the clarity and detail the picture is.
Here's an example of a video recorded at dusk:
"Virtual Tour" mode
Perhaps the camera feature that most impressed me was Samsung smartphone Galaxy S5 is a "Virtual Tour". It allows you to create whole virtual tours with movements in space.


The shooting itself is carried out in the same way as when shooting photospheres. That is, just follow the instructions on the screen, combine the circle with the point, and everything will happen by itself. The output is a video file without sound in MP4 format. Unfortunately, the function's capabilities are limited to only 30 pictures. Therefore, if you do not stop, the camera will simply start recording the next video.

During video playback, a motion pattern is displayed on the smartphone screen in the upper right corner. The viewing angle in relation to the route is separately highlighted.

And this is what the result looks like in the video:
Instead of a conclusion
I hope that after this introduction to the camera of the Samsung Galaxy S5 smartphone, you will understand why I consider it the most outstanding I have ever seen in a phone. Besides High Quality shooting, it includes all the variety of technologies available today in the mobile phone industry. And it simply provides a huge field for creativity. If you still have any questions, I will try to answer them in the comments.