In computer activities, situations arise when you need to save an image from the monitor screen, or, as they say, take a screenshot of the screen. A screenshot is often also called a printscreen. They can be done either using the built-in functions of the operating system or using specially designed programs that may have additional functions and provide additional convenience in creating screenshots.
How to take a screenshot in Windows. On all operating systems Windows family(XP, Vista and Windows 7) the screenshot is created in the same way. To do this, you just need to press a button PrtSc on keyboard. PrtSc is an abbreviated version of PrintScreen, which in our opinion is read as a printscreen, or screenshot. On some types of keyboards, this button may be labeled Print Screen/SysRq.
When you press this button, the entire visible part of the monitor screen, that is, everything that you see on it, is transferred to the clipboard. If you are not satisfied with this and want to get an image of only the active window, without Windows menu and other unnecessary elements, you can use the key combination PrtSc+Alt. First, press Alt, and then PrtSc, and as a result, the image of only the currently active window will be copied to the clipboard. Thus, we almost completed the task and received a screenshot, but for now it is in our special department random access memory computer - clipboard. To save it as an image you need to open any graphics editor(you can use the built-in Paint), create in it new document and insert an image from RAM into it by pressing the Ctrl+V key combination. First press the Ctrl button, and then V (English letter V). In modern graphic editors, the size of a new document when you copy an image into it will automatically adjust to the size of your screenshot. You don't need to specify them manually.
After you copy your screenshot into a new document, you can perform various editing operations. Resize, cut out the desired area, add the necessary signatures, change brightness, contrast and other parameters as needed. In conclusion, you only need to save the image by giving the file a unique name and choosing one of the possible jpeg formats, gif, png, tiff or bmp. At this point, the question of how to take a screenshot of the screen using the built-in tools of the operating system can be considered closed.
In many computer games The developers have provided for creating screenshots by pressing a key F12. They will be saved in the My Documents folder.
There are also various third-party programs and utilities for taking screenshots. The most famous of them: Paparazzi, Floomby, Magic Screenshot, Jing and many others. If you wish, you can familiarize yourself with the functions of each of these programs on their official websites and select the one you need based on your needs.
How to take a screenshot on a laptop.
As you know, laptop keyboards have an incomplete set of buttons. This is due to the lack of space allocated for the keyboard. Therefore, the PrintScreen button in them can be combined with another key. You can press it using the Fn button located at the bottom left of the keyboard. In all other respects, the process of taking a screenshot is no different from taking it on a full keyboard.
How to take a screenshot on Mac (Mac).
Over the past few years, computers from Apple began to enjoy increased popularity. When users switch to Mac for a long time worked in Windows environment, then they are horrified to discover that many things that they have already become accustomed to and have brought to automaticity in Mac OS do not work. But this does not mean that they are not there at all. In practice, taking a screenshot on a Mac using the operating system is even easier than on Windows. To do this, you do not need to use a graphic editor, since the image of the eran is saved directly into the image literally in one step.
All you need to do is press the keyboard shortcut Shift+Cmd+3. First press the Shift button, then Cmd and then the number 3 on the keyboard. As a result, a print screen of the entire screen area will be saved on the computer desktop as a file with the name “Screenshot 2012-02-29 at 17.44.09” and the extension .png. The time and date in your file name will, of course, be different.

In order to take a screenshot of part of the screen in Mac OS, you must press a keyboard shortcut Shift+Cmd+4.

The cursor will look like this. You need to place it in the upper left corner of the area from which you will take a screenshot, press the left mouse button and, without releasing it, select the required area. As soon as you release the left button, a screenshot will be taken and saved on the computer desktop.
In conclusion of the article, I would like to remind you that when creating screenshots and posting them online, you should always check that they do not contain private information that could be used by attackers. Happy shooting!
This is a screenshot, a picture that shows everything that is on your screen. The need to take a screenshot arises quite often. Therefore, this function was built directly into the operating system. In this material you will learn about which key to take a screenshot on a computer with the Windows operating system.
In the operating room Windows system To take screenshots, use the PRINT SCREEN key (on some PRT SCN keyboards). This key is located in the upper left part of the keyboard, next to the NUM LOCK, CAPS LOCK and SCROLL LOCK indicators. In order to take a screenshot you just need to press this key.
After pressing the PRINT SCREEN key, the screenshot will be placed on the clipboard. In order to save this screenshot as a picture, you need to open any graphics editor, paste the screenshot into it and save it as a file. For example, you can open the built-in graphics editor Paint. To do this, open the Start menu and search for “Paint.” After this the system will find this program, and you can open it.

After opening the Paint program, click on the “Insert” button or use the combination CTRL-V keys. After this, your screenshot will appear in Paint.


After saving the picture, you will receive the screenshot you need as a file.
A little trick: When taking a screenshot, you can use the PRINT SCREEN key together with the ALT key.

In this case, the system will create a screenshot of only the active window. This way, you can create screenshots only of the program you are currently working with.
This approach saves a lot of time. Since the resulting screenshot does not contain unnecessary information and does not need to be cropped in a graphics editor.
In this tutorial I will show you how to take a screenshot (screenshot) on a computer and laptop. We will learn how to photograph the entire screen or part of it.
A screenshot is a screenshot, a photograph of what a person sees on a computer.
To create such photos, there is a special button on the keyboard Print Screen. It may also be called Prt Scr, PrtScr, Prt Sc, PrtScn or PrntScrn.
After pressing it, nothing will happen - no clicks, no flashes. But the photographed screen will be recorded in the PC memory. For this image to be displayed, it must be inserted into an image program. For example, in Paint.
Most popular way taking screenshots:
- Press the Print Screen button on your keyboard.
- Open the Paint program.
- Insert a photo into it.
- Save to your computer.
But there are other ways. I will tell you more about each below.
In Paint
Let's take a step-by-step look at how to make a screenshot using Paint. This is the most popular way because Paint program is on every computer.
1 . Press the Print Screen key on your keyboard. You don't need to hold it down - just press once and release. It happens that on a laptop you need to press two keys at once: Fn and Print Screen.

2. Open “Start” and select “Accessories - Windows” at the end of the list. And from it select Paint.

You can also directly open menu“Start” type paint and launch the application.

3. Insert a photo. To do this, click on the “Insert” button at the top left.
The screen photo will be added to the program window.

4 . Edit the photo if necessary.
Since the resulting photo is larger than the program window, it usually goes outside of Paint. Its scale can be reduced using the slider in the lower right corner.

To trim off excess, use the Select tool. Click on it and hold down the left mouse button and select the part of the image that you want to keep. It should be indicated by a dotted line.

Then click on the "Crop" button at the top ().
Increase the zoom to 100% using the bottom right slider. This way you will see a real picture of what happened.

5 . Save the result to your computer.
To do this, click on the “File” button at the top and select “Save as...”.

A save window will appear. Go through it to the computer folder where you want to place the image. For example, if you want to add it to the Desktop, then select “Desktop” from the list on the left.

In the File Name field, type a name for the photo. It is usually called "Unnamed" by default. You can type a number instead.

If necessary, change the file format in the lower field. In most cases, PNG or JPG is suitable.


6. The screenshot will be recorded in the location and under the name that you specified when saving it (see the previous paragraph). This will be a regular photo file that can be recorded on a flash drive, sent by mail, published on a social network, etc.
On a note . If you want to take a snapshot of only one window that is currently open, press the Alt + Print Screen key combination.
In the Scissors program
Snipping Tool is a special program for creating screenshots. It is natively available in Windows 7, 8 and 10 (but not in all editions).
You can open “Scissors” the same way as Paint: Start → Accessories - Windows → Scissors.

Or by typing the word scissors directly into the open Start menu.

This is what the program window looks like:

Click on the “Create” button - the screen will become foggy. Hold down the left mouse button and select the part you want to photograph. After you release the mouse button, the image will be added to the program window.

Saving an image to a computer is the same as in Paint (see).
On a note . In some editions Windows programs"Scissors" no. Therefore, if you do not find it on your computer, it means that it was not initially present in your system. Use one of the programs I talk about instead.
Via keyboard shortcut
In Windows 8 and 10, you can take a screenshot using the keyboard shortcut Win + Print Screen. The image will be immediately saved to the Screenshots folder.
To do this, click Windows key() and, without releasing it, the Print Screen key.

Now open the Pictures folder. There will be a "Screenshots" folder, and inside it is your photo.

And also in Windows 10 using the combination Win keys+ Shift + S you can launch “Sketch on a fragment of the screen”. This is an improved version of the Scissors app - it has more editing tools.
Services for creating screenshots
To create screenshots, you can use special services on the Internet: pastenow.ru, makescreen.ru, snipboard.io and others. They have editing tools: cropping, rotating, text printing, arrow, line, shapes.
How to take a screenshot through the service:
- Take a photo of the screen by pressing the Print Screen key. Or just one active window by pressing Alt + Print Screen.
- Go to pastenow.ru and paste the image by pressing Ctrl + V.
- If necessary, edit the picture and save it: right-click on the photo - “Save picture as”.

On a note . To send screenshots over the Internet, it is better to use the website prnt.sc. Upload the image and receive a short link - through it the frame will be available to everyone on the Internet. This link can be sent by mail, via a social network or messenger, or published on a website/forum.
Programs for screenshots
To take screenshots there is also individual applications. They are convenient if you need to take pictures often. Next, I will briefly talk about the most convenient free programs.
Hello, dear readers of the blog site. Everyone or a laptop at one time or another is faced with the question: how to take a screenshot (or in other words, a snapshot - read more) of the screen, for example, in order to then send it to someone. Sometimes it doesn’t appear on the computer special programs, helping to implement all this quickly and efficiently.
It doesn’t matter, because the built-in Windows features(even in old XP) is quite enough to accomplish this task. If you use Windows 7, 8 or Vista, then they even have a special built-in program called “Scissors” for this purpose. So be sure to cope if you read the relevant section of this publication.
The second frequently asked question is: how to take a screenshot on your phone running Android, iOS (this operating system used on iPhone and iPad), Windows Phone(used, for example, on Nokia Lumia), Sinbine and other OS. If you are encountering this for the first time, the answers will not be obvious to you.
And finally, I want to devote some of my time to describing specialized programs that allow you not only to take all imaginable screenshots on your computer and laptop, but also to automatically upload them to the Internet so that whoever you give the link to can view them and download them if desired. . I hope it will be interesting.
How to take a screenshot on a computer or laptop in Windows XP, 7 and 8
The most ancient and proven way to take screenshots on a computer is still the key "Print Screen". It is usually located at the top right of the keyboard, as shown in the following figure:

True, on different types of keyboards (depending on its size and purpose), instead of “Print Screen” it may be written: PrntScrn, PrtSc, PrtScn, PrtScr or something similar.
On laptops to take a screenshot, you may need to press not just one key, but a combination of them: Fn + Print Screen. The fact is that laptops (especially small ones) use a truncated keyboard, some of the keys of which are accessible only by holding down the additional Fn key, usually located at the bottom of the keyboard (these virtual keys will be written in the same color as the Fn inscription).
When you press the Print Screen key (or Fn + PrtScn in the case of a laptop), a screenshot of everything that was displayed on the screen of your computer or laptop at that moment will be copied. If you need to take a screenshot of only the currently active program window (which currently has focus), then you should use the key combination Alt+PrintScreen.
Okay, we can assume that we have learned how to take screenshots. Now is the time to learn how to use them, i.e. save them in the form of graphic files, which can then, for example, be sent to someone, inserted into a website (as I do) or stored in a secluded place. To do this, you will need to paste screenshots from your computer’s clipboard into any graphics program you have on your computer or laptop (off the top of my head, I can give examples of Photoshop, IrfanView, and dozens of others).
If there is nothing like this (you haven’t installed it, or you are working on someone else’s computer), then the Windows operating system itself has a built-in free graphics editor, Paint. Even if he is not perfect (or rather simply wretched), but to “develop” the screenshot taken will do just fine. So, in order to fish Point out of the wilds of the software built into Windows, you will need to do the following manipulations: “Start” - “Programs” - “Accessories” - “Paint”.
Now, in an open graphic editor (Point or any other), select “File” - “Create” from the top menu (or press the Ctrl+N combination), and then type the Ctrl+V key combination (or select “Edit” from the top menu - "Insert"). The screenshot previously copied to the clipboard will be pasted into the editor window, and you can, if necessary, properly process it (crop, add captions, highlights, etc.).

At this stage, we have achieved that we finally saw with our own eyes the screenshot we made and even managed to mock (process) it, but this is not enough. It will still need to be saved as a graphic file (most often used for this). To do this, you can use the keyboard shortcut Ctrl+S, or select “File” - “Save As” from the top menu. All that remains is to choose required format and give the file a name. All. Now you can do whatever your heart desires with it.
How to take screenshots in the Scissors program from Windows 7 and 8
There is one obvious drawback in the method of taking screenshots described above - the process itself does not occur in an explicit form, and for those who encountered this for the first time, it may seem that after clicking the “Print Screen” button, nothing happened at all. However, in Windows Vista, 7 and 8, a new tool called “Scissors” has appeared, which allows you to take screenshots in a much more understandable and visual way. In the same program they can be processed and saved as a graphic file.
The “Scissors” program lives in the same place as the Point discussed just above: “Start” - “Programs” - “Standard” - “Scissors”. As a result, you will see a tiny program window, and the rest of the screen will seem to be overexposed.

It is assumed that you are already ready to select the desired area of the screen on your computer or laptop in order to take a screenshot of it. If this is the case, then hold down the left button and select the fragment. If what is open at the moment is not what you wanted to “capture”, then click on the “Create” button in the “Scissors” program window (or click on Escape) so that it is pressed out. After that, open what you want to screenshot, and again click on the “Create” button, then select the required area of the screen.

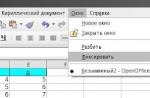
Default used to select a rectangular area, but if you click on the arrow to the right of the “Create” button, you can choose one of four options:

- Free form - you are free to circle the desired area with the mouse cursor or a graphic pen (if you use one)
- Rectangle - default
- Window - a screenshot of the window of the program that will be located under the mouse cursor will be taken (for clarity, it will be surrounded by a red frame)
- Whole screen - in this case the program takes a screenshot of everything that is currently displayed on the screen (except for the mouse cursor)
What is this method better than that, when the “Print Screen” button is used, it means that you will immediately see the screenshot taken in the window of the graphic editor built into “Scissors”, where you can draw on something using the three available tools: a pen, a marker and an eraser.

The functionality of the “Scissors” editor doesn’t even reach Point, but it will be possible to quickly scribble something on the screen (I’m getting greedy in this regard, because I use it to work with screenshots professional program, which will be discussed below). In general, when you have made the necessary notes, you can safely press the button with the floppy disk to save screen as a graphic file Gif format, Png or Jpg, and it is also possible to do this in the form of a separate Html file (it’s not very clear, however, for what purpose).
On the program panel there is also a button for sending a screenshot as an attachment via e-mail, for example, when you took a screenshot to show it to someone. There are again options third party programs for computers and laptops, which allow you to automatically upload screenshots taken to the network and give everyone access to them, but we’ll talk about them a little later.
And finally, by selecting “Tools” - “Options” from the top menu, you will have access to the limited settings of this program.

In my opinion, the developers of Windows 7 and 8 could have added a little functionality to this built-in program so that it would not look so unpresentable in terms of editing screenshots. .
Yes, I also forgot to say that “Scissors” allows you to take a screenshot of, for example, a drop-down menu. To do this, you will need to open this menu and press the key combination “Ctrl+Print Screen”. A screenshot of the desired menu will be taken, which can then be cropped and saved.
Programs for working with screenshots in Windows
First, I’ll tell you a little more about the programs that I use myself, and then I’ll give a list of other popular applications for working with screenshots.
One of the most popular software on my computer is . It has a lot of capabilities and can be useful not only for a webmaster, but also just in the household for solving a number of everyday tasks, one way or another related to taking a screenshot or recording video from the screen.

The program has powerful functionality for both taking screenshots and processing them. For example, it easily allows you to take a photo of a web page that takes up more than one screen (it takes a long time to scroll to the end).
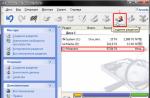
For this purpose, there is a universal and convenient “All in one” operating mode, when by pressing the red button or the Print Screen key (when Snagit is running, this key starts working specifically for this application, and not for copying the screen to the clipboard), you can easily do whatever you please.

For example, if you press the “Print Screen” button and move the mouse cursor to the application window from which you would like to take a photo, then magic happens. By moving the cursor over different places window, you will see that either the entire window, or the menu, or some other internal subdivisions will be automatically selected. Those. you don’t need to aim precisely to draw a frame around the fragment you want to capture.
But you can also work in normal mode, selecting the desired area while holding down the left mouse button, and at the same time you can aim accurately, because a magnifying glass appears under the cursor, magnifying the point of contact of the cursor with the screen.

With the help of Snagit, you can capture video from the screen and do much more. And already about possibilities for processing screenshots on your computer or laptop In general, songs can be composed. Here it will probably be easiest to provide a few screenshots so that the greatness of this creation can be understood:


There are a number of other programs that are roughly on par with Snagit:
- FastStone Capture— a good screenshot for a laptop or computer, not overloaded with anything unnecessary.
- PicPick— allows you to quickly take a screenshot of the computer screen or any selected area of it, including scrolling windows. In terms of functionality it is very close to Snagit, except that it can’t capture video. The built-in editor allows you to actually professionally process the resulting image.
Programs for taking and uploading screenshots from a computer to the Internet
Clip2net can not only take screenshots and record videos from the screen, but also allows you to instantly post the whole thing on the Internet (the link to the screenshot will be automatically copied to the clipboard and you just need to paste it into an email, website, forum or blog). As a result, you will not need to use your own hosting or one of Yandex Disk, Dropbox, etc.
After taking a screenshot, the program will open a window for editing the captured image. If you do not need this operation, then in the Clip2net settings, check the “Immediate download” box. In the editing window you can use standard tools (inserting labels, selections, arrows):

Clip2net is not a unique program of its kind, and there are several good ones on the market. programs for quickly sharing screenshots:
- Joxi— a good screenshot with the ability to instantly publish. They are edited directly when the desired area of the screen is selected, i.e. without going to the editor window.
- Lightshot— allows you to quickly take a screenshot, add notes to it, draw arrows and other shapes with a pencil. When a file is saved on a computer, it is immediately assigned a unique name, and you can immediately send it to the developers’ server and instantly receive a link to it, which is very convenient.
- — outrageously simple and concise to use. There seems to be nothing superfluous in it, but everything that is there hits the bull's eye (in my experienced opinion). Actually, the idea, as far as I understand, was taken from the Apple people (Mac) - you activate the key combination and the picture with the screenshot will immediately fall on the desktop.
- , which not long ago learned how to take screenshots and upload them to its own Yandex cloud with a link to them. The program has a fairly convenient graphic editor that allows you to add arrows, frames, lines, etc. to the screenshot. things.
- Monosnap is also a very good service that allows you to take, process and post online not only screenshots, but also screencasts (video captures from the screen). It also allows you to organize access to your desktop or webcam in real time.
- Skitch— a simple screenshot and screencaster, but with somewhat poorer functionality than the services described above. However, it allows you to send screenshots from your computer or laptop to Evernote, of which it is a part.
- Jet Screenshot- allows you to capture the entire screen, the active window or a selected area, and then crop the resulting screen, add arrows, circle the desired area or insert an inscription. In the program settings, you can specify where the final file will be saved - on a computer (laptop) or on a developer server with a link to it.
How to take screenshots on a phone (Android, iOS and other platforms)
Also quite an interesting question. If everything about a computer or laptop is more or less clear, the problem is not how to do it, but how to do it in the most optimal and in a convenient way. But it’s a little more difficult to understand how to take a screenshot of a mobile phone or smartphone, because there is no special button for this purpose, but a combination of control keys is used, which will be different for various types mobile operating systems.
Let's start with iOS, on which phones from the Apple campaign ( iPad and iPhone). In order to take a screenshot, you will need to hold down two buttons for several seconds: “Power” (sleep/wake) and “Home”. The resulting images are saved in the Photos application on your device as part of the operating system.


How to take a screenshot on Android
The Android operating system has several versions, for which the method of taking screenshots differs. In addition, phone manufacturers also sometimes make their own adjustments (for example, on my old Samsung Galaxy S3, a screenshot is taken by swiping the edge of the palm across the screen from left to right). Actually, I’ll try to summarize the information I have on different types devices:
- Android 1 and 2— devices running on this OS did not have a built-in ability to take screenshots, so we had to install third party application helping to make this happen. The methods for taking screenshots in this case depended on the application you chose.
- Android 3.2- starting from this version and before the appearance of the four, to take a screenshot of the screen it was enough to hold down the “Recent programs” button for a while.
- Android 4— a screenshot is taken after briefly holding the “Volume Down” and “Power” keys.
- Samsung under Android control — most often, this phone manufacturer allows you to take screenshots by holding down a pair of “Home” and “Power” buttons, or “Back” and “Home”.
- HTC running Android- hold down the Home and Power buttons for a few seconds
Screenshots obtained in this way from an Android phone are saved in the “Gallery” application, which comes with the OS.
There is also such an operating system for mobile phones, How Windows Phone, on which, for example, quite popular Nokia phones Lumiya. IN Windows versions Phone 8 to take a screenshot, just press the “Power” button (on the right side of the phone) and the “Win” button (at the bottom of the phone screen). But in Windows Phone 8.1 everything has changed a bit - you need to click on “Power” and “Volume Up”.
Good luck to you! See you soon on the pages of the blog site
You might be interested
 Screenshot - what is it and how to take a screenshot
  How to install Viber on a computer?
  Skype - what is it, how to install it, create an account and start using Skype
  FAQ and FAQ - what is it?
  Where can you download Photoshop for free - how to get it and activate it for free PhotoShop program CS2 from the official Adobe website What's happened computer program
How to add money to a phone from the balance of another phone Official website - how to find the official website through a search engine
Where can you download Photoshop for free - how to get it and activate it for free PhotoShop program CS2 from the official Adobe website What's happened computer program
How to add money to a phone from the balance of another phone Official website - how to find the official website through a search engine
When you type articles, abstracts, reports, and the like, you almost always need to capture the information on the screen so that you can then insert this image or part of it into any document you are working on. The process of capturing a monitor screen (taking a photograph) is called Print Screen. It reads like a print screen or screenshot. In any case, taking such a screenshot is incredibly simple.
All laptop models: ASUS, Acer, HP, Compaq, Toshiba, Samsung, Lenovo, Dell and others, as well as computer keyboards, have a “Print Screen” button for print screen.
How to install extra on a laptop software and use only those standard programs, which are available in Windows, you only need to learn two steps.
First, to take a photo of the screen, you need to press the “Print Screen” button, or “PrtSc” for short. You can find it in the upper right corner of the keyboard. Basically it is located next to the “Delete” button.

It should be taken into account that on some laptops on some keyboards this button combines two functions – “Print Screen” and “Insert”. In this case, “Print Screen” is highlighted in blue, and only works in combination with pressing the “Fn” button.

After you have completed these manipulations, the photo will be on the clipboard as an image.
Secondly, any graphic editor opens: Paint, Photoshop. After this, the image is inserted into the editor using the Paint menu, or using the combination of two buttons “Ctrl + V”.
Once the image is inserted, you can edit it or simply save it to any folder.
If you have the skills to use Paint, then you can do a lot of things with the image. For example, write any inscription in a different font, change the size of the image itself, add different elements and save in the desired format.
When you press a key to get a screenshot, the entire screen will be shown in the image. If you only need part of the image, you can use scissors. To find them, go to the “Start” menu, find the line “All Programs” - “Accessories” - “Snivers”.
Using scissors, you can create the desired photo of any part of your screen.
By the way, by simultaneously pressing the “Alt+Print screen” buttons, you can make a print screen of the application’s working window. Then you won't waste time editing the image in Paint.
Programs that help you take a screenshot of the screen on a laptop
To make your task easier, you can download one of the programs listed below and use it for free. Finding them is not difficult, and even a beginner can handle it.
FastStone Capture - in stock additional functions, except for the ability to take screenshots.
Screenshot Captor - the program is equipped with various functions and capabilities for editing print screens.
EasyCapture - a program designed to create different types screenshots and is very simple and accessible to use.
DuckCapture - makes it possible to take any type of screenshot of a screen or application window.
Clip2Net - after a screenshot is taken, helps to post it on the Internet.
SnapaShot is a program that does not require installation and allows you to take a screenshot of any desired area.