The popularity of the Android operating system is growing every day, which is explained by the availability of access to unique content from Google Play, a large number of interesting applications, games, high system performance and a minimum number of malicious objects that are written specifically for this OS. Therefore, users often ask the question: how to install Android on a PC without losing the data of the second system?
Preparing your computer for installing Android OS
Before you install Android on your computer, you need to create a boot disk. To do this, download any suitable software from this section, for example Alcohol 120%, DAEMON Tools or UltraISO and install it on your PC.
Now download any version of Android OS that you want to install.
After downloading the installation file, run the software to create a boot disk. In this example, UltraISO will be used. Launch the program, click “File”, “New”, “CD/DVD image with data”. Add the file and click Write.
If your PC has one hard drive, you need to create a separate partition on the HDD. To do this, you can use Acronis Disc Director Suite or download MiniTool Partition Wizard.
Launch Acronis Disc Director Suite, select the disk on which the new OS will be installed and click “Create partition”.

A new window will open. Enter the name of the partition, then select “File system”, click “Create as” logical disk, indicate the disk size and click “OK”.

The section has been created.
Installing Android OS on a computer
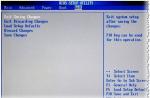
Reboot the PC and go into the BIOS by clicking F2 or Del a couple of times. Go to the Boot section and select Boot Device Priority. A list will appear with options for selecting boot devices. Select your drive.

In the next dialog box, the system will prompt you to select a partition to boot. Typically this will be sda1 and sda2. Select the first one if you made a partition on drive C.
Now you need to select the file system type. For Android, ext2 and ext3 are acceptable. A type such as NTFS is not supported by the OS, and FAT32 is not recommended.

After selecting the file system type, you must accept a special bootloader. Without which Android will not boot. Click “Yes” and click “Enter”.

After the OS, determine the installed version of the system, and will also offer to integrate a universal bootloader for both OSes. Click “Yes”, since this operation is very important. With its help, you can select the desired system at the start of your computer.

The system installation process will begin.

Upon completion, the system will offer to launch Android on your PC.

If all actions are performed correctly, problems with system performance should not arise.
Before purchasing a smartphone, many users want to become more familiar with Android. In order to understand whether a smartphone with this operating system is suitable for them or not. Fortunately, this can now be done using a computer. After all, you can install Android on your PC and explore its capabilities.
In this article, we will look at the entire process of installing Android on a PC in as much detail as possible. Starting from downloading an ISO image with the Android operating system and ending with its installation on a PC.
In order to install Android on a regular PC, you first need to do some preparatory work. First, you need an Android ISO image that is ready to run on x86-based PCs. This ISO image can be downloaded from the Internet. For example, you can download ISO images from Android version 4.3. If you need a more modern version of Android, then at the moment you can download Android version 6.0 there.
After the ISO file with the operating system image is downloaded, it needs to be written to a CD or flash drive that will be used to install Android on a PC. You can use various programs for recording. In this article we will demonstrate how this is done using the UltraISO program as an example.
Launch the UltraISO program on your computer and using the “File – Open” menu, open the previously downloaded ISO image with Android. After this, you can start burning the ISO image. If you want to burn an ISO image to a CD, then press the F7 key or the button on the UltraISO toolbar.

If you want to make a bootable USB flash drive with Android, then this can also be done in UltraISO. To do this, you need to open the ISO image in the program and use the menu “Boot - Burn Hard Disk Image”.

After this, you need to select the flash drive that should be used to install Android on your PC and click on the “Burn” button.

As a result of the above steps, you should have a bootable CD or bootable USB flash drive with installation files for the Android operating system.
Installing Android on PC
After completing the preparatory stage, you can proceed directly to installing Android. To do this, we reboot the computer, enable booting from a flash drive or disk in the BIOS, insert a boot disk or flash drive into boot the PC from this drive.
As a result, a menu should appear on your PC screen asking you to boot into LiveCD mode or start installing Android on your PC. Select the installation option and move on.

After this, the process of installing Android on your PC will begin. At the first stage, you will need to select the partition on which you want to install Android. Please note that the partition you select will be formatted, so make sure you don't lose any data before proceeding.


After this, we allow writing to the system directory.

And wait until the process of installing Android on your PC is completed.

When the installation of Android on your PC is completed, you will see a proposal to immediately launch Android or restart your PC. Select reboot.

After restarting the PC, disconnect the bootable USB flash drive or disk and boot from the newly installed Android. When you launch Android for the first time on your PC, a menu will appear for the initial setup of the operating system.

You will need to select the operating system language and also configure some other options. After this, the Android desktop will appear on your PC screen.
Let's imagine that you have come to the conclusion: you simply need the Android operating system on your computer, be it a desktop PC, laptop or netbook. I think you understand that today we will discuss how to install Android on a computer. The need for Android on, say, devices not intended for it, can be due to many factors:
- The “bank” of applications on Android contains an incredible number of programs for any area of life and activity, be it business, sports, the hobby of electronic cigarettes or jogging - for everything there are a dozen or even a hundred applications of varying degrees of convenience. And despite the fact that the most popular Windows OS is older and has already acquired a sufficient amount of software, in some aspects Android wins. In addition, for the latest OS there are more offers in the free software niche, which cannot but please users.
- You have an insufficiently powerful netbook that is pointless to sell, it would be a pity to send it to scrap, and it is useless to install Windows, since it will work very slowly. Moreover, programs are now being developed that are simply not suitable for weak computers. The Android system is less demanding on device resources. Even the simplest smartphones work very well with the Android system.
- There is an application (most often a game) on Android, which has no analogue for Windows, why not install Android on your PC as a second OS. By the way, it is not necessary to install the OS; you can run it on your computer in Live mode. I will talk about this below.
- The level of data synchronization in Android OS is excellent. Contacts, calendar data, tasks and much more - it will be very easy to “make friends” with your Android PC.
- There are no viruses or malware on Android OS. All the “malware” that exists for Android can only do the most it can do - send a paid SMS message. But we install the OS on a PC, which means that the ability for scammers to steal money from us via SMS is simply physically absent, since very rarely a PC is equipped with a GSM module.
Should I choose an emulator, installation or LiveCD?
So, the decision has been made - you need Android on your computer. How to install it? To begin with, I suggest you decide which format for using the Android OS on a PC is most suitable for you. Here are three options you can use:- Android emulator. The most “safe” if you look at it from the perspective of the average user. There is no need to go into the BIOS and shake for fear of accidentally destroying the system. Everything is quite simple: install the application, launch it, and you’re done. Disadvantages of this solution: all currently available and more or less tolerable emulators are demanding on computer resources; you will need to allocate the resources of your computer for everything to work as it should. After all, running another operating system inside Windows OS means an additional load on the RAM and processor. You should also take into account that you must allocate space on your hard drive for the new system. Suitable for powerful PCs.
- Running Android in LiveCD mode. Something in between the first and third options, does not require installation. A fairly simple launch algorithm. The PC is not demanding on resources, as I mentioned earlier. The negative side: every time you start you get a “disposable” operating system, all data and settings of which are erased when you reboot. Therefore, this option is suitable, for example, for a one-time check of an application. For regular use, the third option is suitable.
- Installation of a full Android OS. The leader of all three options in terms of reliability. It doesn't require much in terms of resources, but the only thing additionally required is some hard drive space for installation. You are not picky about the performance of a computer or laptop - the device must be no weaker than a regular smartphone (that is, any weak netbook will do). An excellent solution for permanent use of the Android OS as the main or additional operating system (for example, along with Windows).
Android Emulator
Installing Android emulators will not be discussed in detail in this article. Firstly, due to some inferiority of each of them (somewhere there may be problems in setting up manipulators, in others there may be “jambs” in the operation of graphics in applications). Secondly, if you really want to try this option, installing the emulator should not be any difficulties - it is no more difficult than installing any other application under Windows.
I can only list some emulators that you can pay attention to due to their fairly simple installation and relatively decent performance: Droid4x, Bluestacks and Genymotion. From my own experience, I can also say that the first one was suitable for my purposes, but I will make a reservation that I had specific goals.
To help users who decide to use emulators a little, I decided to add a video that will help you understand the installation principles:
How to download Android installation file
You can download different versions of Android here, for example, version 5.1 or 6. Here I cannot tell you which version is better to choose, since I don’t know why it is needed. Of course, you can test 2 versions and then make a decision. The site presents images (archives) of two types - .iso and .img; I will explain their differences a little later. To download a particular file from the site, click on “View”. After this, the file will begin downloading. I recommend downloading versions in iso files.
By the way, at the end of the article I will tell you about another version of Android that may suit your needs.
Creating a Bootable Android USB Flash Drive
In order to run Android on a PC, we need a boot disk. The era of CDs is ending, so I’ll tell you how to make a bootable USB flash drive. To create a bootable USB flash drive from an iso image (file), you can use the Rufus program. If you do not have this program, here is a link to the official website where you can download it.
The program is simple, download it, run it, and see the program window. In the window we enter the following parameters (the picture with the settings is below):
- “Device” - select our flash drive, which will act as a boot drive.
- “Partition scheme and system interface type” - leave it as is.
- "File system" - FAT
- “Cluster size” is the default.
- “New volume label” - it doesn’t matter what you name your disk.
Specify the remaining parameters as in the screenshot above. And of course, you need to indicate the image that you will download from the site, the link to it was given above. To do this, click on the disk icon, which is located to the right of the inscription “Creating a bootable USB flash drive.” Now click on the “Start” button to start creating the flash drive.

After that, select “Burn in ISO image mode (Recommended).” Next, the program will remind you that all files will be deleted from the flash drive, but you already know this and so just click “OK”.

Now we just have to wait for the final result.
Another option for creating a bootable USB flash drive is using the UNetbootin program. Download the program and run it (the flash drive must already be connected to the PC). Select “Disk Image”, click on “…” and indicate the downloaded distribution. In the “Media” drop-down list, you need to select your flash drive. Click “OK”, and when finished click “Exit”.

Well, I’m sure you didn’t have any difficulties, and now the bootable flash drive is ready.
A little about the image with the img extension. In the case of EFI boot, use the Win32 Disk Imager program to create a bootable USB flash drive. Its interface is no more complicated than Rufus's, so you can handle it.
Booting Android OS from a USB flash drive
First, you need to set the BIOS to boot from a flash drive. This is done simply - just go to the BIOS (when turning on the PC at the very beginning, press the "Del", "F2" or "Esc" key) - after which the BIOS will open with settings. BIOS versions may vary, we need to find the “Boot” - “Boot Device Priority” section at the top (can be on the left or right), and select a flash drive as the value of the “First boot device” parameter (the device from which to boot first) .
Typically, moving to Bios is done with the Up Arrow and Down Arrow keys. The mouse rarely works in Bios, so all actions there must be performed using keys. In one of my articles, I talked about how to set the BIOS to boot from disk. This information will be very useful to you if you have not previously configured the BIOS. I’ll note that I’m talking there about how to set up booting from a disk, but you need to select a flash drive instead of a disk.
Then exit the BIOS and save the changes (“Save and exit” - “Yes”). In almost all BIOS versions, the F10 button is used to save settings. We reboot the PC, the bootable flash drive should be in one of the USB ports of the laptop or computer.
Download Android without installation
After a few seconds of loading we will see the following menu:
Attention: If the boot does not occur, it means that you have not configured the settings in the BIOS so that you can boot from a flash drive. I will now describe everything step by step, but you should understand that at the moment the installation is what it is, but after, for example, 6 months, it may be slightly different. In any case, the steps that I will describe will be useful to you so that you understand what needs to be done and where.
As you can see, you can either install the OS or run it in LiveCD mode. We are now interested in the last option, select the appropriate line - “Run Android-x86 without installation”.

As a result of the download, a language selection will first appear (the language selection is done using the arrows on the keyboard, after selecting, click on the yellow arrow to go to the next menu):
And then there will be the initial settings of the Android OS. There is no point in going into too much detail and setting it up, since, let me remind you, starting the OS in LiveCD mode stores all the settings until a reboot.
Then you will be asked to connect to Wi-Fi:
You can specify your Google account if required, or click “Skip”:
Then they will write to you what this account is for:
You can set the date and time or click “Next”:
In the next window you can enter your data, I click “Next”:

After specifying all the settings, you will have a completely real Android OS in your hands, with which you can do whatever you want. Experiment and check functionality, install applications. By the way, it is worth noting that Google Play services are not installed by default.
Preparing a disk partition for Android
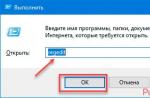
If you need to install Android on your computer, you will first need to partition your disk to make room for the new system. Windows has a built-in tool for managing disk partitions. To launch it, press “Win” + “R”, write “diskmgmt.msc” and click “OK”.

In the window you need to select the drive from which you want to take space for the Android system. In other words, you need to create a disk on which you want to install the system. There is an article on the site that explains in detail how to do this in Windows 7: "". But this article is also relevant for other versions of Windows: 10 and 8.1. Therefore, follow the link and study the article. Now I will describe this procedure for Windows 10. Select the disk that you want to split into parts and right-click on it. After this, select “Shrink volume” (you will have to wait a little while the system performs the analysis):

In the next window, in the “MB compressible space size” field, you must indicate the size that you are allocating for your new disk. For example, you can specify "10000". Now click "Compress".

After a while, on the right side you will see an area of the disk that is not allocated. Right-click on this part and select “Create a simple volume...”. Then a window will open where you need to specify the disk parameters and then click “Next”. And in just a couple of minutes you will have a disk ready on which you can install the necessary system.
IMPORTANT: to install Android OS you will need a partition of approximately 10 GB in size. If you have a disk that does not have the necessary information or is empty, right-click on it and select the “Delete volume” line. After this, the entire volume of the disk will become unsold, from which you can make a partition for the Android OS - an alternative option with which you can create a disk for Android. But I recommend using another method, which is described just above. Let me remind you that I provided a link to an article where I described this process in detail.
You can also use programs for working with hard drives, for example, Acronis Disk Director and others.
Installing Android OS from a USB flash drive
If, when starting the PC, you select “Install Android-x86 to harddisk” in the bootable flash drive menu, a full installation of the operating system will start.
IMPORTANT: if the PC is “clean”, all the necessary files are saved, and Android will act as the main operating system, then you can continue with a clear conscience. If you plan to install Android as an additional OS, then you first need to allocate a disk partition for it. How to do this is described above. If the partition for Android has been created, we can now continue the installation from the flash drive.

Next we will see a suggestion for installing the GRUB bootloader. You will need it if, in addition to Android, other operating systems are installed on your PC, for example, Windows. We answer (“YES” - “Yes”, “Skip” - “Skip”) and move on.
If other OSes are installed, the program will notify us about this in the next step, and will also clarify whether to add them to the boot menu. We select “Yes” if we need the ability to launch them from time to time, and “No” if we plan to use only Android and do not want to clutter the boot menu with unnecessary OSes.
After this, the long-awaited installation of Android-x86 will finally begin. When it is finished, you will see the Android OS launch menu, in which you can immediately select to start the OS or restart the computer or select the operating system from the list.
Congratulations, a full-fledged Android OS is installed on your PC. I am sure that you will cope with the initial system settings without any problems.
Advanced version of Android – Remix OS for PC
There is another option for using Android on your computer - Remix OS. This operating system is based on Android OS, but is more advanced. It was released at the beginning of 2016, and is a kind of Android OS with aspirations for Windows functionality: a multi-window interface with the ability to minimize windows, a taskbar and Start menu, as well as a notification area similar to Windows. In addition, it is more adapted for use on PC compared to Android-x86.
The process of creating a bootable flash drive with Remix OS on board is no different from writing an Android-x86 image to a flash drive. After booting from the newly created flash drive, we will be greeted by a similar menu, where we can choose to install the OS on the hard drive (“Resident mode”) or boot in LiveCD mode (“Guest mode”).
You can download the distribution kit for creating a bootable USB flash drive for Remix OS using the link: . By the way, a utility for creating bootable disks is also available there.
To summarize, I will say that installing Android on a PC is not difficult, you just need to follow the instructions outlined above. Easy installation and pleasant use of the new operating system.
Video that will show how to install Android on a computer or laptop:
It’s no secret that for a long time the Android system was treated with distrust, and many fans of “Apple devices” even pretended that it did not exist. But now more and more people, fed up with the notorious fruit, began to pay attention to this green robot with two antennas on its head. And over time, everyone, even those people who do not have mobile devices, got the opportunity to get to know him, invite him “to visit”, on board their personal computer. But what needs to be done for him to come?
The wedge hit you...
In order to receive such a guest, it is necessary to follow certain “rules of etiquette” and rituals of hospitality. Obviously, in the case of personal computers, these rules will differ significantly from what has already come into practice with mobile devices. Therefore, inquisitive but prudent users of personal computers face a difficult situation, which is succinctly described by the phrase “you want it, and it hurts.” But if you stock up on the necessary knowledge, then everything will work out!
Nodding acquaintance
The Android developers have been very kind and have provided a way to get acquainted with the operating system without any installation required.
- To do this, go to the website with the programs and download there the current ISO image with the latest version of Android.
- The catalogs contain images specially prepared for certain models of netbooks and laptops. Therefore, it is advisable to take a closer look if you plan to install Android on them.
The guest is already on the doorstep!
- The "UltraISO" program allows you to create a boot disk on any media in a couple of clicks: (HDD), USB drive (popularly “flash drive”), and so on.
- If your computer does not have a disk drive, the image can be written to HDD or USB. In this case, be sure to select the “Boot” item (in the English version - “Bootable”).
Hello, I'm your Android!
To understand how to run Android on a computer in trial mode, you need to:
- insert or boot the image if it is recorded on HDD or USB;
- select "Run Android without installation".
Load up! Fell yourself like at your own home!
If you intend to “accommodate a guest” at your place, you will have to prepare even more seriously to install the Android system on your computer (recommendations for experienced users):
- allocate him a separate “room” (that is, an HDD);
- run it through the BIOS and put the boot disk first in the queue in the "Boot Device Priority" section;
- launch the boot disk and select the menu item "Install Android to harddisk";
- specify the allocated HDD;

- select the file system type;

- select installation of the bootloader "GRUB";

- Confirm support for OS selection at boot if OSs other than Android are installed.

- be glad that everything worked out and the guest became a full-fledged resident.
If it doesn't work out?
Of course, many people have problems with the “registration” of this guest. The reasons may be errors in preparing the computer, or incompatibility of the requirements of this version of the Android operating system with the software and hardware configuration. In such cases, correct installation of Android on a computer is impossible. There are no uniform recipes, but the most general and main recommendation is to do everything again and with the utmost care. The following are a number of specific measures that apply from case to case.
- If Android and Windows are installed on the same hard drive partition, the boot loader with OS selection may disappear. In this case, it is recommended to install Android on another partition and format it to ext3. It is also recommended to reinstall "GRUB".
- If the computer does not see Android, one of the possible reasons may be that the boot disk was not made correctly.
- If, when installing the system on your computer, a message appears that there is not enough memory on the hard drive, the system may be installed on the wrong drive, and the wrong drive was selected by mistake.
- The waiting time for the installation to start after selecting the "Install Android to harddisk" menu item is too long. If this time is more than 10 minutes, then you should check how the partition that is selected for installing the Android OS on the computer is formatted. If its format is NTFS, then this is an error and you need to reformat it to ext3.
Android in everyday life
In case of difficulties or ambiguities, they can resort to the help of the FAQ. Just in case, let us remind you that FAQ is not a curse, but a necessary and useful thing!
Installed Android! How can I remove it now?
In this case, one well-known phrase is true: “Execution cannot be pardoned!” It has two spellings, which radically changes the meaning.
“You can’t execute, you can have mercy!” You should not cut from the shoulder. Maybe first, at least a little appreciate the main charms of Android? How much time and effort was spent installing the Android program on your computer!
“Execute, cannot be pardoned!” If, after all, the decision to “evict” Android is unshakable, then you should prepare for new litigation and proceedings.
Now let's move directly to the example

First of all, you need to download Android. We will play with it: we will make both a bootable “Android live flash” and a bootable “Android live CD”, and then we will boot the system from it. To do this, it is enough to resort to one of the methods. From a flash drive or created disk, you can launch Android in “live CD” mode or simply install it on your hard drive.
Download the ISO image of Android
We go to the website with the program, then find the “StableRelease” section and click “View”. At this point, you should begin the process of downloading the Android iso image to your computer. Now one small detail. Do not forget which folder you downloaded the iso into, since all manipulations in the future will be carried out with this file.
Create a bootable Flash Drive
Make sure that the flash drive you prepared for transferring the program is formatted and, moreover, its size exceeds 256 MB. By and large, you can simply free up 256 megabytes of space, but it’s better to format it for the purity of the experiment. Next, you need to place the system image on the flash drive. There are a number of utilities for this. You can opt for "Unetbootin". Launch the utility you just downloaded, select "Diskimage" and open the "Android ISO" file. You have already downloaded it earlier, you had to remember the path to it. Select the drive with the flash drive in the bottom line and click "Ok". Everything is ready to download.
Installing and downloading Android
To begin, restart your computer, go into the BIOS and select your preferred option or from CD. Save and restart your computer again. Select "Live CD" then "Run Android-x86 without installation". This feature will allow you to run Android without installing it on your personal computer. After downloading, a beautiful desktop will appear before your eyes. Click on it and hold the context menu. Everything should start working quickly. But there are other, in other words, additional programs that can be found on the “AndAppStore”; they can be installed if Android is already on your hard drive. Otherwise, these programs may disappear when you restart your computer. can support almost all hardware programs, for example, Wi-Fi, cameras, that were installed on laptops and netbooks.
Recently, smartphones and tablets running on the Android operating system have become very popular. And this is obvious: high system performance, the ability to synchronize various devices, many games and applications.
This is why more and more computer users are interested in the question of how to install the Android operating system on a computer.
If you want to use only the Android operating system on your laptop or computer, format the hard drive on which the old operating system is installed and install Android on this partition. If you want to use Android along with the operating system installed on your computer, you need to create a new hard drive partition and install Android on this partition.
I have the Windows 7 operating system installed on my laptop, so in this article I will describe in detail what needs to be done to install Android next to the main operating system.
To download the Android operating system for your computer, you need to go to the official website of the Android-x86 project developers:
http://www.android-x86.org/download
Here, select the version of Android you want to install and click on the “View” button. After this, the image download will begin.
Creating a new disk partition
The site already has an article on how to partition a hard drive in Windows 7. Therefore, below I will simply provide screenshots with a short description.
Go to “Start” – right-click “Computer” – “Management”.
In the next window, select "Disk Management".

A window will open with information about installed hard drives. I have one, divided into sections C: and D:. Select the partition from which part of the memory will be taken to create a new one, right-click on it and click “Shrink Volume”.

Now you need to wait a little.

Next, select the required amount of memory for the new partition. It all depends on how you plan to use the Android OS. If you will install a lot of games, choose more, the main thing is not to exceed the available memory. For example, I have enough memory on my phone, so I enter 5 GB. Click Compress.

A new section has appeared.

Right-click on it and select "Create Simple Volume".

Here we set the maximum value for the volume size and click “Next”.

Now assign an unused drive letter and click Next.

We format the section, you can give it a name, click “Next”.

To complete creating the new volume, click Finish.

You should have another one appear in the list of hard drive partitions, with the specified name and memory size.

Creating a bootable USB flash drive
Please note that the selected flash drive will be formatted and all data from it will be erased. To avoid losing important information, copy all the necessary files from it to your computer.
You can create a bootable USB flash drive using special programs. I will use the free program Rufus. We insert the flash drive into the port of the laptop or computer and launch the Rufus program. Select the desired device and FAT32 file system. To create a bootable flash drive, click on the disk icon and select the downloaded image on your computer. Press the “Start” button.

If you see the following window, select the desired item and click “OK”. First I put a marker in the point “Burn in ISO image mode”, but it was not possible to boot from the flash drive. Then I created a bootable USB flash drive again and selected “Write in DD-image mode” and everything worked out.

As soon as the bootable USB flash drive with Android OS is created, the following window will appear, click “Close” in it.

Download priority
Here I’ll tell you briefly: reboot the computer and go into the BIOS - press F2 or Del; go to the “Boot” section; put the flash drive first in the list; save the settings and exit the BIOS.
Installing a new OS
After you exit the BIOS, the computer will boot from the flash drive. The following window will appear. In it you will choose "Install Android-x86 to harddisk"– installing Android OS on your hard drive. Press "Enter".
You can move between different items using the arrows; if you need to select an item, press “Enter” on it.

Next you need to select the hard drive partition to install the operating system: sda1, sda2... I was afraid of making a mistake, so I selected “Create/Modify partitions” and clicked “OK”.

The following menu opens. All devices connected to the laptop are shown here: sda – installed hard drive, sdb – connected flash drives, mmcblk0 – memory card. I'm interested in the hard drive, so I select "Harddisk" and press "Enter".


In the next window, we look at the name of the hard drive partition that we just created. I set the memory volume to 5 GB, which corresponds to a disk partition called sda6. To exit this menu, use the Right arrow to select “Quit” and press Enter.

A familiar window will open; in it, feel free to select the desired hard drive partition - for me it’s sda6.
Next you need to select the file system type. To install Android OS, it is recommended to select ext3 or ext2, data will not be saved in fat32, and ntfs is not supported.

Now we confirm the formatting of the selected hard drive partition into the desired file system - click “Yes”.

In the next window you will be asked to install the GRUB bootloader, since without it Android simply will not start on the computer, click “Yes”.

In order to be able to choose which operating system to load when you turn on your computer: Android or Windows, click “Yes”.

Now you need to install another bootloader, click “Yes”.