Content
Some time ago, on the vastness of the World Wide Web, I read an article where operating systems were once again compared Windows systems and Linux. In addition to various objective pros and cons, that article expressed a very interesting, original thesis. Linux is better, because in it the clock shows not only minutes, but also seconds. Behind all the comedy of the situation lies, by and large, a sad truth. The standard Windows clock is pretty limited and doesn't really tell you the seconds. Standard Windows tools and Linux
It's no secret that in Windows XP the clock is located in the system tray. They display hours and minutes. The design of the clock directly depends on the current system theme. You cannot change the background or clock font separately. When you hover your mouse over the clock, a tooltip appears with the current date. Double-clicking opens their properties. You can change the current time and date, select a time zone, enable or disable automatic daylight saving time, and synchronize data with exact time servers.
When it comes to Linux, it's best to consider the two most popular desktop environments, KDE and GNOME, which include time display tools. Clocks in KDE come in four varieties. The first and second methods, called “simple” and “digital” respectively, provide time display using numbers. You can also display current date. The differences between the two modes boil down to the presence of additional styling in “digital” watches. You can change the background textures, add a shadow and a blinking minutes and seconds separator. Analog watches imply the presence of a dial. At the bottom of the indicator you can place the date and current day of the week. It is possible to enable anti-aliasing of graphic elements. The “inaccurate clock” mode allows you to look at the time not in the language of numbers, but in colloquial phrases. “What time is it?” - the question is asked mentally, and the eyes are drawn to the area of the system tray. “It’s ten to one,” the clock politely answers. You can adjust the degree of inaccuracy of the watch by introducing new phrases into its vocabulary, for example, a joyful cry of “day off!” 
Left-clicking on the clock opens a compact calendar. The right mouse button is responsible for calling context menu, from which you can launch various time adjustment tools.
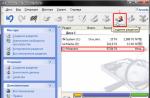
Setting up the clock and system time software module is represented by various tools. In the second case, the root password is required. 
The clock included with the GNOME desktop environment can operate in a standard 24-hour mode, as well as display UNIX time and Internet time. The second and third options are not popular modes accessible to the uninitiated user.
The clock is set using a compact dialog box. You can turn on the display of seconds, and in relation to the 24-hour mode, also display the current date and time in Greenwich Mean Time. 
From all of the above, it is easy to conclude that the KDE and GNOME time display tools have more advanced capabilities than their standard Windows counterpart. However, this injustice is more than eliminated big amount applications from third party developers. Programs that expand the capabilities of time display in operating system Windows will be covered in this guide.
The actions of alarm clocks may vary. If you only want to hear the sound, you can choose to play through a standard speaker system unit(you can specify the frequency of the tone and its duration) or launch an audio file in WAV or MP3 format (you can specify the file on your hard drive). The program includes a rich set of preinstalled sounds. In addition, saying the time out loud is allowed. For this purpose, the Speech API built into the system is used. If you do not have one installed, then this module can be downloaded from the official website. Russian speech language is supported. Time is spoken by a pleasant female voice, a bit reminiscent in intonation of EVA from the game Command & Conquer. Finally, the last option is to play the music CD in your CD-ROM drive.
In addition to alarm sound actions, you can assign other types of operations by selecting them from a predefined list. You can launch or close any application, change the theme of the described program, hide or show the clock and reminders, synchronize the time, execute Winamp commands and much more.
By default, the program speaks the time out loud every half hour. You can turn on your voice at any time using the Win+S keyboard shortcut, which can be changed in the program settings.
The program supports displaying timer reminders. Their appearance resembles yellow sticky notes - notes attached to monitors in offices. You enter some text into them. You can specify a URL. In this case, after the reminder is displayed, using a separate context menu command, you can open the address in the browser installed on the system by default. Appearance Notes can be customized. You can change transparency, background and text colors, and font. In addition, you can make sure that the window with the note is always on top of all other windows. It is also possible to prohibit its movement across the screen.
AceClock XP supports the creation of timers. Their job is to count down time. You need to enter a name for the timer and set it for a specific time, up to a maximum of 9999 hours. After it starts, the countdown can be displayed in a special window. If you don’t want to see it, you can turn on hidden mode, and only when the countdown is completed, a corresponding message will appear on the screen.
A very interesting feature of the AceClock XP program is the Calendar. This is exactly what the module is affectionately and affectionately called, which independently calculates the number of days between any two dates. A similar task often faces secretaries, HR specialists, and accountants. Under normal conditions, problems are solved by manually counting the number of days on any calendar. The program in question performs a similar operation on its own, saving the user from tedious, monotonous work.
The program supports the creation of several profiles. Each Windows user can have their own set of settings.
You can change any hotkeys supported by the program. By default, three actions are offered.
AceClock XP supports creating a contact list indicating users' birthdays. You can schedule a reminder to be sent when a holiday occurs. The program does not contain tools for importing contacts from any external applications.
AceClock XP was created by Russian-speaking programmers and, as a result, has a competent, convenient Russian interface, as well as detailed Help. Thanks to its wide capabilities, thanks to a thousand pleasant little things, this program without any reservations it can replace a whole group of specialized utilities.
It is worth noting one serious drawback of AceClock XP. When the program is running, serious problems begin in the system. While saying the time out loud, some applications, such as games, crash with an error. Several popular programs also crashed on startup if AceClock XP was in memory. The program is very interesting, but before deciding to purchase it, you need to carefully check the system for the absence of conflicts.
August 12, 2014 at 5:07 pmProblems with time and time zones in Android and ways to solve them
- System administration
- Tutorial
Let's say you've been using Android for a long time, and therefore it may seem that it copes perfectly with time synchronization tasks - alarms go off on time, there are no obvious time deviations, etc. However, are you completely sure where Android comes from? actually receives data about the exact time and time zones? If you have any doubts about how this works, welcome to cat.
Android has two problems with time: its unpredictable synchronization and the need to update time zone data even in the latest version of the OS.
Background: Android is a mobile OS based on Linux kernel, it easily connects to the Internet and, of course, one can assume that time synchronization is carried out using NTP, however, this is not the case. Historically, Android was intended to be used exclusively in mobile phones(remember version 1.6). At the same time, only by the 3rd major version did it acquire an interface for tablets and other progress began towards unifying the interface and OS hardware. However, even versions 4.4 and Android L receive time signals using the same methods that Nokia 3310 and other earlier GSM/3GPP phones received them, i.e. from towers cellular communications when registering on the network (when connecting to a tower). At the same time, tablets or other devices without a communication module, in principle, do not have the ability to synchronize time automatically.
Unfortunately, to teach Android to synchronize time completely automatically using NTP we need root access because there is currently no API for accurately setting the time in Android.
Let's get started. The first thing you need to do is turn off time synchronization with mobile network. At the same time, I recommend leaving the time zone setting at automatic mode, and you should turn it off only if there is a guarantee that the device will operate in stationary mode.
Screenshot of the settings window “Settings -> Date and time” Android versions 4.x:

Next, you need to install the ClockSync application, which will act as an alternative to the time synchronization daemon using NTP.
Screenshots of the ClockSync program window before synchronization (left) and after (right):


The screenshots show that the difference with exact time turned out to be quite small, however, there are different situations, for some the time on the device may even float back and forth because the operator did not bother to put things in order on his BS.
After making sure that everything works, we’ll set up automatic synchronization in the ClockSync program. To improve accuracy, I recommend enabling the “High Accuracy Mode” and “Only via WI-FI” options. If everything is clear with the first option from the description in the program (see screenshot below), then I recommend enabling the second option first of all, not for reasons of economy mobile traffic, but due to the fact that Mobile Internet is not able to guarantee any stable delays.
A little more about accuracy:
The still widespread mobile Internet of the 2nd (GPRS/EDGE) is, in principle, unable to provide stable transmission delays. Even the Internet of the 3rd (3G) and, to some extent, 4th (LTE/LTE-advanced) generations, when the network or communication channels between BS are heavily loaded, which is a typical situation for large populated areas, cannot guarantee stable delays. Therefore, even with approximation, the final accuracy of time setting can be worse than a fraction of a second and can even easily reach several seconds.
Screenshot of settings automatic synchronization in ClockSync:

In connection with large-scale changes in time zones in the Russian Federation in the fall of this year, it is necessary now to think about updating information about them on all devices, and if there are no problems with supported desktop OSes, then in Android even the latest version of the OS contains outdated data. To make sure of this, install TimeZone Fixer and observe an unsightly picture.
Screenshot of TimeZone Fixer running on Android 4.4.4 ( Cyanogenmod firmware dated August 4, 2014), which clearly shows that the data in the firmware is out of date:

A little bit of common sense and concern for users:
The author of the TimeZone Fixer program warns us that updating time zone data files can completely “break” the device and even gives recommendations on how to protect yourself from additional problems, although the cases of problems are isolated and very specific - this is really good care for ordinary users.


That’s the only reason I included this piece in the article; although it is not directly related to the problem, it is a really good example of caring about users. At the same time, the warning about versions 4.3+ is caused by only a small number of reviews about the program for devices with new OS versions, so please be sure to write a review about this application after use.
After updating the time zone data, the program will offer to reboot, however, I recommend rebooting the device yourself through the system menu since the program performs a reboot that is actually equivalent to a reset, which, although with a low probability, can lead to problems and data loss.
I will be happy to answer any questions or make additions that the community deems necessary, however, I would like to avoid overloading the article additional information, in order to adhere to the format of a compact guide to solving a specific problem.
UPD: This instruction completely solves the problem of time zones only for versions younger than 4.4. From version 4.4, additional patching is needed, while the issue is at the stage of exploring the possibilities for creating a user-friendly solution.
It happens that the clock on an Android device disappears, for example, after a firmware update. Returning them to the desktop is usually not difficult, since in most cases the widget only stops being displayed on the display, remaining in the device’s memory. We will tell you further how to return the clock to the Android screen or, if necessary, install new ones from the Google application store.
How to return an installed widget
If you accidentally deleted your watch or it disappeared, try displaying it on the screen in the simplest way:
If you deleted the application with the widget, read below on how to install a similar one from Google Play.
Clock widgets
Let's consider further best programs with graphic modules for the main screen of the gadget from those presented in the official application store. Basically, in addition to displaying the time, they also provide a lot of other information, for example, the weather directly at the user’s location according to data received by the utility via GPS.
Transparent clock and weather

This is one of the most popular free clock widgets with more than 10 million installations. The small program has very flexible settings, as a result of which the owner of the gadget can set the display on the display the way he needs it. Utility features:
- the presence of various beautiful and informative widgets in sizes 2x1, 4x1-3, 5x3;
- wide selection of design themes, covers, fonts;
- displaying, in addition to the exact time, other important information - about the weather, wind direction, humidity and pressure, battery charge, calendar events, etc.
If the device owner does not need all this data provided by the utility by default, he can delete it in the settings and leave just the clock. For this:
- Tap your finger on the time display on the screen, which will open the settings window.
- Go to the "Appearance" section, then to "Advanced Settings".
- Uncheck the boxes next to the items displaying information about the current location, system information, battery charge and check the box next to the line “Hide weather”.
After this, a minimalistic clock widget will appear on the screen, the appearance of which you can also change according to your own preferences.
Sense Flip Clock & Weather

This clock widget displaying time and date is suitable for users who like Flip Clock style clocks with turning pages. Features of the utility:
- selection of widgets of different sizes - 4x1, 4x2 and 5x2;
- Flipping animation implemented;
- selection of different skins and icon display;
- the location is determined automatically, which allows the user to be informed of the most accurate forecast.
The weather display here can also be turned off if necessary, after which only a beautiful retro clock will appear on the screen. You can also test other similar utilities:


Clock on lock screen
If there is a need to change installed screen locking in such a way that a large dial is displayed on it, then in this case we can recommend the “Luminous Clock Chest of Drawers”. The utility with such a strange name is free, does not require setup and does not show any advertising on the lock screen.

If you've ever been annoyed by the clutter of icons at the top of your Android home screen, good news: there's a way to fix it.
It turns out that there are 3 secret settings for Android users, and one of them will allow you to hide or show icons in the status bar (status bar). You can also rearrange the contents of the Quick Settings panel from the drop-down menu (status bar) as easily as making a small but important adjustment to the Android battery indicator.
You won't find these settings by poking around in standard screen settings. Instead, you need to unlock hidden settings first user interface(System UI Tuner) Here's how to do it.
How to open System UI Tuner
First, slide down the Quick Settings panel at the top of the screen, then press and hold the settings button (the one that looks like a gear) in the top right corner of the screen.
 Press and hold the Settings button until you see a small wrench icon appear.
 Hold the Settings button long enough and a small wrench icon will appear next to the Settings button. Once you see the wrench, click on the Settings button again, then scroll all the way down to the new settings section - System UI Tuner.
When you first launch System UI Tuner, you'll see a warning that says (excerpt) "these features may change, break, or disappear in future updates" and "proceed with caution." Click Got It to continue and don't worry, you can always disable System UI Tuner if you don't want to bother with such "experimental" settings in Android anymore.
Once you have turned off the warning, you will have access to the System UI Tuner settings. Let's take a tour.
Re-sorting the Quick Settings panel buttons
You probably already know how to open the Quick Settings panel using a two-finger swipe down from the top edge of the screen. What you may still not know is that you have the ability to add, remove, and rearrange Quick Settings panel buttons, at least using the System UI Tuner.
 You can rearrange or hide any quick settings buttons you want, all with a little help from System UI Tuner.
 Click Quick Settings on the System UI Tuner home screen and you'll see the standard Quick Settings button bar.
To move a button, press and hold, then drag it over another button, the two locations will move. To hide a button from the Quick Settings panel, press and hold it, then drag it onto the delete icon. To bring back any removed buttons, click Add Tile, then click the button's name.
If you want to return the old Quick Settings buttons, tap the three-dot menu button in the top right corner of the screen, then tap Reset.
Status bar control
If all the icons - Bluetooth, Wi-Fi, alarm and do not disturb - in the Android status bar are too large, System UI Tuner will help you reduce them.
 Simply tap the switch to hide a specific icon in your status bar. Android devices.
Tap the status bar settings to see a list of ten status bar icons, ranging from Casts and Hotspot to mobile data and airplane mode, each with its own toggle. By default, each icon is enabled; To disable the icon, simply turn off the switch.
You can disable almost any icon in the status bar except the battery indicator and clock.
If you want to more accurately track your Android device's battery charge, you can use the System UI Tuner to add percentage indications to standard Android icon.
 A simple System UI Tuner will add a percentage value to the Android battery icon.
 Return to the main System UI Tuner screen, then tap Show Battery Level. Once you do this, you will see a small percentage on the battery icon at the top of the status bar.
Deactivating the System UI Tuner panel
Google isn't making any promises about removing features from its hidden System UI Tuner. As you may recall, a pop-up message when you launch Tuner warns that any and all of its customization options may change or disappear at any time.
If you'd rather not worry about when your favorite new settings will disappear, you can simply delete them in advance. On the main System UI Tuner screen, click on the three dots button in the top right corner of the screen, and then click Remove from Settings.
You can always change your mind, of course; just go back to quick settings swipe down and press and hold the Settings button.