Android phones are notable for the fact that they allow you to install custom firmware, which, as a rule, is superior in quality to stock Android. CyanogenMod is the most successful custom firmware, which duplicates the interface of the “naked” Android, but at the same time provides users with a significantly expanded range of functions. Below we will talk about how to install Cyanogenmod on your smartphone or tablet.
CyanogenMod is a popular firmware that is in great demand among users. This firmware will be an ideal option if you do not want to put up with TouchWiz shells and other solutions that have never been stable and high-speed.
CyanogenMod allows users a significantly more expanded set of settings, which allows you to customize many aspects of the operating system: LED color for each application, replacing icons, changing the system font, applying themes, assigning additional buttons to the lock screen, switching music with physical buttons, detailed setup sound and much more. At the same time, everything implemented for stock Android will always work correctly.
Note! By installing custom firmware, you take full responsibility for the performance of your smartphone. At incorrect installation firmware, your smartphone may well fail completely.
The CyanogenMod developers have put a lot of effort into making the process of installing their firmware as simple as possible. To do this, you need to use the special program CyanogenMod Installer, the use of which will be clear to many users even without further instructions, but we will still look at this process in more detail.
1. First, make sure that your device supports installing CyanogenMod using this application. To do this, simply follow this link and find your device in the list.
2. Once you have found your device, go to your smartphone's settings and enable USB debugging. To do this, open your smartphone settings and go to the section "About the phone" . Go down to the very end of the list and click on the item "Build number" until the system displays a message indicating that the menu "Activated for developers" .

Now go back one position. At the end of the list an item will appear "For developers" , click on it to activate the parameter "Debug mode" .

3. Go to the store Play Store or download the CyanogenMod Installer app.
4. Next, a program with the same name must be installed on the computer under Windows control by downloading it from the link at the end of the article.
5. Once you're done with the installation, launch CyanogenMod Installer on your Android device. Now you need to follow the instructions displayed by your smartphone.

6. As required by the application. Please note that at this stage you must use the original cable (not Chinese!).
7. Launch the CyanogenMod Installer program on your computer. Your device should be automatically detected on the program screen.
8. The computer program will then begin downloading the required version CyanogenMod, suitable specifically for your device. Once the download process is complete, a message will be displayed on the screen "Everything is ready" , and a button will appear just below "Install" .

9. By clicking the button, the process of installing the firmware on your device will immediately begin. While the process is running, your device may reboot several times - this is normal.
10. When the firmware installation is complete, a message will appear on the computer screen "Installation Complete" . Close the window computer program.

Now the latest version of CyanogenMod is installed on your smartphone, so you can immediately proceed to setting up and studying the updated device. Enjoy using it!
It is common practice in the world to compare Android and iOS. The main difference is the attitude towards the openness of the system for the user. If iOS does not even allow you to view individual folders on the device, then in Android file system available to the user. However, only at first glance it seems that Android developers allow you to do anything with their OS: many important and required functions remain unavailable. Therefore, CyanogenMod firmware has become popular among advanced users. For information on how to install, update and, if necessary, remove the firmware, read our article.
What is CyanogenMod?
СyanogenMod is an alternative Android firmware that expands functionality operating system. The firmware has gained popularity: as of 2016, CyanogenMod is installed on 14 million devices.
It all started with the fact that a simple programmer Steven Kondik posted on xda-developers.com, the largest site with custom firmware for Android, his development for HTC smartphone Dream. He didn’t think long about the name and took his nickname - Cyanogen, adding Mod to it. Steven Kondik did not imagine that anyone would be interested in his development, but already in the first days users responded positively to the firmware. Then the programmer, in a creative impulse, began intensively refining CyanogenMod, posting several updates per day on xda-developers.com.
Then Steven Kondik released CyanogenMod on Github, a collaborative development service. Then other programmers joined in improving the project, bringing their ideas and developments. Over time, it became clear that CyanogenMod had turned from an amateur firmware into an exceptional project. The capabilities of CyanogenMod did mobile device more functional than any other firmware.
Advantages
Why do users love CyanogenMod so much?
- High performance. CyanogenMod, thanks to its optimization, significantly improves the performance of the device. Both menus and heavy games run on this firmware much faster and smoother than on the standard one. As an example, consider the Nexus 4, which on standard firmware produces 15–16 thousand Antutu Benchmark points. After installation, Cyanogen makes 21 thousand points. In addition, Cyanogen allows advanced users to change the processor operation scheme and control its frequency at their discretion. There are five modes: Interactive - standard frequency distribution, increases when the screen is turned on; Ondemand - less productive, more energy efficient; Userspace - allows you to configure everything yourself; Powersave - minimum processor frequency, maximum energy saving; Performance- maximum frequency CPU performance, best performance, but high power consumption.
- The only way to install new version Android for older devices. Few manufacturers support their devices even for 4-5 years, releasing firmware 5 and 6 Android, so CyanogenMod is the only way to bet on such Android devices Lollipop and Marshmallow. Cyanogen also allows you to get rid of the manufacturer’s pre-installed firmware, for example, Samsung’s TouchWiz.
- Customizable appearance . CyanogenMod makes it possible to change the design of every detail of the interface to your liking. PlayMarket has thousands of custom theme options. The firmware also supports the original Android theme (Android Holo up to version 12 and Google Material Design in versions 12 and 13), unlike the official firmware of device manufacturers.
- System openness. Standard Android firmware has various restrictions for users. CyanogenMod eliminates these restrictions, thanks to which it has a Free Lossless Audio Codec, a compressed cache, a large list of APNs, an OpenVPN client and a reboot menu. However, this advantage is only for knowledgeable and skilled people, because the device can be accidentally broken.
Firmware versions
The latest version of CyanogenMod is the thirteenth version, based on Android 6.0 Marshmallow. Each new version of CyanogenMod is developed under Android update. In addition, the developers support and constantly update all versions simultaneously, releasing new builds of the project. There are six types of CyanogenMod builds:
- Experimental - experimental firmware versions for testing new ideas. These versions are extremely unstable, have an abundance of bugs and are needed only by developers for testing.
- Nightly - daily updates, the result of a day's work by programmers. Like Experimental, they exist only for developers, so that enthusiasts can follow the development of the project and help it with new ideas and suggestions.
- Millie stone is a raw version that collects all the innovations to test their interaction.
- Snapshot is an already developed assembly suitable for use. Usually, not all bugs have been caught and not all errors have been fixed.
- Release Candidaty (RC) is an almost ready version of the firmware. The developers check for errors, performance and stability one last time.
- Stable is the final, stable version of CyanogenMod.
If you are a simple user who wants to install CyanogenMod, then you should choose a stable firmware version. This guarantees no errors and functionality. But for the sake of useful functions, which are not yet in the stable version, you can also try the developer versions. But such firmware is almost impossible to use - there are too many errors.
How to install: step-by-step instructions
Please note: installing CyanogenMod will void your warranty! This applies not only to Cyanogen, but also to any other custom firmware. There are certain ways to hide traces of third-party firmware, but the methods are unreliable and do not always work. So unless you're willing to forfeit your warranty, don't take the risk.
The installation of CyanogenMod is non-standard and complicated for untrained users: it involves more than 10 steps. Updating the system isn't the most intuitive either. Of course, there is an easy way to install the firmware, but this is far from the best option. The latest version of CyanogenMod is automatically downloaded, which is not always stable, which may result in errors. But since not everyone will want to spend time on a more complex method, we will look at this option.
Easy installation
- First, check if your device is supported. To do this, follow the link: http://wiki.cyanogenmod.org/w/CyanogenMod_Installer#Supported_Devices and view the list of supported devices.
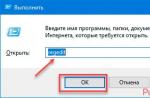
- In your smartphone settings, enable USB debugging (Accessibility -> For Developers -> USB Debugging).
- Download the CyanogenModInstaller app to your smartphone. Google Play.
- Download to your computer special program for Windows (Vista/7/8): http://beta.download.cyanogenmod.org/install.
- Turn on the application on your smartphone and follow the instructions in the program.
- Connect your device to your computer via USB.
- Turn on the program on your computer.
- The program itself will start downloading the files necessary for the firmware. When everything is downloaded, you will see the message “Everything is ready.”
- Click on the “Install” button.
- When the firmware installation is complete, the program will notify you with the message “Installation complete”.
- Ready.
The hard way
- First you need to get Root rights (remove restrictions imposed by Android developers). Let's do this using the Framaroot program. Download Framaroot 1.9.1 from the Internet, install it and run it. If your antivirus issues a warning, click Allow.
- Now you need to unlock the Android bootloader. The best way to do this is the BootUnlocker program. You can download the application directly from Google Play. Launch the program and click the “Unlock” button. The bootloader will be unlocked.
- You need to install Custom Recovery. Let's look at its installation using TWRP (Team Win Recovery Project) as an example.

- Let's start installing CyanogenMod.

- Once the installation is complete, reboot the system. If everything went well, an empty desktop will open. If not, the phone will not boot. In this case, you need to log in again Recovery mode, install the new firmware, but only enable full Wipe.
- The last thing left is to install Google Play. To do this, download the Gapps package (http://opengapps.org), move them to root folder and install it in the same way as the firmware itself, via Recovery.
- Ready!
Video: how to install CyanogenMod firmware?
Is it possible to install CyanogenMod on an unsupported device?
The answer is clear: no. CyanogenMod Installer will simply write that your device is not supported. If you install it manually, there may be a lot of problems, even to the point where the phone or tablet stops working. If the device could run firmware, the developers would have added it to their list anyway.
How to update firmware
There are also two ways to update CyaongenMod.
Easy way
This method works for Cyanogen versions 10.0 and higher. Everything is extremely simple: open the settings, go to “About phone”, then “CyanogenMod update”. The device will boot on its own Last update and install it. During the process, the smartphone will reboot several times. All data will be saved.
Manual option
Please note: you should not update your device to more than one version of CyanogenMod at a time (for example, from CM version 10.0 to version 10.2). Unpredictable errors may appear and incorrect work firmware. It is also not recommended to roll back the device to earlier versions of CM (for example, from 10.2 to 10.1). Sometimes it leads to an error with the smartphone endlessly rebooting. For any downgrade, you must first do a Wipe Data/Factory Reset.
It's almost always better to use the easy update method, as you're less likely to do something wrong. However, if you have Cyanogen version below the tenth version, and also if you use third-party add-ons (add-ons), you will have to use in a complicated way, since the standard update does not allow you to immediately install additions to the firmware.
- To get started, download the latest stable version (or whatever version you need) of CyanogenMod and the latest version of the Gapps package.
- Turn on Recovery mode.
- Install the firmware first, then the zip archive with Gapps, and then third-party addons. There is no need to Wape, so all data is preserved during the update.
- Ready.
At re-updating there is no need to re-install Gapps, since the data is saved, but add-ons will have to be installed manually.
In addition, only with the complex option can you choose which update to install (which cannot be done with in a simple way installations).
How to remove if necessary
If you decide to return everything as it was, you need to reinstall the firmware again, but this time replace CyanogenMod with the stock firmware from the manufacturer of your device. You can download such firmware from the manufacturer’s official website.
- When you download the firmware, save the archive in the root directory of the device
- Enable Recovery mode (press and hold the power button and volume up button while starting the device).
- Check all the Wipe boxes. Please note that all data will be deleted.
- Then install the downloaded archive with the official firmware.
- Wait for the installation to complete.
- Reboot your device.
- Ready.
Sometimes returning to the device's native firmware erases all traces of the presence of CyanogenMod, in which case the warranty is not nullified. However, you should not count on this, as it depends on luck and the carelessness of the support staff. The rules for providing warranty service prohibit changing the manufacturer's firmware.
CyanogenMod is an interesting firmware that has grown from an amateur craft to a serious and ambitious project, the likes of which have no analogues in the world. CM allows you to do things with the device that no official firmware allows. But only advanced and knowledgeable users should install it, since open systems are unsafe. In addition, the phone may malfunction and warranty service will not be available. However, if you do not have enough standard functions of a smartphone or tablet on stock Android firmware, if you are ready to learn and develop, are ready to spend time and effort on overcoming errors that arise, then you definitely need to flash your device with CyanogenMod. According to some users, CyanogenMod is the highest point in the development of mobile devices.
As new versions of mobile operating systems are released, developers are often of the opinion that new systems simply will not take root on an outdated smartphone, and limit themselves to releasing only one (maximum 2) updates for a phone that was two or three years old. This has to do with official operating system updates, but what about unofficial updates? Luckily, there are plenty to choose from. There is a wide abundance of unofficial Android OS firmware available on the market today, which, it is worth saying, work faster, more reliably and more efficiently than the official update (Paranoid Android, MIUI). In addition, usually much more is available in custom firmware more features and opportunities not revealed in official version. One of the most stable unofficial firmware is the version CyanogenMod, supported by an international team of enthusiasts who consistently release new versions with support latest models smartphones. Today we will talk about how to install custom firmware on a smartphone.
Preparing for a firmware update
Before you start updating, make a backup of all important data stored on the flash memory of your smartphone. You can compress all existing information into an archive, or you can simply transfer it to a third-party drive ( external USB drive or to a computer). You don’t have to worry about saving data on the SD card - the installation will only affect internal memory phone.
The next important point is recharging. Before installing custom firmware on your smartphone, make sure that your device is charged at least 50%, or even more. If the battery runs out during the installation of CyanogenMod, this may result in a critical error that can turn your smartphone into a brick.
Another condition is that you should definitely take into account what firmware version you currently have on your phone. Almost any CyanogenMod build is installed exclusively on the official firmware of the phone, or on an earlier CyanogenMod, be it a Samsung, HTC, LG or any other model. To find out which version of CyanogenMod is available for your smartphone, and what basic firmware is needed to update to it, please visit the portal forum 4pda.ru. On this site, each phone model and the available unofficial firmware for it have a whole separate thread dedicated to it, which describes detailed instructions for updating and opinions of users on the operation of the system who have already installed the update on their device. In addition, after registration, you can ask questions that interest you, if after reading the header you still have unclear points.
In our material we will talk about installing CyanogenMod 13 (Android 6.0) on a Samsung device Galaxy Ace 2 (GT-I8160). This phone is far from the newest, and the update will literally give it new life, which will allow you to hold off on buying a new device, provided that the performance of this specific device you are quite satisfied.
So, you have transferred important information (synchronized your contact list with account Google or done backup copy, transferred photos and electronic notes) to external media and the device is sufficiently charged. What to do now?
Basic firmware version
If installing CyanogenMod requires basic official firmware, you can install it in two ways:
1. Using the official application from the developer company (for Samsung products this is KIES, for LG this is LG PC Suite, etc.). Although this method is available by default, the update speed with it leaves much to be desired.
2. Using unofficial application(for Samsung - this is the Odin program, for LG - KDZ Updater, for Lenovo - Smart Phone Flash Tool, etc.). This method is used by most technicians involved in the repair and restoration of mobile equipment. In our article we will use the Odin program, since it is the one that supports all devices trademark Samsung.
How to install custom firmware via Odin - detailed instructions
For different Samsung smartphones You will need a different version of Odin, depending on the year of manufacture of the device. For phones from 2012 and earlier, you will need version 1.83, which can be downloaded from this link. Complies with later models version 3.10, relevant at the time of writing.
1. Download the Odin program of the required version from the links provided. Extract the contents of the file from the archive.

3. Launch the Odin program.

4. Turn off the phone and connect it to the computer via a cord.
5. Switch the smartphone to Download Mode (home button + volume down key + power off button).

6. When the corresponding message appears on the smartphone screen, press the volume up button. Download mode is activated.

7. If all preparations for flashing were completed correctly, a yellow indicator will appear in Odin with the number of the port used to connect the device to the PC.

8. Now add the PIT, PDA and CSC files corresponding to your firmware version. You can find out which file corresponds to each category in the description of the official firmware for your model mobile phone in the corresponding forum thread on the website 4pda.ru (link in paragraph 2 of the instructions).

9. Press the “Start” button to start flashing.

10. After approximately 5-10 minutes, the operation will be completed. Its successful completion should be indicated by a green indicator with the inscription “PASS” in the leftmost panel at the top.

Updating to new firmware version
Now let's update to the new version of CyanogenMod. To learn in detail how to install custom firmware on a smartphone, you need to familiarize yourself with all the details of the 4pda.ru forum ( link as an example). As a rule, to update to a new version, 3 files are needed: this is the CyanogenMod firmware itself (in particular, the archive with it), the Open Gapps package, which allows you to install minimum set Google services and programs and Play Market, and the recovery file (cwm). All this can be found on the forum. Sometimes (in the case of installing Android 5.0/6.0) a kernel update is also required; it is installed from the recovery menu in the same exact way, so we will not dwell on this.
It should be noted that each version of the Android OS has its own Open Gapps package, so before downloading the archive, make sure that it is suitable for the version of Android you need.
1. Find these three files on the network and copy them into a single folder on the phone’s memory card.

10. Specify the path to the file CyanogenMod firmware and proceed to install it on your phone.
11. After a few minutes, when a message appears indicating that the file has been downloaded, indicate the path to the GApps archive and wait another minute.
13. Everything is ready, the new system is now loading.

If something goes wrong, having the basic official firmware in hand, you can return to the official firmware version at any time using the Odin program. For information on how to install basic firmware, read the section “ Basic version firmware” in this article.
Results
We hope that the material presented will provide you with all the answers to the question: how to install custom firmware on a smartphone. Before performing any operations, read reviews about using a particular firmware version on the 4pda.ru forum (fortunately, other users leave their comments about whether they successfully installed this or that firmware on their device).
Screenshot sources: babbler.me / samsung.com
People using standard Android firmware often lack their functionality. An alternative was invented especially for them - CyanogenMod. It has many interesting features, gives access to advanced device settings, allows you to update the operating system Android system before latest version and much more.
CyanogenMod is modified firmware on Android based open source. It allows you to expand standard phone settings and functions that are not available in factory versions.
CyanogenMod combines source Android and experimental, created by the developers of Cyanogen Inc.
Advantages of firmware
- Original Android. Smartphone manufacturers often modify the Android operating system (OS) beyond recognition for commercial purposes. In CyanogenMod, this OS is exactly as it was intended from the very beginning.
- Ability to manage access settings for each individual application.
- Superuser. There are many dubious applications to root your device, with CyanogenMod you won't need them as you are the default root user.
- Ability to transfer any applications to a memory card.
- Theming. Most themes in standard firmware only slightly change the appearance of the device. In CyanogenMod you can customize literally everything: fonts, icons, sounds, loading animation, system applications etc.
You can customize not only the appearance, but also the system itself.
- Equalizer. Music lovers will appreciate the DSP Manager, which allows you to customize the sound of your music and apply various effects.
- Update Android to the latest version. Manufacturers often forget to update the operating system, and a gadget with good technical characteristics quickly becomes outdated due to poor filling. In CyanogenMod this problem does not exist; the system is updated automatically to the latest release.
- Ability to combine settings into profiles. Each profile combines several settings that can be enabled with one click. For example, at work, set the quiet mode and turn on Wi-Fi, when outside, turn up the music louder, reduce the screen brightness and turn on GPS.
Various versions
Cyanogen produces several firmware versions, and which one to choose is up to you to decide:
- Experimental - experimental firmware versions for testing new ideas. These versions are extremely unstable, have an abundance of bugs and are needed only by developers for testing.
- Nightly - daily updates, the result of a day's work by programmers. Like Experimental, they exist only for developers, so that enthusiasts can follow the development of the project and help it with new ideas and suggestions.
- Millie stone is a raw version that collects all the innovations to test their interaction.
- Snapshot is an already developed assembly suitable for use. Usually, not all bugs have been caught and not all errors have been fixed.
- Release Candidaty (RC) is an almost finished firmware version. The developers check for errors, performance and stability one last time.
- Stable is the final, stable version of CyanogenMod.
How to install on your device
If your device is not on the list of those that support CyanogenMod, you should not try to install the firmware manually or in any way that was recommended to you on the forum. During the process, a large number of problems may appear, including complete cessation of operation of the smartphone/tablet.
Attention! After installing CyanogenMod or any other custom firmware, the warranty will no longer apply.
Devices that can be installed with CyanogenMod - table
| Code | Device | Windows | Mac | Installation version |
| crespo | Google Nexus S | Yes | Yes | 11.0-InstallerXNPQ08Q |
| crespo4g | Google Nexus S 4G | Yes | Yes | 10.1-InstallerBeta3 |
| d2att | Samsung Galaxy S III (AT&T) | Yes | Yes | 11.0-InstallerXNPQ09Q |
| d2can | Samsung Galaxy S III (Canadian) | Yes | No | 11.0-InstallerXNPQ09Q |
| d2spr | Samsung Galaxy S III (Sprint) | Yes | Yes | 11.0-InstallerXNPQ09O |
| d2tmo | Samsung Galaxy S III (T-Mobile) | Yes | Yes | 11.0-InstallerXNPQ09O |
| d2usc | Samsung Galaxy S III (US Cellular) | Yes | Yes | 11.0-InstallerXNPQ09O |
| d2cri | Samsung Galaxy S III (Cricket) | Yes | Yes | 11.0-InstallerXNPQ09O |
| deb | Google Nexus 7 2013 (LTE) | Yes | Yes | 11.0-InstallerXNPQ25S |
| flo | Google Nexus 7 2013 (WiFi) | Yes | Yes | 11.0-InstallerXNPQ25S |
| grouper | Google Nexus 7 (WiFi) | Yes | Yes | 11.0-InstallerXNPQ25S |
| hammerhead | Google Nexus 5 | No | Yes | 11.0-InstallerXNPQ25S |
| hercules | Samsung Galaxy S II Hercules | Yes | No | 10.2-InstallerWPPQ50S |
| i9100 | Samsung Galaxy S II (Intl) | Yes | Yes | 10.2-InstallerWPPQ50S |
| i9300 | Samsung Galaxy S III (Intl) | Yes | Yes | 11.0-InstallerXNPQ08Q |
| jfltecan | Samsung Galaxy S4 (Canada) | Yes | Yes | 11.0-InstallerXNPQ09O |
| jfltecri | Samsung Galaxy S4 (Cricket) | Yes | Yes | 11.0-InstallerXNPQ09O |
| jfltecsp | Samsung Galaxy S4 (C Spire) | Yes | Yes | 11.0-InstallerXNPQ09O |
| jfltespr | Samsung Galaxy S4 (Sprint) | Yes | Yes | 11.0-InstallerXNPQ09O |
| jfltetmo | Samsung Galaxy S4 (T-Mobile) | Yes | Yes | 11.0-InstallerXNPQ09O |
| jflteusc | Samsung Galaxy S4 (US Cellular) | Yes | Yes | 11.0-InstallerXNPQ09O |
| jfltexx | Samsung Galaxy S4 (Intl) | Yes | Yes | 11.0-InstallerXNPQ09O |
| l900 | Samsung Galaxy Note II (Sprint) | Yes | Yes | 10.2-InstallerWPPQ50S |
| m7att | HTC One (AT&T) | Yes | Yes | 11.0-InstallerXNPQ08Q |
| m7spr | HTC One (Sprint) | Yes | Yes | 11.0-InstallerXNPQ08Q |
| m7tmo | HTC One (T-Mobile) | Yes | Yes | 11.0-InstallerXNPQ08Q |
| m7ul | HTC One (Unlocked) | Yes | Yes | 11.0-InstallerXNPQ08Q |
| maguro | Google Galaxy Nexus (GSM) | Yes | Yes | 11.0-InstallerXNPQ25S |
| mako | Google Nexus 4 | Yes | Yes | 11.0-InstallerXNPQ25S |
| manta | Google Nexus 10 | Yes | Yes | 11.0-InstallerXNPQ25S |
| n7000 | Samsung Galaxy Note (Intl) | Yes | Yes | 10.2-InstallerWPPQ50S |
| n7100 | Samsung Galaxy Note II (GSM) | Yes | Yes | 10.2-InstallerWPPQ50S |
| quincyatt | Samsung Galaxy Note (AT&T) | Yes | No | 10.1-InstallerBeta3 |
| quincytmo | Samsung Galaxy Note (T-Mobile) | Yes | No | 10.1-InstallerBeta3 |
| skyrocket | Samsung Galaxy S II Skyrocket | Yes | No | 10.2-InstallerWPPQ50S |
| t0lte | Samsung Galaxy Note II (GSM LTE) | Yes | Yes | 11.0-InstallerXNPQ08Q |
| t0lteatt | Samsung Galaxy Note II (AT&T) | Yes | Yes | 10.2-InstallerWPPQ50S |
| t0ltetmo | Samsung Galaxy Note II (T-Mobile) | Yes | Yes | 10.2-InstallerWPPQ50S |
| t769 | Samsung Galaxy S II (T-Mobile) | Yes | No | 10.2-InstallerWPPQ50S |
| tilapia | Google Nexus 7 (GSM) | Yes | Yes | 10.2-InstallerWPPQ50S |
| toro | Google Galaxy Nexus (Verizon) | Yes | Yes | 11.0-InstallerXNPQ25S |
| toroplus | Google Galaxy Nexus (Sprint) | Yes | Yes | 11.0-InstallerXNPQ25S |
How to flash your smartphone/tablet: step-by-step instructions
- Make sure your device supports the firmware.
- Enable USB debugging. To do this, go to Settings/Accessibility/Developer Options and check the “USB Debugging” box.
- On the official website cyanogenmod.org, download the application for phone/tablet and PC and install.

- Launch the application on your device and follow the instructions.

- Connect via USB to PC.
- Launch the application on your computer, it should detect the connected device.
- Loading all necessary files will take some time. Wait for the process to complete.
- After the message about successful completion Click on the Install button and wait again.

- The Installation complete message indicates that the process is complete and you can use the new firmware.

Installing firmware - video
How to update CyanogenMod
Via firmware interface
- Go to your device settings.
- Then go to the “About phone” section.
- Click "Update CyanogenMod".
- Wait for the update to complete.
Photo instructions for updating
Manually
- Go to the Install Zip - Choose zip from /sdcard menu.
- Select the gapps package file, wait for the installation to complete.
- Return to the root menu, select Reboot System Now - for the first time after the update it is better to boot without installing third-party kernels and mods.
- Enter recovery mode again.
- In the Install Zip menu - Choose zip from /sdcard - select the kernel and/or mod files one by one and install them.
- Click Reboot System Now.
How to remove/remove CyanogenMod
- Turn on Recovery mode (hold down the power button and volume up button while starting the device).
- Check all the Wipe boxes. Please note that all data will be deleted.
When you download the official firmware, save the archive in the root directory of the device.
- Then install the downloaded archive with the official firmware.
- Wait for the installation to complete.
- Reboot your device.
- Ready.
CyanogenMod has many advantages: advanced functionality, custom settings, etc. This firmware is definitely worth installing, especially since even an inexperienced user can handle it. If you don’t like it for some reason, you can always delete it.
We mention CyanogenMod quite often on our website. This is the firmware for those who are bored with stock Android or the firmware version with the shell from the smartphone manufacturer. This firmware is for those who lack control over their device and operating system and I want more opportunities. In other words, this is a firmware for advanced users, but it is not that difficult to install.
What is CyanogenMod
Start over. CyanogenMod is a custom version of Android that allows you to quickly change themes, create profiles for use wireless connections, supports gestures, screen calibration and many other settings. Firmware from amateur Android versions has grown into a product that some smartphone manufacturers are willing to use. One of bright examples smartphones running Cyanogen OS are .
How to install CyanogenMod

Today, the process of installing this custom firmware is as simplified as possible. It will not take much time and will not require root rights or special user skills. Here's where to start.
- Go to the settings section and allow installation of applications from unknown sources.
- Visit http://get.cm using your device's browser and follow the onscreen instructions.
- After downloading the APK file and installing the app, follow the instructions in the app.
- You can also use the official Windows program and quickly install CyanogenMod using a USB cable, also following the instructions.

This instruction will work for supported devices. You can find a list of these devices at this link. There is a way to install the firmware on devices not included in this list, but it, in turn, requires certain skills. Those who are able to install custom firmware and have the necessary knowledge and skills have probably already tried CyanogenMod.
Based on materials from AndroidPit