Every time the creators want to combine a number of devices into one for the greatest convenience and comfort. For example, this happened with a mini-computer and a TV set-top box. Now these 2 devices can be purchased in one Android mini PC device and enjoy a wide variety of functions of this device.
The mini PC contains the Android operating system above version 4.4, and also has a small size (which is why, exactly, the name "mini"). Android mini PCs are produced in 2 variations - Android HDMI dongle mini PC and Android TV box. Let's take a closer look at each device.

Many users may have many questions - is it really time to throw away your personal system unit? Really, ordinary computers in our opinion have already become irrelevant and the creators, in their own desire, want to do everything in a small size, or will they only produce these small computers? Before, the computer also occupied a huge building, and the ordinary system unit, which we are all familiar with, became a true revolution!
It is necessary to deal with this issue and irrevocably put everything on the shelves.

By its very nature, mini PC is more similar to modern tablets and phones, but in terms of power it is somewhat ahead of them. It contains USB ports and HDMI output, more functions, more RAM. A computer that is more than 5 years old, or a telephone with an "age" of a year and a half lags far behind this device. Progress, since it does not stand in space, something fresh comes out every month.
But at the same time, mini PCs do not have a monitor and their own, independent power source. These devices do not have a microphone, speaker, 3G module. That is why they must be connected to a TV set, like a prefix. In this case, the TV set itself acts as a monitor. In this case, a mini PC is like a system unit, to which it is possible to connect various peripheral devices so that it can perform all the necessary functions.

Well, if we have already touched on the topic of multifunctionality, in general, you can change a regular computer to an Android mini PC only if you do not need anything else, apart from going online and playing games. If you want to edit photos, videos, work in any more or less serious programs - a mini PC will not cope with these tasks.
This device is created by default for games and as a means of accessing the Internet. A mini PC will allow you to view mail, make video calls to your family (Skype), view and edit ljrevtyns, read books, connect to a computer or laptop and display your desktop on a large screen. You can create on this small computer everything that the currently available software allows. And now we envisage that the development in the field of Android proceeds rather quickly ... It is likely that even more functions will become available quickly.
The operating system Google Android is now loved by almost all users, and has long been used not only on telephones, but also on other devices, such as e-books, tablets, netbooks, including wrist watches. Now they also release TV sets on this system (
What is a mini PC?
Today, a media player on Android is a set-top box with its own operating system, capable of giving TV the functions of a computer. TVs on which you can run various applications and access the Internet are called Smart TVs. The prices for such "smart" devices are quite high. By connecting to an ordinary TV box on Android, you will get the same functions for less money. You will have the opportunity to: watch HD and Full HD movies on the big screen; chat with friends on Skype and on social networks, browse web pages in a browser, listen to music, play video games, read and send email, create and edit files (text documents, images, etc.). Connect additional digital TV channels, record TV programs, download files, launch pre-installed applications and install new ones. A TV box will give you no less opportunities than a ready-made Smart TV.
And managing it is no more difficult than a mobile phone.
How to choose a TV box?
When buying, you should pay attention to some features. Smart TV boxes differ:
- hardware platform,
- operating systems,
- communication capabilities,
- as well as external performance (form factor).
The central processor, video core, memory, controllers, network and sound adapters are collected in one microcircuit - SoC, which is why they are so compact. The smallest set-top box is slightly larger than a regular flash drive. The largest one (in the TV box form factor) is slightly larger than a mobile phone. Most of the devices are powered by 2 and 4 core processors Rockchip, Intel Atom, Amlogic or Allwinner. Quad-core platforms are more expensive, but they allow you to watch videos in higher quality than dual-core platforms, as well as run resource-intensive applications and play modern games without brakes. The well-proven Mali 400, Mali-T764 and Intel HD Graphics video processors are responsible for reproducing the graphics of most TV boxes. The most modern models are equipped with the next generation graphics core - Mali450, Mali-T764, which supports ultra high resolution 4K. Another important parameter for a mini PC is the capacity of RAM and permanent memory. The more, the better. The majority of devices are equipped with one or two gigabytes of RAM, but there are models where it is only 512 MB. They are cheaper, but no longer meet the requirements of the latest Smart TV apps. Permanent flash memory is used to store data such as movies, recorded shows, and applications. Its average size is 8-16 Gb, but almost all set-top boxes have a slot for a micro SD card, due to which the memory can be increased by another 32-64 Gb. It is worth noting that all mini pc models have the ability to connect various game controllers, such as wireless game controllers and others.
To access the network and connect peripheral devices, the devices are equipped with the following interfaces: WiFi, Ethernet, Bluetooth, an infrared port for remote control, USB and USB OTG, 3.5 jack for headphones, a micro SD card reader, HDMI and RCA connectors for connection to TV, port for power adapter. Not every device has all of the listed interfaces. Miniature models usually lack RJ-45 Ethernet, RCA, headphone jack, but there is also a full-size USB port and a micro USB port. This allows you to connect wireless keyboards and pointing devices and traditional mice to these devices.
90% of all smart TV boxes run on the Android OS, so the whole class of these devices is often called Android mini PC or Android TV box. Certain models with Intel Atom processors, such as the Minix Neo z64, can also run on Windows. Which operating system to choose is a matter of personal preference, but most users and experts choose Android because of the much larger number of applications available in the playmarket, better performance and less demand on hardware resources.
Hello. It's about a device called Android mini pc, also called TV BOX, Google TV and so on. The main function of this TV set-top box is to connect your TV (if it does not support Smart TV technology) to the Internet via WIFI (you can also use a wire if you have an appropriate adapter). In fact, this is a full-fledged mini computer with the Android operating system (as on tablets and smartphones), so connecting the TV to the Internet is not the only function, after connecting and setting up, you can install games and applications from Google play and use them on the TV.
Main technical characteristics
Product name: mk808
Processor: Rockchip Rk3066 up to 1.6GHz (Clocked 1.3GHz) Cortex A9 Dual Core
Graphics subsystem: Mali400 Quad Core, 2D / 3D / OpenGL ES2.0 / OpenVG1.1. Video Decoding: Support 1920x1080p 60fps
Video Encoding: Support encoding in H.264. 1080p 60fps, 720 100fps
Operating system: Android 4.2.2 (Jelly Bean)
RAM Memory: 1GB DDR3
ROM memory: 8GB (you only can seen arond 5.7G from the system)
Support for memory cards up to 32 gb.
WIFI:
WiFi 802.11b / g / n
HDMI interface: 1920x1080P 60Hz Full HD (maximum can be set below)
Ports:
1xUSB 2.0
1x MINI USB (Power)
1xOTG
1xHDMI 1.4
1x Micro SD card slot
Powered from the mains using a 100 / 240v adapter via mini usb.
Weight: 36g.
Dimensions: 88x32x14mm
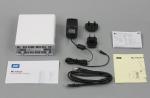
The device came in beautiful packaging (for those who are for a gift or for resale), an unpacked set:

Equipment:
Power adapter for euro socket, input 100/240 V 0.3 A 50/60 Hz, output 5 V 2000 mlA, USB output, suitable for charging tablets and phones, respectively.
OTG cable - length 15 cm
The mini usb cable (power supply) is 1.2 m long.
Mini HDMI cable> HDMI 30 cm, although the site claims 50 cm.
Instruction in English
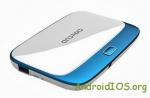
The device itself:
The body is plastic, pleasant to the touch. The build quality is not bad, there are no backlashes, no squeaks.
On the front side there is a logo and ventilation holes
On the left side there are mini usb (power) and USB connectors. 
On the right end there is mini HDMI 
Bottom Micro SD card slot 
Top OTG connector 
On the back there are ventilation holes.
Connecting external devices.
The set-top box is equipped with an OTG interface that allows you to connect many external devices, for example, I have a 4-port usb hub connected, and through it I connect flash drives, an external hard drive, even a joystick.
TV connection.
Connecting the device to a TV is simple, on the one hand we connect to the TV via HDMI, on the other hand we connect it to the network. It looks something like this 
This particular model is capable of outputting video only via HDMI, there are models that can be connected using ordinary tulips, for example, to old TVs that are not equipped with an HDMI input.
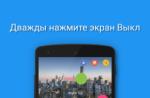
Device management.
This topic is of interest to many who have not yet encountered prefixes. How do you manage it? It can be controlled in different ways, for example, there are a large number of special wireless remotes with a touchpad and a Russian ytsuken keyboard.
For example such 
In my case, a regular wireless mouse is connected, and it suits me 90%, it is a little inconvenient to type text, for example, a request in youtube, but in the age of prompts by the first letters, this is practically not a problem. The mouse takes away, even from the next room through the wall. Of the control features, I only noticed that sometimes you have to press the left mouse button and hold down to move, like on a tablet (this is rarely found on a computer).
The attachment is in operation.
At Full HD resolution and a frequency of 50 Hz, no strong defects were noticed, sometimes a strip at the bottom of the screen jumps (it does not interfere at all), the interface works without freezes, but in the browser the control slows down a little, only the control, the video running in the browser works without problems , youtube app also works without freezes, other apps do too. During operation, the device heats up quite a lot, the hand suffers, it did not measure exactly, but in the region of 50 grams. about.
Internet connection.
It connects to the Internet using WIFI, it is also possible to connect with a LAN wire through a special USB> LAN adapter, but personally I have not seen these adapters live, so I cannot say anything about such a connection. If your WIFI router is far from the TV, it makes sense to buy a set-top box with an external WIFI antenna.
Some screenshots
Home screen, no different from tablets 
Permission support 
Memory 
Standard device information 
AnTuTu test 
AnTuTu Device Information 


In conclusion, I want to say that I liked the device, it copes with its tasks well. It makes sense to pay a little extra and buy a 4-core version, the price difference is small. And I do not advise buying cheaper single-core ones, you can use them, but they barely turn and turn (navigation through the menu, interface), although online videos are shown normally.
Well, a little video of my console:
Unpacking the package:
A small video review:
I plan to buy +40 Add to favourites I liked the review +21 +58
About two years ago, devices of a completely new type began to appear on the shelves of Chinese stores and in online catalogs: the so-called mini-PCs based on ARM processors and the Android operating system, equipped with an HDMI output. The devices turned out to be so successful and popular that soon clones began to be produced in almost every second Chinese basement, and even the most eminent online stores began to sell them.
Mini PC?
Mini PC is the semi-official name for such devices. It would be more accurate to call them set-top boxes, but for some reason this did not take root. The name MK802 or MK808 is often used, in honor of the first models of such devices. In any case, whatever the name may be, we are always talking about a device a little more than a flash drive, with an HDMI output sticking out on one side and several USB ports on the other.
The whole point is that by plugging such a thing into the HDMI port of any TV set, you can immediately turn it into a Smart TV without unnecessary troubles, on which you can watch YouTube videos via a Wi-Fi network, surf the Internet and generally run any Android software, including heavy games. And all this for some 2000 rubles, including an HDMI cable and a remote control.
The back of the stick houses two microUSB 2.0 ports, one full-size USB 2.0 port, a memory card slot and an LED
Background
One of the first such consoles was the Rikomagic MK802 model, built on the basis of the outdated Allwinner A10 SoC (with a 1 GHz processor, 512 MB of RAM, a Mali-400 MP graphics processor) and equipped with Android 4.0. The model went on sale in May last year and is no longer in production, giving way to the MK802 III and MK802 IV models based on the much more powerful dual-core Rockchip RK3066 and quad-core Rockchip RK3188 with 1 GB and 2 GB of memory, respectively. In addition to the HDMI output, all models are equipped with two microUSB 2.0 ports, a USB 2.0 port and a microSD slot, which together allows them to be used as full-fledged computers with a keyboard, a mouse, a large memory card or an external hard drive.
Over time, this line of devices has spawned a huge number of clones produced in a wide variety of Chinese factories. The most famous of them were the iMito MX1 and MX2 with an aluminum body that dissipates heat very well, as well as the Minix Neo line, whose models (G4, X5, X5, X3) did not differ much from the original. All of them are fully compatible with the MK802 III and, in fact, are a copy of it in a different package. With the release of the MK802 IV model, the corresponding iMito QX1 and Minix X7 models based on the quad-core Rockchip RK3188 with two gigabytes of memory immediately appeared.
Later in the article, I will talk about the iMito MX1, which, although somewhat outdated, has managed to acquire a large number of different manuals, improvements and firmwares, among which there is Ubuntu, and its price is $ 30 lower. If you are just going to order a device, then I recommend staying at the iMito QX1 - apart from the additional two cores and a gig of memory, it does not differ so much from the previous model, and much will be relevant for it as well. One has only to prepare for the fact that there are no alternative firmwares, not to mention Ubuntu, for it yet.
Purchase and launch
You can buy any of the devices listed above from one of three sites: dealextreame.com, tinydeal.com, or pandawill.com. They almost do not differ in the quality of service, nor in the prices, nor in the speed of delivery, so choose any one, type in the name of the device and click "Buy now". Beforehand, of course, you will have to make a credit card. In about a month, the package will arrive at your local post office.

I will not go into detail about what this miracle looks like. Everything is clear and without descriptions, I can only say that the rear microUSB port is used only for power supply, so it makes no sense to connect anything other than a charger to it. To turn it on, just stick one side of the stick into the HDMI input of any TV set or monitor (well, or use an HDMI extension cable), and insert the miniUSB cable into the other and power it in any convenient way - even with a charger, at least through a computer.
The gizmo turns on automatically immediately after power is applied, and after 20 seconds, the Android desktop appears on the screen. For ease of control, some manufacturers attach special remotes to their HDMI sticks (which can be bought for $ 10 apiece at the same dealerships). But it is much more convenient to use, at least at first, a simple wireless mouse, it is detected without problems and works immediately after connection. In the future, instead of it, you can use the DroidMote software or the official RKRemoteControl, which allow you to steer the device from your smartphone (and yes, it's still more convenient than the remote control).
After acquiring a mouse, everything else becomes simple and obvious: setting the language, connecting to Wi-Fi, connecting a Google account, installing software. Inside, this is the most common Android, so there shouldn't be any problems with using it. If you really want to squeeze everything out of this device and learn how to use it effectively, then you cannot do without some tricks and hacks.
 Disassembled Mini PC
 Remote control
The mouse is good and convenient, and the keyboard is not bad either, but we must take care of more versatile control methods. Best of all, a smartphone on the same android is suitable for this role, especially since any device of the MK802 series, with the exception of the first two, has its own remote control system using a smartphone called RKRemoteControl.
This system is good in that, having the functionality of consoles that require root rights, it already has a built-in server and does not need root itself. The only thing you have to do is download the application for management from a third-party site (goo.gl/WOrQf) and install it yourself on the control device (smartphone or tablet).
The remote includes four main functions: touchpad (remote mouse), remote keyboard, media player control and navigation (up, down, left, right, home, back, search and so on). In general, the app is very good, although it is inferior to DroidMote, which both works better and includes a joystick. On the other hand, you have to pay for DroidMote, and even get root privileges before doing so.
Another interesting option is to use a variety of Bluetooth mice, keyboards, and joysticks. Starting with MK802 III, the device supports blue tooth, so it will all work without any problems. By the way, so that when using various USB or any remote keyboards, the standard Android keyboard does not appear on the screen, you can install the NULL Keyboard from the market. This is such a stub that replaces a normal keyboard. Before use, it must be activated via "Settings -> Language and input -> Default".

Wired Internet
In the event that for some reason you do not have Wi-Fi (which is very strange in 2013), the device can be easily brought to the Internet using a USB - RJ45 adapter. You can buy one again in any Chinese online store for 3-4 dollars (for example, here: goo.gl/tt9cP), or in a computer store, overpaying three times.
In any case, just plug the adapter into the USB port, enable the Ethernet option in the settings, and if there is a DHCP server on the other end, the system will be on the Internet in a few seconds. If a static setting is used, then in the same Ethernet option for this there is an item "Static IP Settings", where you can independently register the IP, gateway and DNS server addresses.
And again root
Although the MK802 can be used without root and installing third-party firmware, the latter opens up a lot more interesting possibilities. So, having root, you can turn off the display of the bottom control line, which is practically meaningless on the TV, activate the debug mode (ADB) over Wi-Fi, which allows you to easily transfer files to the device, make backup copies of applications, synchronize application data (which is very convenient to use for sharing saves in games), as well as much more.
As with any Android device, there are three ways to root the MK802: using an exploit, flashing an update with root, or installing an already rooted custom firmware. In the next section, I will talk about installing the Finless ROM firmware, and now I will explain how to get root on the MK802 III.
The easiest and most straightforward way to do this is to install a specially prepared update that will add the / system / bin / su command and the SuperUser application to the system, providing access to superuser privileges. To do this, just follow three simple steps:
- Download the update.zip file (goo.gl/gbbDE) and put it in the root of any available memory card.
- Insert the memory card into the device, after which an update message should appear on the screen, followed by a reboot and installation of the firmware.
- After the installation process is complete, remove the card and delete the file from it, otherwise, after plugging it in again, the device will try to update again. After rebooting, the firmware will be rooted, and you can use the full! Screen application to hide the status bar, WiFi ADB to access ADB via a wireless network, PPP Widget to easily connect to the Internet via a 3G modem, and you will also be able to use the device as a server ( more on that later).
Firmware
The system-on-a-chip RK3066 and its later modifications, on which the MK802 is based, starting from version III, differs in that the manufacturer does not open the SDK for its hardware. Because of this, the process of porting other OSes is significantly complicated, and assemblies, for example, of the same CyanogenMod for devices based on RK3066, cannot be found. It remains to be content with the modifications of the standard firmware from the manufacturer. The most interesting of them, I would call the Finless ROM firmware, suitable for MK802 III and analogs. It differs from the stock one in the following features:
- Auto-hide the status bar when starting any application. A very convenient function, available through the menu: "Settings -> Screen -> Auto Hide System Bar".
- The ability to turn on the lock screen. The function is useful in that it allows you to set a pin code so that no one but you can use Smart TV.
- Automatic going to sleep with screen blanking. Fires after a specified period of time after the termination of any network activity. It is included in "Settings -> Display -> Sleep mode".
- Support for location by IP address. Allows, for example, to get more accurate search results or to work correctly for applications displaying weather and other geo-dependent data.
- Fixes a compatibility problem with Gameloft games, which affects almost all RK3066 devices.
- Supports hardware video decoding in XBMC.
- Compatible with Xbox Joystick.
Most important, however, is full support for 1080p video output. The fact is that, although the MK802 supports output at this resolution, Android somehow operates with a 720p picture, and when sent to the screen, it scales it to 1080p. As a result, when viewed up close on Full HD screens, the image looks blurry and text on a white background becomes difficult to read.
The manufacturer did this on purpose, because the device copes with a lot of work in 1080p mode, which is why Android starts to slow down, games lag, and 1080p video loads the device so much that it can simply burn out. If that doesn't bother you, the Finless ROM comes with a Full HD kernel that you can choose at boot time.
Like all other devices on the RK3066, the MK802 III is flashed using the proprietary Rockchip Batch Tool, and the flashing process itself resembles some illogical quest from a bad game. In general, this is done like this:
- We disconnect the experimental device, and plug the power cable into the side OTG connector instead of the rear one. We plug the opposite end of the cable into the comp.
- Load Windows on your computer and download the archive with the firmware and all the necessary tools goo.gl/Df5Ur.
- We unpack the archive anywhere, and run the ROM FLash Tool.exe file contained in it, which displays a window where the inscription “No Found RKAndroid rock USB” should appear.
- In the device settings, activate the drive access mode using "Settings -> Memory -> Menu -> Mass Storage".
- After that, the inscription "Found RKAndroid Mass Storage USB" should appear in the ROM Flash Tool. If so, click on the "Reboot to Flash Mode" button.
- The device restarts and then appears in the Windows Device Manager as an unknown device. To fix this, go to Device Manager, find a device with a name like RK30, marked with a yellow exclamation mark, open it and click the Update Driver button. Next, you should specify the folder with the unpacked Finless ROM to search for the driver, in it x32 or x64, depending on the bitness of the OS, and already there the required OS (Xp, Vista ...). Windows will install the driver and prompt you to reboot. We agree.
- After rebooting, run ROM FLash Tool.exe again, wait for the "Found RKAndroid Mass Storage USB" message to appear. Again we press "Reboot to Flash Mode", wait for the appearance of the same inscription, then press "Erase NAND (IDB)" to erase everything that is on the device.
- (Optional step) If you need a Full HD kernel, find kernel720.img in the upper list of firmware components and rename it to kernel1080.img.
- We press "Flash ROM" and wait for the end of the firmware.
- We are waiting for the system to be fully loaded.
If the system does not boot, repeat the last four steps.
WARNING
- When activating the sleep mode in Finless ROM, do not forget to turn on the constant connection to the network in the Wi-Fi settings, otherwise you will lose connection with it immediately after the device falls asleep.
- In the Finless ROM firmware, the device name is replaced with GT-I9100 (Galaxy S II) for compatibility with a large number of applications in the market. So don't be surprised to see the Samsung Galaxy S II instead of the familiar MK802 III.
Server
The great thing about the MK802 is that you don't have to connect HDMI to work. This feature, combined with the tiny size of the device itself, makes the MK802 a tempting candidate for a home power-efficient and very good-performing server. One problem remains to be solved - Android is not suitable for such tasks.
When installing Picuntuneed to flash
kernel to recovery section
The easiest way to do this is to install the Servers Ultimate app from the marketplace. It is no less than a collection of about 40 different servers and 14 network monitoring and management utilities. The app lets you run servers like DHCP, DNS, CVS, FTP, MySQL, HTTP, PHP, X11, SMB, and even Styx. Moreover, this is not just a collection of servers in a beautiful graphical shell, which can only be started and stopped with standard settings. Each server has a graphical configuration interface that allows you to change many options. Of course, you cannot configure optimized nginx with Ruby on Rails in this way, but it is very possible to run your own FTP and SMB server to share files from a hard drive connected via USB.
Servers Ultimate fully integrates into Android and allows you to start servers on boot or when events occur, view server status and logs using a user-friendly interface, and much more. In general, it's just a dream, but it's all worth it - even taking into account the seasonal price reduction - $ 10. The free version allows you to run only two servers at the same time, and even then for 14 days (Trial).
However, in the market you can find many others, mostly of lower quality wrappers for running servers. The same droidsshd for SSH, for example. If you have root, you can also use tools to install a Linux distribution, such as Linux Deploy, and install the necessary servers already in it. An even more interesting option is the BotBrew tool (botbrew.com), which allows you to install Linux software, including Apache and Samba, right into Android. By the way, in the next issue of the magazine there will be a separate article about him, do not miss it. Well, the surest option is to install a real Linux distribution on the device.
Ubuntu
Despite the absence of any normally working firmware based on CyanogenMod, for MK802 III and clones there is quite a high-quality and fully functional port of Ubuntu 12.10, and even installed as an alternative OS next to the main code.google.com. In fact, this means that the MK802 can be a very good thin client, server or simple PC for purposes such as "check mail" or "watch cats on the Internet." For a $ 60 price tag, that's very, very good.
The installation itself includes two steps: the first is to flash the alternative kernel into the recovery section of the device and the second is to install the system itself on a USB flash drive or SD card (you need a card with a size of at least 4 GB). To flash the kernel, we will use the ROM FLash Tool.exe, which is already familiar for installing the Finless ROM firmware. Download the goo.gl/uXQBS kernel, run the ROM FLash Tool.exe, but this time, at the top of the window, uncheck all fields except the sixth (recovery), click on the last field and select the previously downloaded file. Click "Flash ROM". It's all.
To install the Ubuntu distribution itself on a memory card, boot into Linux on a desktop machine (without it in any way), download the pre-picuntu.sh goo.gl/RsRlS script, run:
Bash pre-picuntu.sh
and follow the instructions. Alternatively, you can do the installation yourself. To do this, you need to create an ext4 partition on the memory card called linuxroot, and then unpack the archive with the goo.gl/y0Kq6 system into it. Next, insert the memory card into the device and reboot into recovery mode in one of two ways to choose from:
- With the Reboot app in Finless ROM.
- By executing the command "su && reboot recovery" in the Android terminal (you need root). The system will then reboot into Ubuntu. If everything is OK, a login window will appear, the password for root is 12qwaszx. To switch back to Android, simply reboot the device in any way (even by pulling out the power cable).
WWW
- Branch MK802 III on w3bsit3-dns.com: goo.gl/LDZAL
- Firmware for MK802 III and compatible devices: goo.gl/QSCLQ
conclusions
The MK802 is a great device that beats its price with interest. With the right level of knowledge and patience, he can be made to do absolutely everything, from playing Internet radio to hosting files. It can be turned into a thin client, or you can buy a bluetooth joystick and play games. Despite its Chinese origins and ridiculous price tag, it has virtually no design problems and can work for weeks on end.
The hero of today's story is a gadget designed to make it possible to work with the Internet through a TV, which initially does not have support for Smart TV or the Internet in any form at all - neither via cable nor via WiFi. This miracle is called the Prefix Android Smart TV Box for TV, which is essentially a mini computer (Mini PC Box) with a preinstalled mobile operating system. This device connects via modern HDMI or old-fashioned AV cable to any TV with these connectors, and turns it into a large tablet. In this manual, I will tell you in detail how to connect and set up a TV set-top box.
Features of TV Box Android Mini PC Box
Surprisingly, even in 2018, while shopping, I found that not all modern fancy TVs even have a simple Ethernet port for connecting an Internet cable. What can we say about wi-fi. So the invention, invented by the Chinese several years ago, is more relevant today than ever.
Moreover, Android TV set-top boxes, like any electronics, are being improved along with other technologies. Therefore, top models today support 4K video, wifi in the 5 GHz range, and many other “goodies” that make our life more enjoyable. And it will completely allow you to get rid of the need to pay a subscription fee for a television antenna, by default, carried out to an apartment.
So let's figure it out. There are now many modifications of TV set-top boxes on Android for TV on the market, differing mainly in the size of RAM, processor power and additional functions, but they all have common features:
- WiFi support
- Support for drives via OTG cable
- Built-in Android system
- USB ports for connecting peripherals and flash drives for watching videos or photos
- Many models have slots for SD memory cards
Installing, connecting and configuring the Android TV box does not require any skills and works directly, as they say, “out of the box” without any additional drivers or programs - connected via HDMI cable to the TV, and off you go.

Programs for an Android set-top box are no different from applications for a regular phone - in most cases they immediately have Google Play, YouTube, a browser, and so on - as on any tablet. Accordingly, new applications are installed in the same way as in any smartphone through the Play Market. They can be controlled either through a connected mouse or keyboard, or through a special console.

Instructions on how to connect an Android TV box to a TV as a Smart TV
But let's move on from words to practical instructions and see how to connect Android TV Box in reality. Before purchasing a model, make sure your computer has HDMI or AV input (popularly called “tulips”). The latter is on all TVs with a “glass” tube, which means that even old TVs inherited from parents and which have been gathering dust on the distant mezzanine for years can be connected to the Android TV set-top box, and go online from them or play movies, music or photos from flash drives.
The same applies to the Android Smart TV itself - most of the inexpensive small models only have an HDMI connector, if you have a very old TV, then it will not work.

At the same time, keep in mind that if your TV supports HDMI, then naturally use it to get the highest quality picture. Even on a good modern TV, connecting a Smart TV Box via AV tulips will give a mediocre image, like on a tube TV. Next, turn on the set-top box and select HDMI or AV as the input signal source in the TV menu, depending on which cable you connected the Android TV Box with.
In short, you need to have identical connectors on both the set-top box and the TV set. Better, of course, HDMI - the quality will be noticeably higher.
Let's move on to the practice of connecting a TV set-top box on Android to a TV. We choose our option:
- HDMI cable
- or AV tulips for old TVs

and connect the TV Box to the TV


A picture familiar to all Android users will appear on the screen.

Now you can install everything on the set-top box and enjoy watching.
How to set up an Android TV box via a WiFi router?
Here you can already use the pre-installed utilities, but working with Android TV Box would be incomplete without its main advantage - the ability to access the Internet. In order to configure the set-top box to work on the Internet and connect to a WiFi router, we do the same as in the tablet:


After that, you can already enjoy all the benefits of the Internet - download applications, watch movies on YouTube, browse sites, play games, and so on.
How to control Android TV Box from your phone?
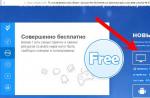
To facilitate the management of Smart TV Box on Android, many models support operation as a co, which must be purchased separately. An alternative to it can be an application that is installed on a smartphone or tablet and turns it into a remote control for the set-top box.
There are many such programs - I have already introduced you to one of them. It was pre-installed on all Xiaomi smartphones. Its advantage is that it interacts not only with TV set-top boxes, but also with televisions, air conditioners and other household appliances and other elements of a smart home.

However, you simply cannot download it and install it, and even more so when it comes to an iPhone. Therefore, today we will talk about another universal and, most importantly, cross-platform application - Cetus Play. I briefly talked about it in the article about. It can be downloaded from both the Google Play Market and the Apple Store. And that means install both on Android phones and on iOS - iPhone or iPad.

To control an Android TV set-top box from a phone, 2 conditions are required:
- Connecting both the set-top box and the smartphone to the same wifi network
- Installing an identical application on both devices.
This means that you will need to go to the same Play Market on the set-top box and install the version of the Cetus Play program for Android TV. It is also free and freely available.