Despite the fact that there are so many smart gadgets around us and the possibilities associated with them, we are not always easy and simple to navigate in all this ... So let's say even a simple copying of audio files from CDs can cause difficulty. Indeed, the manufacturer did not make this process intuitive, which is why you probably came to our page to find out how to copy audio from a CD or as it is also called CD to a computer. This is exactly what our article is about.
How to set up Media player to rip music from CD
First of all, you need to open the player, the standard program that comes by default to the system. For this...
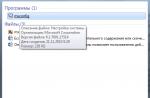
1. Open Start> All Programs> Windows Media Player. If you suddenly do not have "Start", then press the Windows + R keys at the same time, and then copy and enter wmplayer.exe into the line. Then click OK. The player will load in front of you.
2. In Windows Media Player (Library mode), click Organize> Options. See the picture below ...

As soon as we hit Windows Media Player Options, the fun begins. We look ...

Here you can select the path to save the files. We would recommend that you immediately change the path to the "Desktop", so as not to scour later where everything has been saved. You can also choose audio formats:
WMA 48-192 kbps;
WMA Pro 48-192 kbps;
WMA (variable bit rate) from 40-75 kbps to 240-355 kbps;
WMA without data loss 470-940 kbps;
MP3 128-320 kbps;
WAV is a lossless audio format.
We also select the quality by moving the slider from left to right and vice versa.
How to rip audio CD recordings to your computer
1. If you still have not inserted the CD, then insert it.

2. Check the boxes for the tracks you want to copy. All or those that you want to take. Perhaps a warning about rights will pop up, that they must be observed and all that, of course we say that we all know ...
3. Now go to Unknown album> Copy disc to library ...

4. All files will start to fill in green and thus copied. Wait for the end of such copying. Now all that remains is to find them on the computer.
5. If you changed the path, see what we talked about above, then we are looking for records there. If we did not touch anything, then we open it along the following path ...
That's all. You have achieved what you wanted, now you can be distracted by other things, in accordance with your priorities!
Although compact discs are no longer in vogue, because they are intensively squeezed out by flash drives, nevertheless I decided to write an article today about how to rip entire DVD / CD to a computer or another CD. I think this instruction will be interesting and useful to many. We will copy the contents of the discs using the UltraIso program, thanks to which you can create disc images, burn them to flash drives, hard drives, CDs, etc. The program is easy to learn and at the same time functional, so we will use it to copy discs ...
Note: you can copy the contents of the disc to a computer and then write it to a blank disc using the standard tools of the operating system. However, if you copy the contents of the bootable disk in this way, and write to a new blank disk, then the new media will not be bootable.
How to copy DVD / CD disc to computer
If UltraISO is not installed on your computer, then download and install it first. So, the first thing to do is insert the disc into your DVD-ROM drive. Then we launch the UltraISO program,

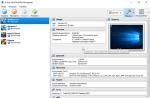
Now we need to click on the "Create CD Image" button,

A window for creating an image will open, where we need to specify the main parameters. First of all, we will notice whether the correct drive is selected, then we indicate the location on the computer where you want to save the disk image (for example, I chose the Desktop). Click the "Make" button,

The process of creating a disk image will begin,

Upon completion, you will see such a window,

Click no.
The disk image has been successfully created and saved to the local disk.
How to Rip DVD / CD to Another CD
In the above way, we saved the disk image to the computer. Now if you want to make a copy of the disc, then you need to burn this image to a blank CD / DVD disc. Well, let's get started.
We insert a blank disc into the drive. Now let's open the previously created * .iso format disco image,
Hello, I will briefly express my problem. There is very little experience of working with a computer, so do not scold too much for questions. I recently bought a laptop with a pre-installed Windows 7 operating system. I know that it does not have a built-in program for working with CD and DVD discs, I mean recording and so on. Accordingly, the question is, the information I need, because there is probably a good and proven free software? I tried to use the ImgBurn program, but in my opinion there is no direct copying of discs in it, or I just did not find it? I also want to install Ashampoo Burning Studio, everything will probably be fine there. Dmitriy.
Second letter. Faced a problem that I cannot fix on my own. I figured out the settings of the Nero 8 program and apparently changed something in the Nero Burning ROM application, now, instead of copying the disc I need to a blank disc, Nero tries to Save the image file to the hard disk.
And in Nero Express I create an image from my files and burn it to a disc, but the information on this disc is not readable at all. Thank you in advance. Vladimir.
How to write from disk to disk
As you rightly noted, there are quite a few free programs that could rewrite almost any CD or DVD you have. I personally prefer to work with two free apps Ashampoo Burning Studio and ImgBurn, which have long proven themselves on the good side. Well, two paid Nero 8 and Nero 6.
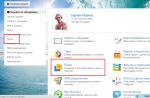
Unfortunately, Windows 7 itself can only burn the finished image to a blank CD (if you hover the mouse over any image and right-click, a menu will open in which you can select Open With, and then select Windows Disk Image Writers).
And very often one of the very first problems that beginners face after purchasing a computer is finding and installing programs for working with CDs, DVDs.
So our freeware ones are Ashampoo Burning Studio and ImgBurn. It is very easy to work with them, they are in Russian and even a beginner can handle them. How to download and install these programs is described step by step in our article, you can follow the link and familiarize yourself, I will not repeat myself. In this article I will go directly directly to working with them. For those who are interested how to write from disk to disk various information using the program Nero 8 and Nero 6, and what errors may be made in this case, can go directly to the end of the article.
Ashampoo Burning Studio, the main window of the program, as you can see, its capabilities are quite large and it will undoubtedly come in handy for you. So insert the disc that you need to copy or rewrite to the CD / DVD drive.
We choose Rip CD / DVD / Bly-ray disc.

Next, you need to select the source drive, those users who have installed programs for working with virtual drives, for example Daemon Tools, must specify their real drive here, in my case Optiarc DVD RW AD-7191S and click next.


We insert a blank CD and DVD disc, depending on what we are copying. Push Burn DVD

There is a short burning process and the disc is ready.


How to write from disk to disk the files we need using ImgBurn. Before us is the main window of the program. This program was originally intended primarily for creating and burning almost any existing image. You can also use it to create an audio CD from files: AAC, APE, FLAC and the like. It is possible to create a DVD video disc from the VIDEO_TS folder.
In this program, there is no direct copying CD / DVD-disc function, but if you do not need to rewrite discs often, then you can first create an image of the disc you need in this program, and then burn it to a blank disc.
In the main window of the program, select Create a disk image.
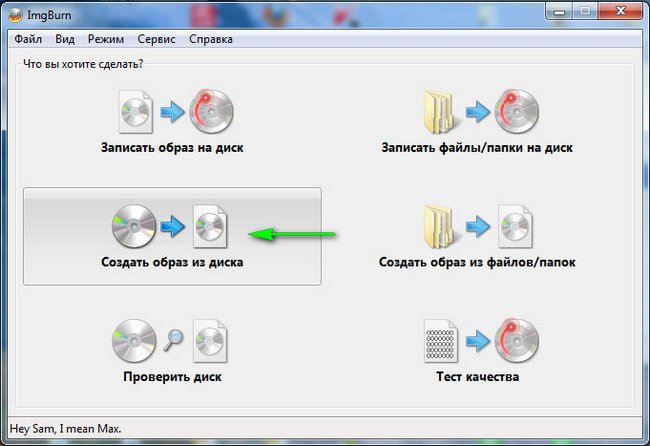
We select the destination folder, that is, where exactly on our hard disk the image will be created.

You can select a desktop and give the image any name, for example, My Image, then click the Save button.

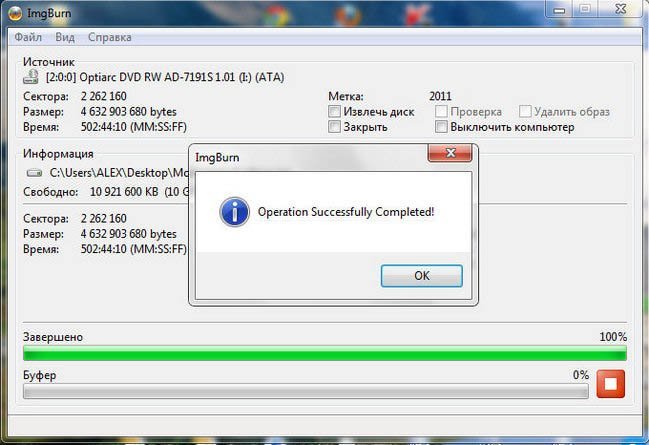
Press the read button. The image is being created.

Now it's the turn to burn this image onto a blank disc, insert it into the CD / DVD drive.
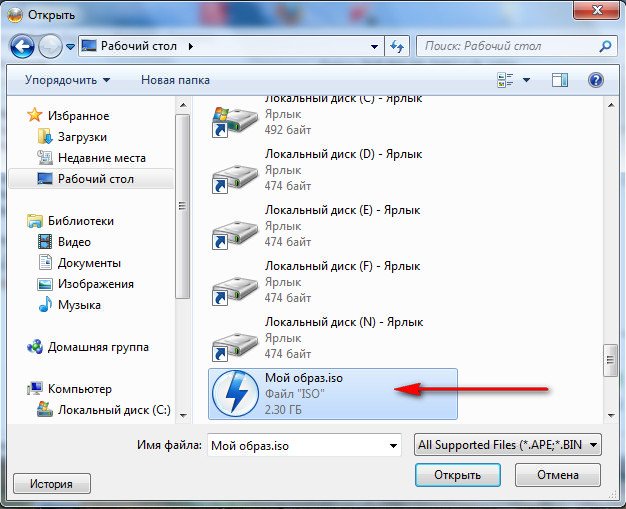
In the main ImgBurn window select Burn the image to disk.

Under Select a file,

select our image and then Open.


Now let's take a look at working with Nero 8.
The initial window of the Nero 8 -Nero StartSmart program, from which we can run the following programs with which you can copy the files we need from disk to disk and more.
Nero StartSmart- a module for launching your ready-made projects
Nero Burning ROM- a special module for creating images and burning discs
Nero Express- a very simple module, one might say for the same purposes.
Let's start with Nero StartSmart - insert the disc into the drive and click on the Copy Disc button, then Copy.

After a short copying process

insert a blank disc for recording and press Download, in a couple of minutes our disk will be ready.

The same can be done with Nero Burning ROM. Select Launch Applications and Nero Tools, then Nero Burning ROM.

If we want to rewrite a DVD, then we will select a project DVD, then DVD-Copy and most importantly, if you intend to rewrite a DVD disc, and NOT create an image, then in the List of Recorders item your CD / DVD drive, in my case Optiarc DVD RW AD-7191S. Push Copying.

The copying process will begin, then you will need to insert a blank disc.

Nero Express is also very simple.

Image, project, copying. Copy of entire DVD.

We also pay attention to the fact that Source drive and Receiver drive were specified correctly, click on the Copy button.
Most music CDs are copy protected. Opening the list of tracks in the explorer, you will see the files (with the extension .cda), the size of which does not exceed 1Kb. Of course, this is negligible for music files. The fact is that these are shortcuts and, having copied them to the computer, they will be launched as long as there is a disc in the drive.
But there is a way to transfer normal files (mp3). For this we do not need third-party software, but only a standard player Windows Media Player... Let's run the program through the " Execute". To do this, press the key combination Windows and R... Then, in the text line, enter the command wmplayer.exe and click " OK«.
The program will appear on the screen Windows Media Player... Before we start copying music, let's change some settings. In the list " Arrange"Select the section" Options«.

In the program parameters window, go to the " Rip Music from CD". We indicate the format of music files (best of all mp3) and increase the sound quality (at least 128 kbps, preferably 256 kbps). We confirm the changes made using the buttons « Apply" and " OK«.


A list of all music files will be displayed. Checkmark the tracks (tracks) that need to be transferred to the computer. And select the item " Copy from CD«.

It remains only to wait until the selected tracks are transferred to the computer.
DVDs, like other optical media, are hopelessly outdated. At the same time, many users still store various videos on these discs, and some have solid collections of once purchased films. In this article, we will talk about how to transfer information from DVD to computer hard drive.
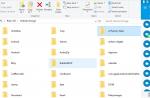
The easiest way to transfer a video or movie to your hard drive is to copy the folder named "VIDEO_TS"... It contains content, as well as various metadata, menus, subtitles, cover art, and more.

This folder can be copied to any convenient place, and for playback you need to drag it in its entirety to the player window. For these purposes, VLC Media Player is perfect, as the most omnivorous in terms of file formats.

As you can see, the screen displays a clickable menu, as if we were playing a disc in a DVD player.

It is not always convenient to keep a whole folder with files on a disk or a flash drive, so later we will figure out how to turn it into one complete video. This is done by converting data using special programs.
Method 1: Freemake Video Converter
This program allows you to convert videos from one format to another, including those located on DVD media. In order to perform the operation we need, there is no need to copy the folder to the computer "VIDEO_TS".

Method 2: Format Factory
Format Factory will also help us achieve the desired result. The difference from Freemake Video Converter is that we get a fully functional free version of the program. However, this software is a little more difficult to master.
- After starting the program, go to the tab with the name "ROM Device \ DVD \ CD \ ISO" in the left block of the interface.

- Here we press the button DVD to Video.

- In the window that opens, you can select both the drive into which the disc is inserted, and the folder, if it was previously copied to the computer.

- In the settings block, select the title next to which the longest time interval is indicated.

- Define the output format in the corresponding drop-down list.

- We press "Start", after which the conversion process will begin.

Conclusion
Today we have learned how to transfer videos and movies from DVDs to a computer, as well as convert them into one file for ease of use. Do not postpone this business "on the back burner", as discs tend to become unusable, which can lead to the loss of valuable and dear materials.