The computer starts to slow down? Do files and programs take a long time to open? Are there any failures all the time? All this may indicate a hard drive failure. How do you know the status of your hard drive? You will find out in this post.
Hello. Today I will tell you how to test and repair your hard drive.
Indeed, the hard drive can be the cause of slowdown and malfunction of the computer. The fact is that the hard drive is constantly in use. We constantly write information on it, and then erase it. There is a constant overwriting of data on our hard drive. All this can lead to malfunctions in its work. But how do we determine the health of a hard drive?
For this, quite a few various programs have been created, we will consider one of them today. This program is called "HDD Regenerator". Why did I choose this particular program. Yes, simply because this program is quite easy to use, for example, if you compare it with the Victoria program. Although, of course, the Victoria program has more features, but it is more difficult to work with it. In general, today we are working with the "HDD Regenerator".
Features of HDD Regenerator
This program tests the hard disk, and also performs recovery of bad sectors (bad sectors). These are the main features of this program.
You can use the program both from under Windows, that is, with the operating system turned on, and from under dos, without using the operating system. The control of the program is the same in both cases. The only difference is how to start the program. Below there is a video in which I showed how to use the program with the operating system turned on, therefore, here I will describe the second option, namely how to use the program from under dos. Let's start.
How to use HDD Regenerator
First you need to install this program. The installation process is normal, so I will not describe it. After installation, you launched the program. The program window will open in front of you.

In this window, you need to do the following:
- Select "Bootable USB Flash", click on it.
- Next, you will need to select your USB device, the flash drive should already be inserted into the computer. Select it and click "OK".
- Then an informational message will appear, in which you just need to click "OK". The USB stick will be written very quickly, and you will be prompted to restart your computer (in English). Click "Yes", the computer will restart.
Now we do the following:
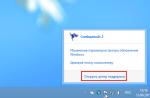
- While turning on the computer, press and hold the "F12" key. This is necessary in order to launch the "BOOT MENU". On some computers, it starts differently, if it does not start for you, look on the Internet to see how it starts on your computer.
- In the "BOOT MENU" select boot from "USB-HD" (this item may look different, for example, "USB-HDD").
- After that, the program will be loaded, with which we will work.
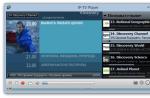
The program opens and you are prompted to select the drive you want to scan. Select the desired one by pressing the corresponding key (number).


- Prescan - This option will show you bad zones, if any.
- Normal Scan - this option will scan and restore bad sectors.
- Version Info is information about the hard drive.

- Scan and repair is a scan and repair.
- Scan, but do not repair is to scan, but not repair. It will just show the bad sectors.
- Regenerate - this option overwrites the entire disk, even if there are no bad sectors.
I choose the first option, press Enter.
Now you need to choose which sector to start with. I choose the first option to start scanning from sector zero. I recommend that you do the same. Press one and press "Enter".

So the scan has begun, and if the program finds bad sectors, it will restore them.

After verification, a similar window will appear.

In order to exit the program, press the "Esc" key. One more thing, often after pressing "Esc" a black screen with an input line appears. Just click on the restart button on your system unit. After rebooting, do not press anything, Windows will boot automatically.
That's all. You have learned how to test and repair your hard drive. If not everything is clear, watch the video, on it I showed the process of scanning the hard drive. It should be noted that this method only helps in case of hard disk failures, it is unlikely that it will help if, for example, you dropped the hard disk on the floor, that is, with physical damage.
You can download this program on the Internet, and also this program is on the bootable USB flash drive that we created earlier.
Well, on this I will end this article. I hope you found it helpful. Subscribe to or channel "PC instructor"
Many of us are familiar with the situation where using a computer becomes problematic due to the fact that your hard drive suddenly refuses to work correctly. The most common option is the so-called bad sectors that cannot be read. One of them is the HDD Regenerator program.
Purpose of the program:
- Diagnostics of software faults, treatment of bad blocks.
- Hard disk diagnostics () and real-time status monitoring.
- If the OS does not boot due to errors on the HDD, you can quickly write a bootable USB flash drive and bring the hard drive into working condition.
Quite often the reason for the inoperability of the disk. The above program is designed specifically to fix this problem.
Download the installer of the program, install and run. By the way, the latest versions are paid, but there is always an opportunity download demo version that works with constraints.
Before starting the program for the first time, be sure to disable all running applications, including antivirus. Otherwise, the operation of the HDD Regenerator may turn out to be incorrect or completely impossible. The program will warn you if you have not disabled everything and you can correct your mistake
The program interface is simple and straightforward. After starting, you must scan your hard drive by clicking the corresponding button.
Once the process is complete, you will see a list of all the logical drives on your PC in front of you. Select the drive to scan and click “Start Process”.

I must say that all actions will be performed in the command line window, so you will need basic knowledge of English. But even if you do not have them, then it's okay!
There are only four items in the menu: scanning with restoration of damaged areas, conventional scanning (without "curing"), restoration of sectors in a separate part of the disk and displaying statistics after the scan is completed.
To select an item, enter the corresponding number from the keyboard and press "Enter". Then we calmly wait until the program completes its work.

After the scan is complete, you can view the statistics:
- number of "bad" sectors [B]
- the number of recovered [R]
- and just found bad sectors [N],
- as well as the total number of "bad" sectors [R]

When the trial version of the HDD Regenerator program comes across a bad block, it becomes clear why the program is paid. The first she heals, and to restore the rest, you need to pay for the full version.
On some sites you can find information that the program is unique and by "surface magnetization reversal". It is not, the program does not do anything supernatural. It just overwrites badly read sectors over and over again. As a result, the soft-beds will be overwritten, and for more complex ones, the standard Remap procedure will start.
The program is quite suitable for the treatment of Soft-Bad blocks, but given that there are good free analogues, it is better to use them. For example, or.
The hard drive is not an eternal component of the computer system. Unfortunately, sooner or later it fails. The reason for this is demagnetization, as a result of which bad sectors appear. But what to do to prolong, or even restore the hard drive's performance? According to the assurances of many experts, one simple program will help with this, and it is about it that we will talk today. To be more precise, the article will tell you how to use HDD Regenerator 1.71, but right away it is worth clarifying that the guide is suitable for other versions of the application as well.
Testing
You will be interested in:
Since the developers of the program position it as a tool for recovering bad sectors of a hard drive, it would be reasonable to start an article on the topic "How to use the HDD Regenerator" directly from this function. However, it will not be entirely correct to do this, because there can be many reasons for a drive failure. It is for this purpose that the software has the S.M.A.R.T.testing function. This is one of the most reliable disk diagnostic systems, so it is recommended to use it before proceeding with the "repair" of the drive.
As a result of a rather lengthy analysis, the program will show you the status of the hard disk. If there are no problems with it, then you will see the inscription "OK". If it is different, then you can be sure that the problem lies in the bad sectors and you need to use the option to restore them.

Disk recovery
The guide on how to use the 2011 HDD Regenerator, we will continue directly with the most important feature of the program - the ability to recover bad sectors of the hard disk. In fact, this procedure is quite time consuming, so be patient and don't miss anything.

As soon as you complete all the above steps, an indicator of the progress of the restoration work will appear on the screen. It is with its help that you can track how many bad sectors were found and how many of them were restored. All that remains to be done is to wait for the scan to complete.
Creating a bootable USB drive
From the guide on how to use HDD Regenerator, you already know how to recover bad sectors. This is the main function of the program, however, not the last. With its help, you can create a bootable USB flash drive in order to drop some program onto it in the future to run it directly from the drive.

It does not last very long. Immediately after the end, the program will notify you of this, after which you can copy the program to the USB flash drive to launch it from the BIOS.
Create a boot disk
The instructions on how to use the HDD Regenerator would not be complete if it did not tell you how to create a bootable disk. In general, this operation is not much different from the previous one, but for the sake of completeness, we will tell you about it in detail:

Now you fully know how to use HDD Regenerator. Of course, there are a few more points in the appendix that were not mentioned, however, they play a mediocre role.
Conclusion
So we figured out how to use the HDD Regenerator program. As can be noted, despite the fact that the developers position it as an application for restoring the health of a hard drive, it has other equally useful functions. You can easily use it to create a bootable disk, USB flash drive or test a drive. In general, the program is very useful and it is recommended to install it on the computer immediately, so that at any time there is an opportunity to influence the operation of the computer.
The hard drive is one of the most important elements of a computer. To avoid serious problems with your computer, you need to monitor the health of your hard drive. If you are thinking about checking the status of the hard disk, then it is most advisable to do this procedure using the program HDD Regenerator .
HDD Regenerator is unique in that it allows you to recover bad sectors of your hard drive, unlike other programs that simply hide them. The first serious signs of hard drive problems include:
1) Long opening of folders and files;
Stages of checking the hard drive.
2. To use HDD Regenerator, it is best to create a bootable USB flash drive or disk with the program, but the easiest way to start checking is to boot from Windows.
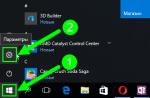
To do this, launch the main program window and open the tab in the upper left corner "Regeneration" , and then select "Start Process under Windows" .

3. In chapter "Choose Drive to Process" select the drive to be scanned and recovered, and then click the small item "Start Process" .

4. The program will warn you that to start the scan, you must close all programs running on your computer. Close as many programs as possible.
5. A black window will appear, in which control is carried out not by the mouse, but exclusively by the keyboard. First, let's run a normal scan in which you can choose whether to recover bad sectors or not. This parameter is located under item number 2 so type that number on your keyboard and hit the Enter key.

6. In the next step, the program will ask you to choose whether you are going to recover the bad sectors or if you want to limit yourself to just checking with a report. By choosing the number 1, the program will start checking for errors and then correcting them, the second item will only check.

7. Observe the progress of the process. At the bottom of the window, the completed process will be displayed, the number of bad sectors found and the number of corrected sectors.

8. As soon as the HDD Regenerator process is over, the program will display a detailed report on the number of errors found and fixed.
Separately, I would like to note the item "Delays detected", which denotes a delay. If the number is too high at this point, then, most likely, the disk check was carried out for a very long time. This indicates that the hard drive is worn out and damaged. In this regard, it is more expedient to replace it.

Conclusion. Of course, HDD Regenerator is not a 100% solution for everyone. As far as possible, the program can help with the recovery of bad sectors, but if the disk is excessively damaged, then the program is already powerless.
Hello everyone! Nowadays there are practically no such people who would not use a computer. Each of us, to the extent of our capabilities and abilities, uses this adaptation, which has already become part of the usual course of our life. But, like any other technique, a computer can break down. Based on this, we are divided into people who only use a computer, and in the event of a breakdown, resort to the services of masters. Others try to repair themselves. For this category of curious people in today's issue, an overview of one interesting program.
One of the important problems associated with a computer breakdown is the unstable operation of the hard disk. Why do I say it is unstable, if it completely refuses to work, the problem is solved mainly by purchasing a new one. Of course, it is unpleasant when your HDD suddenly starts to "junk". A lot of necessary information is stored on it and the loss can be irreparable.
What causes HDD failure? The most common variant is the so-called "broken" sectors that cannot be read. Various utilities are used to check and restore them.
One of the most successful in terms of recovering bad sectors, and without losing information, is the HDD Regenerator program. True, it is English-speaking, but you can understand it. You can also find the Russian version of the program. The developer claims that the principle of the program is based on a special algorithm for remagnetizing bad sectors, and the data structure on the disk remains unchanged.

The recovery program can be run directly from Windows. In this mode, you can also check the S.M.A.R.T disk. However, for full-fledged error correction work, it must be loaded from under DOS from a flash drive or disk, and run
How to use HDD Regenerator from Windows?
So, download the program from any source available to you and install it on your computer. The interface of the program is also good in that it allows you to easily write a program to a USB flash drive or disk without using additional programs - all the tools are in the interface. After that, the window of the program itself will open. Next, we have to do the following operations. In the English version, this window looks like this:

In the Russian version, like this:

Let's start with running the program under Windows OS. We select the topmost, first window (highlighted in red in English, with an arrow in Russian).
Before starting work, disable all running applications, including the antivirus program.
After you have selected the hard disk check menu, a window for selecting hard disk partitions required for recovery will open. After you have selected the required partition for recovery, the check will begin. However, before that, the following message about restarting the computer may appear. In this example, the message says that the disk is busy, and the system prompts you to start the scan from a bootable USB flash drive or disk.

Click on the cancel button and we will see a window that appears with an invitation to select a disk (if you have more than one hard disk):

In later versions, after selecting a disk, we get a menu with the following items:

We translate it into Russian:
- Diagnostics and scanning of "broken" sectors and partitions. Broken sectors will recover;
- Full HDD scan with / without data recovery;
- Re-magnetizes all sectors in a row, including intact ones;
- Information about the results of the HDD Regenerator (sector statistics).
We select the first item and start checking.

To immediately cure the disk, select the item highlighted in red. The treatment process will begin:

The test results are displayed on the screen, the program shows everything clearly:

The recovery process can take a long time. Modern hard drives are large enough. To restore the disk completely, you need to purchase a licensed program, since if you come across an unlicensed one, it will check only the first sector.
How to burn HDD regenerator to a USB flash drive or disk
If you are going to work with the program via a USB flash drive, then you need a medium of at least 1 GB. It also happens that sometimes flash drives may not boot on some laptops. In this case, you can burn a bootable CD. We launch the program and see a familiar window:

Here we select the second window (highlighted in red). The program will format the media and install boot files on it, after which the computer will reboot.
Configuring BIOS to run HDD Regenerator from under DOS
Now you need to configure your computer so that it boots the next time you turn it on from a USB flash drive. It's easy. We insert the USB flash drive into the computer and restart it. If you press the key while restarting your computer F9 or more often F12- you can call the boot menu:

As soon as you see such a window, click F12, you will be taken to the menu for selecting the device from which you need to boot:

On computers with UEFI - BIOS, it is also possible to boot the computer from a USB flash drive, but here you first need to enter the BIOS by pressing the Del key or (F2)

After that, you also need to select the desired flash drive from the list:

On laptops, in order for the flash drive to boot as a hard drive, sometimes you need to additionally disable the UEFI boot mode, (or Secure boot):

Another important point - on many modern motherboard models, in order for the program to see your hard drive, you must first switch the operating modes AHCI v IDE... The operating mode of the hard disk used to be carried out through the interface IDE... With the advent of faster devices on the SATA bus, a corresponding new mode has appeared. For such programs, you need to programmatically switch to the mode IDE... In laptops, this setting is easy to find:

In the UEFI-BIOS, the settings window looks different and is located in different ways, but the essence is the same:

A DOS window will open, where you will need to select the disks for analysis and recovery. Everything is done in the same way as we did earlier. After completion, we are waiting for the statistics window:

In principle, there is nothing complicated when using the program. To clearly see this, you can watch the video
Video on how HDD Regenerator works
Personally, this program has helped me out many times. But I must say right away that it just as it will not improve S.M.A.R.T. It is designed to eliminate relatively light damage. By the way, in combination with Victoria, I restored the performance of some disks. First I went through one program, then another. The main thing was to save the data. See you!