Remote video surveillance is an increasingly popular service. CEOs and directors of companies are increasingly conducting their business remotely or on the road. It is good when an experienced deputy or head of department supervises the staff. And if your assistant is not so good in this matter? Or is there a risk that in your absence there will be a “drain” of clients to the side? Or will theft flourish?
The tasks solved by remote viewing are varied. To start viewing, it is necessary to do port forwarding on the router at the final stage of mounting the cameras, sometimes this procedure is called port forwarding.
A bit of theory
Port forwarding is not related to camera type. Whatever video surveillance system you have: ip or analog - everything is tied to the router. The difference is that analog cameras do not have their own IP address.
circuit diagram remote connection to DVR or IP cameras
Each analog camera is connected directly to the DVR via a cable. The DVR is connected to the network and port forwarding is done in it.
Each ip camera has its own ip address on the network, for example, one is 192.168.0.110, the second is 192.168.0.111. The DVR also has its own IP address, for example, 192.168.0.100. Unlike analog cameras, digital cameras can be connected to a switch anywhere local network. And when you combine switches into one network, you can connect to ip cameras directly and through a DVR.

Setting up the program on a PC for remote connection to video cameras
Each camera has not only its own IP address, but also a web-interface, login and password to enter.
Thus, in reality, you can connect remotely not only to the DVR, but also to the cameras directly. To do this, you need to make port forwarding on the router not only for the IP address of the DVR, but also for the IP address of each camera.
Types of routers
There are a fairly large number of routers on the market, each of them has its own interface. In my opinion, the most sophisticated one is the D-Link DIR-620. I'll try to arrange the routers in order of prevalence (these are purely my observations):
- Tp link.
- d-link.
- Asus.
- Zyxel.
- Huawei.
- Other
In order not to get confused, there are wi-fi routers and they are also called routers.
DVR settings
We have come to the most important point, I will try to suggest the one for which you are reading this article. First, go to the DVR and set up. If you have one camera, go to the camera through the web interface, configure network settings video cameras.

NVR network settings
To remotely connect to CCTV cameras in the router, you need to forward the ports specified in the DVR. For too suspicious users who think about the security of access to cameras, the ports that are opened can be changed, but then there may be difficulties in the settings.

Brief instructions for setting up the DVR
In order not to be mistaken which ports we need to forward, go to the network ip settings of the DVR and open the ports in the router specified in the TCP, HTTP, CDM, RTSP, etc. windows. Depending on the manufacturer's brand and chipset, they may be different. You can also set them yourself manually.
Setting up routers
There are routers with automatic opening of ports for this, they have a function, and we also enable this function in the DVR. In most cases, business owners do not remember or do not know logins and passwords from routers. This feature in some cases helps to save time during setup. The function does not always work, then there is nothing left but to make a factor reset to the router.
Before doing a factory reset, ask the customer about the availability of settings from the provider that provides Internet access.
If you have access to the settings of the router and the DVR, feel free to enable the UPnP function, which will help you quickly resolve the issue of port forwarding. This is especially useful when you manually set all ports and there are a number of other devices on the local grid that you need to connect to. remote access. Otherwise, you will spend a long time figuring out which devices are in conflict with each other.

UPnP auto port forwarding feature. Must be enabled in both the router and the DVR
When you entered the settings of the router (router), find the "Virtual Servers" menu in it, it is there that you need to register port forwarding.
Where it can be illustrated in the screenshots:
- D-Link DIR-300

- TP-LINK

- D-Link DIR-600

- ASUS RT-N65U

nuances
A few more important points and this will conclude the article. If this is not mentioned, you may have difficulties in setting up.

- The HTTP port of the DVR and router is port 80 by default. To avoid conflict on the DVR, change to 88, respectively, forward port 88 in the router.
- External start and internal start ports in the router settings can be set the same, for example, 37777, or different. If you set an external one, then connect to the DVR (camera) through the port that you set. The connection is made through the CMS program included with the DVR.
- The external end port does not need to be set.
- Set the internal IP address for the device to which you want to connect remotely. This may not necessarily be a DVR, but also a printer, PC, network drive.
- Ports 80 - for connecting via a browser (HTTP), 37777, 37778 - for connecting via a CMS program (TCP, UDP), 34567 - RTSP (sometimes called mobile) - for connecting via phone (in older DVRs this value can be 554, 654 and etc.)
I tried to cover this topic as widely as possible so that you do not have any questions, but if you still have them, ask in the comments.

An example of settings for connecting remote viewing of an ip camera from a phone
Watch the video where I spend comparative analysis cameras, it shows how to set up and connect the cameras to the DVR.
Completely forgot.
Examination
Before rejoicing at the completion of the hardware settings and proceeding with setting up the CMS or client phone, I recommend checking port forwarding using an online service. Using the service, you can determine the external ip address of the computer, check whether it is static or dynamic.

Port checking service
The external IP address is required to be entered into the CMS or phone when setting up a remote connection. In the 2ip service, we check the ports for openness or closeness. If they are closed, you will not be able to connect remotely. Check all settings again. Fixing bugs.

Checking ports
In conclusion, I will mention that you can connect to cameras remotely not only directly. There are cloud services with which you can bypass the port forwarding procedure and purchase a DVR. All you need is a permanent internet connection. They have their drawbacks, which ones - this story is for the next one.
Many users need to organize access to the camera via the Internet in order to organize their video surveillance system, for security or for some other purpose. Connecting and configuring an ip camera is not difficult, the main thing is to follow all the requirements and recommendations.
An IP camera is a digital video camera in which the video stream is transmitted in digital format over an Ethernet network that uses the IP protocol. Each IP camera on the network is identified by its IP address.
IP camera location
Many users who have connected an ip camera on their own are not always satisfied with the result. The camera may work with distortions (image slows down, sound is out of sync with voice). Consider the process of connecting and configuring an ip camera through a router in more detail in order to avoid such troubles.
First you need to choose the right place where your ip camera will be installed. If it is necessary to attach it, for example, under the ceiling to ensure best view room, then you need to check whether the signal can come from there (for a wireless ip camera). Take your laptop and place it where you plan to place the camera. If the connection is WiFi assistance weak, it is not recommended to place the camera there. From this place it will not be possible to receive a constant video stream.
You should also be aware that even if correct connection cameras, when the signal is going well, there may still be problems with the signal. The reason, in this case, is not the signal quality, but the use of the same channel. wireless network such as neighbors. In this case, there is competition, and the connection WiFi devices and the connection ip camera - router occurs with great difficulty.
To fix this problem, you need to launch the camera control interface and see if there is a signal from other networks on the same channel. If there is, then the camera signal must be switched to another network. Leave the channel the same.
When you install the camera, you will find desired channel and network, proceed with camera settings to get the best performance. Camera Setup Processes various manufacturers may differ, but they are similar.
Connecting the camera to a router
- For wired IP camera and . In this case, an additional UTP cable is required to connect the router to the camera.
- For wireless IP camera and router. An additional UTP cable is not required.
Camera setup
To be able to access your camera from the Internet or from a local network, for example, in the webcamXP program, you need to start a web server. Before starting the web server, you need to know the type of IP address. To organize broadcasting only in the home local network, you do not need to determine the type of your IP.
An IP address is a unique identifier (address) of a device (router, computer, etc.) connected to the Internet or local area network. IP addresses are divided into internal (local) and external. External and internal IP addresses are divided into dynamic and static. A static IP address is an address that is permanently assigned to a device connected to a network. A dynamic IP address is an address that is automatically assigned to a device connected to a network. A dynamic IP address is used for a limited period of time, mainly until the end of the connection session.
The range of IP addresses that are allocated to local networks:
- 10.0.0.0 - 10.255.255.255
- 172.16.0.0 - 172.31.255.255
- 192.168.0.0 - 192.168.255.255
You also need to know that your router connected to the Internet must have a real (external, white) static or dynamic IP address so that other users can access your camera from the Internet. If you have a gray IP (local IP), then you need to activate the service of a real (external) IP address.
To distinguish a gray address, you need to view the status of your connection and find out which address you have been assigned, and then open the site http://2ip.ru/ and check it there.

In this example, the ip address 95.95.95.100 matches, so this is a direct ip address. If the addresses do not match, you need to contact the provider to connect the direct address service.
The camera is connected mainly through home routers. In this case, the ip camera transmits a video stream through the router. Let's take TP-LINK TL-WR941ND as an example. First go to the camera and through the menu SETTING - BASIC -Network - Information change the port number (HTTP port) from 80 to another port. Let's use port 20000 as an example.
After that, you need to forward this port on your router. Go to the PORT FORWARDING settings on your router. In different routers your way. For TP-LINK routers, you need to open Forwarding - Virtual Server. In the window that opens, add a new entry, as in the example.

Here you can see that port 20000 of the router is forwarded to 192.168.1.102 (192.168.1.102 is the ip address of the camera).
Now you can enter http://95.95.95.100:20000 in the browser and you will be taken to the camera menu. Here 95.95.95.100 is your ip address, and: 20000 is the port specified for the camera and forwarded on the router. After that, you should check the readiness of the camera for full-fledged work. The camera must transmit a good quality image and shoot from anywhere where there is access to the Internet.
If you plan to operate the camera around the clock, then many additional functions You may not need cameras. Therefore, almost all wireless cameras have a motion tracking function that immediately responds to changes in the field of view. When someone passes by the camera, it immediately captures it and transmits the “correct” image with almost no delay. For many cameras, the FTP notification function via the camera is available. In this case, the information is instantly transmitted to a specific site. Different cameras have different functionality. Therefore, before setting individual functions you need to check the manual and make sure that this function is supported by your IP camera. After each setting, it is important not to forget to save the installed functions, otherwise you will have to configure everything from the beginning.
After making these settings, you can configure the IP Surveillance program. This program is used to create and view an archive of video images of IP cameras from a computer. The program allows you to simultaneously view and record images of up to 16 IP cameras (704x576 resolution at 25 fps for each channel). With the help of such a program, it is quite simple to organize round-the-clock security of an office, warehouse, store, house, parking lot or apartment.
The program can work with any device that can receive JPEG or Motion-JPEG. To do this, go to the IP Surveillance – MAIN Console menu and click CONFIG (settings), then go to the “Cameras” tab and click “Paste”. Then register all the camera parameters by analogy, as shown in the screenshot below.
For stable access to the ip camera via the Internet, the best outcome would be if your "ip address" is statistical. If not, then you can contact the provider and activate this service (but you will have to pay extra for this according to the provider's tariffs).
How to find the ip address of a surveillance camera?
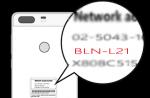
To forward the port for the ip camera, you will need the “ip address” of the camera: it is indicated either on the camera itself or in the accompanying documents that make up the package.
As part of this example let it be "192.168.11.11".
Now about the main thing. To access the ip camera via the Internet, you need to bring your “ip address” and the camera address to the same subnet.
Let's say (as suggested above) the "ip address" of the camera is "192.168.11.11", and 192.168.0.11.
In order to bring them to the same subnet for a while on the camera subnet (192.168.11.12): now you can safely enter the camera interface for configuration.
Setting up an ip camera for viewing via the Internet
- - enter its “ip address” into the address bar of the browser (check the login and password for entering either on the camera itself or also in the documents) or you can use the installation disk that is also supplied with the device;
- - now go to the tab "Setting" (Settings) - "Basic" (Basic);
- - further the section "Network" (Network) - "Information" (Information);
- - in the line "ip address" enter the address that is with your computer (192.168.0.12);
- - and in this section, pay attention to the line "HTTP port": by default, the camera's standard ip port is number 80, but sometimes providers block this port. Therefore, we recommend changing the port number to any suitable for this (fortunately, the range of possible ports is huge). For example, "7777" and click "OK".
- In addition, we recommend that you bypass the ports of ip cameras with the following numbers: "21", "23", "25", "433", "435", "1243", "137", "139", "555", " 666", "1025" and "7000" - according to statistics, they are the most susceptible to virus infection (or can be used to gain unauthorized access to your ip camera).
- - then go to the tab "System" (System) - "Initialize" (Initialize): in order for the changes to take effect, click "Reboot" - to reboot the ip camera.
Now go back to the properties of your network and return the old "ip address" 192.168.0.11.
How to open a port to access an ip camera from the Internet?
After completing the above steps, proceed to setting up the “forwarding” of the port (saved in the camera’s ip settings) on the router. As part of the example, let's look at how to forward a port for an ip camera on a TP-Link router.

So, to connect an ip camera to the Internet:
- - go to the router settings and go to the section "Forwarding" - "Virtual Server" (Virtual Servers);
- - click "Add new" to create a new rule;
- - in the first line "Service port" the number of the port to be opened (in the example it is "7777");
- - in the line "IP address" enter the address of your ip camera "192.168.0.12";
- - in the "Protocol" line, you can choose which protocol the opened port belongs to (or just specify "ALL");
- - click "Save" and reboot the router with saving the configuration.
You can check if the port is open using the "2ip" service.
As for routers from other companies:
ip camera via D-Link router:
- - go to the "Firewall" - "Virtual servers" section and click "Add";
- - in the window that opens, enter the name of the port to be opened (any convenient for you);
- - indicate which protocol the port belongs to - "UDP" or "TCP";
- - in the lines "External port (initial)" and "Internal port (initial)" enter the number of the port to be opened;
- - and in the line "Internal IP" enter your "IP address".
ASUS:
- - go to the section "Internet" - "Port Forwarding";
- - in the lower part of the "List of forwarded ports" window;
- - then fill in the "service name";
- - specify the "Port range" (if it is one, then only the number, if it is in the range, then specify it through a colon: for example, "7777:8888");
- - select your "IP address", "Protocol", click on "+" and "Apply".

netgear:
- - go to settings and find "Port Forwarding/Initiating Ports";
- - filled in according to the same principle: "service name", "Protocol", "Start port", "End port" and "IP address".

How to connect to ip camera via internet?
Now in order to access the camera with local computer it is enough to enter the “IP address” of the camera + the number of the saved port “192.168.0.12:7777” in the address bar of the browser.
The rest of the cameras are configured according to the same principle.
Today, the use of IP cameras is popular. They are installed in public facilities, mainly to capture various images. Each device has an internal web server, and it can fully function with Internet networks using a Wi-Fi connection or a WAN or LAN network. Each device has its own IP address, which can display video images on the screen of any personal computer that has internet access. To view video images, it is not necessary to install a special software, it is enough to have a browser.

In addition to the standard image transmission, some devices have additional functions:
- sound reproduction;
- ability to transfer voice messages through the built-in speaker;
- installed motion sensors, night vision, etc.;
- Possibility of e-mail notification.
Cameras are used not only for the safety of surrounding citizens, they are also installed at various work sites, such as mines. It happens that video surveillance serves for cultural acquaintance of people with the territory.
Since most people switched to video surveillance, the question arose of how to connect an IP camera to a computer directly. Of course, users who are not well versed in computers will not be able to immediately connect a video camera, but those who communicate with the computer on “you” will certainly be able to do this.

Video camera installation
An IP camera is connected directly to a computer through a connection. This method connections of an IP camera powered by twisted pair are familiar to everyone, because they connect WiFi routers, as well as a direct wired internet connection, set-top boxes, and a host of other miscellaneous hardware. If two or more video surveillance devices need to be connected to the computer, then the IP camera is powered over twisted pair in the same way only with the help of a router.

Each device has its own IP address, which you must know to connect to a personal computer. There is special programs, which help to determine the IP address of each device individually. Also, usually complete with a video camera should go installation disk, which contains device drivers and special programs.
After you know the IP address, you should change it using standard or downloaded programs, since your local address must match the local network address. It is possible to change the IP address via the local network. To do this, go to its properties and select the Internet Protocol. In the window " IP address» enter the updated address, and in the window « Main gate» Enter the address of the video camera.

After that, access to the device can be obtained by entering its address in the browser. When you go to the IP address of the device, you can immediately connect to it and see the image. So in a simple way used by everyone who wants to see their own webcam from the monitor screen. In addition to the fact that you can record from an IP camera to a computer, it is possible to provide a connection for an IP video surveillance camera to a DVR.
The process of connecting a camera that has a Wi-Fi interface
To accomplish this task, you must perform the following steps:

After all the steps taken, the video link should work and be displayed in the browser of a personal computer.
To connect multiple cameras, you need to have router. The router has its own input for connecting to the Internet and many inputs for connecting IP cameras. It is configured in exactly the same way, the only difference is that instead of one address, a set is written, since each device has its own unique address, and it must be registered to access the device. Each camera has a unique port number, and the fourth digits must be different.
How to connect an IP video surveillance camera without a computer
It is also possible to use the connection without a PC. For this use special registrar and storage disk data that contains the recording from the IP camera. All this is connected to the monitor directly and displayed on the screen.

This method is used only if HDD, recorder and cameras were purchased from the same manufacturer. This is feasible because different manufacturers may not be compatible with each other and therefore can give you a lot of problems when connecting. And not the fact that the connection will have a successful result.
Video surveillance over the Internet
At the moment it is possible to view your camcorders using cloud. This will get rid of a lot of complex settings, port assignment in the router and DNNS settings. cloud services are easier to use, and it is also possible to purchase a video camera from them, which will already be with ready-made settings. And all that remains to be done is to create a connection to the router and download the software application to your mobile device. Thanks to this, you can configure in a matter of minutes without using a personal computer. As well as nice bonuses, for example, on a cloud service Videon it is possible to connect several cameras for free, because you will start paying only when the number of cameras exceeds 15 pieces.

Provide power for the IP camera - the key to uninterrupted and successful work. For this, IP camera technology is used. . The PoE IP camera can be directly connected to the power supply and provide uninterrupted monitoring of the object. Power supply for IP cameras provides power, sometimes used for connection splitter to connect the camera via PoE injector for IP cameras. An injector is needed in order to connect a camera with an IP address to the unit if it does not have a PoE connection. In this case, the injector plays the role of a conductor. There are cameras with built-in PoE that do not need to be connected to an injector. Multi-channel injector uses the connection of all cameras to it and provides them with uninterrupted power due to the fact that a PoE power supply for IP cameras is connected to it.

From the article, you will learn several ways to set up an effective video surveillance and alarm system in your apartment with minimal financial investment using a personal computer.
There are two types. Analog - have various data transmission formats, among them the most common: CVBS (the outdated format is gradually becoming a thing of the past), AHD, HD-CVI, HD-TVI (new formats giving an image comparable in quality to digital). IP video cameras - transmit information in digital form after compressing it using codec programs: H.264, MPEG-4, M-JPEG.
There are two most common ways to connect a digital camera to a computer. Through the cloud service and over the local network. Each of these methods has its own characteristics, advantages and disadvantages.
Cloud video surveillance - connecting a digital IP video camera through the NOVIcloud cloud service
A cloud video surveillance service is actually a server on which specialized software is deployed to help store and process video data coming from cameras. As a rule, such servers are the property of video surveillance equipment companies and do not support devices from other manufacturers. For example, the SpaceCam service belongs to the RVi company, Ezviz only supports equipment from a well-known manufacturer HIKVISION, and Ivideon works with Samsung cameras. The functionality of such services is somewhat scarce, but you can use them for free.

Recently, commercial cloud services have begun to develop that support work with large quantity manufacturers. For example, the domestic project NOVIcloud. Such services have an order of magnitude more functionality, including analytical ones:
- triggered by a software motion detector,
- sending alarm SMS,
- recognition of faces and numbers of vehicles,
- search for information in the archive by action, etc.
However, all these functions are available only for the appropriate payment, and free or demo versions are severely limited in functionality and the amount of memory used for the video archive.
Consider the sequence of actions for connecting IP cameras using the NOVIcloud cloud service as an example. To do this, you need to purchase a digital camera with firmware support for the NOVIcloud service. The manufacturer NoviCam offers a fairly wide range of indoor dome cameras (IP N27P, IP N12W, IP NC22VP) and outdoor domes (IP N29WP, IP W68NR, IP NC13/23/29WP). Such cameras have, in addition to the RS-485 interface, the possibility of additional connection via the RJ45 LAN interface.

The sequence of actions for connecting an IP camera to a cloud resource:
- A twisted-pair network cable is connected to the camera's LAN connector;
- Using a special utility that comes with the device, the IP address of the camera is determined;
- The device firmware is logged in via an Internet browser;
- The manufacturer's cloud service support switch is activated;
- Gets the device ID. You can usually find it at MENU → INFO → Cloud ID VERSION;
- You are logged in to the cloud resource website at: https://www.cloud.novicam.ru/
- The Cloud ID tab is selected where the unique device code is entered.
IMPORTANT! On the same site you can download mobile applications to view video information from cameras on smartphones or tablets.
If you plan to create a full-fledged video surveillance system, then it is advisable to purchase an additional IP DVR device, which will serve as both a router and a storage device. For example, models NR1208 and NR4224 from the same manufacturer.

The video surveillance system will be controlled in two ways - similarly to the previous scheme through a browser window on a cloud resource. And in the firmware directly on the DVR. The entrance to the device program will also be carried out through a PC.
How to connect IP cameras directly to PC
With this hardware configuration, you need a fairly powerful PC with an appropriate graphics card. In addition, you need specialized software. Utilities that come with cameras are usually used. But the developers have already released a lot of programs functionality which are much wider. Video management software includes:
- XProject Go– supports up to 8 free digital cameras one video archive up to 5 days. Video recording in AVI format. The program is quite unpretentious, 2.4 GHz and 2 GB of RAM are enough to maintain its performance, it works on almost all modern Windows platforms.
- Ben Software Security Spy- Designed for Mac OS users. Of the main features, an integrated software motion detector with automatic notification by e-mail, its own browser and the ability to automatically send information to an FTP server.
- Zone Minder- Designed for Linux OS. It has no restrictions on the size and retrospective of the video archive and the number of cameras. Supports IP and USB cameras. Sends alarm SMS and e-mail messages.
- smart IP– developments of domestic programmers. Program in free version has restrictions on the number of cameras up to 16 and the size of the video archive up to 1 GB.

For example, let's take the IP video camera Hikvision DS-2CD2032-I. The sequence of actions for connecting the camera to the PC will be as follows:
- The camera is connected via the LAN output to the switch, where the computer is also connected (you can directly to the PC network card).
- In the window of any browser, the default IP address is typed. For manufacturer Hikvision it is 0.0.64, login admin, password 12345.
For other manufacturers, IP addresses, logins and passwords are listed in the table:

As a rule, the message "Page not available" will appear in the browser window. This happened because the range of IP addresses of the camera and PC is different.
- The camera address needs to be changed. To do this, in Windows, go to the tabs "Network and Control Center and public access» → «LAN connection» → «Details». In the window "Information about network connection"We are interested in the addresses of DHCP and DNC servers, as well as the" Default Gateway ". For example, 192.168.0.1. it is necessary to replace the IP address of the camera with a comparable one. From 0.0.64 to 192.168.0.64. You can replace it using a special utility from the manufacturer for Hikvision cameras, this is the SADP program, which is located at https://overseas.hikvision.com/en/tools_82.html.
She will find the equipment connected to the PC. It remains only to enter the login and password specified in the table and change the address.
Connecting analog cameras to a PC
Use of analog cameras in systems home video surveillance has a number of advantages:
- The cost of an analog camera is much lower (2-5 times) than a digital one, and the devices themselves are more compact;
- Clearly distinguishable and not subject to excessive interference, the signal is received via coaxial cable from 300 m. while the ceiling of video transmission over twisted pair is 100 m;
- The light sensitivity of an analog CMOS matrix is somewhat higher than that of a digital one.
But if you need to connect analog cameras to a PC, the most important drawback arises, leveling all the listed advantages - the need to purchase additional equipment that will digitize the video signal.
Connecting an analog camera via a cloud service
Connecting an analog camera to a cloud service, and through it to a PC, is quite possible using hybrid or analog DVRs. For example, NOVIcam's PRO series models are AR1108 and AR1104.

In this case, access to cameras from a PC will occur as follows:
- Through the LAN output (1) the recorder is connected to the Internet;
- The device firmware recognizes its unique ID code MENU → Details → Version → Device number;
- After logging in to the site https://www.cloud.novicam.ru/, the device is registered;
- The registrar will receive a request to activate the cloud service, the request is confirmed.
Further work with analog cameras follows the same scenario as with digital ones.
Connecting an analog camera to a PC
The computer can receive analog video signal through 3 devices:
- Video card equipped with TV input. For new generation devices, incoming TV-in and S-Video-In interfaces are common;


- Video capture cards are also available in two variations, as an expansion board and a separate device. They have a certain advantage in processing speed of the incoming video signal over tuners and video cards.

- Video capture card Iconbit TV-HUNTER Analog Recorder U57 USB 2.0$

- Hawell HW-104 video capture card.
After placing the video processing device in the PC case (or connecting it via USB), the driver is installed. The software is also installed. Usually, utilities with limited functionality are supplied in the kit. You can use video processing software: Adobe Premiere, ULead Media Studio, etc. or one of the specialized programs, provided that it is compatible with the video capture card.
If the installation of devices and programs is done correctly, then after connecting to the BNC output of the video camera, an image will appear in the program window.