I greet you. Alexander Glebov is in touch with you. This time I will tell and show you how to enable remote desktop, i.e. rdp, remotely. If interested, read on.
Introduction
You may ask: "Why do we need to enable remote desktop remotely at all? In a domain, politicians can do this in general, etc." I'll tell you where I needed to enable remote desktop. I worked at one time in the company NG Energo, and there was such a case. In one office, a new computer was installed with Windows 7 installed, but it was not in the domain, and in Windows, RDP was disabled by default. So I had to think about how to remotely enable rdp, so that I can then connect and enter the computer into the domain. Let's get to the point ...
Procedure - enable remote desktop (rdp) remotely
There are several requirements without which you cannot enable rdp remotely, namely:
- You must have this administrator on the remote workstation;
- there must be physical access over the network.
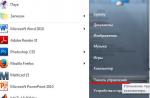
So let's get started. Press start, press execute there, enter regedit and press enter. This will open the registry editor. It so happens that there is no run button, then press "Windows + R", our run will open. It looks like this: 
In the opened registry editor, you need to connect the remote registry. This is done like this: click in the upper left corner, "file", then "connect the network registry". In the window that opens, enter the name or ip of the remote computer, click ok. 
As a result, if your computer is in the domain and you have sufficient authority, that is, your account is a member of the local administrators group, a new registry branch will appear in the editor (example below). If, as in my example, the computer is in a workgroup, then a request will pop up to enter credentials that have the appropriate rights: 
Read also:
Windows update minitool review - an alternative update tool for Windows 10
Enter the login (User) in the format: name of the remote computer \\ name of the remote user, then enter the password and click OK. If the data is entered correctly, we get the following picture: 
Then we go along the following path: "HKLM \\ SYSTEM \\ CurrentControlSet \\ Control \\ Terminal Server", and on the right we see a set of keys, we are interested in the key fDenyTSConnections... It needs to be assigned the value 0. 
After that, we ask someone to restart the computer and try to connect via RDP. However, it may turn out that it will not be possible to connect, this means that most likely FireWall is enabled on the remote computer, and you need to add a rule that allows you to connect via the standard port 3389. If for some reason you could not add a key through the registry editor, then we read below. There I give the command to enable rdp via pstools and the command line.
How to add a rule to the firewall on a remote computer?
The requirements are the same, you must have physical access over the network, and you must have administrator data on the remote computer. Let's follow these steps:

All editions of Windows, starting from XP, have a standard RDP client that is used to connect to the Remote Desktop Service. In this article I want to describe in detail the capabilities of this program.
The RDP client is used to connect to a terminal server using the Remote Desktop Protocol, or via Remote Desktop. You can also read about installing the server using the terminal on this site.
You can start the program "" from the menu " Start» — « All programs» — « Standard» — « Remote Desktop Connection", Or by running the command mstsc.exe(to do this, press the key combination WIN + R and enter the name of the command in the appeared window " Execute"). Accordingly, the executable file itself mstsc.exelocated in the directory C: \\ Windows \\ System32... For convenience, you can put a shortcut to the worker with the specified settings.

In the window that appears, you need to enter the ip-address or the name of the server to which you want to connect.

When connected, you will be prompted to enter your credentials. After entering, you will be taken to your server desktop.

To change the parameters, click on the link " Show options»In the main window of the program.

In the menu that appears, you can configure the parameters you need, which will be used when connecting.

On the second tab “ Screen»Configures the size of the connected remote desktop and the color depth for the remote session. You can also remove the connection panel that is completely moving out from above, but I do not advise you to do this, since close the connection via Alt + F4 it will not work if the settings use the keyboard shortcut " on a remote computer", And the connection can be closed only through the" Task Manager ".

On the tab “ Local resources»Sound transmission is configured - recording and playback. To configure, you must click the " Options».


It also configures " Using keyboard shortcuts", Which I wrote about above.
On this tab, you can configure enabling or disabling the "Printers" and "Clipboard", which will be used during a remote session, by clearing or, conversely, setting the flag of those parameters that you need.
And if you press the button " More details", Then it will be possible to put the connection" Smart cards ", if, of course, you have a Smart card with credentials, you can also connect any disk or DVD and CD-ROM of the local computer from which the connection is made.

On the tab “ Programs»You can configure the launch of the program that will be automatically launched when the user logs on to the remote desktop. The user's working directory is also configured here.

On the next tab “ Interaction”, You can specify the speed of connection with the terminal server and specify those parameters that are needed or not needed to improve performance. Although in our time of high-speed Internet these settings are no longer relevant, so you can safely leave auto-detection.

On the tab “ Additionally"Server authentication is configured.

You can also configure a Remote Desktop Gateway connection by clicking the " Options».

To save all the set parameters, go to the " Are common"And save the settings as an RDP connection shortcut in any place convenient for you and with any name.

Through the shortcut obtained in this way, you will connect to the remote desktop with the previously made and saved settings.
Did this article help you?
So, today we will talk about what Windows 7 Remote Desktop is, how to properly configure and use it. This feature is quite useful, especially for those who work with computers. Before we "shaman" over the settings and inclusion, let's talk about why such a "table" is needed.
What is it needed for?
So why do you need Remote Desktop? In truth, such a little thing is very useful for those who, to put it mildly, love solitude and silence and prefer to work at home or in their personal office. With the help of such a program, you can access any computer with all its resources, which is only connected to the local network. Thus, you can do your job anywhere you have internet access and a local network.
Remote is the main place of work for system administrators. Now you just need to call him and tell him about the problem - the employee will quickly "connect" to you and correct the error without leaving the table. You don't need to call him, wait a long time and get nervous. In addition, Remote Desktop can help anyone in general who may need access to their, say, home computer and its data. How can you turn it on?
Programs
Undoubtedly, Windows 7 Remote Desktop can be connected and used through various specialized programs. As a rule, in order to create a "local network", you just need to install the "program", run it and give the password from your "computer" assigned by the program specifically for access.
Windows 7 Remote Desktop is easily connected using TeamViewer. This is a program that accesses your computer for anyone who has a password assigned to the computer through the program. Quite a convenient way if you don't really want to trick with access settings.

All you need is a program and an internet connection. True, this approach has a significant disadvantage - every time you restart the program, you will receive a new access password. From a security point of view, this kind of approach is very appropriate. But for the user, the Win 7 Remote Desktop connected via TeamViewer can be somewhat inconvenient.
We turn on by system means
Of course, you can create, connect and configure, and then enter the Windows 7 Remote Desktop using system tools. They are available in every new generation of operating systems. Thus, if you need to use "remote", you can easily do it without resorting to third-party programs. Unfortunately, there is no remote desktop on the old "axes". professional, ultimate - all have the necessary content. Today we will focus on what methods exist for setting up and further using remote access to a computer without any help from third-party programs and applications. First, you need to figure out how to enable Windows 7 Remote Desktop.
Standard method

There are two ways in total, which we will consider. Let's start with a more "mundane" one, with the logical name "standard". It does not require any special knowledge and skills. So, to connect, say, a Windows 7 home premium remote desktop, you first need to click on "Start", select "Computer", right-click on it and click "Properties" there. In the list that opens on the left, select "Remote Access Settings".
Next, in the "Remote Desktop" menu, you have to choose one of three items. The first completely denies access to this computer and is "disabled" by default. The differences between the two are simple: the second is for any operating system, and the third is for Vista and above. All that remains now is to select and add the required users to access.
Non-standard method
There is a second, non-standard approach to remote desktop connection. It is carried out using administration services. So let's get started. First of all, go to the services (through "Start", going there to the "Control Panel", then - in "Administrative Tools" and there already - in "Services"). Find Windows Firewall there, turn it on and set it to start automatically. Now you need to get into the local security policy. To go there, there are two ways: "Control Panel", go to "Administrative Tools" again and this time go to the "Local Security Policy" tab or enter secpol.msc through the control panel and run this command. There you need to select "Windows Firewall with Advanced Security-Local Group Policy Object-Outbound Rules". In the right part of the window, click RMB and "Create rule". Follow all directions. Select the protocol type TCP, remote port - all, local - 3389. Allow ip-addresses, then mark the networks from which you want to accept connections and give a name to the new rule. Next, you need to get into ("Run" -gpedit.msc). Next, go to and go there to the administrative templates. Next, visit Windows Components and Remote Desktop Services. Now select "Workstation Session Host" and click on "Connections".

Here you can choose what exactly you need to access. Be sure to do:
- Allow remote connections using dedicated Remote Desktop Services.
- Establish rules for remote control over user sessions by means of remote special services (select the necessary parameters yourself).
This will connect Windows 7 Remote Desktop. Multiple users can connect to your computer. But that's the point. Remote access must be configured correctly. This should be fairly easy to do if you have the slightest idea of \u200b\u200bcomputers.
Access settings
Now let's see what is needed in order to configure and successfully access the "Windows 7 Remote Desktop" function. A team of programmers and sysadmins will not hurt. Undoubtedly, the setup itself does not require any special knowledge and skills, but nevertheless, if you want to achieve more detailed settings, you can use it to get help. So let's get started.
Go to properties with the right mouse button - "Properties". Now click on "Configure Remote Access". Now in the "Remote Desktop" section, select the required item - the second or third, by analogy with the first method of enabling and configuring the "table". Next, select the users you want to allow access to your computer. Add new "contacts" if necessary and confirm your actions. That's all.

Benefits
Any program and service has its own disadvantages and advantages. We have already talked about why you need a remote desktop. Now it's time to start talking about what's good about such access.
Of course, if you need quick access to your computer, Remote Desktop will really come in handy. The main advantage is access to all the resources and data that are stored on the computer. You can receive the necessary information from your "iron friend" and even change some of its settings.
Another significant plus applies to those who are not used to one workspace. Remote desktops have support for working with multiple monitors.
To be honest, Remote Desktop has a lot of features that can now be seen in, say, Skype (there is a desktop demo there). Thus, using standard and non-standard access methods, you can, say, watch the same movie or program with friends. In general, you can think of a lot of opportunities. The main thing is to show your imagination.

disadvantages
There are few disadvantages to remote access. To begin with, Windows 7 remote desktop works over the Internet. So, if you have a low connection speed or it is completely absent (disconnected for a while or not carried out in principle), then you can forget about this type of connection.
Another disadvantage is that a computer to which remote access is possible must always be turned on and connected to the Internet. Basically, it plays the role of a server to some extent, to which other computers are connected.
The disadvantage of using some programs is the constant need to change settings and obtain new access passwords. As mentioned earlier, the remote desktop, which is launched using programs, constantly receives a new "password", which must be sent to users all the time to work. In principle, on this all the "bad" sides on this note came to an end.
What people say

But what do users think about such access? By what methods do they implement it? Let's see!
So, according to statistics, you can see that small masses of people trust remote access. You can understand the users - it is possible to steal absolutely any data via the Internet in our information time, even so that the owner is not aware of what is happening. Losing sensitive and important files is not very pleasant.
Specialized programs are more popular and trusted. Probably, this is because a person can at any time "cut off the oxygen" to the one who sees his computer - simply turn off the program.
When it comes to offices, this kind of access is very convenient. Easy connection reduces work time, which allows you to submit your next report on time and on time and fix your computer without leaving your workplace. Local networks are common friends of all office workers. Remote desktops also become companions.
Conclusion
As always, it's time to take stock of our conversation. The remote desktop can be connected to any operating system and any more or less powerful computer (to work without brakes). Easy access to data helps you work quickly. At the same time, the "server" is sufficiently protected from unwanted users. However, even a configured Remote Desktop cannot guarantee you 100% security and integrity of the data stored on your computer. If you want to use your "car" on your own away from it, you can try doing it using programs.
Greetings, dear readers, and again Denis Trishkin is in touch.
I recently came across a question like "Remote Desktop" (RDP Windows 7). This tool allows you to operate your computer using a different device. So, for example, the user can use home equipment to perform all the necessary functions on a PC located in the office. Agree, in some situations such an opportunity is convenient. But at the same time, you must first debug everything correctly.
In order to enable rdp, you need to do a few things:
If you use an access point, router or any other equipment through which the Internet is connected, you need to forward the ports first. Or the option of using the DMZ is possible - setting the necessary settings through a single computer.
It is important to have an external dynamic or static IP address.
Check for a password on the account through which the connection will be made. And if not, install it. Otherwise, the relationship cannot be made.
Configure rdp server:
- go to " Start", And on the icon" A computer"Call the context menu, and then" Properties»;
- choose "";

to enlarge
- a window will appear in which we press " Allow Remote Assistance Connections ..."(If you plan to connect only from equipment on Win 7 and higher, it is better to check the box next to the item with authentication);

to enlarge
- the "" button restricts or allows the user to use the computer remotely (if you set the ban, the person will only see what is happening on the other computer);

- on the tab “ Select users»Specifies people who will be able to connect to the device remotely (and everyone must have a password).

Important! Windows does not provide the ability to connect multiple users at the same time. This is specifically limited by the license. For removal, a special patch from a third-party development team is provided. It can be found on the Internet without any problems.
Establishing a connection( )
To establish a connection via rdp, you first need to know its IP address. To do this, on the desired device, go to the command line (open "" and write " cmd»).

In the window that appears, indicate "". A list will open in which you need to find a string with the IPv4 parameter. The numbers that are indicated opposite are the data we need.

After that, on the computer from which we plan to connect, run the rdp client or "". To do this, go to " Start"And then go to" Standard».

to enlarge
A window will open where the equipment address (IPv4) is set. Then press "".

If everything is indicated, as it should be, a menu will appear in which you need to enter your username and password to establish communication.

Before that, there is a choice of " Parameters", Where various rdp settings are provided:
Update( )
It is important to understand that with constant work with this tool, you need it to perform all its functions 100%. Otherwise, users may simply not achieve their goals.
All settings must be correctly specified for correct functioning. But in some cases this is not enough. It is also worthwhile to install all upcoming rdp updates from Microsoft on time. This can be done not only in the appropriate center provided in the operating system itself, but also on the official developer page.
Sandbox
Natasha February 9, 2012 at 06:08 PMEnabling Remote Desktop in Windows 7
- Lumber room *
Friends!
Just the other day, I ran into the problem of enabling "Remote Desktop" on Windows 7.
Many people immediately thought: "Oh, yes, he probably has some kind of Win 7 Home Premium or even Starter." However, this is not at all the case. I have a full-fledged Windows 7 x64 Professional, in which it would seem that everything should work instantly and without reservations.
Standard switching algorithm
Go to the computer properties Start-\u003e Computer (right click) -\u003e Properties
On the left in the list, select "Remote Access Settings"
In the "Remote Desktop" section, select the second or third item. Difference: the second point - any OS, the third - Vista and higher
We press the button to select users and add the necessary ones. (For example, your user on this computer. Or you can create a separate user for the remote desktop)
Setup finished
It all looked very different to me. And point number 3 was not available to me. There are items, but they are disabled.
This is how my RDP enable settings looked like
Various kinds of searches did not lead me to an unambiguous and clear answer to the question: "What to do with such nonsense?"
Only pieces of scattered information that I would like to bring together. Having dealt with this small problem, I decided that it would be worthwhile to share its solution with the public.
So let's get started.
We will need:
- A computer
- Eye / arms / head
- Administrator rights
Non-standard inclusion algorithm
1. Go to services (Start-\u003e Control Panel-\u003e Administrative Tools-\u003e Services)
2. We find the Windows firewall there. We set it to start automatically, and start the service.
Something like this:
3. Go to local security policies (Start-\u003e Control Panel-\u003e Administrative Tools-\u003e Local Security Policy OR Start-\u003e Run-\u003e Enter secpol.msc)
4. Select there Windows Firewall with Advanced Security - Local Group Policy Object -\u003e Outbound Rules.
5. In the right part of the snap-in, right-click on "Create rule". Further in steps (each item is a link to a picture with a step):
- Protocol type - select TCP. Local port - 3389. Remote port - all ports
- Any ip addresses (if you want to come from anywhere, if not sure, allow everything)
- Check the networks on which you would like your computer to accept these connections
Eventually, you should end up with something like this:
6. Go to the local group policy editor (Start -\u003e Run -\u003e gpedit.msc).
7. Computer Configuration -\u003e Administrative Templates -\u003e Windows Components -\u003e Remote Desktop Services -\u003e Remote Desktop Session Host -\u003e Connections
- Allow remote connections using Remote Desktop Services
- Sets the rules for remote control for user sessions of Remote Desktop Services (select the value of the parameter yourself, I set for myself "Full control without client permission").
In total, you will get:
9. Go to the properties of the computer Start-\u003e Computer (right click) -\u003e Properties
10. On the left in the list, select "Setting up remote access"
11. In the "Remote Desktop" section, select the second or third item. Difference: the second point - any OS, the third - Vista and higher.
12. We press the button to select users and add the necessary ones. (For example, your user on this computer. Or you can create a separate user for the remote desktop)