Yesterday on GT that the developers of Remix OS released an alpha version of their OS for PC. The operating system itself was originally intended for a compact system unit Remix Mini. The OS has everything you need for comfortable work, including the ability to work with a mouse, keyboard, plus support for multi-window mode.
There is no problem in installing this OS on a PC, the developers have released clear step-by-step instructions. But what if you want to install this operating system on a MAC? Let's see.
For a PC, a bootable USB flash drive. For the Mac, let's do the same. To do this, you need a special program UNetbootin, which creates a bootable USB flash drive, which can be accessed in Startup Manager. The flash drive works after preparation as a Live USB.
What is necessary?
- USB flash drive with at least 8 GB of memory;
- Mac (OS was successfully installed in OS X El Capitan environment on MacBook Pro);
- Mouse.
What to do?
Step 1. Download UNetbootin for Mac if you haven't already. If your system's security settings do not allow opening third-party files, use Ctrl + Right Click to bypass this precaution and download the file;
Step 2. Download Remix OS for PC;
Step 3. Open UNetbootin and select the boot image:

Step 5. Click "OK" and then "Exit".

Step 6. Restart your Mac and immediately press and hold alt / option as soon as you hear the startup sound. Startup Manager opens.
Step 7. Select the “Windows” drive. This will load Remix OS


Emulation is designed to expand the standard functionality of the PC software shell. Installing Remix OS is an opportunity to test a full-fledged operating system based on Android. Today we will grieve about the features of the platform, its capabilities, methods of software "editing"
Remix OS is a software shell based on Android. The user interface has common features with the "desktop" OS: the lower taskbar, analogue of the button "Start" in the left corner of the screen (brings up a list of installed applications).
The list of software is sorted by date of last changes, alphabet, size, frequency of use, there is a search bar and a logout mechanism.
The right half of the taskbar is occupied by the system tray, where you can adjust: volume settings, wireless network, brightness, time and date. Additional information about the indicator is called up with a single press.
Installing Remix OS enables multitasking that is done in an impressive way. The user has the right to open several applications in windowed mode, change their display order, size. Each program is equipped with a header with control buttons: collapse, close or expand in full screen mode, the functionality of hot keys is preserved.
Remix OS is ideal for testing your own applications, deeper immersion in the Android ecosystem.
Popular installation methods
Before installation, please make sure the following system requirements match your PC specifications:
- Availability of 2 GB random access memory.
- The minimum physical memory is 8 GB.
- Broadband internet connection.
If there are no problems with the hardware, go to the review step by step instructions... The download link for the distribution is at the end of the article.
Method number 1

Before the instruction itself, it is worth telling what this Remix OS 2.0... This fork Android x86aims to bring an ecosystem of applications Android on computers with a convenient desktop interface. In the second version Remix OS startup developers Jide added a convenient window interface where you can use several Android-applications at the same time. At the same time, applications are scaled to fit the window, and the entire interface has normal mouse and keyboard controls - no bottom bar with three buttons.

How to install Remix OS 2.0 on a computer
To install the system you will need USB-flash drive with standard support USB 3.0, speed write / read not less 10 Mbps, memory capacity not less 8 GBas well as the computer itself on which you are going to install the system. It should be noted that the requirements to USB-store quite formal - many users have installed Remix OS 2.0using an old standard flash drive USB 2.0 and with volume 4 GB memory.1. Download the image and install it on the flash drive
You can download the system image on the official website of the startup Jide by direct link (687 Mb, torrent)... Available eFI-enabled image (torrent)... You can also download an image for 32- bit systems(torrent)... Inside the archive you will find both the image itself and a special utility for installing it on USB-flash drive. Before proceeding with the installation of the image, you need to format your drive for the file system FAT32 with deletion of all data.Updated: 1st beta version was released on March 1, 2016 Remix OS 2.0. Fresh links to download the system:
- 64 bits (UEFI + Legacy BIOS) - direct link + torrent.
- 32 bits (Legacy BIOS)- torrent.

Utility Remix OS USB Tool, which you can find in the image archive, is a special variation Unetbootin... Run the utility, select Remix OS 2.0 ISO, as well as USB-the drive on which you will install it. Then press the button “ Ok”, After which the installation of the image on the flash drive will begin. Also you can useoriginal utility Unetbootin by selecting the distribution kit in it FreeBSDand image Remix OS 2.0... The result will be the same.


If everything went well, the utility will immediately prompt you to restart your computer to boot into Remix OS 2.0 from a flash drive. If you install the system on the computer where you burn the image, then you can safely press the restart button, but before that it is better to read the next paragraph of the instructions.
2. Boot from USB
After restarting your computer, you need to bring up the alternative menu boot"A. On different computers, this is done in different ways. On laptops ASUS- button Esc, eg. On ordinary PC mostly with F8 or the buttons next to it. It is better to find out about this on the Internet in advance. Also, before such loading, it is worth checking the function Legacy Boot Mode Enabled in BIOS... It must be enabled.
After turning on the computer, we call the alternative boot menu and select your USB-storage device. Next, a menu with two items should appear on the screen - “ Guest Mode”And“ Resident mode”. The first is the usual Live CD mode, where the user boots the system from disk and tries it without saving all the data. The second mode allows you to use Remix OS 2.0 as a complete system for USB-flash. When this mode is selected, the OS boots in a mode where all progress and user manipulations are saved on the drive and can be accessed the next time.
It is for the “ Resident mode”And requires a standard flash drive USB 3.0 and fast write / read speed. The developers assume that it is in the mode of saving all data on USB and you need to use Remix OS 2.0.
3. Installation
But what to do for those who want to fully install Remix OS 2.0 on hDD computer and use it as a second system? For such users there is no "official" installation method, as, for example, in Linux-distributions, but there is a hidden function. to install Remix OS 2.0 directly to the computer, you must:- Once again boot from the flash drive, but do not start one of the system operation modes. You need to stop at the blue window to choose between “ Resident”And“ Guest ”.
- Press the button Tab.
- Erase all text that appears and write the following command:/ kernel initrd \u003d / initrd.img root \u003d / dev / ram0 androidboot.hardware \u003d remix_x86_64 INSTALL \u003d 1 DEBUG \u003d
- Press Enter.
If your system does not boot after such an installation, then you can try the same process, but enter a different command to call the installation programs:/ kernel initrd \u003d / initrd.img root \u003d / dev / ram0 androidboot.hardware \u003d remix_x86_64 androidboot.selinux \u003d permissive quiet INSTALL \u003d 1
4. Alternative installation
You can also install Remix OS 2.0 from under another Linux-systems, in particular - Ubuntu... To do this, you must already have installed on your computer Ubuntu with bootloader Grub.Instructions:
- Create a folder “ remix”(Without quotes) in the directory / directory on Ubuntu.
- Open the image ISO / IMG operating system Remix OS 2.0 some archiver or simple explorer; take files from the image initrd.img, kernel, ramdisk.img, system.img and move them to the folder “ remix”.
- Inside the folder “ remix"Make another folder" data ”.
- Open your console and enter the commandgksudo gedit /etc/grub.d/40_custom
- The console will ask you for an administrator password - enter it.
- Then a window will appear text editor with a specific document; at the end of the text you need to insert the following text (in order not to lose formatting, it is better to download the txt file and copy the code from there):
menuentry "Remix OS" --class android-x86 (insmod part_gptsearch --file --no-floppy --set \u003d root /remix/system.imglinux / remix / kernel root \u003d / dev / ram0 androidboot.hardware \u003d remix_x86_64
androidboot.selinux \u003d permissive CMDLINEinitrd /remix/initrd.img} - Save your changes and close the editor.
- Enter one more command in the console -sudo update-grub
- Now after rebooting into Grub there should be a line with a start Remix OS 2.0... The system should work.
5. Another way to install from under Windows
Also, the community found another way to install Remix OS 2.0 to hard drive using Windowsand getting a double boot.This requires:
- Create a new partition on a disk with a volume of at least 8 GBand file system FAT32... This can be done with a simple tool in Windowsby typing in the search menu " Start»Word« section". Name the section REMIX_OS.
- Download image Remix OS 2.0 (in the first section of the article), if you have not already done so, as well as the EasyBCD program.
- Unpack the image completely Remix OS 2.0 (you can through WinRar) and copy all files from it to the partition you created earlier.
- Install the app EasyBCD and run it.
- In the program, select the menu “ Add New Entry” → ISO.
- In chapter " Portable / External Media" in field Nameenter Remix OSand click on the “ Path”And select the image Remix OS 2.0that you downloaded.
- Then press the button “Tools” → “Restart Computer”.
- Voila, you should see a dual boot menu on the screen - Windowsor Remix OS... The system should work.
6. Install on a virtual machine
If you don't want to install at all Remix OS 2.0 to your hard drive and risk the stability of other operating systems in case something suddenly goes wrong, then you can use a virtual machine, namely - VirtualBox.Installation instructions Remix OS 2.0 in VirtualBox(assumes you already have a virtual machine program and a system image):
- Run VirtualBoxand call the menu for creating a new virtual machine. Call it any name, choose a type Linux and view "Other Linux 64-bit".
- Allocate half (recommended) of your RAM to virtual machine.
- Create a new virtual disk for the system, allocate for it 16 GBmemory.
- After completing the creation of the machine, start it and when choosing the disk from which it will boot, specify the image Remix OS 2.0.
- If everything goes well, you will see a menu for choosing between modes Guest and Resident... Please select Guestbut click not Enter, and Tab... After that, a line with text will appear at the bottom. Into it after recording DATA_IN_NEM \u003d 1 need to add vga \u003d 791
- Then press Enter.
- The screen should display Remix OS 2.0.
What you need to know about Remix OS 2.0
Shell Remix OS 2.0 well optimized for mouse and keyboard. Basic keyboard shortcuts like Ctrl + C / V / Z / X, Alt + Tab, Alt + F4and others. Buttons work correctly Num lockwith the entire digital block and Caps lock.


How to install Google play and its services on Remix OS 2.0:
- Download the GMS Installer installation file.
- Install it and run it.
- The application will offer to install the service Google play - agree.
- Go to Settings → Applications → Manage Applications → All.
- Select “ Clear Data”For applications Google Play Services and Google Service Framework.
- Reboot the system and use Google play.
How to get root access on Remix OS 2.0(from under another Linux system):
- Download the RemixRoot.zip archive and unpack it into a folder with the same name.
- Copy the file system.img from the system directory where installed Remix OS, to the folder RemixRoot.
- Open your console ( Ctrl + Alt + T).
- Enter the command sudo -i
- Enter your password if you have an installed version of the system.
- Copy the path to the RemixRoot folder and navigate to it in the console this way— cd<путь к директории> .
- If you did everything correctly, then in the console in front of the cursor an inscription will appearRemixRoot #.
- Now run the script rootx.sh in this way — sh rootx.sh.
- If everything goes well, then in the folder RemixRoot instead of file system.img will appear root.img.
- Rename this file back to system.img and copy it with replacement to where you originally got it from.
- Reboot and run Remix OS 2.0... Update SuperSU.
- You should now have root access.
Here are the applications you might need when using R emix OS 2.0 on the computer:
Today you will learn how to create a virtual machine for Remix OS in and install this operating system.
Remix OS is distributed free of charge for 32/64-bit configurations. You can download it from the official website.
Stage 2: Create a virtual machine
To run Remix OS, you need to create a virtual machine (VM) that acts as a PC that is isolated from your main operating system. Start VirtualBox Manager to set parameters for the future VM.

Stage 3: Configuring the Virtual Machine
If you wish, you can tweak the created machine a little and increase its performance.

Stage 4: Install Remix OS
When everything is ready for installing the operating system, you can proceed to the final stage.
- Select your OS in the left part of the VirtualBox Manager with a mouse click and click on the button "Run"located on the toolbar.

- The machine will start its work, and for further use it will ask you to specify the OS image to start the installation. Click on the folder icon and through Explorer select the downloaded Remix OS image.

- The system will offer to select the type of launch:
- Resident mode - mode for the installed operating system;
- Guest mode - guest mode, in which the session will not be saved.

To install Remix OS, you must have a dedicated Resident mode... Press the key Tab - a line with launch parameters will appear under the block with the mode selection.

- Erase the text down to the word "Quiet"as shown in the screenshot below. Please note that there must be a space after the word.

- Add parameter "INSTALL \u003d 1" and press Enter.

- You will be prompted to create a partition on a virtual hard disk, where Remix OS will be installed later. Select item "Create / Modify partitions".

- To the question: "Do you want to use GPT?" answer "No".

- The utility will start cfdisk, dealing with drive partitions. Hereinafter, all buttons will be located at the bottom of the window. Please select "New"to create a partition for installing the OS.

- This section should be made basic. To do this, assign it as "Primary".

- If you are creating one partition (you do not want to divide the virtual HDD into several volumes), then leave the number of megabytes that the utility set in advance. You allocated this amount yourself when creating a virtual machine.

- To make the disk bootable and the system can start from it, select the option "Bootable".

The window will remain the same, but in the table you can see that the main section (sda1) was marked as "Boot".

- You don't need to adjust any more parameters, so select "Write"to save the settings and go to the next window.

- You will be prompted for confirmation to create a partition on the disk. Write a word "Yes", if you agree. The word itself does not fit into the screen entirely, but it is written without problems.

- The recording process will start, please wait.

- We have created the main and only partition for installing the OS on it. Please select "Quit".

- You will be taken to the installer interface again. Now select the created section sda1where Remix OS will be installed in the future.

- When prompted to format the partition, select a file system "Ext4" - it is commonly used on Linux based systems.

- A notification will appear stating that formatting will delete all data from this drive, and you will be asked if you are sure of your actions. Please select "Yes".

- When asked if you want to install the GRUB bootloader, answer "Yes".

- Another question will be displayed: "You want to set the / system directory as read-write (editable)"... Click "Yes".

- Remix OS installation will begin.

- At the end of the installation, you will be prompted to continue downloading or reboot. Choose a convenient option - usually no reboot is required.

- The first boot of the OS will begin, which may take several minutes.

- A welcome window will appear.

- The system will prompt you to select a language. There are only 2 languages \u200b\u200bavailable - English and Chinese in two variations. In the future, it will be possible to change the language to Russian inside the OS itself.

- Accept the terms of the user agreement by clicking "Agree".

- The Wi-Fi setup step will open. Select an icon «+»
in the upper right corner to add Wi-Fi network, or press "Skip"to skip this step.

- Press the key Enter.

- You will be prompted to install various popular applications. The cursor has already appeared in this interface, but it may be inconvenient to use it - to move it within the system, you will need to hold down the left mouse button.

The selected applications will be displayed and you can install them by clicking on the button "Install"... Alternatively, you can skip this step and click "Finish".

- Leave the checkbox on the offer to activate Google Play services, if you agree, or uncheck it, and then click "Next".

Perform all further installation steps using the key Enter and up-down and right-left arrows.
This completes the setup, and you are taken to the desktop of the Remix OS operating system.

How to start Remix OS after installation
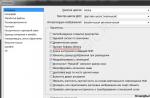
After you turn off the Remix OS virtual machine and turn it on again, the installation window appears again instead of the GRUB bootloader. To further boot this OS in normal mode, do the following:

After saving the settings, you can start Remix OS and work with the GRUB bootloader.
Despite the fact that Remix OS has an interface similar to Windows, its functionality is not much different from Android. Unfortunately, from July 2017 OS Remix will no longer be updated and supported by developers, so you shouldn't wait for updates and support for this system.
Hello. Recently learned about operating system Remix OSbuilt on Android.
Interesting enough systemoptimized for laptops and PCs. There is a windowed mode, that is, you can open programs in windows, and not like in Android, in which you need to switch between them.

Of course the system Remix OS still raw, I hope that it will be brought to mind. For example, due to some games, the system completely freezes, only a restart helps. Maybe this is due to the incompatibility of applications, or maybe because of the windowed mode.
Remix OS installs on a USB 3.0 flash drive and can be used from any PC, just boot from it, not from hard disk... All data (downloaded applications, etc.), the system also stores on a USB flash drive.
Personally, I recorded the system on a 2.0 flash drive, the write and read speed of which is 25 - 20 MB / s - this is quite enough. And it will not boot Remix OS from a flash drive with a write speed of less than 10mb / s. So, you can try to record on 2.0, she herself will say whether the flash is suitable or not.
Well, now let's get down to business and put Remix OS as a second system:
1. We will need EasyBCD and EaseUS Partition Master, download them here TYK TYK
3. We download the system itself from the official site TYK
5. We take out the file from the archive, or rather the system image.
Using the EaseUS Partition Master program, we edit the partition from which we want to take at least 16GB.
- Select the partition from which we want to take 16GB and click "Change / Move Partition", reduce it so that the unallocated space remains 16 gigs


- Now click on "unoccupied" and create a partition, in "Name" write REMIX OS, "File system" - FAT32


- Click "Apply" and get your 16GB partition.
Now you need to extract the files from the image itself, onto the created section. This can be done with a 7-Zip or WinRAR archiver.
Open EasyBCD, click "Add entry": in the column "Removable / external media" - select the "ISO" tab, in the "Name" field write "REMIX OS", in the "Path" select the image of our system (from which files were dropped into the section ) and click add. By the way, the image cannot be deleted and moved (the system will not start), so it is better to drop it into the created section too.