Before you start using Photoshop, you need to set it up correctly for it to work correctly. Don't worry if you don't understand something, just follow the instructions below. We will analyze each setting item separately. Then, when you understand each item and master the process of its operation, you will independently understand which settings are best for you.
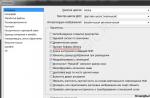
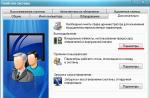
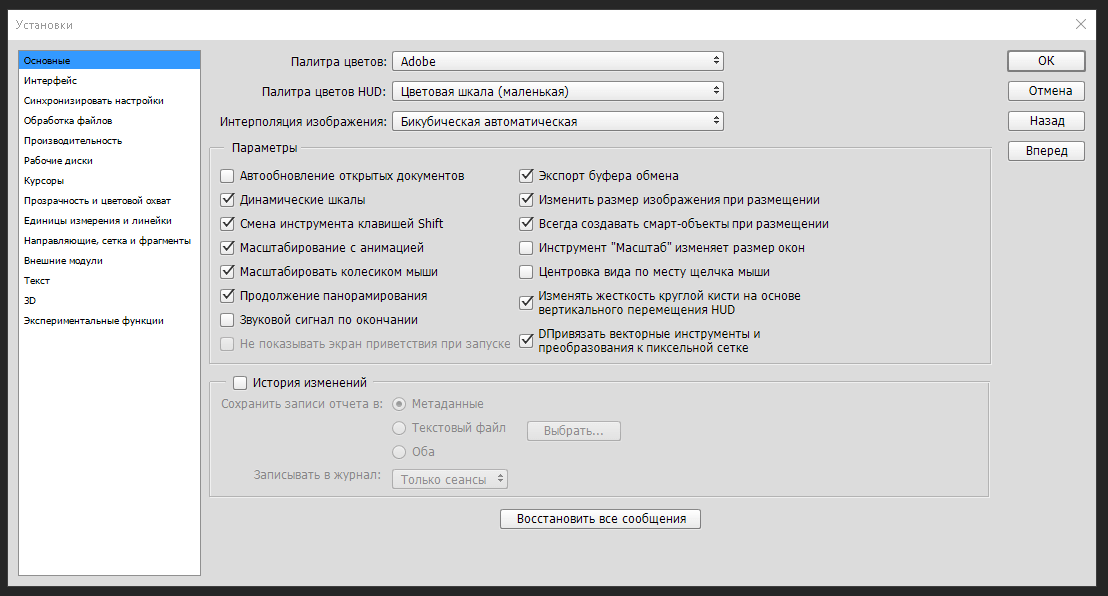
And so, first, go to the settings Edit → Settings → Basic
I think that the function of exporting the clipboard is not necessary, it only takes the place. Therefore, I advise you to uncheck the box against this item. The rest is all right, feel free to move on!

Interface

File handling
First of all, uncheck the box next to "Display warning before saving files in TIFF format", it displays a warning that the number of layers increases the size of the output file. You can also cancel the maximization of PSD and PSB compatibility by changing the item to "Never".

Performance
This is one of the important settings of Photoshop, which solves a lot)
- Memory usage
Everything here directly depends on your RAM. On average, if you do not use other programs when working in Photoshop, then you should separate 70-80%, as you can see, I separated a little more than 80%, and photoshop does quite well.
- History and caching
At this stage, I strongly advise you to change the action history item. This parameter is very important for everyone; it is responsible for the number of steps in the story. That is, for how many times you can press the undo Ctrl + Z action. For full-fledged work, 500 I think is completely enough, but do not take into account the maximum you can only 1000. The more the history of actions, the more RAM is required.
- Scratch disks
I will not talk about how this parameter works and how important it is, for too long. Let me just say that it affects the speed of work. For these purposes, specify preferably a separate disk where there is no OS. For most tasks, + 20gb is enough.
- GPU settings
You must be sure to check the box next to "OpenCL". This function is not required for full-fledged work, it makes navigation and editing of files (such as visualization, effects) smoother. Unfortunately, my video card does not allow using this feature, which I am very sorry about.

Cursors
- Paint brushes
Set the brush tip to full size. I advise you to check the box opposite to show the crosshair at the tip of the cyst purely for convenience.
- Other cursors
Leave "Standard" as is. Use Caps lock for precise cursor output.

Transparency and color gamut
You can leave it by default, there are no vital items here.

- Units
Since I mainly use Photoshop for the web, my ruler is displayed in pixels. If you are working in a different direction, then you can choose the appropriate ruler format from the drop-down list.
- Speaker
You don't need to change anything, you can leave it as it is.
- Default permissions for new documents
The print resolution is fine, so let's leave it as it is. The resolution for displaying on the screen can be raised to 80 p / d if you are working with web images.
- Point / Peak Size
Let's leave it as it is, quite enough

Guides, grid and slices

External modules
The only thing that can be done here to speed up work is to specify one more folder for external modules. How can this help me? Very simple. By default, all plugins are installed in the system plugins folder, and the more new plugins there are, the slower Photoshop loads. By specifying a new location for the plugins, Photoshop will load them as they are activated, which accordingly speeds up the loading of the program.

Fonts
You can leave the default settings here

3D
I rarely use this function, so I can't give specific advice. But in cases where I have used it, the default settings suit me.

In custody.
That's it! Now you have configured your Photoshop for a more normal and comfortable work in it. If you have any questions with any item, write! Let's figure it out together ...
In this article, I tried to describe the settings that are necessary for comfortable work in Photoshop.
Program interface language
Photoshop (now CC 2014 is current) is now part of the Creative Cloud package and is installed from the shell. Creative Cloud is a kind of universal installer. Install it, and he downloads the necessary distributions and installs himself, monitors updates, etc. I highly recommend using the English version, for which you need to switch the language in Creative Cloud BEFORE starting the installation. If you have already installed the Russian version, just uninstall, switch the language and re-install.
Preferences - program settings.
- on Mac: Photoshop\u003e Preferences
- on Windows: Edit\u003e Preferences ( Ctrl + K)
It is recommended to set exactly these settings, but you can always change them if necessary. I tried to describe why such settings are needed, but in some places it is difficult to understand. The rest of the settings (not described in the article) can be left "as is" or you can copy mine. When in doubt, copy all settings.
Preferences\u003e General
On this tab, you need to set the interpolation mode ( Image Interpolation) in Bicubic (Best for smooth gradients). This mode will be used in all transformations and where not explicitly specified. This interpolation mode gives minimal distortion when rotating objects.

Preferences\u003e Interface
Set all background colors (three fields) to Medium Gray... This is necessary for the correct perception of the picture. A picture on a light background looks darker, and on a dark background it looks lighter than it is.

Preferences\u003e Performance
We adjust performance. We allow to use more memory (as much as there is), we allow to store LOTS of History items (1000 pieces, 8 cache levels), enable support for normal cards (“Graphics Processor Settings” enable the Use checkbox and set it in Advanced Settings as shown in the picture below). In versions CS6 and earlier, increasing the cache levels can slow down if there is little space on the screw and a weak machine.

In Advanced settings, put all the checkboxes, for Retina under MacOSX, uncheck Anti-alias Guides and Paths (on Windows and without it works ok).
30bit Display is described separately (), it works only with 30bit video cards.

Preferences\u003e Scratch Disks
We select the disk where the temporary files will be located (preferably a separate SSD). Photoshop creates several tens of gigabytes while it runs, so make sure you have enough space. Previously, this setting was on the Perfomance tab.

Preferences\u003e Cursors
Set the brush tools to the normal display of the brush ( Normal Brush Tip) to see the shape of the brush. The rest on the exact cursor ( Precise) to see the point from which you take the color. During operation, the Normal / Precise cursor mode is toggled with the CAPS LOCK key ( frequent question "Where did my brush cursor go?"). If you don't understand what this is about, just select a large radius brush and press CAPS LOCK.

Preferences\u003e Units & Rullers
Adjust for counting linear dimensions ( Rullers) in millimeters or pixels (the latter is more relevant for the web).
Print resolution put in 300PPI (in the printing house / photo lab you can find out the print resolution, but usually 300).
Screen resolution can count (on that website). The new version of Photoshop considers it itself, usually even correctly. Put "standard 72PPI" there NOT NECESSARY, there are no monitors with such pixel density for a long time.
Resolution (Resolution) - a value that determines the number of dots (raster image elements) per unit length. Resolution settings are not critical if you do not plan to print images, but it is better to set it correctly.

How it works and how to configure a color management system (CMS).
(you can open the color management settings here: Edit\u003e Color Settings, Shift + Ctrl + K)
Correct CMS settings are needed so that you and other users see the picture in the same way. In most cases, the sRGB color space is used, so it is recommended to work in it. Until you are familiar with the color management system, it is recommended to set the following values:
* In the old version of Photoshop, you need to click on the More Options button to display all the settings (not all are shown by default).
Working Spaces
Working Spaces\u003e RGB select a profile sRGB IEC61966-2.1 (In no case should you put Monitor Colors here!)
Working Spaces\u003e CMYK select a profile Coated FOGRA39
Working Spaces\u003e Gray select a profile Gray Gamma 2.2
Color Management Policies
In Color Management Policies you need to put all three fields in Preserve Embedded Profiles, all three check marks Ask When Opening include.
Conversion options
It is very important to use the engine Adobe ACE, not microsoftware.
· Intent = Perceptual (in most cases it gives the optimal result, later there will be a separate article about out-of-gamut color casting modes)
· Use Black Point Compensation turn on
· Use dither turn on
· Compensate for scene-referred profiles turn on
Advanced controls
Blend RGB Colors Using Gamma \u003d 1.0
Blend Text Colors Using Gamma \u003d 1.0
These settings are extremely important for those who paint in Photoshop. Without the option "blending in linear gamut" enabled, color mixing in Photoshop does not work correctly and the colors are "dirty".
It should look like the picture below

This completes the initial setup of Photoshop.
The reason for writing this material was the repeated questions on the forums and in personal messages by e-mail. The fact is that if the settings are not optimal, the program may slow down, as well as various other problems, for example, the inability to work with individual filters or tools.
So let's get started.
First, we will configure the basic parameters of the program itself, and then move on to the color management settings.
In order to open the settings dialog, you either need to go to the menu Editing - Settings - General (Edit -Preferences -General) CTRL +K.
The following settings window will appear (by clicking on the picture, you can view a larger image).
Here I usually put the default interpolation algorithm Bicubic (best for smooth gradients)... This algorithm is the most versatile and is suitable for both reducing and enlarging images. However, after reduction, you will have to sharpen it. If you mainly reduce images, then you can put the algorithm Bilinear... Then, in most cases, you will not have to sharpen after reduction, or you will have to do it much less often.
Also I uncheck the option Tool change by keySHIFT... This speeds up work, as it allows you to quickly switch between tools of the same subgroup (for example, between a regular and a mix brush) by pressing just one key, rather than two.
Now let's go to the next tab Interface

The settings here are mainly about visual effects (circled in red). I turn them off as it interferes with my work. The color of the interface is a matter of taste, but I'm used to working in the old fashioned way in a light interface.

I do not use the next tab, as the settings synchronization function is not yet fully developed. I am not making any changes to it.

Go to the tab File handling

This is where I change the setting Maximize file compatibilityPSD andPSB... I put the value Alwaysso that every time you save, the window with this request does not appear.
The next tab is Performance.

Here you need to set the amount of RAM that will be used by the program, the number of steps in the file change history available in the palette History, scratch disks, and configure the settings for using the GPU (video card). Let's go through the order.
It is better to set RAM within the range recommended by the program so as not to slow down the operation of the operating system and other concurrently running programs and processes.
The working disk must be selected different from the system one (the one on which the operating system is installed). The scratch disk is used for temporary files that Photoshop creates in the process. It is very good if it is an SSD drive, in which case many operations will be performed faster.
I leave the number of steps in history at 20 by default, since I hardly use the history of changes. Why? Yes, because after a couple of minutes of retouching, even 500 steps of the history will already be used, and large resources are required to store history, which can slow down the program.
Therefore, instead of referring to history, you just need to properly organize your work: perform operations on copies of layers, use the principles of non-destructive editing.
In the GPU settings block, you need to check that the checkbox is enabled Use GPU... For more detailed settings, click the button Extra options

Check that the parameters are set in the same way as in the figure. Pay particular attention to the two checkboxes - Use GPU to speed up computations and UseOpenCL... Disabling these features makes many operations and filters unusable.
Of the following tabs, the tab is practical. External modules... It must include the block flags Filters and Extension Panels... Then all filters will be shown in the menu, and the various extension panels will work.

Now let's configure the settings for the color management system. To do this, either go to the menu Editing - Color Settings (Edit -ColorSettings) or press the key combination SHIFT +CTRL +K... The settings window will open

In line Settings from the dropdown list select Universal settings for Europe... Thus, sRGB IEC61966-2.1 will become the main workspace for RGB. This completes the color adjustment.
You can use the pre-installed environment as a working environment The photo... You can select it in the upper right corner of the program window. You can then customize the program palettes as you wish.

Now you need to restart the program and you can start working.
Articles in the same category
Regardless of how you got the Adobe Photoshop CC program, whether you registered on the official website and rented it or downloaded it from Torrent, in any case, you need to set up Photoshop.
Someone in English, someone in Russian. It doesn't matter either. We can customize it anyway. I will show on my Russified version.
The interface, depending on the version of the program, may differ slightly. Don't worry if some setting is missing in one section or another, it will still be reflected in another.
Photoshop setup is as follows
Go to the menu Editing - Settings - General
It is better to leave everything by default in the basic settings.
Working window interface
In the Interface menu, customize the color theme of your Photoshop. It can be completely black, it can be very light. It all depends on the taste and mood of the person.

Here you can also adjust the language and font size. The most convenient Small, but everyone can choose from the list for their monitor and their level of vision. We leave the rest as is.
"Synchronize settings" skip and configure file processing
This section of the settings menu does not require editing at this stage. The developers have tried to set the optimal settings by default. Later, when you learn what the RAW format is used for, you may need this setting. Now we leave everything as it is


Check the Use GPU box. This is to help your computer's processor.
The fact is that image processing is a process that requires a lot of resources from your computer, so it uses all its capabilities. And if you have a good video card, which also has the same GPU, and it also needs to be connected to the image processing work. This is where we connect it.
Memory usage. This is the setting we define for using Adobe Photoshop CC in its workflow.
The available memory determines how much your computer can give to run Photoshop at the moment. And at the same time, to give other programs the opportunity to
work. We define this with the slider, setting the memory it occupies for the program.
60% is enough for stable operation. By setting 100%, we condemn parallel programs to braking.
Leave the rest of the parameters in this section as they are.
Scratch disks for storing archives
If you install the C drive, that is, the root drive, then you boot the system, which is not desirable.

This parameter is purely creative, over time it will be needed, but for now we will leave it as it is.

We leave "Transparency and color gamut" as it is
Measurement units and rulers
We set the units in pixels, Columns in points

We do not pay attention to "Guides and fragments" for now and leave it in the same form.

"External modules", "3D", "Experimental functions" leave the default settings.
Make the settings for this parameter as follows

We have successfully completed the Photoshop setup, in the next article we will consider Importing photos into the program.
In the era of digital photographs, the means of processing them were required. The place of the best is rightfully taken by "Photoshop". Its possibilities, if not limitless, are certainly very significant. But most users completely misuse some of Photoshop's settings, or are unaware of their existence. To use the full power of the program, you need to configure it correctly.
What are the options?
Many, when they first open the program, find themselves face to face with dozens of buttons, sliders, and parameters. A completely logical question immediately arises: "Where are the settings in Photoshop?" Editor parameters can be divided into several conditional categories:
- Hardware settings of the program itself.
- Colors.
- Brush and interface options.
- Separate parameters for each tool.
Correctly and conveniently setting up "Photoshop" for the first time is almost impossible. It takes time to get used to the program. It can take several hours, a week, a month - it all depends on the frequency of work.
Differences between Photoshop CC and CS
The debate about which version of the popular editor is better has been going on for several years.
In "Photoshop CC" built-in advanced capabilities for teamwork on a project, improved capabilities and performance of 3D-design and 3D-printing, expanded standard set of brushes and some tools. In addition, the program runs on a new engine, which means it has become a little more productive.

Differences between the CC version and CS will be subtle or invisible to a novice user altogether. Setting up "Photoshop CC" is almost identical to setting up any other "Photoshop", therefore, following the general recommendations of this article, you can customize this editor as you like.
main parameters
You can go to the main parameters window by pressing Ctrl + K. There are quite a few parameters here, and if you describe each of them separately, you will get a whole documentation for "Photoshop", so we will dwell only on important points in detail.

- So, the first tab is General (basic settings). Here you can select the dynamic palette display, color system, and image interpolation method. Below is a list of useful items. By default, they are quite acceptable, if you are not sure of the correctness of the actions, you do not need to touch them.
- Next comes the Interface tab. Here you can select the background color and the window itself, the program language and the font size. Everything you need to customize Photoshop for yourself.
- File Handling menu. Menu for saving and opening documents. You can also leave everything as default here.
- Performance tab. More detailed below.
- Next are the various interface settings. You can choose the display mode for rulers or their values, cursors in different situations, guides and grids, plug-ins and typography settings window.
Performance settings
In the Performance tab, you can choose the settings of "Photoshop CS6", at which it will be more comfortable to work even on weak machines. The first section is memory. Any value can be set using the slider. The system automatically calculates the available amount of memory bytes and the most favorable range of values, in case you find it difficult to decide yourself.
Cash and history. History is needed to save actions and their possible cancellation. The choice of the number of steps to record is entirely up to you. 20-30 points is a perfectly acceptable value. The cache is needed to store the current image at different scales in memory. So, it is easier for the program to reproduce the saved image than to scale it every time.

Graphics and disks
In the Disk Settings section, you can select a local partition that will be used to store temporary files, and, if necessary, act as a swap partition. By default, this is the system partition, but you can use a disk with a lot of free space. Ideally, a separate section should be reserved for "Photoshop", and in this window, specify it. This will speed up the program a little.
The last window is GPU usage. It is definitely worth checking the box if you have an additional graphics card. To render large images, Photoshop needs as much processing power as possible. In the additional menu of this item, you can select the GPU usage mode.
Color setting
Photoshop supports many working color profiles. You can go to the "Photoshop" color settings menu by pressing Shift + Ctrl + K. There are few items here, but many parameters inside each dropdown list.

- The first section, Settings, is a list of settings. Offers several predefined macros to choose from. In most cases, you can use one of them.
- Next are the settings for the working color profile. Classic Adobe RGB (1998) is suitable for most professional cameras and other images. Having the largest allows you to display and adjust colors in Photoshop on a monitor or print.
- The last point is the choice of a policy of action. For each color space, there are three identical color profile settings. Off - Disables color management for images with a profile different from the working one. Preserve Embedded Profiles is the best option. Allows you to save the embedded profile and restore it in case of incorrect conversion to a working one. Convert to Working - Simply converts the original profile to working.
In order to fully control the color parameters of incoming images, check all three lower checkboxes in the Color Management Policies section. In this case, the program will offer several actions to choose from each time if the color profile of the incoming file does not match the built-in working profile.
Interface personalization
There is a fairly wide range of interface settings in Photoshop. It is possible to change the position of almost all tools, tabs, add or remove any of them by simple drag and drop.

There are also saved factory macros for various tasks. You can select them in the "Main workspace" tab in the upper right corner, just above the entire work area. In the drop-down list, you can select ready-made samples, reset settings or delete the workspace macro.
By the way, the choice of the type of workspace is a purely individual matter. For artists, it will be useful to constantly display a navigator or palette, for photographers a histogram, for designers, coordinates.
In the "Photoshop" settings you can control the parameters of the main menu. By default, the window opens with the Shift + Alt + Ctrl + M combination and contains only two tabs and one list of current settings. It makes sense to turn off rarely used tools in order to save screen space, but only if it's really necessary, because you never know what pitfalls the processed photo is hiding.

In the same window, you can customize keyboard shortcuts based on your needs. You can connect any combination for any item. The menu is intuitive, there are no complicated settings in it, which means that we will not dwell on this in more detail.
Instrument settings
In addition to customizing the usability of the program, you can fine-tune brushes and other tools. Each has a "flash menu" that opens directly above the work area when activated. For example, brushes have a choice of type, size, blending mode, pressure, and several settings for tablets. There is also a button for switching to a full-fledged menu for setting and managing brushes.

There are quite a few brushes in Photoshop, but they are all useful. The menu with brush presets opens by right-clicking in any part of the workspace, but the global settings menu is opened by LMB clicking on the brush icon in the side menu on the right or on the icon in the flash menu. Here you can choose any path effects, add texture, blur, rotate, refine and stylize only the path or the entire print. More flexible brush settings in Photoshop can be done with a graphics tablet. You will immediately notice the effect of pressure and the quality of the texture of a particular brush at the edges of the line. This is more true for brushes with complex shapes.
Instrument Settings Manager
From the same menu, you can go to another block of settings by clicking on the icon in the lower right corner. In this window, you can add or remove brushes, create your own, sort and create toolboxes. You can load not only brushes, but also any other elements from the drop-down list. You can download them ready-made or make yourself.
Unfortunately, we cannot recommend any generalized settings for this menu. It all depends on your preferences and type of activity. Just try moving the sliders and see what happens. You will definitely find a brush of the desired shape and texture.

Printing
"Photoshop" can be used not only for drawing or processing photos, but also for high-quality photo printing.
All print settings in Photoshop are located at or Ctrl + P. There are several ways to print, depending on what kind of images you want to get on paper:
- Small resolution prints, vectors, text, monotonous abstractions and low resolution photos.
- High resolution photos and pictures and complex geometry printing.
In the first case, you can simply go to the print menu by pressing Ctrl + P. All that needs to be set in this window is Printer Manages Colors. Optionally, in the upper section of Printer Setup, you can select the orientation of the sheet or make adjustments to the advanced settings of the printer itself.

As in the first case, go to the print section Ctrl + P. In the color management menu, select Photoshop Manages Colors (the color is controlled by "Photoshop"). Next, select a color profile. It usually comes with the printer drivers, but it can also be downloaded manually from the printer manufacturer's website. The color profile should accurately describe the operation of the printer. Optionally, you can set the rendering method and black point compensation and other parameters. This method will allow the most accurate color reproduction during printing.
There is no need to change the standard RGB. All modern printers perform automatic profile conversion.
What if you've configured too much?
After visiting all the sections of the settings, dragging the various sliders and hiding a couple of important windows, you may find that the program has become noticeably worse. There is nothing to worry about, you do not have to reinstall the program. You can return to the default Photoshop settings in a few steps and get the product out of the box.
- To do this, at the time of launching the program, hold and hold the Shift + Ctrl + Alt combination. A confirmation window will appear. After agreement, the program will restart with factory settings.
- But you can also click on the "Cancel" button in the main settings window, with the Alt key pressed first.
After the done actions, set the necessary settings for "Photoshop" and restart the program.