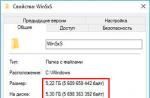
Every year there are more and more owners of high-tech intelligent technology, and more and more often the question arises about the possibility of connecting smartphones via wifi connection to the computer.
This problem can be solved simply if the home Internet connection is connected via a Wi-Fi router, but situations often arise when there is no access point nearby, and the only possible solution This problem is the ability to distribute Wi-Fi from a laptop running under the Windows 7 operating system.
Configuring a wireless connection using the operating system
Great advantage modern systems Microsoft is that there is no need to install additional third-party software in order to solve the problem of distributing Internet from a laptop on Windows 7 via WiFi, since all the tools necessary for this are already built into the operating system.
It is enough just to perform a few simple steps, following the instructions that will be given in the article below. To set up a connection, you first need to go to the "Network and Sharing Center" by clicking on the corresponding icon in the lower right corner of the desktop.
Network and Access Center
Then you should start the "Connection Wizard".
 From the options offered, select "Configuring computer-to-computer wireless networks", after which a new window will appear in Windows in which you must continue to establish the connection by clicking the "Next" button.
Then, in the appropriate fields in the setup wizard, it is recommended to enter the standard wireless connection parameters, where the network name - you can use any name based on your personal wishes, and select the security type “WPA2-Personal” and come up with a difficult password. After filling in all the fields, you need to save the wi-fi parameters Windows connections and press the "Next" button again. 
If all the above steps were performed correctly, then the new wireless wi-fi connection should work. Before starting work in this connection, you must turn on general access by pressing the specially indicated button.
After closing the settings wizard, you need to complete the access settings, for which you need to go to the sharing settings section from the Network Control Center. All buttons must be set exactly as in the photo below and click on the "Save Changes" button.
Finally, all the settings are completed and now you know how to distribute Wi-Fi from a laptop using windows 7. 
Wifi from the command line
There are many tutorials on the Internet on how to set up wifi for distribution on the Windows 7 operating system, but here we will consider setting up distribution from a laptop using the Windows command line. To start configuring the distribution of the Internet, open the "Start" menu and find the "Command Line" utility in the system applications, after which the application must be launched. To create a wireless wi-fi network in the command line of the laptop, enter the commands: "netsh wlan set hostednetwork mode = allow ssid = komputer-info key = 12345678". "Komputer-info" is the name of the shared wifi from a laptop on Windows 7, and "12345678" is the password without wired connection Wi-Fi. When you have finished entering all the commands, you must continue by pressing the "Enter" key.
 The monitor screen will display information about the new wifi network, which can be started by running the command "netsh wlan start hostednetwork". Now that the wireless connection has been activated, there are a number of steps you must follow to configure your laptop to be able to access the global web.
You need to go to the "Network Control Center", find the desired connection through which the computer is connected to global network, and go to the "Properties" section. In the "Access" tab, check the boxes as in the picture below.

After completing all the settings, you can freely connect all the necessary devices to wireless wifi connection created by a laptop and enjoy the vastness of the Internet.
It should be borne in mind that sometimes even with the correct settings for wireless connections, devices do not get access to the network. The reason for this may be an incorrectly selected connection, an incorrect password, and often the connection is interrupted by firewalls and antiviruses.
The publication discussed in detail the options for creating new wireless connections, in the case when there is no specialized wifi router, but access to Runet is needed on all home devices. Modern Windows tools 7 allows you to quickly solve this problem, which is within the power of even inexperienced computer users.
In our age of digital and modern technologies, it is impossible for the average citizen of the city to imagine life without the Internet. One of her sons is WiFi. And the question naturally arises, how is it still necessary to distribute WiFi from a laptop, if there is no possibility (or desire) to connect a router. Let's take a closer look at this.

Before sharing WiFi from laptop
Before you start setting up WiFi sharing via a laptop, you need to make sure that your device is equipped with a built-in device for distributing the Internet: WiFi adapter either USB or PCL type. Their availability can be viewed in the Control Panel under the Network and Internet tab. If you found the Wireless Network item in Network Connections, then you can safely start organizing the distribution of WiFi.
WiFi is a trademark of the Wi-Fi Alliance. Provides the ability to connect using the standard IEEE 802.11 protocol. In general, it is a wireless network that can be used by all devices that support a similar transmission standard.
Programs for creating a virtual WiFi hotspot
The first step is to create a virtual access point. It will be your laptop. To make a WiFi point out of it, you can download free programs from the official sites.
mHotspot
One of these programs is called mHotspot. This software does not need to be installed. After it is downloaded, you need to launch mHotspot. The necessary program settings will be indicated there. For example, a field called Mhotspot name is used to enter the name of the future network. It is he who will be seen in the list of points available for connection.
You can download the program from the official mHotspot website.
The window for working with the mHotspot program
The next field is called Password. This is the password. It must be at least eight characters long. It is important to enter it in order to protect the network from access to it by unauthorized people.
The field called Max Clients controls the number of gadgets that can be connected to the network at the same time. The maximum number is ten. If one is specified in this field, then no one except your computer will be able to connect to it. Click Start Mhotspot and proceed to create an access point.
Video: how to use the mHotspot program
MyPublicWiFi
Another program that can be downloaded from the Internet is MyPublicWiFi. By clicking on the link to the official site of the downloader, you can download the software to your laptop. The program does not require installation and works immediately after downloading.
MyPublicWifi work window
The MyPublicWifi program allows you to make a Wifi hotspot from your computer. Operating instructions:
- Download MyPublicWifi (preferably version 5.1).
- To install the program.
- Restart your laptop.
- Run MyPublicWifi (or run the MyPublicWifi program as administrator, if it gives an error during normal startup).
- Specify the Automatic HotSpot configuration item.
- select the name of the network to be created in the Network Name (SSID) field.
- Enter the password in the Network Key.
- Select (tick) Enable Internet Sharing.
- In the list, select the laptop's connection to the Internet network.
- Click the Set up and Start Hotspot button.
MyPublicWifi software works great and does not require much effort to connect
How to Create an Access Point: Three Best Ways
Sharing via an existing Internet connection
Distributing Wi-Fi via an existing Internet connection is within the power of Windows 7 and 8 operating systems.
In order to make an Internet distribution, you must follow these points:
- Start.
- Control Panel.
- Network and Internet.
- Network and Sharing Center.
- Change adapter settings.
- Wireless Network Connection 2. Rename it as desired. As you wish.
- We find our own active connection. It is mainly referred to as connect over local network... Also referred to as Virtual WiFi.
- In the properties of the active connection, find the "Access" tab and go on it. In this tab we put a checkmark, that is, we agree with all the points. Namely:
- we allow other users to use this network;
- allow other users to control the connection to the selected network.
- Select your active connection from the list. That is: a local area connection (or whatever name you renamed the connection to).
- Click the "OK" button and restart your computer.
If you want your smartphone, tablet or laptop to be able to use this access point, you should only run the program for distributing Wi-Fi. And on the devices that will be connected, you must enter the passwords for accessing the network.
A way to configure WiFi sharing using the command line
The above methods work little if you need to distribute WiFi from a computer on which Windows 10 is installed.
What the command line looks like on a laptop screen
Stages of distributing wireless networks using command line:
- Check the possibility of distribution. You must run a command prompt as administrator and enter the netsh wlan show drivers command in it.
- Read the item "Hosted Network Support" (if the settings are in English, it will say Hosted Network). The word "yes" should be indicated there.
- The next item on the command line is: netsh wlan set hostednetwork mode = allow ssid = remontka key = secretpassword. In this case, in the command instructions such as "remontka" is the name wireless network(you can write your own, spaces are not used). Secretpassword is a secret WiFi password. You choose it yourself.
- After all the data is entered, enter the command: netsh wlan start hostednetwork.
- Right-click on the "Start" menu on the desktop and select " Network connections».
- In this list, select the Internet connection that is currently in use. Click the right mouse button to open the "Access" tab. Allow access to other users.
Configuring network capabilities via the command line
Finally, a notification will appear on the screen that the wireless network has started. If no errors and failures have occurred, then you can connect phones, tablets and laptops to this network. They will now have access to the Internet.
Windows 7 Access Point: Computer-to-Computer Network
Video how to set up WiFi distribution from a computer via Windows 7
In order to organize a wireless connection on Windows 7, you need to create a computer-to-computer network. In the lower right corner of the screen (where the clock, date, icons quick launch... This is called - tray) find "Internet connection". Click on it, and then select "Network and Sharing Center".
A window will appear. In it, you must select the item "Setting up a new connection". And click "Configure the wireless network" Computer-Computer "and" next ".
In a new window, fill in three columns:
- network name (come up with yourself);
- security type (WPA2-ptrsonal is best);
- security key.
Going to the "Network and Sharing Center" in the "Change advanced sharing options" check the box on "Enable" on all items. Do not forget to check the box "remember network settings". Press the button "next".
After the system configures the distribution of the Internet via WiFi, in the window that appears, you will need to click "Enable Internet Connection Sharing".
The setup was successful if after that the computer can freely distribute the Internet via WiFi
Security issues when distributing Wi-Fi without a router
Since, as a result of organizing a virtual access point, an account is created with standard parameters, the name admin, then any person who is at least somehow familiar with the network can easily connect to it.
To prevent this from happening, it is important to know some points. Actions that are required to protect yourself and the network from intrusion by interviewed guests.
Window 192.168.0.1.
In the address bar of the browser (any), enter 192.168.0.1. A window will load on the screen, in which you will need to enter the admin name and password. Going to the Maintenance tab in the section called Administrator. In the New Password field, enter a new, complex password. It must be remembered. It will be required when connecting other devices to the network. By clicking on Confirm Password, we confirm that we are saving the written password. By the same principle, we change the Login Name. At the end of each performed action, click Save Settings. This means: save the settings.
Thus, we have protected account... With the help of another, it is possible to change all the network settings. Including connecting and disconnecting devices, as well as blocking gadgets so that they cannot connect to this network.
We turn to directly protecting the access point. In already open tab in the browser we find an item called Setup, that is, Settings. In it, select the Wireless Settings section. Will open a new window. It requires you to select a function called Manual Wireless Connection Setup. In the settings section, which is located in Wireless Network Settings, set a new network name (SSID). It has to be hard enough.
If you want the configured network not to be seen by users of other gadgets, then the Enable Hidden Wireless field should be checked.
We connect the tablet, smartphone and laptop to the distribution
After the distribution of Wi-Fi is organized, smartphones, planets and other gadgets with support for a wireless connection will need to be connected to the newly-minted "router" in the form of a laptop.
The connection features have devices running on the Android operating system. Of course, first of all, it is better to check if other devices are allowed to access the network.
If it is, then you need to download the adb program. It is designed for the Internet from Windows to Android devices. The next step is to enable a mode called "USB debugging" in the settings of your Android tablet or smartphone. And after that, connect the gadget via a USB cable to the laptop.
Unpack the folder with the adb program and run AndroidTool.exe. A window will open, in it you will need to click the Refresh Devices button. On the right, there will be a list called Select Domain Name Server (Dns) ... There you choose your DNS server. After clicking the Show Android Interface button, the application will be installed on your tablet.
Allow the USB Tunnel program to root the tablet. And boldly press the Connect button.
To organize a wireless network, a router is used - a special device that forwards packets of information between network components (see).
In the absence of a router, data transmission can be realized using modern laptops, tablets, smartphones that have a WiFi module built into devices at the manufacturing and assembly stage.
Using software methods on a laptop, you can create a virtual router that distributes WiFi signals with the provision of general access to the Internet (see).
The article discusses three ways to organize "distribution" of WiFi from laptops:
- when using the "Computer - Computer" connection;
- using the command line operating system console application;
- using additional software.
In Windows versions 7, 8, 10, the processes of creating and configuring a wireless connection and sharing the Internet are similar and have a general scheme.
Before creating a shared access point on a laptop and distributing Internet tools from it, you need to:
- check the operation of the wireless module of the laptop. You can diagnose the Wireless Network Adapter using the built-in tools of the operating system in the Device Manager (Screen. 1);
- if any problems are found, update or reinstall the drivers on network adapter by downloading programs from official sources;
- connect your laptop to the Internet using a cable connection or USB modem;
- enter the data correctly network settings into the operating system of the laptop, taking into account the recommendations of the provider.

Screen. 1
Setting up a temporary peer-to-peer network between computers for Internet sharing
To install, you must use the system tools for configuring and managing networks. In the control console, sequentially go through the sections, according to the screenshots below (Screen. 2 - 8).

Screen. 2

Screen. 3

Screen. 4

Screen. 5
Assign a name new network, select the security options and mark "Save options", as indicated on the Screen. 6.
For example, name: Connection check 2, 8 character security key: 12345678.

Screen. 6
Wait until the end of the setup and activation of the newly created network to connect users - Screen 7.8.


Screen. 7, 8
In the list of available wireless connections in the surrounding area Wi-FI devices a newly created network will appear (in the example: Connection check 2) - Screen. nine.

Screen. nine
- in the section of configuring and managing networks, use the Changes adapter parameters console,
- select a connection that provides access to the Internet (in the example, Ethernet);
- go to Properties;
- in the Access tab, mark "Allow ..." and OK - Screen 10, 11.


Screen. eleven
Organization of WiFi through the command console
Command line interface launch options:
Using the command window / Run /. Press the combination + R, type cmd in the line and OK - Screen. 12.

Screen. 12
Through the search bar in Start. In the line, type "cmd" or "Command line" and run the result as indicated on the Screen. 13 (with administrator rights).

Screen. 13

Screen. fourteen
In chapter Standard programs in the Start menu, find the Command Prompt application and launch the console (see Screen 14).
Find the "cmd (.exe)" file in the C: \ Windows \ System32 directory and open it with administrator rights (Screen 15).

Screen. 15
For Windows, version 8, 10, type in the search bar "cmd" or press the combination + X.

Screen.16

Screen. 17

Screen. eighteen
In the command console that opens, do the following:
- to dial Netsh wlan show drivers,
- press Enter to start the wireless adapter test.
A message about hosted network support will appear - Screen 19.

Screen 19
If there is no such message, check the drivers installed in the system for the WiFi module.
After a positive check, type the line:
netsh wlan set hostednetwork mode = allow ssid = proverka key = 12345678 keyUsage = persistent.
As a result:
- the wireless module of the laptop is converted into a router,
- a name (proverka) is assigned,
- set to a constant value for the use of the security key (password-12345678, keyUsage with the value persistent).
If the command is executed correctly, the console will display lines to confirm the network mode permission and change the identifier and password - Screen 20.

Screen. twenty
To start, dial:
- Screen. 21

Screen. 21

Screen. 22
The new connection works, but Without Internet access - Screen 22.
To configure the general use of Internet resources, you need:
through the Start / Run / menu interface, type ncpa.сpl(Screen. 23) and enter Network Connections.

Screen.23
As indicated on Screen. 24, in the properties of the adapter to which the cable is connected, set permission to access and use the Internet connection.

Screen. 24
restart the network by typing in the command line to stop and start- Screen. 25:
- netsh wlan stop hostednetwork
- netsh wlan start hostednetwork.,

Screen. 25
to get information about the status of the hosted network, the number of users and the state of the connection, the command is useful:
netsh wlan show hostednetwork- Screen. 26.

Screen. 26
The distribution of the Internet via Wi-Fi launched in this way stops after each shutdown of the laptop. To restart, you need to retype the start command.
Creation of a special batch file to automatically start the network when the laptop starts
In order for the organized wireless network to start automatically when the laptop is turned on or rebooted, it is necessary to create a special batch file containing the Wi-Fi parameters and place it in startup.
For this:
Create a file in Notepad editor,
- netsh wlan set hostednetwork mode = allow ssid = proverka key = 12345678 keyUsage = persistent
- netsh wlan start hostednetwork(Screen. 27),
- where s s i d and k e y must have the values of the newly created connection (in the example, the name proverka and the password 12345678).

Screen. 27

Screen. 28
The interface is in English.
After installing mHotSpot, to configure, you must enter the following data (Screen 29):
- Network ID Hotspot Name (in the example proverka 4);
- Connection password Password;
- Source of access to the Internet - Internet Source (for example, local area network connection);
- The maximum number of users to connect to the access point.
Click Start Hotspot and the network will be activated.

Screen 29
In the mHotSpot working window, you can track the statistics of the use of network resources, configure autostart and auto-update of the client list.
Connectify
The program interface is English, supports Windows systems XP, Vista, Windows7, Windows8, Windows10.
The program is paid, however, there is a free analogue with some limitations in functionality.
After downloading the program from the official site (Connectify.Me), it must be installed with the subsequent reboot of the laptop.
After launching the Connectify application, in the Setting section, enter the following data:
- HotspotName = Connectify-me (does not change in the free version);
- Password - in the Password field;
- The Internet connection from which the distribution is made, in the Internet field;
Press Start to start (Screen 30).
The program is automatically placed into startup, creates a special service and is accessible from the tray.

Screen. thirty
Switch Virtual Router
To configure the interface language, control autorun and display on the screen, go to the menu ("gear" in the lower right corner) and select the General tab.
To open public access to the Internet through a virtual router, you need to click on the arrow of the main program window, as shown in Screen 31, and proceed to setting up network connections (see the description above in the article and on Screen 24).

Screen.31
- In the general settings of the virtual router parameters:
- fill in the name field (in the example proverka 4),
- enter the password twice;
- OK, Apply;
- click Start and start the connection (in the main window of the program there will be an inscription Access to the Internet, and information about the connected devices will appear) - Screen. 32.

Screen.32
My Public WiFi
it free program with an English-language interface.
My Public WiFi is similar to the mHotSpot, Connectify and SwitchVirtual Router utilities described earlier in the article.
It is necessary to install and run the program with administrator rights (Screen. 33).

Screen. 33
In the Automatic HotSpot configuration menu items, enter the Network Name, password, check the Enable Internet Sharing general access and select the required connection. Then click Set up and Start and the My Public WiFi program will start distributing WiFi.
In the Client and Management items, you can view the connected users and change the general settings.
Virtual Router Manager
Program with an English-language interface.
You can download it for free at VirtualRouter.Codeplex.Com.
To distribute WiFi funds, you need:
have a cable connection with Internet access by specifying it in the settings,
set a name and password (Screen 34).

Screen. 34
FAQ - Wireless Distribution Issues
There are messages - "unable to start virtual router", "this type of network is not supported", "failed to start the hosted network"
- update or reinstall drivers for laptop WiFi adapter,
- check if the wireless network is working.
When a mobile device is connected to the created virtual network, there is no Internet access
Check the following:
- whether the source of WiFi distribution through which the laptop has an Internet connection is specified correctly,
- whether web pages are opened on the laptop itself,
- Disable antivirus and firewall (firewall) and try to check access. If, in this case, Internet access appears, add this connection to the antivirus exceptions.
Reload the Wi Fi distribution with the appropriate commands.
Devices do not connect to the created network and the error "failed to connect to the network" appears, or the "Obtaining IP address" process hangs
Disable anti-virus software and try reconnecting.
If you have a computer that is connected to the Internet using a cable, then you do not need to buy a router in order to connect other devices to the Internet. Instead, you can share Wi-Fi directly from your computer and connect your phones, tablets, and other mobile gadgets to it.
Sharing Wi-Fi from a computer running Windows 7
The first way to distribute Wi-Fi from computer to phone involves using the command line. It works fine on both Windows 7 and the more modern Windows 10. Although, if you have Windows 10, we recommend using the second method, which is described a little below, and this method is best used only on Windows 7.
So, in order to configure the distribution of Wi-Fi, you need a command line. Moreover, it must be run with administrator rights, otherwise the commands will not work. In order to start the command line with administrator rights, open the "Start" menu, enter "Command line" in the search, right-click on the found program and select "Run as administrator".
After starting the command line, you can proceed to Wi-Fi setup connection that will distribute the Internet from a computer to a phone. To do this, first enter the following command:
netsh wlan set hostednetwork mode = allow ssid = "wifi_name" key = "wifi_password" keyUsage = persistent
Wherein parameters "wifi_name" and "wifi_password" must be replaced with your own since this is the name Wi-Fi networks and a password to access it.
If this command succeeds, you will receive a message stating that the hosted network mode is enabled in the wireless service, and the network ID and password have been changed.

After that, you need to execute one more command:
netsh wlan start hostednetwork
This command will launch the previously created Wi-Fi network, after which it will already be possible to connect to it. If the command “netsh wlan start hostednetwork” does not work and you receive the error “Failed to start hosted network”, then this means that you have some problem with the Wi-Fi adapter. The drivers may not be installed or the Wi-Fi adapter is disabled. Check everything and try running the command again.

After the Wi-Fi network is launched, you can also connect to it using your phone, but the Internet is still not being distributed. In order for this Wi-Fi network to start distributing the Internet, you need to press the combination Windows-R keys and in the window that opens, run the following command:
This will take you to the Network Connections window. Here you need to right-click on the connection, through which your computer gains access to the Internet and select "Properties"... Please note that you need to open the "Properties" for the connection through which the Internet enters your computer, do not confuse network connections.

After that, a window with the properties of the network connection will open in front of you. Here you need to go to the "Access" tab, check the box opposite the function "Allow other network users to use the Internet connection this computer"And select" Local Area Connection 13 "in the drop-down list.
It should be noted that in your case, the name of the network that you need to select will be different... You can see the correct name in the "Network Connections" window, a new connection will appear there.

That's all, close the connection properties by clicking on the "Ok" button and check how the distribution of Wi-Fi from the computer to the phone works.
In the future, if you want to stop the distribution of Wi-Fi, run the command "netsh wlan stop hostednetwork". In order to restart the distribution of Wi-Fi after stopping or restarting the computer, run the command "netsh wlan start hostednetwork".
How to share Wi-Fi from a Windows 10 computer
If your computer is running Windows 10, then there is a much easier way for you than the one described above. In your case, to configure the distribution of Wi-Fi from the computer to the phone, you will need to do just a few clicks.
So, if you have Windows 10, then you need to open the "Start" menu and click on the gear button in order to go to "Settings".


After that, you need to go to the subsection " Mobile hotspot»Enable the function with the same name there.

After that, Windows 10 will start sharing Wi-Fi from the computer. In order to connect to the created network, you need to use a password that is available in the same section of the "Parameters" window.

If necessary, the name of the Wi-Fi network and the password can be changed, for this there is a button "Change".
To connect several devices to the Internet at once, including wirelessly, a classic Wi-Fi router is most often used. Modern routers do an excellent job of providing a reliable and interference-resistant connection, but a router may not always be at hand. A standard situation - you decided to spend a few days at the dacha and took with you only a laptop with a USB modem. It would be nice to be able to connect to the Internet through it, not only on your laptop, but also on mobile gadgets such as a smartphone or iPod. Those. there is a need to use a laptop as a separate Wi-Fi access point, to which, by analogy with a conventional router, other devices can be connected. If anyone did not know, the functionality for the implementation of such a task is built into OS Windows 7/10, the main thing is that your laptop is equipped with a wireless adapter.
So, in this article, in a step-by-step mode, we will consider all the main methods of distributing Wi-Fi from a laptop running under Windows control 7 or Windows 10. The access point will be created both by the system itself and by using the most popular third-party programs. The source of the Internet for the laptop will be a 3G modem of one of the operators mobile communications... However, all the considered schemes will work in the case of a conventional wired Internet connection.
Creating a virtual Wi-Fi router via the command line
For users who are not friendly with the command line, this method will certainly seem rather complicated and tricky. However, if you follow the instructions exactly, then no problems should arise. The most important thing, this way universal, i.e. works in both Window 7 and Windows 10, and does not require the installation of any additional applications.
First of all, we will launch the command line itself as administrator. This can be done through the search bar of the Start menu by right-clicking on the "Command line" item and selecting "Run as administrator". In Windows 10, just right-click on the Start menu icon and select "Command Prompt (Admin)".
In the console, immediately execute the command netsh wlan show drivers in order to make sure that the laptop's Wi-Fi adapter is currently capable of operating in access point mode. After entering the specified command, press Enter and look for the line "Hosted network support".
If there is “Yes” next to it, then everything is in order and you can proceed to the next step, but if “No” is written, then it makes no sense to continue, since the adapter is not ready for Wi-Fi distribution. The reasons for the lack of support for the hosted network can be very different - from incorrectly installed (or old) drivers to incompatibility of the current Windows versions with installed equipment. We have devoted a separate article to ways of solving such a problem (see ""), so now we will not focus on them and will go further.
At this stage, we need to enter a command to initialize the created Wi-Fi virtual host. It looks like this:
netsh wlan set hostednetwork mode = allow ssid = InternetNout key = 87654321
- InternetNout is the name of the wireless network;
- 87654321 - password.
If everything went well, a corresponding message will appear, as in the screenshot.

Now we launch our network with the command netsh wlan start hostednetwork, as a result of the execution of which we should see the message "Hosted network started".

We need to check if a new wireless connection has really appeared. We go to the "Network and Sharing Center" and find the network we created InternetNout.

True, she still has the status "Without access to the network", which categorically does not suit us. For a virtual Wi-Fi point to be able to distribute the Internet, it must access directly the connection through which the laptop itself receives the Internet. In our case it is Ethernet 3.

Click on it, and then click on the "Properties" button.

Next, go to the "Access" tab and put a check mark next to the item "Allow other network users to use the Internet connection of this computer." Below in the drop-down list, select the target connection. We have this "Local Area Connection * 14".

Click "OK" to apply the parameters. Now in the network management center status InternetNout changed to "Internet", which is what we wanted.

We take a smartphone in our hands and in the corresponding settings section we check whether the device sees the created Wifi hotspot... If all the steps described above are completed, then the network will certainly be detected. We click on it, enter the password and wait for the connection to occur.

The laptop will start distributing the Internet to our smartphone via Wi-Fi. To display information about the network, for example, the number of connected clients, the command netsh wlan show hostednetwork... To disconnect the access point, run the command netsh wlan stop hostednetwork.

Sharing Wi-Fi using a wireless computer-to-computer network in Windows 7
This method allows you to create an access point without any manipulations with the command line, but the technique works only in Windows 7. First, open the "Network and Sharing Center", and then click on the link "Set up a new connection or network".

In the window that opens, select the item "Configuring the wireless network computer-computer", and then click "Next".

Fill in the fields "Network name" and "Security key", then click "Next" again.

A window will appear informing you that the network is ready for use. At the same stage, it is suggested to enable Internet Connection Sharing. This must be done by clicking on the appropriate link.

Now all that remains is to wait for the operation to complete.

To see the newly created network, in the "Network and Sharing Center" on the left you need to go to the link "Manage wireless networks".

Here you can manage connections - delete, add, change properties, set priority.

Mobile hotspot in Windows 10
In Windows 10, it is possible to very quickly organize an access point for mobile devices via the Parameters utility. Launch the application and go to the "Network and Internet" section. In the menu on the left, select the item "Mobile hotspot".

If the laptop is connected to the Internet by a wired method or using a USB modem, on the page that opens, you can allow sharing internet connections by multiple devices. That is, the same Wi-Fi access point will appear, through which the Internet will be distributed from the laptop to other devices. To activate the hotspot, move the slider located at the top to the "On" position.

The network name and password for accessing it will be indicated below (they are generated automatically). The network exists (we call it DESKTOP-EHJUIN4 3118), but does not yet have access to the Internet, as can be seen by going to the network control center.

To open this access, you need to repeat all the same actions that we performed when working with the command line. We go to the Properties of the connection, which is responsible for the "delivery" of the Internet to the laptop, and on the "Access" tab, put a tick next to the corresponding item. Below, select the required connection from the list, for which we open access to the Internet. We save the changes with the OK button.

Make sure the network is now connected to the Internet.

We connect to it on a smartphone or any other device.

Popular programs for distributing Wi-Fi from a laptop
If all of the above methods do not suit you, or with the help of them it was not possible to distribute the Internet, it makes sense to use third-party programs, of which there are a great many. We will consider two of the most convenient in our opinion.
MyPublicWiFi
This application has a lot of positive reviews and has a simple interface that allows you to start distributing the Internet via Wi-Fi from a laptop after a couple of clicks. Download the program from the official website mypublicwifi.com and install it on your laptop. During installation, you will need to restart your laptop. Next, run the utility and set the settings for the virtual access point.

We register the name of the network and the password, we also indicate the connection through which the Internet will be distributed via Wi-Fi. The virtual network is launched by pressing the "Set up and Start Hotspot" button. The program has a minimum of settings, so it will not be difficult to understand them.

Connectify Hotspot
Another popular program that provides the ability to easily distribute Wi-Fi from a laptop to any portable device. Download the Russian-language version of the utility at http://www.connectify.me/ru/, install it and restart your computer. We launch the program. On the "Settings" tab, we see that the application can work in several modes. By default, the "Wi-Fi hotspot" mode is selected - this suits us. We set the parameters of the virtual router approximately as in the screenshot below.

Please note that we have created a new wireless access point, receiving the Internet through the same Wi-Fi. The program allows this configuration. After completing all the settings, we launch the point by clicking the button at the bottom of the window. After a few seconds of waiting, the network should appear. We find it on a smartphone and connect, having previously entered the password.

We did not have any difficulties - after a successful connection, the distribution of the Internet from the laptop proceeded as if it were a regular router. All users connected to your Wi-Fi will be displayed in the Clients tab of the Connectify Hotspot app.

Note that to create the access point, we used free version program, the functionality of which turned out to be quite enough. If you want advanced features, then, of course, you have to pay.
This is, perhaps, all that we wanted to tell on the topic of distributing Wi-Fi from a laptop using Windows 7/10 or using special programs... If the virtual router does not want to be created, then most likely there are problems with the adapter drivers or it does not support operation in the access point mode at all (the latter is unlikely). If the network appears, but after connecting to it, the sites do not load, then the general access to the Internet is not open or is blocked by a firewall / antivirus. Write about the difficulties that arise in the comments below, and we will jointly try to help you.