The main merit of any web designer is being able to understand - and even organize - what's going on behind the scenes.
At the very least, you should take some programming lessons. I'm not talking about front-end languages like HTML and CSS - you probably already know a lot of this stuff. I'm talking about back-end stuff.
If you know how to lay the foundation, then you can better understand how to design the rest of the site. The point is, learning to program will make you a more erudite designer. Plus, who wouldn't want to hire a designer who knows everything from design to website development?
The trick is choosing a place to start. Learning programming can be a tricky process, especially if you choose one of the more difficult languages like C ++ or PHP.
So where is the best place to start? There is only one answer: Ruby on Rails is one of the best programming languages and frameworks for learning the basics of design.
Why is Ruby the best choice?
For beginners, Ruby is one of the easiest languages to learn, especially if you have some HTML or CSS experience that most designers have.
One of the first programs you will do when you start learning a language is the infamous Hello World, which involves displaying these words on the screen.
With languages like C ++, there can be anywhere from five to seven lines of code just to display those two words. But if you use Ruby, there will be only one line and one command.
Puts "hello, world!"
That's all! That's all you need to type the words "Hello world!" on the screen. Pretty easy, right?
Ruby on Rails is also a very dry language. As one of the developmental principles, DRY (dry) means “Don’t Repeat Yourself” - that is, do not program the element again when you can use the one you have already created. This makes Ruby a very lightweight and often used programming language for development, as it is aimed at quickly and efficiently completing a project.
Ruby or Rails?
Ruby is a programming language. Rails is a framework that uses Ruby to get the job done. The Ruby on Rails framework is a collection of pre-built or pre-written code that can help speed up the process of creating new projects. It was originally created to develop the Basecamp project management tool. Besides Basecamp, there are other popular web applications built with Rails such as 500px, ThemeForest, and MyFitnessPal.
Once you understand how to work with the Ruby language and get the material to work in the Ruby on Rails framework, you can start building web applications.
Ruby is at its peak!
With the explosion of mobile devices and always connected technology, Ruby is incredibly popular right now. And, probably, it will be so in the future. The TIOBE Index ranks Ruby as the 13th most popular programming language. In line with emerging trends, according to Indeed.com, Ruby is also experiencing surprisingly strong demand.
TIOBE Index

In any case, whatever you choose - demand or popularity - Ruby is quite popular. This makes it one of the best places to start, because once you get the hang of the language, you can get the job done pretty quickly. And that's before you start learning another language to expand your skills.
Ruby has a solid footing!
Some of the other languages have been around for more, that's true, but even so, the support and documentation pales in comparison to what's available for Ruby. Other languages also lack the social cohesion around one highly supported framework.
Thanks to the Ruby On Rails framework, there are already tons of pre-existing code that you can use in your own projects. Ruby Gems, a library of Ruby frameworks, has over 600,000 libraries to choose from.
Every time you learn something new, you need a lot of documentation and support. There are a ton of places to find tutorials, tutorials, guides, and even Q&A forums. If you run into a specific problem, a simple web search will probably fix it. It is important.
Simple documentation and easy access to support are essential when you are learning a new language - when you are actually learning something new.
Ruby "allows" more design control
If you're just a web designer, building a website can be a lengthy and complex process. When you sit down to work with a programmer and discuss the necessary back-end for your site, you often have to sacrifice the front end for everything to work properly.
Ultimately, this can lead to a product that looks completely different than your original vision. The programmer may not care, but it will probably be problematic for you.
You won't run into problems of this kind if you program yourself. You don't have to depend on others to get a finished project, and you will have a much better understanding of what can be achieved in terms of development. Surely there were a time or two when the goals of your project were too high for one programmer or development team? When you learn a language like Ruby, you can enjoy the ease of understanding the needs, and the possibilities, on the other hand.
Basically, Ruby is meant to be used in web applications and web development, so this is the perfect place for aspiring web designers. Once you understand this language and learn how to use the Ruby on Rails framework, you will have a lot more control over your projects.
Where to learn Ruby?
The best way to learn a language is to immerse yourself in and work with it. There are many tutorials and tutorials you can refer to as well. If you have a developed visual memory, and you understand better thanks to visual presentations, then go ahead to YouTube - there is a large selection of training videos.
If you want traditional classroom learning, you can get training on dedicated programming learning sites. You don't have to go to university or college to get a working degree.
One of my favorite resources - and completely free - for learning Rails is Michael Hartl's Rails Tutorial. It will guide you from simple to complex project at your own learning pace, and you can start from scratch with absolutely no Ruby on Rails knowledge.
Regardless of which path of learning you choose, remember, only practice leads to excellence. Set personal goals to spend a certain amount of time each day working with Ruby. Stick to these goals and be persistent. Before you know this language to the end, you will already be an expert who can create fantastic projects.
This guide covers installing and running Ruby on Rails.
After reading it, you will find out:
- How to install Rails, create a new Rails application, and attach your application to the database.
- The general structure of a Rails application.
- Basic principles of MVC (Model, View Controller) and RESTful based design.
- How to quickly generate initial Rails application code.
Assumptions in this guide
This tutorial is intended for beginners who want to start a Rails application from scratch. It does not imply that you have worked with Rails before.
Rails is a web development framework written in the Ruby programming language. If you are new to Ruby, it may be difficult to get started with Rails right away. There are some good English-language resources for learning Ruby, for example:
Note that some of the resources, while still great, still cover older versions of Ruby such as 1.6, and especially 1.8, and do not include some of the syntax that you will see in your day-to-day Rails development.
What is Rails?
Rails is a web development framework written in the Ruby programming language. It is designed to make programming web applications easier by using a number of assumptions about what each developer needs to create a new project. It allows you to write less code while programming than other languages and frameworks. Professional Rails developers also note that web application development is more fun with it =)
Rails is a masterful piece of software. He makes the assumption that there is a "better" way to do something, and he is designed to encourage that way - and in some cases even discourage alternatives. If you study "The Rails Way", you will probably discover a significant increase in productivity. If you persist and carry over old habits from other languages into Rails development, and try to use patterns learned elsewhere, your development experience will be less happy.
The Rails philosophy includes two important guiding principles:
- Don "t Repeat Yourself: DRY is a software development principle that states that "Every piece of information must have a single, non-redundant, authoritative representation in the system." Don't write the same information over and over, the code will be easier to maintain and more extensible and less buggy.
- Convention Over Configuration: Rails has opinions on the best ways to do a lot of things in a web application, and these conventions are set by default, rather than forcing you to tweak numerous configuration files in small details.
Creating a new Rails project
The best way to use this tutorial is to walk through it step by step. All steps are essential to running the sample application and no additional code or steps are required.
By following this tutorial, you will create a Rails project called blog, a very simple web blog. Before we start building our application, we need to make sure that Rails itself is installed.
The following examples use $ to denote the terminal input string on UNIX-like operating systems, although it can be configured differently. If using Windows, the line will look like c: \ source_code>
3.1. Installing Rails
Before installing Rails, you need to check that the required pre-dependencies are installed on your system. These include Ruby and SQLite3.
Open Command Line Applications. On macOS open Terminal.app, on Windows choose Run from the Start menu and type cmd.exe. Any commands starting with a dollar sign $ must be run on the command line. Make sure you have the current Ruby version installed:
$ ruby -v ruby 2.5.0
Rails requires Ruby 2.5.0 or later to be installed. If the version number is less than this, you will need to install a fresh copy of Ruby.
To quickly install Ruby and Ruby on Rails on a system, Windows users can use the Rails Installer. Additional installation methods for most operating systems can be seen at ruby-lang.org.
If you are on Windows, you need to install the Ruby Installer Development Kit.
You will also need a SQLite3 database installation.
Many popular UNIX-like operating systems ship with an acceptable version of SQLite3. On Windows, if you installed Rails using the Rails Installer, you already have SQLite installed. Other users can refer to the installation instructions on the SQLite3 website. Check that it is correctly installed and included in your PATH:
$ sqlite3 --version
The program should report its version.
To install Rails, use the gem install command provided by RubyGems:
$ gem install rails
To check that everything is installed correctly, you need to do the following:
$ rails --version
If you see something like "Rails 6.0.0" you can continue.
3.2. Creating the Blog app
Rails comes with a number of scripts called generators, designed to make the developer's life easier by creating everything it takes to get started on a given task. One is the New Application Generator, which provides you with the foundation of a Rails application so you don't have to write it yourself.
To use this generator, open a terminal, go to the folder where you have permission to create files and write:
$ rails new blog
This will create a Rails application named Blog in the blog directory and install the gems the dependencies for which are mentioned in the Gemfile using bundle install.
When using the Windows Subsystem for Linux, there are some restrictions on the filesystem messages, meaning that the spring and listen gems should be disabled, which can be done by running rails new blog --skip-spring --skip-listen.
You can see all the possible command line options that the Rails application builder accepts by running rails new -h.
Once you've created the blog app, navigate to its folder:
The blog directory contains several auto-generated files and folders that define the structure of your Rails application. Most of the work in this tutorial will take place in the app folder, but for now let's go over the functions of each folder that Rails creates in the new default application:
| File / Folder | Appointment |
|---|---|
| app / | Contains controllers, models, views, helpers, mailers, channels, jobs and assets for your application. We'll look at this folder in more detail later. |
| bin / | Contains Rails scripts that start your application, and the directory may also contain other scripts that you use to configure, update, deploy, or run. |
| config / | Route configurations, your application's database, etc. This is covered in more detail in Configuring Rails Applications. |
| config.ru | Rack configuration for Rack based servers used to run the application. For more information on Rack, see the Rack website. |
| db / | Contains the current schema of your database as well as database migrations. |
| Gemfile Gemfile.lock |
These files allow you to specify what gems dependencies your Rails application needs. These files are used by the Bundler gem. For more information on Bundler, see the Bundler website. |
| lib / | External modules for your application. |
| log / | Application log files. |
| package.json | This file allows you to specify which npm dependencies are needed for your Rails application. This file is used by Yarn. For more information on Yarn, see the Yarn website. |
| public / | The only folder that is accessible from the outside as is. Contains static files and compiled assets. |
| Rakefile | This file finds and loads tasks that can be run from the command line. A specific task is available in all Rails components. Instead of modifying the Rakefile, you can add your own tasks by adding files to the application's lib / tasks directory. |
| README.md | This is an introductory tutorial for your application. It should be edited to tell others what your application does, how to configure it, etc. |
| storage / | Active Storage files for the Disk service. This is covered in the Active Storage Overview guide. |
| test / | Unit tests, fixtures and other testing apparatus. This is covered in the Testing Rails Applications tutorial. |
| tmp / | Temporary files (such as cache and pid files) |
| vendor / | A place for third-party code. In a typical Rails application, includes external gems. |
| .gitignore | This file tells git which files (explicitly or wildly) to ignore. For more information on ignoring files see GitHub - Ignoring files. |
| .ruby-version | This file contains the default Ruby version. |
Hello, Rails!
First, let's display some text on the screen. This requires a running server for your Rails application.
4.1. Launching the web server
In fact, you already have a functional Rails application. To be sure, you need to run a web server on your machine. This can be done by running the following command from the blog directory:
If you are using Windows, you must pipe scripts from the bin folder directly to the Ruby interpreter, i.e. ruby bin \ rails server.
Compressing JavaScript assets requires a JavaScript runtime on your system, and its absence will result in an execjs error while compressing assets. Typically macOS and Windows come with a JavaScript runtime installed. therubyrhino is the recommended runtime for JRuby users and is added to the Gemfile if the application is generated with JRuby. You can find out all about the supported runtimes in ExecJS
This will start Puma, the default web server with Rails. To see the app in action, open a browser window and go to http: // localhost: 3000. You should see the default Rails info page:
To stop the web server, press Ctrl + C in the terminal where it is running. You should see the command line cursor again to verify that the server has been stopped. For most UNIX-like systems, including macOS, this will be the dollar sign $. In development mode, Rails generally doesn't require stopping the server; all changes you make to files are automatically picked up by the server.
The Welcome Aboard page is like a test for a new Rails application: it shows that your programs are configured correctly enough to render the page.
4.2. Say hello to Rails
For Rails to say Hello, you need to create at least controller and vyuhu(performance).
The purpose of the controller is to receive specific requests for the application. Routing decides which controller will receive which requests. There is often more than one route to each controller, and different routes can be handled differently. action games... The purpose of each action is to collect information for presentation to the view.
The purpose of a view is to display this information in a readable format. An important distinction to be made is that the place where information is collected is controller, not a view. The view should only display this information. By default, view templates are written in a language called eRuby (Embedded Ruby), which is converted by a Rails request loop before being sent to the user.
To create a new controller, you start the "controller" generator and tell it that you want a controller named "Welcome" with an action named "index", like this:
$ rails generate controller Welcome index
Rails will create some files and a route.
Create app / controllers / welcome_controller.rb route get "welcome / index" invoke erb create app / views / welcome create app / views / welcome / index.html.erb invoke test_unit create test / controllers / welcome_controller_test.rb invoke helper create app / helpers / welcome_helper.rb invoke test_unit invoke assets invoke scss create app / assets / stylesheets / welcome.scss
The most important of these are, of course, the controller located at app / controllers / welcome_controller.rb and the view located at app / views / welcome / index.html.erb.
Open app / views / welcome / index.html.erb in a text editor. Delete all existing code in the file and replace it with the following line of code:
If you submit the form again, you will see something like the following:
This action now displays the parameters for the article that came from the form. However, this is still useless. Yes, you can see the parameters, but essentially do nothing with them.
5.4. Creating the Article Model
Models in Rails use a singular name, and their corresponding database table uses a plural name. Rails provides a model generator that most Rails developers use to create new models. To create a new model, run this command in your terminal:
$ rails generate model Article title: string text: text
With this command, we tell Rails that we want an Article model with the attribute title string type and attribute text text type. These attributes will be automatically added to the articles table and linked to the Article model.
Rails will create a series of files in response. Now we are only interested in app / models / article.rb and db / migrate / 20140120191729_create_articles.rb (your name may be slightly different). The latter is responsible for creating the structure of the database, which is why we will look at it further.
Active Record is smart enough to automatically associate column names with model attributes, which means you don't need to declare attributes inside Rails models, Active Record will do this automatically.
5.5. Running migration
As you have seen, rails generate model generated the file database migrations in the db / migrate directory. Migrations is a Ruby class designed to make it easy to create and modify database tables. Rails uses rake commands to run migrations, and it is possible to undo the migration after it has been applied to your database. The migration file name includes a time stamp to ensure that they are executed in the order in which they were created.
If you look in the db / migrate / YYYYMMDDHHMMSS_create_articles.rb file (remember, your file has a slightly different name), this is what you find there:
Class CreateArticles< ActiveRecord::Migration def change create_table:articles do |t| t.string:title t.text:text t.timestamps end end end
This migration creates a change method called when this migration starts. The actions defined in this migration are also reversible, which means that Rails knows how to undo the changes made by this migration in case you decide to revert them later. When you run this migration, it will create an articles table with a string column and a text column. It will also create two timestamp fields to track when the article was created and updated.
We now need to use the rails command to start the migration:
$ rails db: migrate
Rails will run this migration command and report that it has created the Articles table.
CreateArticles: migrating ============================================== === - create_table (: articles) -> 0.0019s == CreateArticles: migrated (0.0020s) ========================== ==============
Since you are working in the development environment by default, this command will apply to the database defined in the development section of your config / database.yml file. If you want to migrate in a different environment, for example in production, you must explicitly pass it when you invoke the command: rails db: migrate RAILS_ENV = production.
5.6. Saving data in the controller
Back in ArticlesController, we need to modify the create action to use the new Article model to persist the data to the database. Open app / controllers / articles_controller.rb and modify the create action as follows:
Def create @article = Article.new (params [: article]) @ article.save redirect_to @article end
Here's what's going on here: every Rails model can be initialized with appropriate attributes that will automatically bind to the corresponding database columns. In the first line, we do just that (remember that params [: article] contains the attributes we're interested in). Then @ article.save is responsible for saving the model to the database. Finally, we redirect the user to the show action, which we will define later.
You may be wondering why the A in Article.new is capitalized, although all other article references in this tutorial are all lowercase. In this context, we are referring to a class called Article, which is defined in app / models / article.rb. Class names in Ruby must begin with an uppercase letter.
Now that there are validations, calling @ article.save on an invalid article will return false. If you reopen app / controllers / articles_controller.rb, you can see that we are not checking the result of calling @ article.save in the create action. If @ article.save fails in this situation, we need to show the form to the user again. To do this, replace the new and create actions in app / controllers / articles_controller.rb with these:
Def new @article = Article.new end def create @article = Article.new (article_params) if @ article.save redirect_to @article else render "new" end end private def article_params params.require (: article) .permit (: title ,: text) end
The new action now creates a new instance variable named @article, and you'll see why in a couple of paragraphs.
Note that in the create action we used render instead of redirect_to when save returns false. The render method is used so that the @article object is passed back to the new template when it is rendered. This rendering is done as part of the same request as submitting the form, while redirect_to tells the browser to make another request.

5.11. Updating Articles
We have uncovered the "CR" part of CRUD. Now let's focus on the "U" part, updating the articles.
The first step is to add an edit action to the ArticlesController, usually between the new and create actions, as shown.
Def new @article = Article.new end def edit @article = Article.find (params [: id]) end def create @article = Article.new (article_params) if @ article.save redirect_to @article else render "new" end end
The view will contain a form similar to the one we used when creating new articles. Create a file named app / views / articles / edit.html.erb and add the following to it:
Editing article
<%= form_with(model: @article, local: true) do |form| %> <% if @article.errors.any? %><%= pluralize(@article.errors.count, "error") %>
-
<% @article.errors.full_messages.each do |msg| %>
- <%= msg %> <% end %>
<%= form.label:title %>
<%= form.text_field:title %>
<%= form.label:text %>
<%= form.text_area:text %>
<%= form.submit %>
<% end %> <%= link_to "Back", articles_path %>We are now pointing the form to an update action that has not yet been defined, but we will do so soon.
Passing an article object to the form_with method will automatically set the URL for submitting the edited article form. This option tells Rails that we want this form to be submitted using PATCH, the HTTP method that is expected to be used for renewal resources in accordance with the REST protocol.
Next, you need to create an update action in app / controllers / articles_controller.rb. Add it between the create action and the private method:
Def create @article = Article.new (article_params) if @ article.save redirect_to @article else render "new" end end def update @article = Article.find (params [: id]) if @ article.update (article_params) redirect_to @article else render "edit" end end private def article_params params.require (: article) .permit (: title,: text) end
The new method, update, is used when you want to update a record that already exists, and it accepts a hash containing the attributes you want to update. As before, if there is an error updating the article, we want to show the form to the user again.
We've reused the article_params method that we defined earlier for the create action.
It is not necessary to pass all the attributes to update. For example, if @ article.update (title: "A new title") was called, Rails will update only the title attribute, leaving all other attributes untouched.
| Title | Text | ||
|---|---|---|---|
| <%= article.title %> | <%= article.text %> | <%= link_to "Show", article_path(article) %> | <%= link_to "Edit", edit_article_path(article) %> |
And also add to the app / views / articles / show.html.erb template so that the "Edit" link is also on the article page. Add the following at the end of your template:
... <%= link_to "Edit", edit_article_path(@article) %> | <%= link_to "Back", articles_path %>
And this is what our application looks like now:

5.12. Using Partials to Clean Up Repeat in Views
Our edit page is very similar to the new page, in fact they use the same code to render the form. Let's remove this duplication by using a partial view. By convention, partial files begin with an underscore.
Create a new file app / views / articles / _form.html.erb with the following content:
<%= form_with model: @article, local: true do |form| %> <% if @article.errors.any? %>
<%= pluralize(@article.errors.count, "error") %>prohibited this article from being saved:
-
<% @article.errors.full_messages.each do |msg| %>
- <%= msg %> <% end %>
<%= form.label:title %>
<%= form.text_field:title %>
<%= form.label:text %>
<%= form.text_area:text %>
<%= form.submit %>
<% end %>Let's now update the view app / views / articles / new.html.erb to use this new partial by rewriting it in its entirety:
New article
<%= render "form" %> <%= link_to "Back", articles_path %>And the same for the app / views / articles / edit.html.erb view:
Edit article
<%= render "form" %> <%= link_to "Back", articles_path %>5.13. Deleting Articles
We are now ready to expand on the "D" part of CRUD, deleting from the database. Following the REST convention, the route for deleting articles in the rails routes output is as follows:
DELETE /articles/:id(.:format) articles # destroy
The delete routing method should be used for routes that destroy resources. If left as a regular get route, it would be possible to create the following malicious URLs:
look at this cat!
We use the delete method to destroy resources, and this route is associated with a destroy action in app / controllers / articles_controller.rb that doesn't exist yet. The destroy method is usually the last CRUD action in the controller, and like other public CRUD actions, it must be placed before any private or protected methods. Let's add it:
Def destroy @article = Article.find (params [: id]) @ article.destroy redirect_to articles_path end
The complete ArticlesController in app / controllers / articles_controller.rb should now look like this:
Class ArticlesController< ApplicationController def index @articles = Article.all end def show @article = Article.find(params[:id]) end def new @article = Article.new end def edit @article = Article.find(params[:id]) end def create @article = Article.new(article_params) if @article.save redirect_to @article else render "new" end end def update @article = Article.find(params[:id]) if @article.update(article_params) redirect_to @article else render "edit" end end def destroy @article = Article.find(params[:id]) @article.destroy redirect_to articles_path end private def article_params params.require(:article).permit(:title, :text) end end
You can call destroy on Active Record objects when you want to remove them from the database. Note that we do not need to add a view for this action, as we are redirecting to the index.
Listing Articles
<%= link_to "New article", new_article_path %>| Title | Text | |||
|---|---|---|---|---|
| <%= article.title %> | <%= article.text %> | <%= link_to "Show", article_path(article) %> | <%= link_to "Edit", edit_article_path(article) %> | <%= link_to "Destroy", article_path(article), method: :delete, data: { confirm: "Are you sure?" } %> |
Here we use link_to in a different way. We pass the named route as the second argument, and options as the other argument. The method:: delete and data: (confirm: "Are you sure?") Options are used as html5 attributes, so when the link is clicked, Rails will first show the user a confirmation dialog and then send the link using the delete method. This is done using the rails-ujs JavaScript file, which is automatically included in the application layout (app / views / layouts / application.html.erb) when the application is generated. Without this file, the confirmation dialog will not be displayed.

Congratulations, you can now create, view all and individually, update and destroy articles.
Adding a second model
Now is the time to add the second model to the application. The second model will process comments on articles.
6.1. Generating the model
We intend to use the same generator that we used earlier when creating the Article model. This time we will create a Comment model containing a link to the article. Run the following command in terminal:
$ rails generate model Comment commenter: string body: text article: references
This command generates four files:
First, take a look at app / models / comment.rb:
Class Comment< ApplicationRecord belongs_to:article end
This is very similar to the Article model we saw earlier. The difference is in the line belongs_to: article, which sets connection Active Record. You will see links in the next section of the guide.
The (: references) keyword used in the bash command is a special data type for models. It creates a new column in your database with the name of the presented model with _id appended, which can contain numeric values. To understand better, analyze the db / schema.rb file after performing the migration.
In addition to the model, Rails also did a migration to create the corresponding database table:
Class CreateComments< ActiveRecord::Migration def change create_table:comments do |t| t.string:commenter t.text:body t.references:article, null: false, foreign_key: true t.timestamps end end end
The t.references line creates a numeric column named article_id, an index for it, and a foreign key constraint pointing to the id column of the articles table. Next, we start the migration:
$ rails db: migrate
Rails is smart enough to only perform migrations that have not yet been run for the current database, in our case you will see:
CreateComments: migrating ============================================== == - create_table (: comments) -> 0.0115s == CreateComments: migrated (0.0119s) =========================== ============
6.2. Linking Models
Active Record links allow you to easily declare a relationship between two models. In the case of comments and articles, you can describe the relationship as follows:
- Each comment belongs to one article.
- One article can have many comments.
In fact, this is very close to the syntax that Rails uses to declare this relationship. You've already seen the line of code in the Comment model (app / models / comment.rb) that makes each comment belong to the article:
Class Comment< ApplicationRecord belongs_to:article end
You need to edit app / models / article.rb adding the other side of the link:
Class Article< ApplicationRecord has_many:comments validates:title, presence: true, length: { minimum: 5 } [...] end
These two announcements automatically make a wide variety of options available. For example, if you have an @article instance variable containing an article, you can get all comments belonging to that article in an array by calling @ article.comments.
6.3. Adding a route for comments
As with the welcome controller, we need to add a route so Rails knows where we want to go to in order to see the comments. Open the config / routes.rb file again and edit it as follows:
Resources: articles do resources: comments end
This will create comments like nested resource in articles. This is the other side of capturing the hierarchical relationships that exist between articles and comments.
6.4. Generating a controller
With the model in hand, let's turn our attention to creating the appropriate controller. Let's use the same generator we used before:
$ rails generate controller Comments
Four files and an empty directory will be created:
As with any blog, our readers will post their comments immediately after reading the article, and after adding a comment, they will be directed back to the article display page and see that their comment has already been reflected. In this regard, our CommentsController serves as a means of creating comments and removing spam, if any.
First, we'll extend the Article show template (app / views / articles / show.html.erb) to allow a new comment to be added:
Title: <%= @article.title %>
Text: <%= @article.text %>
Add a comment:
<%= form_with(model: [ @article, @article.comments.build ], local: true) do |form| %>
<%= form.label:commenter %>
<%= form.text_field:commenter %>
<%= form.label:body %>
<%= form.text_area:body %>
<%= form.submit %>
<% end %> <%= link_to "Edit", edit_article_path(@article) %> | <%= link_to "Back", articles_path %>This will add a form to the article display page, creating a new comment when the create action is called on the CommentsController. The form_with call here uses an array, which will create a nested route such as / articles / 1 / comments.
Let's write create in app / controllers / comments_controller.rb:
Class CommentsController< ApplicationController def create @article = Article.find(params[:article_id]) @comment = @article.comments.create(comment_params) redirect_to article_path(@article) end private def comment_params params.require(:comment).permit(:commenter, :body) end end
This is a little more complicated than what you saw in the article controller. This is a side effect of the attachment you have configured. Each comment request keeps track of the article to which the comment is attached, so we first resolve the issue of retrieving the article by calling find on the Article model.
In addition, the code takes advantage of some of the methods available for relationships. We use the create method on @ article.comments to create and save a comment. This automatically links the comment so that it belongs to a specific article.
Once we have created a new comment, we bring the user back to the original article using the article_path (@article) helper. As we've seen, it calls the show action on the ArticlesController, which in turn renders the show.html.erb template. This is where we want to display comments, so let's add the following to app / views / articles / show.html.erb.
Title: <%= @article.title %>
Text: <%= @article.text %>
Comments
<% @article.comments.each do |comment| %>Commenter: <%= comment.commenter %>
Comment: <%= comment.body %>
<% end %>Add a comment:
<%= form_with(model: [ @article, @article.comments.build ], local: true) do |form| %>
<%= form.label:commenter %>
<%= form.text_field:commenter %>
<%= form.label:body %>
<%= form.text_area:body %>
<%= form.submit %>
<% end %> <%= link_to "Edit", edit_article_path(@article) %> | <%= link_to "Back", articles_path %>You can now add articles and comments to your blog and display them in the right places.

Refactoring
Now that we have working articles and comments, let's take a look at the app / views / articles / show.html.erb template. It has become long and uncomfortable. Let's use partials to offload it.
7.1. Rendering Partial Collections
First, let's make a comment partial showing all the comments for the article. Create a file app / views / comments / _comment.html.erb and put the following in it:
Commenter: <%= comment.commenter %>
Comment: <%= comment.body %>
Then you can change app / views / articles / show.html.erb like this:
Title: <%= @article.title %>
Text: <%= @article.text %>
Comments
<%= render @article.comments %>Add a comment:
<%= form_with(model: [ @article, @article.comments.build ], local: true) do |form| %>
<%= form.label:commenter %>
<%= form.text_field:commenter %>
<%= form.label:body %>
<%= form.text_area:body %>
<%= form.submit %>
<% end %> <%= link_to "Edit", edit_article_path(@article) %> | <%= link_to "Back", articles_path %>This will now render the app / views / comments / _comment.html.erb partial once for each comment in the @ article.comments collection. Since the render method iterates over the @ article.comments collection, it assigns each comment to a local variable with the same name as the partial, in our case comment, which is available to us in the partial to display.
7.2. Rendering a form in a partial
Let's also move the new comment section into our partial. Again, create a file app / views / comments / _form.html.erb containing:
<%= form_with(model: [ @article, @article.comments.build ], local: true) do |form| %>
<%= form.label:commenter %>
<%= form.text_field:commenter %>
<%= form.label:body %>
<%= form.text_area:body %>
<%= form.submit %>
<% end %>Then change app / views / articles / show.html.erb as follows:
Title: <%= @article.title %>
Text: <%= @article.text %>
Comments
<%= render @article.comments %>Add a comment:
<%= render "comments/form" %> <%= link_to "Edit", edit_article_path(@article) %> | <%= link_to "Back", articles_path %>The second render just defines the template for the partial we want to render, comments / form. Rails is smart enough to put an underscore on this line and realize that you wanted to render the _form.html.erb file in the app / views / comments directory.
The @article object is available on any partials rendered in the view, since we defined it as an instance variable.
Deleting Comments
Another important feature of the blog is the ability to remove spam. To do this, you need to insert some link in the view and a destroy action in the CommentsController.
Commenter: <%= comment.commenter %>
Comment: <%= comment.body %>
<%= link_to "Destroy Comment", , method: :delete, data: { confirm: "Are you sure?" } %>
Clicking this new "Destroy Comment" link will run DELETE / articles /: article_id / comments /: id in our CommentsController, which will then be used to find the comment we want to delete, so let's add a destroy action to our controller (app / controllers / comments_controller.rb):
Class CommentsController< ApplicationController def create @article = Article.find(params[:article_id]) @comment = @article.comments.create(comment_params) redirect_to article_path(@article) end def destroy @article = Article.find(params[:article_id]) @comment = @article.comments.find(params[:id]) @comment.destroy redirect_to article_path(@article) end private def comment_params params.require(:comment).permit(:commenter, :body) end end
The destroy action will find the article we are viewing, find the comment in the @ article.comments collection, and then remove it from the database and bring us back to view the article.
8.1. Removing related objects
If you delete an article, the associated comments must also be deleted, otherwise they will simply take up space in the database. Rails allows you to use the dependent option on a link to achieve this. Modify the Article model, app / models / article.rb, as follows:
Class Article< ApplicationRecord has_many:comments, dependent: :destroy validates:title, presence: true, length: { minimum: 5 } [...] end
Security
9.1. Basic Authentication
If you publish your blog online, anyone can add, edit and delete articles or delete comments.
Rails provides a basic HTTP authentication system that works well for this situation.
In the ArticlesController, we need a way to block access to various actions if the user is not authenticated. Here we can use the Rails http_basic_authenticate_with method to allow access to the required actions, if the method allows it.
To use an authentication system, we'll define it at the top of our ArticlesController in app / controllers / articles_controller.rb. In our case, we want the user to be authenticated for every action except index and show, so we write like this:
Class ArticlesController< ApplicationController http_basic_authenticate_with name: "dhh", password: "secret", except: [:index, :show] def index @articles = Article.all end # пропущено для краткости
We also want to only allow authenticated users to delete comments, so in the CommentsController (app / controllers / comments_controller.rb) we'll write:
Class CommentsController< ApplicationController http_basic_authenticate_with name: "dhh", password: "secret", only: :destroy def create @article = Article.find(params[:article_id]) # ... end # пропущено для краткости
Now, if you try to create a new article, you will encounter an HTTP Basic Authentication challenge:

Other authentication methods are also available for Rails applications. Two popular add-ons for Rails are Devise and Authlogic, among others.
9.2. Other thoughts on safety
Security, especially in web applications, is a vast and detailed area. Securing your Rails application is covered in more detail in the Securing Rails Applications guide. The simplest way to work with Rails is to store all external data in UTF-8. If not, Ruby and Rails libraries will often be able to convert your native data to UTF-8, but this does not always work reliably, so it’s better to be sure that all external data is UTF-8.
If you make a mistake in this area, the most common symptom is a black diamond with a question mark inside that appears in the browser. Another common symptom is characters such as "ü" appearing instead of "ü". Rails takes a number of internal steps to mitigate common cases of problems that can be automatically detected and fixed. However, if there is external data that is not stored in UTF-8, it can lead to these kinds of problems that cannot be automatically detected by Rails and fixed.
The two most common data sources that are not in UTF-8 are:
- Your text editor: Most text editors (such as TextMate) save files as UTF-8 by default. If your text editor does not do this, it may cause special characters entered in your templates (such as é) to appear as a diamond with a question mark in the browser. This also applies to your i18N translation files. Most editors that do not set the default to UTF-8 (such as some versions of Dreamweaver) offer a way to change the defaults to UTF-8. Do this.
- Your database: Rails converts data from your database to UTF-8 by default at the border. However, if your database does not use UTF-8 internally, it may not be able to store all the characters your user enters. For example, if your database internally uses Latin-1, and your user enters Russian, Hebrew or Japanese characters, the data will be lost as soon as it enters the database. If possible, use UTF-8 as internal storage in your database.
Build real-world applications using Ruby on Rails. You may have tried Ruby on Rails, but found it too complicated and feel like you need a more complete introduction. Perhaps your boss or client has thrown you in depth with a Ruby on Rails project and need to quickly learn about Rails? Or maybe you've decided you want to add web development and Ruby on Rails to your resume. If so, you are in the right place. This course teaches you how to create web applications using Ruby on Rails.
Why Ruby on Rails?
Ruby on Rails is a fast and efficient way to develop web applications. It simplifies common repetitive tasks that take a long time to create in other languages. It is much easier to get a high quality product completed in Ruby on Rails than in other languages.
Since the framework is mature, there are a ton of open source projects / code you can use that are extremely powerful and really give you an edge in building robust web applications.
In addition, it uses the Ruby programming language. Ruby code reads like English, which makes it much easier to understand if you're just starting out with programming. As a dynamically typed language, Ruby does not have all the hard and fast rules that other languages do, and is in many ways similar to a spoken language. This gives you the flexibility to solve problems in a more human way than other programming languages.
What is covered?
Some of the features covered by the course include ...
Git Basics, Rails core "7 methods" and how they do "CRUD", Rails Routing, Strong Parameters, Custom Callbacks, Custom Validation, Partials,
Bootstrap 4, Rails Generators, User Authentication, User Authentication, Content Management, Deployment, Database Upload, Sending / Receiving Email Using Rails App, Setting up Sidekiq, Setting Up Redis on Heroku and Private Server, Installing Templates, Custom Validation Messages, adding Assets to the Rails Pipeline, uploading images to your own server, uploading to AWS, adding WYSIWYG - what you see is what you get from the editor and much more!
Why enrolling in this course is the best decision you can make.
These courses use simple examples to complete complex tasks. The goal is to make you understand exactly what you are doing and the reasons why, rather than entering code you don't understand. No code is obscured as it is important for you to understand what each line does.
Upon completion of this course, you will have the necessary skills to create your own web applications using Ruby on Rails.
The sooner you sign up for this course, the sooner you will have the skills and knowledge you need to increase your experience. Ruby on Rails developers are in high demand! Why not get started on Ruby on Rails today?
In this article, I want to show you how to create a simple MySQL database application in Ruby on Rails 3. Think of this as a step-by-step guide for novice Rails programmers.
So, in order to work, we need installed rails and rubygems. I had a problem with the latter yesterday, so I had to remove the rubygems1.8 package, it’s not clear how it ended up in the system and install rubygems1.9. Let me remind you that I am developing on Ubuntu, although for Windows the Rails console commands will be the same. As a development environment I use NetBeans with a plugin for Ruby on Rails. My colleague has written quite well about the installation.
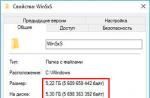
Checking links
Make sure the / usr / bin directory contains rails, rake, ruby, bundler symbolic links to files in / usr / local / ruby / bin. To view the links, use the command:
depending on what you want to filter out.
Create an application
I have created a special directory for my ruby applications.
mkdir / home / andrey / ruby
cd /home.andrey/ruby
Rails has many console utilities that make things a lot easier, especially prototyping. To create an application using mysql as a database, run the command:
app is the name of our new application. After executing the command, we will see how rails made us a skeleton of the future application.
[email protected]: ~ / ruby # rails new app -d mysql
create
create README
create Rakefile
create config.ru
create .gitignore
create Gemfile
create app
create app / controllers / application_controller.rb
create app / helpers / application_helper.rb
create app / mailers
create app / models
create app / views / layouts / application.html.erb
create config
create config / routes.rb
create config / application.rb
create config / environment.rb
create config / environments
create config / environments / development.rb
create config / environments / production.rb
create config / environments / test.rb
create config / initializers
create config / initializers / backtrace_silencers.rb
create config / initializers / inflections.rb
create config / initializers / mime_types.rb
create config / initializers / secret_token.rb
create config / initializers / session_store.rb
create config / locales
create config / locales / en.yml
create config / boot.rb
create config / database.yml
create db
create db / seeds.rb
create doc
create doc / README_FOR_APP
create lib
create lib / tasks
create lib / tasks / .gitkeep
create log
create log / server.log
create log / production.log
create log / development.log
create log / test.log
create public
create public / 404.html
create public / 422.html
create public / 500.html
create public / favicon.ico
create public / index.html
create public / robots.txt
create public / images
create public / images / rails.png
create public / stylesheets
create public / stylesheets / .gitkeep
create public / javascripts
create public / javascripts / application.js
create public / javascripts / controls.js
create public / javascripts / dragdrop.js
create public / javascripts / effects.js
create public / javascripts / prototype.js
create public / javascripts / rails.js
create script
create script / rails
create test
create test / fixtures
create test / functional
create test / integration
create test / performance / browsing_test.rb
create test / test_helper.rb
create test / unit
create tmp
create tmp / sessions
create tmp / sockets
create tmp / cache
create tmp / pids
create vendor / plugins
create vendor / plugins / .gitkeep
We go into the folder with it and install the necessary gems. Gems are plug-in libraries required for a project (analogous to PHP's PECL and PEAR).
After that, the console will display something like this:
[email protected]: ~ / ruby / app> sudo bundle install
Using rake (0.8.7)
Using abstract (1.0.0)
Using activesupport (3.0.0)
Using builder (2.1.2)
Using i18n (0.4.2)
Using activemodel (3.0.0)
Using erubis (2.6.6)
Using rack (1.2.1)
Using rack-mount (0.6.13)
Using rack-test (0.5.6)
Using tzinfo (0.3.23)
Using actionpack (3.0.0)
Using mime-types (1.16)
Using polyglot (0.3.1)
Using treetop (1.4.8)
Using mail (2.2.9)
Using actionmailer (3.0.0)
Using arel (1.0.1)
Using activerecord (3.0.0)
Using activeresource (3.0.0)
Using bundler (1.0.3)
Using mysql2 (0.2.6)
Using thor (0.14.4)
Using railties (3.0.0)
Using rails (3.0.0)
Your bundle is complete! Use `bundle show` to see where a bundled gem is installed.
This means that all gems are installed and connected. If something is missing, then bundle itself will download them from rubygems and install. This is what I missed in php for a long time, in fact it turns out the project installer. The list of dependent gems is located in the Gemfile at the root of the project.
Configuring
Now we need to specify the details of access to the database of our project. Open the project in NetBeans: New Project -> Ruby -> Ruby on Rails application with existing source. We indicate the path, in my case it will be (/ home / andrey / ruby / app) and the name of the project (app). For the Ruby Platform, we select the one installed on the system, not the one built into NetBeans. Click Finish and the project is created. Open the Configuration pseudo-folder and the database.yml file. Here you need to specify the username and password to access the database, preferably for all three environments (development, test, production). Environment is the environment in which our application will run,
- development - the developer's computer,
- production - production server,
- test - work in testing mode on a continuous integration server or a tester's computer.
rails generate model User name: string hashed_password: string salt: string
You can immediately see what Rails has generated for us:
invoke active_record
create db / migrate / 20101107054200_create_users.rb
create app / models / user.rb
invoke test_unit
create test / unit / user_test.rb
create test / fixtures / users.yml
Great, now we need to create a database. For this we perform:
[email protected]: ~ / ruby / app $ rake db: create
(in / home / andrey / ruby / app)
[email protected]: ~ / ruby / app $ rake db: migrate
(in / home / andrey / ruby / app)
== CreateUsers: migrating =========================================== =======
- create_table (: users)
-> 0.0061s
== CreateUsers: migrated (0.0063s) ======================================= ==
The console displays the added data. We look in phpmyadmin and see the new app_development and app_test databases, as well as tables in them. Now it's time to add real data. To do this, run the rails console
The console is not just a console, but an IRB console in the context of your application. Let's create two users as an example:
[email protected]: ~ / ruby / app $ rails console
Loading development environment (Rails 3.0.0)
irb (main): 001: 0> user1 = User.new
=> #
irb (main): 002: 0> user1.name = "andrey"
=> "Andrey"
irb (main): 003: 0> user1.save
=> true
irb (main): 004: 0> user2 = User.new
=> #
irb (main): 005: 0> user2.name = "vasiliy"
=> "Vasiliy"
irb (main): 006: 0> user2.save
=> trueirb (main): 007: 0> exit
[email protected]: ~ / ruby / app $
Let's look at the database, and indeed we have two users. Note that Rails itself added the primary key columns and the created_at (creation date) and updated_at (modified date) fields to the model.
We have the model, the data too. It's time to launch our application.
[email protected]: ~ / ruby / app $ rails server
=> Booting WEBrick
=> Rails 3.0.0 application starting in development on http://0.0.0.0:3000
=> Call with -d to detach
=> Ctrl-C to shutdown server
INFO WEBrick 1.3.1
INFO ruby 1.9.2 (2010-08-18)
INFO WEBrick :: HTTPServer # start: pid = 4193 port = 3000
The application is running, open the browser at the address and see the test page.

Great, the app works. But it shows a regular HTML page from the /public/index.html folder. And we want dynamic. We open the second console window (because in the first we have the Ruby ver-server running - WebRick), go to the folder with the project and type the following command there:
[email protected]: ~ / ruby / app $ rails generate controller index index
create app / controllers / index_controller.rb
route get "index / index"
invoke erb
create app / views / index
create app / views / index / index.html.erb
invoke test_unit
create test / functional / index_controller_test.rb
invoke helper
create app / helpers / index_helper.rb
invoke test_unit
create test / unit / helpers / index_helper_test.rb
[email protected]: ~ / ruby / app $
With this we have created the Index controller, in it the Index action and the type of this action index.html.erb We do a Refresh (F5) in NetBeans and look at our files. Wonderful. Now we need to somehow redirect the route for the main page to the controller action we created. Open the routes file (Configuration / routes.rb) and uncomment the following line there:
# You can have the root of your site routed with "root"
# just remember to delete public / index.html.
root: to => "welcome # index"
But instead of welcome, we also write index. Well, I'm used to it from Zend Framework that the controller and action are named index by default. Do not forget to delete (or rename) the public / index.html file).
root: to => "index # index"
We update the page in the browser, and we see that our view is now displayed.
Index # index
Fine. Now you can code Let's go to our newly created controller (Controllers -> index_controller.rb) and write the following action text there:
class IndexController< ApplicationController
def index
@users = User.find (: all)
end
end
Now open the view Views / index / index.html.erb and write the following code there:
Index # index
Find me in app / views / index / index.html.erb
<% for user in @users -%>
<%=user.name%>
<% end %>
This tells Rails to go through the array of users and display their names. We update the page and see the list of users at the bottom.
Index # index
Find me in app / views / index / index.html.erb
andrey
vasiliy
Fine! The application has been created!
Thanks!
If this article helped you, or you want to support my research and blog, here's the best way to do it:Ruby began development on February 23, 1993, and was released in 1995. The name is inspired by the Perl language, many of the syntax and semantics from which are borrowed in Ruby (pearl - "pearl", ruby - "ruby"). The goal of the development was to create a "true object-oriented", easy to develop, interpreted programming language.
The language has an OS-independent multithreading implementation, strong dynamic typing, a garbage collector, and many other features. The cross-platform implementation of the language interpreter is completely free.
Ruby on Rails (RoR) is a framework written in the Ruby programming language. It implements the Model-View-Controller architectural pattern for web applications and also provides integration with the web server and database server. It is open source software and licensed under the MIT license.
To help you explore these technologies, we have compiled a selection of books. As always, if you know a book that was not included in this material, share it in the comments.
This book is for those who want to write Ruby like a pro. It explains how to design beautiful APIs and work with functional programming techniques. The book is not suitable for beginners, but for those who already understand Ruby, it will definitely come in handy.
The purpose of this book is to teach readers how to use the Ruby language effectively. This book covers Ruby 2.1. The publication contains about 400 different examples, accompanied by a clear statement of the problem and its solution with detailed comments.
The book has a fairly low entry threshold. You don't need to know the basics of web development to learn it. The book takes material about Ruby on Rails, a popular framework for developing web applications, from scratch. Author Michael Hartl, in addition to Ruby on Rails, acquaints the reader with the basics of the Ruby language itself, the query language SQL, CSS, HTML. The book pays a lot of attention to the practical use of the framework's capabilities. You can also read a fragment of the book.
And this book is useful for beginners. Its complexity increases on an increasing basis, and in each subsequent section, the skills learned in the previous ones are used.
With "Learn Ruby" you will learn in an easy and fun way in practice all the features of this language, which at first quickly captured the hearts of programmers in California, and then in Russia.
After reading this book, you will learn how to write elegant code that takes advantage of all of its unique features.
This book takes a detailed look at the internals of the Ruby language. The reader does not need to know Ruby itself, but knowledge of C and, in particular, OOP principles will be a huge plus.
This book is a great introduction to Ruby. It covers all the basics you need, from language installation to file handling and OOP. Each topic is provided with clear examples.
This book covers one of the most interesting features of Ruby - blocks. They are similar to closures and lambdas and are used both in simple language structures like blocks and in complex tricks.
This book is divided into several sections, varying in complexity. It first covers the setup and basic features of Ruby, and then it talks about the standard library and advanced themes.