As you know, CyanogenMod is a developer that releases firmware with a huge number of interesting features that work on any type of smartphone - top-end, mid-budget and low-cost state smartphones. Now the CyanogenMod team is actively releasing firmware for Android based 4.4.4 KitKat, which has already become a series of CM11 firmware. Therefore, this manual is intended to familiarize you with the installation official firmware CM11 on Samsung Galaxy S3 GT-I9300.
Since this is the final release of CyanogenMod 11, so after installing it on your Galaxy S3, all functions and services will work perfectly, which will be an excellent replacement for stock Android from Samsung, which has not been updated for quite some time.
As usual, CyanogenMod has a lot of features, applications and capabilities that you can now literally experience on your Galaxy S3. In addition, CM11 is based on Android 4.4.4 KitKat, which will allow you to join those few Nexus users who have become acquainted with the new operating system and all its delights. In a nutshell - with CM11 you can improve the performance of your Galaxy S3, as performance and time will increase battery life, the loading time of web pages and the smoothness of flipping will speed up, and, of course, it will work quickly user interface, which is almost identical to the clean Android 4.4.4 KitKat interface.

If you want to use this instruction, please go through the preliminary steps first. Please note that without preparing your smartphone, you will not be able to update to Android 4.4.4.
- your Galaxy S3 smartphone must be rooted.
- Your Galaxy S3 must also have a custom recovery installed; We recommend installing the latest version of CWM or TWRP Recovery, as they have been tested with CM11 firmware.
- do backup copy data that is stored on the internal memory of your Galaxy S3, since the flashing process will need to clear all of this. Use the recovery capabilities to create a backup or special applications, of which there are quite a lot in Google Play market.
- make a Nandroid backup in case you don't like the CM11 platform and you could go back to the previous firmware without too much headache.
- Use your computer to temporarily deactivate security protection.
- Make sure your computer recognizes the Galaxy S3, meaning all the necessary drivers are installed.
- On your smartphone, in the settings, enable the “USB debugging” option in Menu/Settings/Developer Options.
- Check the battery status of your Galaxy S3. If the battery is charged less than 50-60%, recharge it before starting flashing.
- follow the instructions step by step, but only if you have the international version of the Galaxy S3 GT-I9300. This firmware CM11 M8 Android 4.4.4 KitKat is compatible only with this version of the device. If you do not follow everything that is written in each step of the instructions, then you will have an excellent chance of getting a broken brick from your Galaxy S3.
You must understand that no one will give a complete guarantee that everything will be successful, even if you follow all the advice in the instructions. Also, flashing will increase the counter by 1, that is, this also deprives you of any guarantees. If you just recently bought a Galaxy S3 and the seller’s warranty is still valid, you can return your warranty by returning it to the backup you created or simply by installing the stock official firmware. And don’t forget that you will get root rights, which means you will have to install all updates manually.
Installing CM11 M8 Android 4.4.4 KitKat firmware on Galaxy S3 GT-I9300:
- 1. At this link you can find the latest CM M8 Snapshot firmware for Galaxy S3 GT-I9300.
- 2. From this link you can download the GAPPS application package for devices running Android 4.4.x.
- 3. Save the files on your computer so that they are visible, but under no circumstances don't unzip archives!
- 4. Connect your Galaxy S3 to your computer.
- 5. Wait for the computer to recognize your device.
- 6. Copy the files you downloaded in step 1 and step 2 to your Galaxy S3 storage.
- 7. Once copying is complete, disconnect your Galaxy S3 from your computer.
- 8. Turn off your smartphone to boot into recovery mode.
- 9. To boot the Galaxy S3 into recovery mode, simultaneously hold down the Volume UP button, Home button and the Power button.
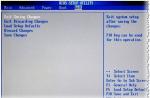
- 10. Then, in recovery mode, you need to select the “wipe data factory reset” option.
- 11. After that, select “wipe cache partition” there.
- 12. Go back through the menu, select “advance” and select “wipe dalvick cache”.
- 13. Return to the main recovery menu again and select “install zip from SD card” and “choose zip from SD card”.
- 14. Select CM 11 M8 Android 4.4.4 firmware file and install it on Galaxy S3.
- 15. Repeat the same process, but with the GAPPS file.
- 16. At the very end, you need to select the “reboot system now” option.
That's basically it. Now it is worth noting that the first boot of the system can be quite long, however, if your Galaxy S3 is frozen at the boot stage, then you will have to boot into recovery mode again and do a “wipe data factory reset” and “wipe cache partition”. In addition, if you don’t like the new CM 11 M8 Android 4.4.4 firmware, you can use the “backup / restore” menu again using recovery if you made a Nandroid backup.
Found a mistake? Select it and press Ctrl+EnterWant to upgrade your Galaxy S3 smartphone to latest version operating room Android systems 7.1? In this article you will find several versions of custom firmware based on Android 7.1 Nougat. New firmware promises amazing features, including CM14.1, as well as additional security patches.
Developers and users who have already updated the Galaxy S3 to Android 7.1 report that the smartphone is fast and stable. However, it is worth remembering that the firmware is under development, so some functions may not work correctly.
On the official website of Android 7.1 Nougat firmware for Galaxy S3 you can read about new features and updates.
At the time of writing this article, the most Last update Android 7.1 Nougat firmware for Galaxy S3 has been released January 23, 2017.
Preparation
- Back up your Galaxy S3 data because inner memory The smartphone will be completely cleaned.
- Enable USB debugging. Read how to do this.
- Galaxy S3 must be Rooted, unlocked and using TWRP recovery mode.
- The smartphone must be charged at least 60%.
Note: These instructions are intended for updating the Samsung Galaxy S3 I9300. If you have a different model of smartphone, do not try to update it using this guide, otherwise problems may arise.
How to update Galaxy S3 to Android 7.1 Nougat
Required files: Download AICP Android 7.1 firmware for Galaxy S3 and save it on your computer. Also download GAPPS, but do not extract the contents of the archive.
- Connect your Galaxy S3 to your computer using a USB cable.
- Copy zip file firmware to the SD memory card.
- Disconnect USB cable and turn off the power of the Galaxy S3.
- Boot your smartphone into recovery mode. You can do this by holding down three keys at the same time: Volume Up + Home + Power.
- Execute backup current firmware: go to Backup > Backup and restore.
- Perform a hard reset: select data/factory reset. Then select wipe cache partition and wipe dalvic cache.
- Next, select the menu item choose zip from sdcard, then go to the section where the previously downloaded file was saved Android firmware 7.1 for Galaxy S3. Confirm the firmware process.
- Return to the main recovery menu and reboot your Galaxy S3.
How to returnthe samefirmwareGalaxy S3: If you want to restore the old firmware then go to recovery mode as described above, click on backup and restore, then select the previous firmware from the list.
That's all! Now you know how to update your Galaxy S3 to Android 7.1 Nougat.
The legendary Samsung Galaxy S3 received an unofficial Android update 6.0.1 Marshmallow in the form of custom firmware. It is under development, so the device may experience problems.
CyanogenMod releases Android 6.0 Marshmallow for Samsung Galaxy S3 i9300
Galaxy S3 has become the most popular and best-selling smartphone from Samsung. Even though it didn't have the same quality body as the iPhone, it had a number of other advantages, such as a large screen...
Samsung UK says Galaxy Note 2 and Galaxy S3 won't get Lollipop update
We are all wondering if Android 5.0 Lollipop will come to the Galaxy S3 and Galaxy Note 2. And now Samsung UK reports on Twitter that this firmware for these smartphones still will not appear.
Samsung Galaxy S3 Neo received full Lollipop firmware
Samsung is unlikely to ever release official Android Lollipop firmware for the Galaxy S3 Neo, but if you still want to install Android 5.0.2 on it, there is already a stable unofficial firmware based on CyanogenMod 12.
Samsung Galaxy S3 mini was one of the first AOSP to receive Android 5.0 Lollipop firmware
Samsung is only going to release Android 5.0 Lollipop firmware for the Galaxy S4 and Galaxy Note 3 at the beginning of next year. But if you don’t want to wait and if you have a Galaxy S3 mini, then a test AOSP firmware for this smartphone has appeared. You can take a chance and install it now.
The international version of the Samsung Galaxy S3 mini VE received a small update
Starting today, Samsung is releasing a new update for the international version Galaxy smartphone S3 mini VE. The firmware itself still works on the same Android versions, as before, and there are no new functions. The only improvements were performance and optimization.
Android 4.4.4 KitKat for Galaxy S3 GT-I9300, unofficial yet [Instructions]
Samsung is not officially going to release Android 4.4.4 KitKat firmware for the Galaxy S3 GT-I9300, but this does not stop us and a ported version of the update from the Galaxy S3 LTE has already appeared. Not all functions work yet, but the firmware is working and can be installed on the GT-I9300. But it's better to wait until a stable build appears. We already offer you installation instructions.
Galaxy S3 LTE GT-I9305N receives Android 4.4.4 KitKat
Yesterday we noticed that Samsung has already released an update for the Galaxy S3 with LTE support, but only in South Korea. That is, Android 4.4.4 KitKat was released for the SHV-E210S model. Now in Europe you can get the same firmware for the Galaxy S3 LTE GT-I9305N smartphone. I think this is great news for all of you.
Galaxy S3 4G receives Android 4.4.4 KitKat update
Samsung today began updating the Galaxy S3 LTE to Android 4.4.4 KitKat. As you understand, for now this applies to the 4G version of the smartphone and the international Galaxy S3 GT-I9300 will remain on the firmware that is currently available for it.
Galaxy S3 Neo receives Android 4.4.4 KitKat update
We are all waiting for Android 4.4.4 KitKat at least for the Galaxy S5, although there are also those impatient who demand this firmware for their S3. Of course it's funny, but only partly. Today, Android 4.4.4 KitKat firmware is already available for the Galaxy S3 Neo. Even the flagship would be surprised if he could.
Samsung Galaxy S4 and Galaxy S3 are the most popular Android smartphones
Despite the fact that the Galaxy S3 has already celebrated its birthday twice, it remains the most popular Android smartphone, and even more popular than the Galaxy S4. We learned this thanks to OpenSignal research. Samsung is the most advanced smartphone manufacturer.
Installing Android 4.4.4 KitKat update on Galaxy S3 GT-I9300
Already today, the simple Galaxy S3 model (not LTE) has received stable CyanogenMod firmware 11 M8. Here you will get everything additional features, which are in Android 4.4.4 on Nexus 4 and Nexus 5. So, in principle, it makes sense to install CyanogenMod 11 M8 on Galaxy S3, and we suggest you use these instructions.
Samsung has officially stopped upgrading the international variant, meaning you can't get the official Android KitKat update. Naturally, when such a thing happens, online communities pick up the slack. And this is very good news, because Samsung, despite a lot of complaints and online petitions, does not seem to want to upgrade its Galaxy S3 to KitKat (even though everyone knows that you can; Android 4.4.4 is designed to run on a 1GHz processor and 512 MB RAM).
ParanoidAndroid is a ROM created by a dedicated team of developers, and the latest (final) version has just arrived for the international Galaxy S3 model, that is, the model designated I9300. Of course, being a custom ROM, the process of installing it on your phone requires you to have root access, which could potentially brick the phone if it goes wrong and void the warranty too.
Still unsure? Here is an excerpt from Android View on reviewing the ROM: “PA3+ is an AOSP based ROM and what I love most is its beauty, especially the hybrid flexibility. ROM performance is fast and responsive, but one thing that still worries me is battery life. Don't expect very decent battery performance from it. Install it, enjoy it, and look forward to a battery leak fix in the future."
We hate to say things like this, but we must emphasize that if you are going to root your phone and install this ROM, then you are doing it at your own risk. We are not responsible if your phone stops working!
Before we begin
- First of all, it is important to clarify that this software and procedure is for the international variant of Galaxy S3, I9300 only. To make sure you have the correct model, go to Settings > About Phone, where you should see the model number. If it's an I9300, move forward. In addition, the phone must be disconnected from the network.
- Secondly, it is a good idea to make backups of any important files or data that you might have on board your Galaxy S3 before moving on. You can manually connect your phone to a PC and extract what you need, or you can use a custom recovery tool like ClockworkMod or TWRP - these tools create an entire backup of your phone and you can restore it to the way it was if things go wrong or you change your mind (provided that the phone is not completely bricked, of course).
- Make sure your computer has updated USB drivers to connect to your phone.
- Make sure USB debugging mode is enabled on your smartphone. Go to Settings > Developer Options and check the Enable USB debugging" Note that if you can't see Developer Options, you can open them by clicking Build Number software seven times.
- Make sure your phone is fully charged.
- Make sure you have microSD card in phone.
You must have received root rights to your smartphone!
Get the files
You must download the custom PA ROM:
- ParanoidAndroid ROM
You must also download compatible Google apps, you have a choice of two sets:
- Google App Files (template)
- Google App Files (full)
Now stitch it!
Using these downloaded files, connect your phone to your computer using USB. Copy PA firmware and Google Apps archive files to root folder Phone SD cards - do not extract files!
Now you can install the ROM using recovery methods either through ClockworkMod (CWM) or TWRP Recovery.
If you are using CWM
- Select "wipe data/factory reset". Then select "Yes" when prompted.
- Select wipe cache partition and confirm.
- Go to the CWM main menu. Click "Advanced" and then wipe the Dalvik cache and confirm.
- Select "Install Zip from SD Card" then "select zip from SD Card". Find the final ParanoidAndroid ROM file, select it and then confirm.
- Once this is done, select “Back” next to “Reboot system now” in the recovery menu. Wait for the phone to complete the reboot process, which may take up to five minutes.
If you are using TWRP
- Turn off your phone and wait 5-10 seconds until it turns off completely.
- Boot your phone into recovery mode by holding Volume Up, Home, and Power buttons simultaneously until the recovery screen appears. You can use the Volume keys to navigate through recovery options and the Power button to select an action.
- Click "Erase" and scroll down. Select "Reset to factory settings".
- Now select Erase > Advanced Erase and select System. Scroll down and select Swipe to Erase.
- Click install and locate the final ParanoidAndroid file on your SD card. Scroll down the screen and make a selection to confirm the firmware.
- Follow the same procedure for Google App files.
- Once the installation is complete, click “restart” and select “System.” The reboot may take up to five minutes.
- Note that if the phone gets stuck in boot loop, perform a factory reset from recovery mode.
Instructions for installing the official single-file firmware on the Samsung Galaxy S3 (GT-I930x).
Drivers and programs
Attention!
To install the official stock firmware on the Galaxy S3 and return the phone’s status (“Settings” > “About device” > “Properties” > “Device status”) to “Official” after switching from custom firmware and thereby returning the ability to receive updates over the air, just follow the instructions provided.
Installation instructions
Unpack the downloaded archive into a folder with Odin PC for convenience. The file in the ".tar" or ".tar.md5" format must be left, but the "SS_DL.dll" can be deleted.
Reset your device.
To do this, go to the settings tab " Accounts
" to the section " Archive and reset", select the item " Reset device" and press the button " Delete everything" The phone will reboot.
Run Odin PC as administrator.
Put your device into download mode ( Download Mode).
To do this, you need to simultaneously hold down the Volume Down key, the Home button and the Power button. Then wait until the phone reboots and agree to the warning by pressing the Volume Up key.
In this state, connect the smartphone to the computer. In Odin the message “ COM».
Click on the button " AP» and select the TAR firmware archive.
Items " Auto Reboot" And " F.Reset Time" must be activated, A " Re-Partition"if active - must be disabled.
Click on the button " Start" The firmware installation process will begin.
At the end of the operation, if everything was successful, the message “All threads completed. (succeed 1 / failed 0)". The phone must be restarted manually by holding down the power button until the screen turns off. It may take up to 5 minutes for your device to boot up initially.
ATTENTION!
If the device does not boot for a long time or the data has not been reset, it must be performed from recovery.
To do this, you need to simultaneously hold down the Volume Up key, the Home button and the Power button. After downloading, select " Wipe data/Factory reset", and then - " Reboot system now" If after these steps the device also freezes when loading, you need to reflash it again.