Today there are hundreds of different routers on the market that allow you to organize your own Wi-Fi network at home. The D-Link company occupies one of the leading places in the list of manufacturers of this kind of devices. It produces a lot of different routers, among which the D LINK DIR 300 model occupies a special place. It combines optimal price and functionality, for which it has received recognition among users. D LINK DIR 300 routers are often purchased for offices, homes, cottages and various other premises where a high-quality Wi-Fi signal is needed. In this article we will look at how to configure the D LINK DIR 300 router.
How to connect the D LINK DIR 300 router
Before proceeding directly to setting up the router, you need to connect it. To do this you will need to do the following:

How to configure the D LINK DIR 300 router
After connecting the router, you can proceed to configure it. First you need to create wireless network:

At this point, you can consider the local network setup stage complete; now you should go directly to setting up the D LINK DIR 300 router. Any router can be configured via a browser. Follow these steps:

That's all, the setup of the D LINK DIR 300 router is complete. After these steps, the Internet should start working. But most likely you want to configure wireless Internet, this will require you to follow a few more steps described below.
How to set up a Wi-Fi access point in the D LINK DIR 300 router
If you have correctly configured the Internet itself according to the instructions described above, now you need to activate the point Wi-Fi access. This is required to be able to connect to the router from any devices via a wireless connection. This is done as follows:

How to connect via Wi-Fi to a D LINK DIR 300 router
The last step is very simple - connect to the router via Wi-Fi. The connection method is no different from connecting to any other wireless access point. If your computer has a Wi-Fi adapter, just turn on the wireless network connection, after which a corresponding icon will appear in the lower right corner indicating that it is possible to connect to the Internet via Wi-Fi. Click on this icon and select the D LINK DIR 300 access point, identifying it by the name you specified as part of the setup.
Enter the password you specified earlier and connect to the network.

Please note: IfWi-The Fi adapter on your computer is “external”, connected viaUSB, the connection process may vary slightly. Most likely, the connection will occur after installing specialized drivers through the appropriate utility.
D-Link DIR-300 is one of the most popular router models used to create a home wireless network. Before the beginning D-Link settings DIR-300, it must be connected correctly. This process is not complicated, but sometimes it confuses users. Incorrect connection results in incorrect operation router, up to the impossibility of creating wireless wifi networks.
Note: The information provided on how to configure the D-Link DIR-300 is general information, applicable for any provider.
Connection
pay attention to back panel router. If it's a D-Link DIR-300, you'll see 4 LAN ports and one WAN connector, as well as a power adapter socket. The WAN port is intended for connecting a wire from your provider, but leave it free for now - you will need the Internet on your computer.
The router comes with a patch cord, which is necessary for the initial connection of the router to the computer. Insert one end of it into any LAN port, and connect the other end to the computer’s network card.
Working with the web interface
Now you can configure the D-Link DIR-300.
Open a browser on your computer and enter the address 192.168.0.1.
This is a single address for all D-Link routers, allowing you to access their web interface. You will need a login and password, which by default is the word “admin” (without quotes). If the password is changed for some reason, reset the router settings to factory settings by pressing the “Reset” button on the case.
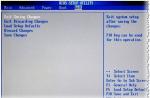
This step is optional, but it will be useful to complete the router as correctly as possible. Once on the main page of the web interface, you will see information about your router. Here you can see its firmware version.
To download the updated firmware version, go to ftp://dlink.ru/pub/Router/. Here you will see a catalog of devices from D-Link, in which you need to find your router model - DIR-300. In the “Firmware” folder, find the file with the .bin extension and save it to your computer.

Then return to the router's web interface. Click on the firmware version to go to the System tab. Here you will be asked to select the path to the saved .bin file. Open it and wait a bit - the D-Link DIR-300 will reboot. 
Internet connection
Before setting up D-Link DIR-300 in Wi-Fi quality points, you need to establish a connection between the router and the Internet. You will need information about what type of connection the provider providing your communication services uses. This information can be found in the contract, found on the website, or asked from technical support.
It doesn’t matter which provider provides communication services, the setup principle does not change.
You can configure the D-Link DIR-300 using the following steps:

An indicator will appear in the top menu on the left, prompting you to save your changes again. Take advantage of it. If the connection is lost, refresh the page. All that remains is to configure Wi-Fi directly on the D-Link DIR-300.
Wireless network
To configure Wi-Fi, you must select “Basic settings” in the corresponding menu of the web interface. 
Here you can specify the name of the wireless network to make it easier to then find it in the list of available ones for connection. The remaining settings do not need to be changed unless the provider specifies otherwise in the contract. Typically, the default settings allow you to create a wireless network correctly.
After saving the changes, go back. In the “Wi-Fi” tab of the D-Link DIR-300 device interface, go to the “Security Settings” item. Here you can protect your network with a password.
In the “Network Authentication” line, set the “WPA2-PSK” parameter. The "encryption key" is the password that you will then need to connect to Wi-Fi. Make it up of eight characters and remember it. The wireless network setup is complete. Now you can connect to a Wi-Fi point using the password you specified during setup.
This instruction will discuss in detail how to configure the D-Link DIR-300 Wi-Fi router. In particular, we’ll talk about how to update the firmware on a router and why it is sometimes required, how to set up an Internet connection and what types of connections are used by different providers. Issues such as setting up a Wi-Fi wireless access point, how to set a password for a wireless network and connect various devices. At the same time, a video tutorial on setting up the DIR-300 router will also be offered.

Wireless router (Wi-Fi router) D-Link DIR-300
Update: If your router has firmware 2.5.11 or 2.15.19 (generally 2.5.x) installed, and the settings interface is similar to the screenshot below, use these instructions: .

What should you do before setting up your router?
Even before you connect the router for further configuration, I recommend downloading the latest firmware file for your hardware revision.
What is a hardware revision? Despite the common name of the routers and the same appearance, D-Link DIR-300 are different. Here is a list of those that can be found on sale today:
- DIR-300 A/C1
- DIR-300NRU B5/B6
- DIR-300NRU B7

Hardware version of the router on a sticker
Each of them requires its own firmware. The hardware revision of the router is indicated on the sticker located on the back of it, in the line H/W ver. In order to download the firmware for the router, you should go to the official D-Link website at ftp.dlink.ru, and follow the following path: pub - Router - Your router model (DIR-300 or DIR-300NRU) - Firmware - hardware revision of the router. The folder you find yourself in will contain one bin file and an “Old” folder. The file mentioned is latest firmware specifically for your device, it should be downloaded to your computer. The Old folder contains old firmware for the router, which can also be useful in some cases (unstable operation on the new firmware).

The next action that is recommended to be performed before setup is to reset the existing settings of the D-Link DIR-300 (if you have already tried to configure something yourself or it was configured for another Internet provider). To do this, use the Reset button located on the back of the router: hold it down for 20-30 seconds, release it and wait about 30 seconds until the router reboots with factory settings.

And one more thing: in order to get into the settings panel of the router, “Obtain an IP address automatically” and “Obtain an address” must be set in the properties of the local network connection. DNS servers automatically". You can find these settings in the following places:
- Windows 8 and 7 - “Control Panel” - “Network and Sharing Center” shared access" - "Changing adapter settings" - "Local Area Connection" (right click, properties) - "Internet Protocol version 4" - "Properties".
- For Windows XP, the path is similar, the only thing is that in the control panel you should go to the folder " Network connections", and then look at the properties of the local network connection.
In some cases and for some providers (Interzet, various providers providing services legal entities) those parameters that were recorded in the properties of the local network connection (IP address, subnet mask, default gateway and DNS servers) should be written down somewhere. Even a little differently: if something was indicated in all these fields, then be sure to write down this data.
Despite the fact that connecting a router should seemingly not cause any difficulties, quite often you see incorrect options. This is due to the fact that even with incorrect connection You can achieve, for example, that one computer has the Internet and at the same time operates digital TV. However, this does not make it correct, and devices connected via Wi-Fi will report that “Connection is limited or absent” or “No Internet access.” The correct connection option is in the picture below.

Thus, the cable from your Internet provider (or the cable coming from the modem, if you have one) must be connected to the Internet port and only to it. The network card is connected to one of the LAN ports of the router using the included RJ-45 cable (standard network cable).
Firmware DIR-300
First of all, a little about why it is better to update your router firmware than not:
- The DIR-300 router you bought in a store most likely has one of the first firmware versions. The manufacturer, in our case D-Link, regularly releases new versions that fix various errors that affect the operation of the device (connection breaks, the router slows down, settings get lost). Therefore, by updating the firmware before setting up the router, you can avoid many problems.
- The router firmware itself is not particularly difficult and is accessible to anyone, even a beginner. The main thing is that there is good leadership. This is exactly what is in front of you.
The first step (assuming that the router is already connected) is to launch any Internet browser on your computer and enter the following address in the address bar: 192.168.0.1, then press Enter.

You will be asked to enter a username and password. The standard login and password for all D-Link DIR-300 is admin (that is, we write the same thing in both fields - admin). Once logged in, you will be asked to change your default password for security purposes. Do this to ensure that no one else can change the settings of your wireless router.
The next thing you will see is the router configuration interface, which, depending on the hardware revision and current firmware, may have a different appearance.

This manual does not cover setting up DIR-300 B1-B3 (they are very old and their owners, as a rule, have already learned how to set them up). Therefore, let's look at how to update the firmware in the last two options.
- For firmware 1.3, go to “Manually configure”, select the “System” tab, and then select the software update. Then click “Browse”, specify the path to the file new firmware(how to download new firmware was described earlier)
- For firmware 1.4, you need to select the “Advanced settings” item, then on the “System” tab, click the right arrow (shown there), select the Software update item, then click “Browse” and specify the path to the new firmware file.
- Click the "Update" button
After this, all that remains is to wait for the completion of the router firmware process.
How to set up a connection
The essence of setting up routers, including the D-Link DIR-300, is that the router itself initializes the Internet connection, distributing it to all other connected devices. The settings for this connection in the router interface are the main necessary action.
It should also be noted that when setting up the router, as well as after it, the previously used connection on the computer should no longer be connected. Those. If you previously launched a Beeline, Rostelecom, Aist, TTK, Dom.ru or some other connection on your computer, now you don’t need to do this, otherwise, because... the connection has already been established directly by the computer, the router most likely will not be able to establish it (in some cases it happens possible work several parallel connections, but for most home Internet tariffs - no).

Let's move on to setting up the connection. On home page of the router settings at the bottom, click “Advanced settings”, then on the “Network” tab, select “WAN” and click “Add” at the bottom of the page, which will display one connection with a dynamic IP address.

Now our task is to correctly fill out all the fields correctly, while the correctness is determined by what type of connection your provider uses:
- Online - Dynamic IP, i.e. You don’t even need to configure anything in the connection, the only thing worth taking care of is the Wi-Fi password, which will be discussed below
- Beeline - L2TP + Dynamic IP
- Interzet - Static IP
- Rostelecom, Domolink, TTK, Dom.ru - PPPoE
- Stork - PPTP + Dynamic IP
Information about what type of connection your Internet provider uses can be easily found on the official website or you can view the properties of the connection that was used on the computer to access the Internet.
In most cases, all that needs to be filled in besides the connection type is the login and password that you received from the service provider, as well as the address VPN servers for providers using PPTP or L2TP connection.
After that, click “Save”. And we find ourselves on a page with a newly created connection, which, as we are shown, is “broken.” Also at the top right you will see an indicator telling us that the router settings have been changed and now they need to be saved (for the second time). You should do this - otherwise, after rebooting the router or turning off the power, all settings will be reset. Refresh the connection list page. If you have configured everything correctly, without mixing up the password or connection type, it will turn green and the Internet will become available. You can proceed to setting up your Wi-Fi wireless network.
Setting up a Wi-Fi access point
In order to set up a wireless network (in fact, it already works, but it would be better if you name it somehow and set a password for Wi-Fi), go again to the advanced settings page of the DIR-300 router and on the Wi-Fi tab Fi click on the “Basic settings” link.

On the page that appears, you can specify the name of the access point SSID, by which you will recognize your wireless network among your neighbors. You can also change other parameters here, but in most cases this is not required. Save your settings.
After that, on the same Wi-Fi tab, select “Security Settings”. Here we can put a password on Wi-Fi router D-Link DIR-300. To do this, in the “Network Authentication” field you should select WPA2-PSK, and in the “PSK Encryption Key” you need to enter the desired password for the access point and save the settings.
That's all, the DIR-300 router can be considered configured, now you can connect to it any devices that support a Wi-Fi connection, as well as a local network. If you are using digital television, then on the main settings page in the “IPTV Settings” item, specify one of the ports as dedicated for TV and connect the set-top box to it.
The question of how to connect a router interests thousands of users, and this is no coincidence - after all, it has rightfully earned the title of the most popular wifi router on the Russian market. This is explained not only by its affordable price and easy setup, but also by the fact that many providers have rented and continue to rent it to their clients as the main connection device. Therefore, even several years after its release, it remains one of the most popular routers and is still sold in various modifications. And today we will find out how connect and configure router D-Link DIR-300 and its twin brother with USB port- Dir-300 NRU.
How to connect a D-Link DIR-300 router to a computer?
By and large, connecting D-Link routers is no different from the models from other manufacturers that we have already reviewed in other articles. But the difficulty is that the interface of the administrator section of different routers differs greatly depending on the company and firmware version, which can cause difficulties for novice users.
These instructions for connecting and configuring the D-Link DIR-300 router are universal for all models with firmware revision B6 and B7.
In total we will need to take three steps
- Connect the D-Link DIR-300 router to your computer
- Set up an Internet connection
- Set up WiFi and set a password for D-Link
First, let's do the most standard steps that are necessary to configure the router out of the box.
- We connect the router to an electrical outlet and turn it on.
- Next, insert the patch cord into the LAN connector and connect it to the computer’s network card.
- Insert the Internet cable from the provider, which was previously inserted into the network connector of the PC, into the “Internet” socket

Now let’s go to the section on the computer that is located in the chain: “Start - Control Panel - Network and Internet - Network and Sharing Center - Changing adapter settings”
Here we find “Local Area Connection” - this is the setting of the computer’s network card. Right-click on it and go to the “Properties” menu. If there are any settings from the provider here, then we write them off and save them. Then we set the computer to automatically obtain an IP address and DNS servers.

How to configure the D-Link DIR-300 router?
After that, launch the browser and enter it in the address bar in order to get to the router’s web interface.

When we first log in, we will be asked to enter a login-password pair - by default “admin/admin”. This is standard data not only when connecting to a D-Link Dir router, but also for the vast majority of other models.

Internet connection and WiFi on the D-Link DIR-300 router
We get to the main page personal account D-Link. We need to open the “Advanced Settings” section - the link to it is in the lower right corner.

Here, first, we will configure the connection of the D-Link router to the Internet. Open the “Network” tab, “WAN” section. We select the type of our connection - it is specified in the agreement with the provider, find it and look at it, or find out in technical support. After this, we enter all the data provided in the contract and required for the connection.

My type is PPPoE, which only requires a login and password for authorization. We leave the remaining fields by default unless the provider requires otherwise.
Next, setting up the D-Link DIR-300 router continues by entering data for the local wireless network, that is, for those computers that will access the Internet through it. First of all, let’s make sure that WiFi is turned on - you can do this either directly on the main admin page in the “WiFi” block - just switch the slider.
Or go to “Basic Settings” and activate the “Enable Wireless” checkbox.

Advanced setup D Link DIR-300
For a more detailed configuration, again go to “Advanced settings”, section “WiFi”. Here we set the name () for the wireless network, the country (for using allowed frequencies), the WiFi standard (mixed) and the maximum number of connected clients. Let's leave it at "auto" - later you can also configure it for a more stable signal.
At the next step, we set it for maximum security, or again “mixed” so that outdated devices can connect to the network. Here we set a password for the connection - from 8 characters. WPA encryption - AES or TKIP, it doesn't matter. We leave the rest as is.

Save the settings. After reboot in the list available networks you will see yours, which you can now connect to.
Good afternoon.
Despite the fact that today the model D-link router DIR 300 cannot be called new (it is slightly outdated) - it is quite widely used. And by the way, it should be noted that in most cases it copes with its task perfectly: it provides Internet to all devices in your apartment, simultaneously organizing between them local network.
In this article we will try to configure this router using the wizard quick settings. First things first.
1. Connecting the D-link DIR 300 router to a computer
The connection is generally normal for of this type routers. By the way, router models 320, 330, 450 are similar in settings to D-link DIR 300 and not much different.
The first thing you do is connect the router to your computer. The wire from the entrance, which was previously connected to your computer’s network card, is connected to the “internet” connector. Using the cable that comes with the router, connect the output from the computer’s network card to one of the local ports (LAN1-LAN4) of the D-link DIR 300.
The picture shows a cable (on the left) for connecting a computer and a router.
That's all. Oh, by the way, pay attention to whether the LEDs on the router case are blinking (if everything is fine, they should blink).
2. Setting up a network adapter in Windows
We will show the setting using Windows 8 as an example (by the way, everything will be the same in Windows 7). By the way, it is advisable to carry out the first setup of the router from a desktop computer, so we will configure the Ethernet adapter* (which means LAN card, connected to a local network and the Internet via a wire *)).
1) First, go to the OS control panel at: “ Control Panel\Network and Internet\Network and Sharing Center". Here you are not interested in the section on changing adapter parameters. See screenshot below.
3) In the Ethernet properties we need to find the line “Internet protocol version 4...” and go to its properties. Next set automatic receipt IP addresses and DNS.
After that, save the settings.
Now in command line type “ipconfig/all” and press Enter.
You should see the properties of all your adapters connected to the computer. We are interested in Ethernet, or rather its MAC address. In the screenshot below, we need to write down (or remember) the line “physical address”, this is what we are looking for.
Now you can move on to the router settings...
3. Setting up the router
First of all, you need to go to the router settings.
Address: http://192.168.0.1 (type in the browser address bar)
Login: admin (small with Latin letters without spaces)
Password: most likely you can leave the field blank. If an error pops up that the password is incorrect, try entering admin in the login and password fields.
3.1. Setting up a PPPoE connection
PPPoE is a connection type used by many providers in Russia. Perhaps you have a different type of connection, you need to check with the contract or the provider’s technical support...
First, go to the “SETUP” section (see above, right under the D-Link header).
By the way, perhaps your firmware version will be Russian, so it will be easier to navigate. Here we will consider English.
In this section we are interested in the “Internet” tab (left column).
INTERNET CONNECTION TYPE - in this column you should select the type of your connection. In this example, we will select PPPoE (Username/Password).
PPPoE - here you select Dynamic IP and just below enter your username and password to access the Internet (this information will be confirmed with your provider)
It is also important to note two columns.
MAC Address - remember a little earlier we wrote down the MAC address of the adapter to which the Internet was previously connected? Now you need to enter this MAC address into the router settings so that it can clone it.
Connection mode select - I recommend choosing Always-on mode. This means that you will always be connected to the Internet; as soon as the connection is lost, the router will try to restore it immediately. For example, if you select Manual, it will connect to the Internet only at your direction...
3.2. Wi-Fi setup
In the “internet” section (top), in the left column, select the “tab” Wireless Settings«.
Here, check the box next to Enable (i.e. enable). Now lower the page a little lower to the heading “Wireless Network Settings”.
The main thing to note here are 2 points:
Enable Wireless - check the box (means you are enabling wireless Wi-Fi network);
Wireless Network name - enter the name of your network. Can be as arbitrary as you like. For example, "dlink".
To do this, under the “WIRELES SECURITY MODE” heading, enable the “Enable WPA/WPA2...” mode as in the picture below.
Then, in the “Network key” column, enter the password that will be used to connect to your wireless network.
That's all. Save the settings and reboot the router. After this you have desktop computer there must be Internet, local network.
If you enable mobile devices(laptop, phone, etc. with Wi-Fi support) you should see a Wi-Fi network with your name (which you set a little higher in the router settings). Join it by entering the password you set earlier. The device must also have access to the Internet and local network.