One of the oldest features of the iPhone, which not every owner of the gadget uses, is a reminder of birthdays and memorable dates. An appropriate notification will allow you to buy a gift for a loved one in advance or not to forget to congratulate a work colleague or acquaintance.
Unfortunately, this feature is disabled by default on newer iPhones.
Entering birthday data manually
To begin with, the smartphone needs to provide data on all memorable dates. If they are not fixed anywhere, you will have to drive them in manually for each contact.
1. Open the contact card in the application Telephone or Contacts and press Change in the upper right corner.
2. Scroll the list to the item add birthday, enter the date and press Ready.
Importing data from a Gmail account

If you have previously used an Android smartphone or just kept an address book in Gmail, you can import birthday data from this service.
1. Go to Settings - Contacts - Accounts and choose Add account.
2. After entering the login and password, check the boxes Contacts And Calendars. Your iPhone will download all the phones, email, addresses, and birthdays from Gmail.
If the desired account has already been added to use mail in the standard Mail application, you only need to activate the switches Contacts And Calendars for this entry.
Setting up reminders

Now all that remains is to turn on birthday notifications. To do this, we do the following:
1. We open Settings - Calendar and go to section Default Reminders.
2. Click on the item Birthdays and choose the appropriate type of reminder.
3. Check that system notifications are enabled for the Calendar application ( Settings - Notifications - Calendar).
iPhone can remind you of an upcoming holiday 1 or 2 days in advance, a week in advance, or on the day of the event. The entire list of dates will be displayed in the Calendar app. 
For convenient viewing, you need to click on the Today button, and to hide other dates and holidays, go to the Calendars section and disable unnecessary ones.
We transfer data to all devices

When everything is set up on the iPhone, it remains to transfer memorable dates to other gadgets. An iCloud account will help us with this.
It is enough to enable calendar synchronization in the iCloud settings section. This must be done on all devices.
If you will be using a different iCloud account on your computer, tablet, or smartphone, and you want to duplicate your birthday reminders, just transfer the data using the method from the previous section.
We thank re:Store for the capacious and comprehensive instructions!
The first thing a user who visits the obvious http://calendar.google.com address sees is a prompt to enter basic information about themselves: a username that will be seen by members of your public calendars From them a little later), as well as your main time zone . Entered? We go further. We go into the settings and first of all switch the application language to "Russian", and then return to the calendar and click on the "Month" tab. We see 30 (with a probability of slightly more than 50% - 31) squares, each of which symbolizes one day. The date of the day is reported by the number in the upper right part of the square. The current date changes its color, making it slightly yellowish.
To move in time, use the left and right arrows at the top of the screen. If you want to travel to 1981, for example, all you need to do is be patient as you rewind month after month. It is very convenient to "wander" through the dates using the mini-calendar, which is located in the left sidebar. It also allows you to sequentially move from month to month using the arrows. If, during your travels in time, you are stuck somewhere in the middle of the last century, then the “Today” button located next to the navigation arrows will help you urgently return to the present.
But stop wandering through the eras and climb into the deep future! It's time to create something in our calendar - for example, a reminder of a meeting with an old friend who returned from a long trip abroad to Holland (why to Holland? Yes, my friend just returned from there. Amsterdam, according to him, is beautiful!). We move the cursor to the desired date, click on the link "Create an event" and begin to explore the input form that appears.
Naturally, first of all, you need to enter the name of the event. Conciseness does not hurt here, because it is the name that will be displayed in the date square you have chosen, and the place there is limited for obvious reasons. A lengthy explanation of the intricacies of a business meeting or the details of a daring bachelor party is more logical to transfer to the "Description" field - there it belongs. Time management professionals recommend encoding task names, adding to them, for example, the name of the project, but for this purpose we will use other functionality. Therefore, once again: be restrained when creating an event, its purpose should be specific and clear from the first, maximum from the second word. Do not write “Friendly Sabantuy about one of the employees of my department going on vacation”, because in a week you will not understand what kind of event this is and whether it is worth going there at all! It is much better to write: “Sergeev” - and even after a month, having received a notification of such a significant date, you will remember exactly what the banquet is being organized for.
The Calendar divides all events into two types - temporary, i.e. tied to a specific time, and daytime, i.e. tasks that can be completed during the selected day, without reference to a specific hour. To set the start and end times of events, click on the "Edit information" link and adjust the start and end times in the corresponding fields. It is advisable to enter the exact time only when it comes to events that are rigidly tied to a certain hour, such as meetings, going to the cinema, and flight departures. In all other cases, it is highly desirable to limit yourself to the day you complete a particular task - this way your schedule will become obviously more flexible.
Really: what difference does it make when exactly during the day you will be engaged in sorting out the rubble on your desktop, in the morning or a little after lunch? Do not drive yourself into too tight a time frame - our life is much richer than any fantasy plans. Therefore, later on you will inevitably have to "move" such tasks, which is annoying and ... right - it takes time! If you do not want to determine the exact time, or the task is guaranteed to take all day, feel free to check the "All day" box - the time entry fields will disappear.
Location of the event. Do not write coordinates here if they are obvious. By definition, a picnic can only be outside the city, a Friday party under the slogan “Thanks God it’s Friday!” always takes place in the office of the general director, and the address of the institute where you defend your diploma, you learned by heart in your third year. When should this field be filled in? Use the principle of reasonable sufficiency: if the scheduled meeting takes place in an unfamiliar city, then it would be reasonable to indicate not only the name of the street and house, but also the descriptions that were given to you by a business partner. Examples: "It's opposite the house with a yellow roof", "Our office is next to the Clothing store", "I'll be in a red blouse and a denim miniskirt" ... (However, the latter seems to be a little different.) But the principle did you understand.
Events are one-time and recurring. A one-time event can be considered a trip to the cinema, a meeting with friends in a cafe, buying a laptop - in a word, everything that happens once or when the date of the next similar event is unknown to you. (Of course, I know that someday my faucet will break again, but I don’t know the exact date of the next plumbing disaster, and therefore the task of “visiting a plumber” is a one-time task.)
In contrast to single events, the dates of recurring events are well known to us. Birthdays, loan repayments (forget them!), gym workouts are all recurring events. This means that you can not enter each episode manually, but simply specify the desired frequency and once again admire high technology, seeing how the periodic tasks you specified automatically “multiplied” for many months in advance. The frequency can be set annually (suitable for birthdays, christenings and wedding anniversaries), monthly (visiting a hairdresser, for example).
By the way, you can specify not only the monthly frequency, but also the period “every few months”. Then it will also be possible to include quarterly reports every three months or an oil change in a car engine every nine months. You can go further and set up the frequency of events on a weekly basis - then you will only need to specify the day of the week on which the English language is taught or meetings are organized in the business club. Every time you change the period, the Calendar tells us if everything is done correctly - the line at the bottom of the screen in one sentence completely describes the frequency of the event "Weekly on Fridays at 17:00", "Annually, January 21 at 15:30", etc.
Set up? Let's move on to notification mode. Events created in the calendar are worthless if we learn about them a week after they end. The habit of looking at the calendar before the start of the working day is great, but it forces you to either keep all the events of the day in your head, or keep the calendar open and periodically review it. There is a better way. The calendar can remind you of an upcoming brainstorm in a conference room or a visit to the dentist using pop-up windows in the browser, e-mail messages or SMS to your mobile phone. Let's take a closer look at each of these modes.
When you set the reminder mode to "Pop-up Window" at the specified time before the event, a hint will appear in the browser window that will help you remember to take out the trash, buy a new toothbrush, or replace a burnt out light bulb in the attic. After pressing the OK button, you will have a chance to take a little time off from completing the task by clicking on the Remind me in five minutes link that appears at the top of the screen. The pop-up window will reappear after 300 seconds.
Setting up email reminders is convenient if your only permanently open browser window is already occupied by Gmail. (After the praises of GMail, I do not believe that you use other email clients and services! No, I simply refuse to believe it!) When you install this type of notification, the system will send a short postcard to the address specified in your Gmail account settings without any questions here is this kind. It contains all the necessary information about the event, as well as a "More Information" hyperlink, clicking on which will send your browser straight to the event on the calendar.
The method of notification via SMS personally seems to me the most convenient, therefore, having tried other types of “reminders”, I chose this one. In fact, the mobile phone is the only device that accompanies me everywhere from the moment I wake up in the morning to the exhausted going to bed. If your working day passes not only behind a computer screen, but also, say, in a factory workshop, a car, or just an open field, there is no better way to find it. However, to connect it, you need to configure and verify (confirm) your phone number - this is done for security purposes. Let's go to the settings (the link to them is located in the usual upper right corner of the screen) and select the "Settings for mobile devices" tab. Choose a country and a mobile operator: for Russia, both the “big federal three” are available - MTS, Beeline, MegaFon, as well as a host of smaller local operators. In my favorite foreign country, in Ukraine, Kyivstar and UMC are supported, while residents of Latvia, for example, are lucky with Latvian Mobile Telephone and Tele2 operators.
After selecting an operator and entering your mobile phone number in the adjacent field, you must click the "Send verification code" button. You will receive a test SMS message with a secret code, which you need to enter in the response confirmation in the "Verification code" field. This will mean that the number really belongs to you, is not blocked or entered by mistake. After successful verification, the "Status" field will change its value to the coveted "Phone number successfully verified".
Now you can return to the notification mode and select the much-desired mode of sending via SMS. Now, for the time specified before the event, your cell phone will receive a short reminder text message of this kind - Reminder: passport exchange @Fri May 1, 2009 (Denis Baluev). If the text of the event is too long, the system will split it into two or more messages - another reason to name cases succinctly. The @ symbol is followed by the day of the week (Mon, Tiie, Wed, Thu, Fri, Sat, Sun - analogues of our Mon, Tue, Wed, Thu, Fri, Sat and Sun), and then the date and name follow your main calendar. Once all the details have been entered, click the Create Event button and you will see a small blue rectangle appear at the specified location on the calendar. This is your task, event or meeting. In response to a mouse click on a rectangle, a small cloud will appear next to it with a detailed description of the event and a proposal to change certain details.
By the way, here's a super-fast way to create events: just click once on an empty space of the day you need. In the pop-up cloud, enter the name of the task and the time - and that's it! If this information is not enough, it can be clarified by going to the details. But if you just specified "Lunch with a friend" and the time from one to two, then just click "OK" - and the event will be created. In order to change the time of an event, it is not necessary to go back to the editing form again. Such actions are easily performed with the mouse. By holding down its left button, events can be dragged to a completely arbitrary day of the year, and deleted using the Delete key. In the case of a single event, it will be destroyed without further questions.
With periodic events, everything is much more interesting. After all, there are options! Let's say you just want to delete that Friday swim in the pool that you're missing because of a date with a beautiful girl/attractive young man with no bad habits/old millionaire who just made out his fortune to you. In this case, you will need to delete only one episode of the series, leaving all the others untouched. The second option: you generally want to give up going to the pool, replacing them with visits to the gym - apparently, you still won’t succeed in the second Michael Phelps, and there is still a chance to surpass Schwarzenegger himself. In this case, you will need to agree with the system's proposal to delete the entire series of events. You can also make a compromise - delete only all subsequent events in the series, leaving the current and past intact.
By the way, the Calendar provides the same choice in case of changing the time and dates of recurring events - you can change them both for one episode and for the entire series. Quite reasonable. If your life is rich in events (I assure you, mine is exactly like that!), then very soon it will begin to seem to you that the review of the month’s affairs from a “bird’s eye view” is clearly not enough: there are too many cherished rectangles in cube-days, and small print is bad read. Let's change focus! Pay attention to the tabs "Day", "Week", "Month", etc., located above the main area of the calendar.
These tabs allow you to change the view mode, switching from the most detailed analysis of the day back to the month view. In the "day mode" you can see how the tasks are distributed by hours and even minutes. The bright red bar when viewing today symbolizes the current time - everything above it is already in the past. For the rest of the days, the hours and minutes are reminiscent of a small red triangle moving from top to bottom on the time scale. In the day view mode, it is convenient to change the duration of tasks without even touching the keyboard - just pull the small slider that resembles the “=” symbol and is located at the very bottom of the event. By the way, in the daily and weekly mode, you can create events by simply selecting the desired time area with the mouse. After you get used to this method, such an operation will take you less and less time. After all, all that remains in this case is to enter the name of the event and click "OK".
Tasks scheduled for the whole day are located in a special area above the timeline. Everything is correct - after all, they do not refer to certain hours and minutes and therefore can take place at any time. The weekly plan, as you might guess, shows all seven days of the week in a row. This mode is useful for people who are used to evaluating the work plan for the week ahead: I know from experience that workers in factories and large enterprises prefer this mode - their activities are subject to the weekly cycle. Do you know what week it is now? And these people know for sure.
A compromise between daily and weekly view is the 4 days tab. By selecting it, you will see exactly four columns on the screen. It is very convenient that the number of days or weeks on this tab can be changed - just go to the settings and specify the desired value. From two days to as many as four weeks are available for selection (the “Default View Mode” parameter).
The last tab is the most interesting. No wonder it's called "Agenda"! Its task is the consistent conclusion of the events planned for the near future. Click on a bookmark and you will be presented with a list of to-dos and appointments in the immediate future. By clicking on any action, as in any other tab, you can view the details of the event and, if necessary, change it. The “Agenda” tab is convenient to use if you need to quickly assess the scale and number of tasks without an exact reference to time. It is also convenient to start your working day with it. Initially, Calendar displays a list of 12 upcoming events for each calendar, warning that the set is limited to one or another date. You can view future events by clicking the "Later" link at the bottom of the screen.
Remember, I said that I do not advise adding a tricky encoding to their names to divide tasks into projects? It's just not needed here. Instead, you should use the functionality of calendars. The fact is that there can be several calendars in the Calendar (I apologize for the involuntary, but mandatory tautology). Yes, you only have one for the main events so far. But the joy is that you can create as many calendars as you want and link your events to them! This approach has a lot of advantages, and now I will try to convince you of them. Plus number one: for each calendar (and therefore events) you can choose your own color.
Remember the visualization I talked about in the Tables articles? Everything is the same here: critical tasks can be attributed to the “Important!” calendar, shining in inviting red, and professional holidays and optional events, on the contrary, should be placed in the “Events” calendar, painted in neutral gray! Plus number two: calendars can be turned off. It is enough to click on one of them - the colored background strip will disappear, and all related events will disappear from the timeline. Not only that - you will no longer receive notifications about them! Obviously it is worth turning off any reminders of business meetings during the holidays - it will be difficult to get to them, lying on the hot sand of a Thai beach, right?
Another huge benefit of having multiple calendars is that the notification modes for each can be configured independently. And therefore, no one bothers to set the reminder mode by SMS for the "Meet with Friends" calendar two hours before gatherings in a cafe, while for the "Birthdays" calendar it is reasonable to set up sending reminders by e-mail a couple of days before a significant date, not to forget to find a worthwhile birthday present.
To set up a new calendar, click the New link below the My Calendars list. Further work is proceeding according to the usual scheme. In the window that appears, specify the name of the calendar. Remember that it will be displayed in a very small window, and therefore should not be too long. You can practice writing Russian and mention all the details in the "Description" field. The “Location” column, generally speaking, serves to indicate the location of the events, but if nothing meaningful can be written there, you can leave it empty. The "Calendar Time Zone" field is very important.
If you yourself live in Moscow, and the events marked on the calendar will have Novosibirsk time (for example, because this is what your friends from the Siberian capital mean when they announce the opening time of a scientific conference in Akademgorodok), then in order to to avoid confusion and recalculation of hours back and forth, you should select the desired country and time zone from the drop-down lists. Initially, there is a belt specified in the general settings. An interesting point: if, for example, Russia is selected as a country, and the “Show all time zones” checkbox is turned off, then in the “Now select a time zone” field we will see only the zones belonging to our vast homeland. The included checkbox allows you to select any time zone of the planet Earth without reference to a specific country.
Do not want to devote people to such detailed details? Check the box "Open access only to information about free and busy time" - and the details of the events will be hidden, only the dates and hours of your employment will remain. How to publish this information on my website, I will definitely tell you a little later. If the circle of people whom you want to dedicate to the details of your own schedule is known in advance, then it is more reasonable to use the “Shared access for individual users” option instead of general access.
In the proposed fields, you sequentially enter the email addresses of friends and colleagues and the level of their access to the calendar - from the maximum (participants can both make changes to the calendar and, in turn, provide access to it to other people) to the minimum detailed (view free and busy time). Created a calendar? Now it should appear in your list, and you can specify it when creating new events. Want to change the color of the calendar? Click on the small triangle to the right of its name and choose a color according to your aesthetic preferences. Let's set up the calendar notification mode. In the same drop-down menu, select "Notifications" and set one or more alert modes for upcoming events.
In addition to our own calendars, you and I always have a wonderful opportunity to connect open calendars of third-party users and companies. In fact, why drive in the schedule of the World Cup matches yourself, if other “tiffosi” had long ago started it, providing detailed information about the participants and the venue? Nothing could be simpler: the functionality of so-called public calendars allows you to view data created by others just like your own. Pay attention to the list "Other calendars". Initially it is empty. In the "Add" drop-down menu, we are offered several installation options: adding so-called "interesting" calendars, adding a friend's calendar, adding by URL and, finally, importing from a file.
Popular calendars are created for our benefit and pleasure by Google employees and are divided into three sections. The "holidays" section allows you to choose one of several dozen schedules of national holidays of the peoples of the world. Russian holidays are also present here - however, this calendar does not shine with details, and only the most important significant dates are taken into account in it. The "Sports" section will give, for example, the opportunity to follow the schedule of matches of your favorite team in hockey, football and even cricket. By the way, there is also a calendar of matches of the teams of the Russian Football Premier League. The "Advanced" tab contains calendars on a variety of topics - here you can see the time of sunrise and sunset for the current time zone, and the display of the week of the year, as well as the birthdays of people from your Gmail contact list!
The "Add by URL" option is perhaps the most versatile. Google calendars perfectly understand the iCal file calendar format, and therefore in the field that appears, you can simply enter the address of such a file, located on any site that provides such information. One example of such sites is http://www.icalshare.com, which contains several thousand calendars on various topics. Finally, the last option to import a calendar is from a file. An iCal format file can be obtained by exporting from almost any modern calendar manager, be it Microsoft Outlook or Mozilla Sunbird. That is why by importing files, you can easily solve the problem of migrating from ordinary "desktop" calendars to their more advanced online counterpart. Simply select the required file, select which calendar to add the information to, and click the Import button.
Another surprise for the readers of our site - I have prepared an excellent calendar of Russian holidays, which every Google Calendar user can add to their schedule! The list of holidays is taken from the wonderful service http://www.calend.ru, which tells about important dates of many peoples of the world, and now you will not be taken by surprise by Easter, the harsh Day of the Airborne Forces or the hooligan joy about Ivan Kupala. Just add another one to the list of calendars, located at http://b23.ru/s0r3, using the "Add by URL" function - and you will no longer need to remember which day of the week this year falls on the New Year or the First May.
But let's get back to setting up our own calendars. See - the options window has changed a bit? Indeed, at the time of entering the calendar, several options were missing. One of them is the ability to publish a link to the calendar on your website. To do this, you need to copy the code indicated in the "Insert this calendar" field and place it in the right place on the site or blog. You can preliminarily adjust the appearance of the calendar to the design and color scheme of your resource by selecting the desired color and size using the "Customize color, size and other settings" link.
Quite another matter - closed calendars! For each of them, a “secret” address is created, which is desirable to keep secret and share it only with reliable people. However, even if the secret has become clear, the old secret path to the file can always be erased or replaced with a new one - for this you need to select the "Reinstall private URLs" item. Sending calendar links to friends is worth it if they don't have a Google account or use a different calendar program. In all other cases, access rights are much more convenient to configure using the "Share Calendar" tab.
At the Google I/O presentation, the company announced some minor updates to the Google Now service. One of these updates added the ability for users to create reminders based on their location and time.
There are several different methods for adding Google Now reminders. You can use your voice or enter the reminder manually.
To create a voice reminder, launch Google Now and say "Google" or click the microphone icon. As soon as you hear a beep warning you that the recording is starting, start the command with "Remind Me" (you have to speak in English, with Russian speech in Android everything is rather sad) and add what you are afraid to forget. You also need to add the time or place when the reminder is triggered. You can set specific times or general time frames such as afternoon or evening.
When you add a reminder using your voice, Now will present you with a card filled with the information you dictated, allowing you to verify that it is correct. Click on the "Set Reminder" button to save it to your account.

To add a reminder manually, launch Google Now and navigate to the bottom where you will find the menu icon. Click on it. Select "Set Reminder" from the list of options. After that, you need to enter a name and select the trigger (time or location).

When adding a location to Now Reminders, it does something pretty amazing. When you need to be reminded to buy some milk from your local grocery store, just enter the name of the store instead of the address (again, in our provinces, I would not really hope for this). Now Google will find nearby places and use them as a reminder trigger.
You can't do this with Siri if the address isn't saved in contacts in your address book.
Unfortunately, you can only access reminders on Google Now, and you won't be able to edit existing reminders. To access your set reminders, you must launch the Now menu and select "Settings>My Stuff>Reminders". You will see a list of your current and past reminders. Clicking on a reminder will only give you the option to delete it, nothing else. If you need to change something in a reminder, you can only delete the current one and add a new one in its place.
When your to-do list includes items that shouldn't be on the calendar, you need google reminders. This time management feature makes it easy to stick to a busy schedule without forgetting anything.
Google Reminders is part of Google Calendar
You may already be using Google Calendar to stay on top of a busy schedule filled with appointments you need to keep track of. Google Reminders offers a way for you to remember the little things too. Reminders can be set to a specific date and time and have many autofill options to make it as easy as possible.
Reminders are a great way to stay on top of your to-do list, and they roll over until you cancel them or mark them as done. When you go to create a reminder, Google will use what it knows to help predict your reminders and save everything quickly. This means that if you set a reminder to call your sister for her birthday, Google will pull the phone number associated with that name.
How to set a Google Reminder
It's important to remember: Google Reminders can only be set for future dates and times. This means that if you're trying to remember to pick up eggs from the store on your way home from work, it won't let you add a reminder for today, as the reminders must be set for another date in the future. Likewise, if you don't mark a reminder as completed on the day it was originally set, it will repeat. It is, after all, a reminder.
Setting up reminders is actually quite a simple process when you follow these steps:
1. Open Google Calendar on your phone.
2. Click red plus icon in the lower right corner of the screen.
3. Click "Reminder".
4. Enter the event or item you want to be reminded of and click on it.
5. Select a date for the reminder. (This can be all day or by pressing the switch you can choose a specific time interval).
How to Change Google Reminder
Sometimes you need change reminder. Again, the process is very simple.
1. Open Google Calendar.
2. Click reminder on your calendar.
3. Click pencil Icon, to change your reminder.
4. Change the name, date, time, or repeat of the reminder.
How to cancel a Google reminder
Cancellation or editing of a reminder is done from the Google Calendars app. If you've finished what the reminder is for, you can open the reminder and then click "Mark Done" and it will stop notifying you. You can also remove a reminder by following these steps:
1. Open Google Calendar.
2. Tap a reminder on your calendar.
3. Click overflow icon in the upper right corner. (It looks like three vertical dots).
4. Click "Delete".
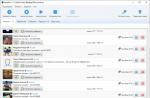
In today's lesson, we will make a reminder of any event or future plans for our loved ones using only Windows tools without using third-party programs.
The instructions for creating reminders will be long, although in essence everything is done quite simply, you just need to delve a little into the sequence of actions. As an example, I will cite the current situation, when in a new letter I received an invitation to a webinar, which I can simply forget about by the evening, because a lot of things are planned for today.
Because I have a lot of different software installed on my computer to work with, then I just don’t want to overload the system with installing another reminder program. And why put too much when Windows 7 and above already have the necessary functionality. Of course, not as wide as we would like and may not be very convenient, but if you do not plan to create dozens of reminders every day, then The windows task scheduler is enough for you.
Let's get started: By the way, for Windows 7 and 8, the instruction is equally relevant, in fact it is the same operating system only with a different interface and, accordingly, different paths to the control panel.
Windows Task Scheduler
Start - Control Panel - Administrative Tools - Task Scheduler

Start - All Programs - Accessories - System Tools - Task Scheduler

Create a reminder in Windows
Create a simple task
On the left, select the task scheduler (local), and in the right window, click the link Create a simple task...

In the field name: write the name of the reminder for yourself. In the description field: description of the task.

Trigger: Accordingly, in my situation, I need a one-time reminder, if you need regular reminders, check the corresponding checkboxes.

At this step, we set the date and time of the start of the task, in other cases (regular) you will have the choice of the start and end of the task, as well as the days of the week, dates and times of each execution.

In order not to forget what will be discussed, I create a task for myself in the form of displaying a message on the screen.

At the end of the creation of the task, do not forget to check the checkbox below Open the Properties window after clicking Finish.

With the creation of a reminder finished, you can check: on the left in the scheduler window, click scheduler library and in the middle at the bottom of the list we see our task and its parameters.

When the reminder is triggered, the following window will appear in the center of the monitor with your message.

Upon completion of the creation of the task, the properties window will open, because we put a tick in the corresponding checkbox. at the top, click the Conditions button and uncheck the checkbox Stop when switching to battery power, so that if you are using a laptop and working on batteries, the task is not canceled.
Below you can check the box so that a sleeping laptop or tablet wakes up from hybrid mode and completes the task. But keep in mind, if your system is configured in the power plan to enter a password on wake-up, then the task will not be completed until you log in to the system.

Disadvantages of this method: Unfortunately, if you run any program as an administrator at this time, the message window will be in the background, and you will see a blinking button in the quick access panel. And the reminder window is quite small and is not accompanied by sound design.
Therefore, we simply create a second task that will run in parallel with the first.
Creating an additional sound reminder
We repeat the above procedure until the step where we selected the item Display message but this time we choose Run the program. remember that the date and time of the second reminder must be the same as the first.

Click the Browse button

In the explorer that opens, select any media file. You can open both audio and video, just check first if this file can be opened by a standard player. And be sure to adjust the system volume and the volume of the player to the desired range, otherwise from unexpectedly loud music ... well, you understand yourself 🙂 ( a good option to poke fun at a friend)

Look again at the parameters of the created task

Now, on the right day and hour, you will receive two reminders at once: first of all, you will hear your favorite music that you have chosen, played by the player, and when you close the player, a message box will appear behind us.
Another reminder option
Well, here's another reminder option for you: we create a word document on the desktop, it is desirable to make the orientation landscape, but it will do and what it is, write the desired message and set the largest font. When creating a task, instead of a media file, we indicate this Word document. Or you can just create another task with this document.
Thus, at rush hour, we listen to music, see a message in large print in Word in half the screen, and also a system message :). So to say, triple control or triple reminder in Windows 7 or 8 is created in just one minute. Try it and see that everything is quite simple.
And for testing at the bottom right, you can click the execute button - the green triangle (see screenshot 9.)
http://website/wp-content/uploads/napominanie_windows.pnghttp://website/wp-content/uploads/napominanie_windows-150x150.png 2018-06-02T13:01:59+00:00 Lessons In today's lesson, we will make a reminder of any event or future plans for our loved ones using only Windows tools without using third-party programs. The instructions for creating reminders will be long, although in essence everything is done quite simply, you just need to delve a little into the sequence of actions. Let me give you today as an example... user site - Computer for dummies