You need to download Virtual PC for Windows 10 if you want to deploy a virtual machine on your computer. Virtual PC is one of the utilities that will allow you to create a virtual machine on a computer running Windows 10. On the virtual machine, you can run another OS other than Windows 10, or open a suspicious program. Many users install Virtual PC to run old OS and old applications. Latest version virtual machine will allow you to work with absolutely any OS that is supported by your hardware. And keep an eye on the OS bit level, on this page you can download Virtual PS for Windows 10 x64.
Virtual PC – a tool for creating a virtual machine
Virtual machines on Windows 10 are created only using additional software, such as, for example, Virtual PC. There is no functionality built into the OS for creating virtual PCs. Therefore, if you need a virtual machine, then you need to download Virtual PC and there is no other option. The maximum that you can change is to choose not Virtual PS, but a similar service from another developer, since there are many analogues. Although you are unlikely to want to change Virtual PC to another solution if you work with this utility at least once. It is far superior to its analogues for a number of reasons:- Even a beginner can deploy a virtual machine using Virtual PC;
- Large selection of available operating systems;
- You can download Virtual PC for free and in Russian;

The list of operating systems that Virtual PC allows you to deploy is so large that it covers 100% of all popular operating systems. You will be able to deploy all modern and all outdated Windows versions, various variations of Linux and other operating systems. Even a beginner can cope with this task, since the developers of Virtual PC for Windows 10 have simplified management to the maximum. This allows you to deploy a virtual machine in 5-10 minutes, the main thing is that you have the distribution kit of the OS you need ready. Virtual PC does not include operating systems. You can deploy to a virtual machine and copy of Windows 10, for this use clean ISO image, which can
Many people have heard about virtual machines, but not everyone knows what virtual machines for Windows 10 or any other operating system are, how they work and what they are needed for. Next, we will look at several popular clients that allow you to configure any configuration in the tenth version of Windows, as well as in any other OS.
Virtual machines for Windows 10 or other OS: general concepts
The virtual machine (VM) itself is a kind of similarity to a real computer, with the only difference being that it operates exclusively in the software environment of another system.
In the very simple definition a virtual machine for Windows 10 x64 or x32 can be regarded as a kind of construction kit with parts from which the required configuration is assembled. In such a really non-existent computer, you can set the size of the hard drive yourself and random access memory, install virtual video card, disk drives, select operating system and even use an Internet or local network connection. That is, this entire virtual configuration in the form of a software shell will work exactly the same as the real existing system.
What is this software environment used for?
Virtual machines for Windows 10 or another environment have several main priorities in use. For example, installing a second operating system on a hard drive very often seems completely impractical, since errors and failures may appear in it too.

In addition, it is not always possible to install Linux in parallel with Windows. And Apple OSes do not work in PC configurations at all and function exclusively on Intel platforms (not to be confused with processors).
If you install virtual machines for Windows 10, you can emulate the operation of the above systems and test them software, designed exclusively for installation and use on these operating systems. But software products for Windows environment When tested in a virtual machine, they do not have any effect on the main system. You can easily emulate damage to a child OS by a virus, but this will in no way affect the main system.
How to install a virtual machine on Windows 10 using Hyper-V as an example: initial steps
Starting with the seventh modification, Windows systems have their own tool for creating and running VMs called Hyper-V.

Installing a virtual machine on Windows 10 at the first stage involves activating this module in the system. This is done from the programs and components section, called from the standard “Control Panel”, where in the presented list a highlight is placed in the box opposite the name of the module and its components.

After activation, a reboot will follow, and upon restart, the “Hyper-V Manager” icon will appear in the administration menu.

The created VM may not work if you do not use BIOS settings, where in the general parameters section, the Advanced settings menu is selected and the use of Virtualization Technology is activated by setting the Enabled parameter. For Intel processors and AMD, as well as for different versions BIOS or UEFI, names may vary.
Creating a virtual network adapter
In the second step, you need to create a so-called virtual switch to use the Internet connection.

This is done in the manager, where the name of the computer is selected, and from the right-click menu, the action line is used with the transition to the “Virtual Switch Manager”. When creating a network and connection, it is better to select the “External” option, so as not to complicate your work, set the desired network name and click the “OK” confirmation button. When connected, the created adapter will use network card or module wireless communication Wi-Fi.
VM creation and launch process
A VM is created from the manager by selecting the appropriate command, after which its name and the location of the machine’s files on the hard drive or logical partition are indicated.

You will then be prompted to select a VM generation. It is better to use the first one, since the second generation will create a VM with UEFI, and booting from images is not always supported.

The next step is choosing the amount of RAM. The default value can be increased, since the main system practically does not use memory when the VM is running.

In the network settings, the previously created adapter is selected, after which the parameters of the virtual hard drive(name, location of files on the hard drive and size).

How to run a virtual machine on Windows 10? Yes, just double-click on it in the dispatcher list and click the “Enable” button. After this, the OS will be installed (if this has not been done before).
Best Third Party Programs
Programs that allow you to use virtual emulators of real computer systems, today you can find quite a lot. However, VirtualBox packages from developers from Oracle and VMWare Workstation are rightfully considered the most powerful and advanced.
Let's look briefly at each of them. The processes for creating VMs in them are very similar to the actions with the Hyper-V module, but there are some differences.
VirtualBox
During the initial installation of this program, you should pay attention to several points with additional components, among which it is advisable to install support for connecting any devices via USB (VirtualBox USB Support) and network adapters for local networks and Internet connections (VirtualBox Networking). Programmers and developers can use support for programming languages (the average user does not need this).

The process of creating a VM in this shell is practically no different from that described above (except that a switch is not needed). Only at the stage of selecting the type of virtual disk can you install a dynamic (expanding as it fills) or a fixed-size disk.
Once the machine is created, it can be configured in terms of the amount of video memory used, CPU load, etc. After this, the start button starts, and the program asks for the path to the OS image. Then the installation starts, no different from a regular installation. If a requirement appears to boot from a CD/DVD-ROM, you will need to disconnect the image file from the drive (use eject disk in the media section).
VMWare Workstation Pro
Creating a VM using this software environment is done using a special “Wizard”, in which it is better to select the usual (recommended) configuration.

When creating a virtual disk, to increase performance in the save type, it is better to use one file rather than splitting it into several.
The hardware is configured from the section of the same name, but to improve device support, you should agree to install the VMWare Tools driver package when the guest OS is fully functional. By the way, even in the guest system you can take a snapshot of the state at a certain moment, and, if necessary, return it to the rollback point.
What to prefer?
What is the best virtual machine for Windows 10 is difficult to say. Some people like VirtualBox, despite having its own tool in the system. This is confirmed by many reviews. The program is easier to use and configure compared to the same Hyper-V module and workstation VMWare. But by and large, all programs are good, and the Hyper-V module can be used without the need to install additional software. But in any program of this type, a VM is created, launched and configured very simply. If you look at the example with the Hyper-V module and master the basics, there will be no problems with other emulator shells.
Good afternoon. Thanks to my site, I constantly tinker with the operating system and, of course, over time I began to look for a way so that I could write instructions, but at the same time make fewer changes to the operating system of my work computer... The solution came to an elementary one - a virtual machine. This is an emulation of a completely (or almost completely) working operating system that runs on your operating system. I tried VirtualBox, VMware Workstation and Hyper-V... VirtualBox is free and not as convenient as the other two. VMware Workstation is excellent in all respects, but is paid. Hyper-V is a completely balanced virtual machine, which migrated from server operating systems to Windows 8 and simply requires turning on for access. Therefore, the choice fell on the latter: simple, free and tasteful. By the way, I have Windows 10 Professional, which is licensed, but I got it for free thanks to Windows program Insider (six months of suffering with bugs and a license in your pocket)).
I’ll probably warn you right away that when you enable Hyper-V components, you will not be able to use other virtual machines. So, let's begin:
Right-click on the corner of “Start” and select “Programs and Features.”
In the left pane, select “Turn Windows features on or off”
Now open the “Start” menu → “All Programs” → look for the “Administration Tools” directory and find “Hyper-V Manager” in it.
By launching it, we will see the virtual machine management console, I already have one created machine on which the music bot for my TeamSpeak server is located. But now we are creating another machine to show how this is done. But first, let's immediately create a “Virtual Network” so that our VM has the Internet. To do this, click on the computer name in the left column, and in the right column select “Virtual Switch Manager”.
I add this paragraph two months after writing the article. That’s because below I described an easier way to connect a virtual machine to the Internet, but I myself use a slightly different one. The difference between them is that in the method described here, the VM gets the main access, and the computer works after it and this is not correct, but it is easier to configure. If you use your computer not only for running virtual machines, select “Internal” → “Create a virtual switch” and check the “Allow identification” checkbox. Internet access is configured using .
On the left select “Create a virtual network switch”, on the right “External” and click “Create a virtual switch”.
Enter a name for the network, in the “External Network” section, select your network adapter and click OK.
Now let's create a virtual machine. Click “Create” - “Virtual machine”.
" New Virtual Machine Creation Wizard“, on the first window just click “Next”.
Specify the name for the future virtual machine. If desired, you can also change the storage location of the virtual machine, I changed the location in the settings so as not to clog the SSD and all virtual machines are stored on one of hard drives. Click “Next”.
Everything is simple here, read what is written if you have motherboard without UEFI support or you are going to install a 32-bit system, then select the first option; if the conditions for using the second generation match your capabilities, select the second generation. I want to install 32-bit Ubuntu for one of the following articles, so I choose the first generation of Hyper-V. Click next.
Amount of virtual memory. In the case of Windows, 2-3 GB for 32-bit systems and 3-4 GB for 64-bit systems are desirable. More does not make sense for a virtual machine, and less can affect the operation of the system. You can also use “Dynamic memory”, in this case the VM will be allocated as much memory as it needs.
We select the size of the hard drive of the future machine and the storage location for its file. According to the needs, for Win 8-10 you need at least 25GB. I use Ubuntu with a lot of reserve.
A program for creating a virtual machine on a PC is software that allows you to emulate the interface of a particular operating system. Ideal for testing any software, or running applications that function only on certain operating systems. The article will talk about troika best programs to simulate a VM on a PC, the nuances of installing such applications, and brief instructions on setting up the software at first launch.
Top 3 virtual machines for Windows 10
The three most popular programs for creating a virtual machine on Windows 10 are as follows:
- VirtualBox
- HYPER-V
Each of these programs has its own characteristics and advantages.
So VirtualBox can boast that it is distributed completely free of charge.
- The software has open source, which makes it possible to create and run virtual machines with special properties and functionality.
- Also the most important quality of the application is its support for many operating systems. So, thanks to this virtual machine, you can run Windows, Linux and MacOS.
Key Features programs are: - Snapshots are an analogue of recovery points on the main OS. Allows you to roll back changes to the user-saved state. This option is useful when testing various settings and applications.
- Support full screen mode work.
- The ability to “drag” objects from window to window (Drap and Drop).
- You can make several clones of virtual machines, and each copy can be used for different purposes.
- An intuitive interface allows even a user who has never encountered virtual machines to understand the basic functions.
The software product interface looks like this:
Concerning Hyper-V, then the program was originally created as a server tool designed to create virtual Windows Server 2008.
Later, the software was added to Windows 8 and 10. It is noteworthy that when loading the OS, it is not activated; it must be enabled using the admin panel. Compared with VirtualBox, has much greater functionality. Can be used on local servers.
The advantages include
- intuitive interface
- no need to download and install
- snapshots
- the ability to clone running virtual machines.
The disadvantages include the fact that when working with the program, the user must have certain skills, and the software is available in the Pro business package for Windows 8 and 10. In the “home” version of these OSes, the presence of the utility is not provided.

- is a free simplified version of the program VMware Workstation.
Compared to VirtualBox, The software is “deprived” of a number of options and functions. For example, here you cannot use snapshots, make clones, or create remote connections.
However, being free and having basic options allows the user to run various applications.
If you need to test various resource-intensive software, or use “stripped-down” options, you can purchase a paid version of the program.
By the way, it is much more functional than the freely distributed VirtualBox machine.

How to install oracle vm virtualbox
Attention! The program installation process in all other cases, except Hyper-V, is carried out in a similar way.
 Download VirtualBox from the official website
During installation, you need to click on the NEXT button, and to install a full-featured version of the software, you need to select all the components offered in the list.

Pressing a button Browse, makes it possible to select the folder where the software product will be installed. Next, a window will appear in which you can create shortcuts.

Then the warning “Warning Network Interface” will appear. It means installing new network connections for the program. This action must be confirmed.

The final step will be to confirm the installation of the application.


After installation is complete, you can proceed directly to installing the virtual machine on Windows 10.
First launch of virtualbox
First of all, you need to download the operating system image. For example, let's choose Ubuntu 32-bit version.

Next, in running program, to create a virtual machine you need to click on the “create” button. In the window that opens, indicate the name of the VM; in the system type section, select Linux, Ubuntu version.


Next you need to select “create new virtual disk", and confirm the action.

Disk type - "VDI".

A dynamic disk fills up as data is written to it.

Next, select the disk size

That's it, the creation of the VM can be considered complete. Now all that remains is to install the previously downloaded operating system on it.
To begin, you need to click on the green “run” button, then select the downloaded image, and click “continue”. After which the normal installation of the operating system on the VM will begin.
Installing a virtual machine on Windows 10. Detailed video instructions
We will add the components Hyper-V in Windows 10, consider the option of creating a virtual machine using Hyper-V, and also consider its parameters.
Adding Hyper-V components.
Let's launch "Run" in any of two ways:
- Right click on the menu "Start" and choose "Run".(Fig.1)
- Press the key combination "Win"+"R".
Enter appwiz.cpl(Fig.2)
 Fig.2 - Enter appwiz.cpl
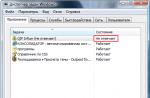
 A window will open "Programs and Features". Click on the left "Turn Windows features on or off".(Fig.3)
 Fig.3 - Programs and components.
 A window will open "Windows components" . Select everything that is in the section Hyper-V.(Fig.4)
Click "OK".
 Fig.4 - Selecting Hyper-V components.
 We are waiting for the components to be installed - Applying changes, and press "Restart now".(Fig.5)
 Fig.5 - Using components, rebooting the system.
 On this Adding Components finished. Getting started with Hyper-V
Launching Hyper-V.
On the menu "Start" -> "Facilities Windows administration" a shortcut appeared "Hyper-V Manager". Let's launch it. (Fig. 6)
 Fig.6 - Launch Hyper-V Manager.
 Before us is the start window "Hyper-V Manager".(Fig.7)
 Fig.7 - Hyper-V Manager start window.
We select our computer on the left, I have this - DESKTOP-9PLBR7Q, a menu will appear on the right "Actions", Click on the item "Virtual Switch Manager".(Fig.8)
 Fig.8 - Go to the Virtual Switch Manager.
 IN "Virtual Switch Manager" click "Create a virtual switch".(Fig.9)
 Fig.9 - Creating a virtual switch.
 Enter Name, I have this - Hypernet and note, I have this - Hyper-V network.(Fig.10)
You will also choose Connection type. I chose to connect to External network via my network card - "Realtek PCIe GBE Family Controller". And also checked the checkbox "Allow the managing operating system to provide general access to this network adapter".
Click "Apply".
 Fig. 10 - Properties of the virtual switch.
 A warning pops up "Pending changes may disrupt network connectivity".(Fig. 11) I assume that this article will be read by beginners, which means they are unlikely to repeat step by step after me, using the involved server, of their enterprise 😀 . Therefore, it’s okay that we may lose our network connection for a while. Click "Yes" and wait "Applying Changes".
 Fig. 11 - Warning about a possible network connection failure.
 Now having entered "Network connections" -> "Configuring adapter settings". We can see our newly created vEthernet (Hypernet), also adjacent to it is not connected vEthernet (Default Switch) - " Standard Network" automatically provides virtual machines access a computer's network using network address translation ( NAT). NAT We are not interested at the moment. And we will not touch this switch. (Fig. 12)
 Fig.12 - Network connections -> Configuring adapter parameters.
 This completes the network setup. Let's move on to the most important thing, why the virtualization system was created Hyper-V- WITH creating a virtual machine.
Creating a virtual machine.
Right click on our computer -> "Create" -> "Virtual machine". (Fig.13)
 Fig. 13 - Creating a Hyper-V virtual machine.
 The “Virtual Machine Creation Wizard” will open (Fig. 14)
- Click the button "Ready" to create a virtual machine with default settings.
- Click the button "Further" to create a virtual machine with specific configuration settings.
 Fig. 14 - Virtual machine creation wizard.
 Specify the name of the virtual machine and its location. (Fig. 15)
I decided to test with Ubuntu Server 18.04 .
So this is what I have:
- Name: ubuntuserver 18.04.
- Location: E:\hyper-v ubuntu server 18.04\.
 Fig.15 - Specify the Name of the virtual machine and its location.
 Select the generation of the virtual machine. (Fig. 16)
In most cases, you should choose the second generation, but if you are installing something 32-bit something worth choosing - Generation -1.
For me personally Ubuntu Server 18.04 64-bit with the support UEFI, therefore I choose - Generation 2.
 Fig. 16 - Select the generation of the virtual machine.
 We select the amount of RAM. (Fig. 17)
My operating system is enough 1Gb RAM=> I leave the default ones included 1024 Mb. Let's go "Further".
 Fig. 17 - Allocating the amount of RAM.
 We select which switch our network interface will be connected to. (Fig. 18)
Choose our "Hypernet", let's go "Further".
 Fig. 18 - Network setup.
 Create a virtual hard disk. (Fig. 19)
We indicate Name,Location and maximum Size virtual file HDD.
I have so:
- Name: ubuntu server 18.04.vhdx.
- Location: E:\hyper-v ubuntu server 1804\.
- Size: 10 GB.
 Fig. 19 - Creating a virtual hard disk.
 Choose ISO image from which we will install the operating system. (Fig. 20)
Select an item "Install operating system from file boot image" -> Click "Review"-> Choose iso image. -> Click "Further".
 Fig.20 - Selecting an OS image.
 Completing the virtual machine creation wizard (Fig. 21)
Click "Ready".
 Fig.21 - Completing the virtual machine creation wizard.
 Now in Hyper-V Manager we see a newly created virtual machine - ubuntu server 1804. (Fig.22)
Right-click on it -> "To plug".
 Fig.22 - Hyper-V Manager, New virtual machine.
 A window will appear (Fig. 23)
If you want to install the system Windows then when you press the button "Start" The installation should start without any errors.
But in order to start Ubuntu Server 18.04 I had to "File" - > "Options"->"Safety" disable "Secure Boot".(Fig.24)
 Fig.23 - Connecting to a virtual machine.
  Fig.24 - Disable Secure Boot.
 Turn on the virtual machine. (Fig. 25)
 Fig.25 - Turn on the virtual machine.
 Everything is fine, the virtual machine started. The installer meets us Ubuntu Server 18.04.(Fig.26)
 Fig.26 - Running virtual machine. Ubuntu Server 18.04 installer.
 Changing virtual machine settings.
Let's make a short overview of the virtual machine parameters so that you can see the main functions before you decide to use the virtualization system Hyper-V.
"File" - > "Options".(Fig.27) Fig.27 - Go to "File" -> "Options"Equipment.
"Firmware"- you can change the boot priority of devices in the virtual machine. (Fig. 28)
 Fig.28 - Selecting boot priority.
 "Safety"- Can "Enable/Disable Secure Boot", "Enable/Disable encryption support".(Fig.29)
Fig.29 - Security parameters of the virtual machine."Memory"- you can edit the amount allocated RAM, Enable/Disable function Dynamic memory.(Fig.30)
 Fig.30 - RAM parameters.
 "CPU"- you can edit the number of virtual processors in accordance with the number of processors on the physical computer. (Fig. 31)
You can also distribute the load across "Resource management".

"SCSI controller" can add HDD ,DVD drive or Shared drive.(Fig.32)
 Fig.32 - SCSI controller parameters.
 You can also change parameters of connected media, for example here we can change inserted into virtual DVD drive ISO image (Fig. 33)
 Fig.33 - Media parameters.
 "Network adapter" you can change the configuration network adapter : Choose Virtual switch, register VLAN ID, configure Bandwidth.(Fig.34)
 Fig.34 - Network parameters.
 Control.
"Name"- you can easily change the virtual machine to one more convenient for your use. (Fig. 35)
 Fig.35 - Changing the name.
 "Integration Services"- Selecting the services that you want to make available to the virtual machine. .(Fig.36)
 Fig.36 - Integration services.
 "Checkpoints"- Here you can configure Checkpoints( snapshot, restore points), enable auto mode their creation and designate a place for their storage. (Fig. 37)
 Fig.37 - Control points.
 "Smart Padding File Location"- You can specify the path to the swap file.(Fig.38)
Smart Padding- a function that makes it possible, if there is insufficient memory to boot a virtual machine, to use a swap file on the host.
 Fig.38 - Smart Padding file location.
 "Automatic startup actions"- You can select the operation you want to perform with this virtual machine when starting the physical computer.(Fig.39)