article from Vmware KB "Hardware and firmware requirements for 64bit guest operating systems" http://kb.vmware.com/selfservice/microsites/search.do?language=en_US&cmd=displayKC&externalId=1003945
Intel
Intel CPUs require EM64T and VT support in the chip and in the BIOS.
note: If VT is enabled in ESX host then vmx flag is found in /proc/cpuinfo .
Intel EM64T CPUs do not have segmentation support in long mode. If the Intel EM64T CPU is VT-capable, it comes with hardware virtualization support (Intel's Virtualization Technology). This hardware virtualization support allows VMware to work around the lack of segmentation, making it possible to run 64bit guest operating systems on Intel EM64T VT-capable CPUs.
notes:
Firmware/BIOS support is required to enable Intel Virtualization Technology. Some systems (particularly laptops) do not have the necessary firmware/BIOS support to enable Intel Virtualization Technology, and cannot run 64bit guest operating systems.
In multi-processor systems, all processors must support compatible VT implementations. At a minimum, all processors must implement the same VMCS revision ID. In multi-processor systems with mixed processor steppings, 64bit guest operating systems may not be supported.
64bit guests are not supported for ESX versions 2.5.x and earlier.
Many servers that include CPUs with VT support might ship with VT disabled by default, and VT must be enabled manually. If your CPUs support VT but you do not this option in the BIOS, see contact your system vendor to request a BIOS version that lets you enable VT support.
Come visit http://kupchinetsky.spaces.live.com
This article will focus on working with virtual machines (virtual operating systems) through the free program VWWare Workstation Player.
I'll start briefly with what a virtual machine is in general. Somehow I already touched on this topic, but now I will repeat myself a little so that you are immediately aware of everything that this article will be about. A virtual machine is a kind of virtual computer with an installed operating system (hereinafter referred to as “OS”) that works on your real system through a special program in a separate window. It turns out that you can work with any other OS through a special program without interrupting your work, without restarting your computer and without performing any other complex operations to switch work from one OS to another.
What is it all for? You can use a virtual system to test some programs, services. For example, I often use a virtual machine to record video tutorials, since my virtual OS is clean, without any personal files and folders, and this will allow me not to highlight anything important to the whole world in my video :) I also use a virtual machine to test all kinds of settings Windows, so as not to experiment in a real system, as well as to test any new programs.
Also, working in a virtual OS is not bad for those who earn in boxes. Why is it suitable? If you work in boxes, then you have probably come across a lot of such tasks where you need to install some small game or program on your computer, register in it, log in and, possibly, perform some other actions. Can you imagine what will happen to your real OS soon if you often perform such tasks, installing just a shitty cloud of programs and games? :) Yes, nothing will be good! And sooner or later, pick up some virus. And when working in a virtual OS, all this rubbish being installed will remain there, without touching your real system in any way, and all the virus (if you pick it up) will also remain there.
This is what a virtual OS looks like running in a separate window:
As you can see, the same OS, only in the window :)
Earlier in the articles, I talked about how to work with virtual machines through the free Oracle VirtualBox program. At first, I used it myself, but then I tried an alternative - VMWare Workstation Player (previously called simply VMWare Player) and realized that this program would be simpler. There are not so many settings in it, they are not so muddy and incomprehensible, and everything, in my opinion, is much more convenient. For beginners, this option is suitable, in my opinion, better than the VirtualBox analogue.
Let's start to figure out in order how to install WMWare Workstation Player to work with virtual machines and then how to install and configure the virtual OS itself through this program!
I recorded the whole process on a video, where I show what to download from where, what and how to configure. If the information from the video is not very convenient for you to perceive, then the whole process is described below in text-graphic form.
Attention!
VMWare Workstation Player only works with 64-bit operating systems! Also note that to work with virtual machines, you must have a powerful computer with a modern processor (for example, Intel Core i3, i5, i7) and a recommended amount of RAM of at least 4 GB. Better even more! If you do not know what RAM, processor and other computer components are, then I recommend reading the article. Otherwise, the virtual machine will be very slow, or your real system will slow down and work unstably.
You can see the bit depth of your OS and information about the system (processor, amount of RAM) as follows. Press the Win + R keys and in the Run line that appears, enter the command: msinfo32.exe. Click "OK":
In the window that opens, on the "System Information" tab, you can find the necessary information:
The "Type" line indicates the bitness of your system (x64 - 64-bit, x86 - 32-bit).
In the line "Processor" - information about the processor, and in the line "Installed RAM" - the amount of RAM on your computer.
Installing WMWare Workstation Player to work with virtual machines!
The program can run on both Windows and Linux operating systems, so you can download it for any OS. Click the "Download" button next to the desired operating system and the download will begin:
I will show on the example of Windows.
The WMWare Workstation Player installation wizard will open. Wait until the first installation window appears. In it, click "Next".
Further, the installation process is the same as in most programs (I talked about how to install programs), so I will stop only at those stages where you need to perform some special actions.
At one of the installation steps, check the box “Enhanced Keybourd Driver” and click “Next”:
Enabling this option means that the extended keyboard driver will be installed for virtual machines and it is better to install it just in case.
In one of the installation windows, uncheck the "Help Improve VMWare Workstation 12 Player" option, and leave the first option enabled:
The first option means that the program will automatically check for updates and if there is a new version, you can immediately upgrade to it. The second option is to help the developers of the program by sending anonymous information about the operation of this program from your computer. This is the option I recommend turning off.
Everything, the installation is complete! The next step is to install a virtual OS through this program.
Launching VMWare Workstation Player and installing a virtual operating system!
Once the VMWare virtual machine software is installed, launch it from the desktop shortcut or from the Start menu.
When you first start the program, the following window will appear:
Here you need to select the first item, as in the image above and enter your E-Mail address. This is only necessary so that you can use the program for free. I inserted my real mail and then I didn’t receive any spam, i.e. nothing to fear :)
After entering your E-Mail, click "Continue".
In the next window, click "Finish":
The program window will open. Immediately after the first launch, in a separate window, on top of the main one, a proposal to switch to the extended version of "Pro" may appear. We do not need it, because it is paid. Click the "Skip this Version" button:
Now in the main window of the program, click "Create a New Virtual Machine" to create a new virtual machine (OS):
Here we have reached the stage where you need to choose from where, from which file or disk the operating system will be installed as a virtual one. There will be 2 options in the window: install from a CD / DVD disc (Installer disc) or install from an image file stored on your computer (Installer disc image file). Choose the first option if you have your own CD / DVD disk with an OS that you want to install as a virtual one:
For example, you have a disk with Windows 7 and want to install this system as a virtual one. Then insert the disk with this system into the computer and choose the first option.
But operating systems for installation can also be stored in a special file on your computer called an “image”. Then you can install the operating system as a virtual machine directly from this file. Here is an example of an image file with the Windows XP operating system:
VMWare Workstation Player supports image files in the ".ISO" format, so if you have an ISO image file with the operating system, then the easiest way to install a virtual machine is from it. And then choose the second option in the current window:
Using the "Browse" button, you can select just the desired image file with the operating system.
After choosing the option you want, click the "Next" button below.
Note!
Any operating system can be installed as a virtual one; any Windows system, any Linux or any other! Those. not necessarily just Windows.
In the next window, we are prompted to specify in advance the key for installing the operating system, specify the username and password:
After all, installing an operating system in a virtual machine will be no different from installing a real OS on your computer :) The only difference is that the system will be installed in a virtual window, and not on your real hard drive. But in that window, I recommend leaving only the username, which is likely to be set automatically (taken from your real OS). The key and other parameters, if necessary, are easier to specify already during the installation of the OS. Therefore, in that window, just click "Next" to continue.
You will probably see a warning window that you didn't specify a key. Click "Yes":
In the next window, in the first field, you need to specify the name of the virtual machine that you are creating, and in the second field, the location of the virtual machine files on your computer.
You can call it whatever you like, usually they call it the name of the OS that you will install. The main thing is that you yourself understand where your OS is, if you suddenly install and work with several virtual OS in the future. Those. don’t call it like this: “1234”, because then you yourself won’t understand what kind of virtual machine you have with that name until you start it :)
You can choose any location of the virtual machine on your computer - i.e. any folder or drive on your actual system. It is in the selected folder that the files (there will be many) that are responsible for starting the virtual machine will be located. Please note that the virtual machine will take up a lot of space (at least 10 GB, as a rule, and most often 20-30 GB.), so make sure that there is enough space on your hard drive to store the virtual machine.
When you specify the name and location, click "Next".
In the next window, you need to specify the amount of your hard disk, which will be allocated for the work of the created virtual machine. This is a very important step!
As I said, a virtual machine is practically no different from your real OS. She will also have her own hard drive only virtual. And the volume of the hard disk of the virtual OS will be equal to the volume of your real hard disk that you allocate for the virtual machine. Everything here will depend on which operating system you install as a virtual one. If, for example, Windows XP, then it does not require a lot of hard disk space and about 10-15 GB is enough for it. But modern Windows OS: 7, 8, 10 require a decent amount of free disk space for their work, at least 20 GB, and preferably 30-40 GB.
And in the first field of the current window, you need to specify how much of your real hard disk you will allocate for the created virtual machine. I, as I said, for example, I will install a trial 30-day version of Windows XP. For this system, 15 GB will be enough. virtual disk size. Please note that your real hard drive should have at least as much free space as you allocate for the virtual machine!
By checking that option, we indicated that it is not necessary to divide the virtual hard disk on which the virtual OS will run on several files, let it be in one file. If we chose the second option "Split virtual disk into multiple files", then the virtual hard disk would be divided into several files. I personally don’t find any sense from this, so I always choose the mode - a virtual hard disk in one file.
In the next window, you will receive information about the settings of the created virtual machine. We can “Finish” right now to start the installation of the virtual machine, but we will not do this now. Let's move on to the advanced settings of the virtual machine to understand one more extremely important setting!
Click the "Customize Hardware" button:
An additional window will open with a bunch of settings on several tabs. We are only interested in the “Memory” tab, which sets the amount of RAM allocated to the virtual machine on your computer.
RAM is an essential component of every computer, without which it simply will not work. This is temporary memory where everything that is running on your computer is preloaded - programs, processes, and so on. In the article I gave a link where you can learn more about all the main components of a computer.
So, in this window you need to specify the amount of your real RAM that will be allocated for the operation of the virtual machine. Everything again depends on what operating system you will install. If this is Windows XP, then it will be able to work with only 128 MB of memory, though it will slow down a lot. It is better for her to allocate 1-2 GB. RAM. If you install Windows 7, 8 or 10 as a virtual machine, then I recommend allocating at least 2 GB. RAM (3-4 GB is better, so that the virtual system works stably and does not slow down). But there is one more point. If your computer has so little RAM, then you cannot allocate much for the virtual system :)
If the computer has only 2 GB of memory (such a computer is very weak today), then you are unlikely to allocate more than 512 MB (megabytes) of memory for the virtual machine, because if you allocate more, your main system may start to slow down hard. Consider this!
In general, if your computer is weak, it’s easier not to bother with virtual machines, as I mentioned at the very beginning of this article.
You will be returned a window with information about setting up your virtual machine. Well, it's time to proceed directly to the installation of the virtual machine! Check that the "Power on this virtual machine after creation" checkbox is checked so that the installation starts immediately and click "Finish":
The installation of the virtual OS you configured will start. First, windows will appear notifying you that some of your real computer hardware is connected to the virtual machine, as well as windows with various non-essential information. Just check the box "Do not show this hint again" in these windows and click "OK":
Also, then a window will appear asking you to install additional tools for the virtual machine. We will put them a little later, so click "Remind Me Later". Alerts on a light background at the bottom of the VMWare Workstation Player window can be closed by clicking on the cross:
Well, then the installation of the virtual OS will go directly. I install Windows XP and the installation looks like this:
It is no different from the actual installation process on a computer. If you install a more modern Windows, then the installation process will of course look different from the Windows XP installation process. Since the installation process for each OS is different, I will only briefly review it below. I talked about installing Windows 8 and 10 in a separate article:
As for the duration of the installation, it depends on the OS being installed and practically does not differ in time from the duration of installing a real system on a computer. Windows XP is installed within about 20 minutes, Windows 7,8 and 10 - about the same. It largely depends on the power of the computer.
The installation process has reached the license key entry:
Now, for full-fledged work with the virtual machine, we will install additional tools for it. This is necessary primarily so that you can easily drag and drop files from the real system into the virtual OS window or vice versa. It's just a freakin' handy feature!! And this is a great advantage of VMWare Workstation Player over its analogue for working with VirtualBox virtual machines, because in the second I couldn’t directly drag and drop files, no matter how I tweaked the settings ... Also, installing additional tools is necessary for the correct operation of some other functions of the virtual machine .
Open the "Player" menu on the top toolbar, select "Manage" and then "Install VMWare Tools":
A window will appear in the virtual OS window, where we click "Download and Install":
A window for downloading additional tools will appear for a few seconds. Then you need to open the "My Computer" section (also called "Computer" or "This PC") through the virtual Windows Explorer and start the installation of additional tools, which are displayed as a connected CD / DVD disk to the computer:
The system will ask you to reboot. This must be done in order for the installed additional tools to start working. Click the "Yes" button to reboot the virtual machine:
After the reboot, additional virtual machine tools will take effect. First, the ability to drag and drop files and folders from a real system to a virtual one and vice versa will work. Simply drag while holding the left mouse button one or more objects directly into the virtual machine window, then release the left mouse button. Files/folders will be moved:
Secondly, you will be able to quickly change the size of the virtual machine window by simply dragging the left mouse button outside the window borders. Thus, you can make the virtual OS window larger than it was originally, so that it would be more convenient for you to work in it.
To switch to a virtual OS, just hover over the window with it and that's it, you will be there and will be able to perform any actions directly in the virtual machine. Getting back to the real system is also easy - just return the cursor from the window of the virtual machine to the window of the real system.
Another useful feature is to open the virtual machine in full screen mode. To do this, click the button as shown in the image below:
As a result, the virtual OS window will be stretched to full screen and outwardly it can no longer be distinguished from the real system. You can return to windowed mode with the same button.
The virtual machine is turned off in the same way as a real one, i.e. go to the "Start" menu, click "Shutdown" there and again the same button. Or you can turn off the virtual machine by simply closing the VMWare Workstation Player window and clicking "Power Off" in the warning window:
In order to restart the desired virtual machine, open the VMWare Workstation Player program, select the virtual machine from the list and click "Play virtual machine" on the right:
And the last thing I would like to show you today is how to go to the settings of an already created and installed virtual machine. Please note that you can only configure a virtual machine if it is already turned off! To configure the desired virtual machine, select it in the main window of VMWare Workstation Player and click the "Edit virtual machine setting" button on the right:
A window with virtual OS settings already familiar to you will appear:
That's all! Now you, I think, will be able to independently create and configure a virtual machine with any operating system for your own tasks. I hope I explained everything clearly for beginners :)
Have a good day and mood! Bye everyone ;)
Vmware Workstation is the software that is most often used to create virtual machines with various operating systems. The possibilities of this program are quite large.
Today we will consider the process of creating a virtual machine with the Windows operating system. A big plus of the Vmware Workstation program is the ability to run and work simultaneously with several virtual machines. The number of simultaneously running virtual machines is limited only by the hardware component of your computer and the settings for allocating computer resources for the operation of these machines.
The program itself is not demanding on the hardware of your computer. A 2-core processor and 2 GB of RAM will be enough for you, but if you are going to work with several virtual machines at the same time, you should think about improving these parameters.
Download and Install Vmware Workstation
First we need to download and install the software.
You can download from the official site https://www.vmware.com/products/workstation-pro/workstation-pro-evaluation.html
When you go to the download page, you can choose for which operating system you will use this software.
After downloading, install. 
After installation, run the program. 
Now we can start installing and configuring our virtual machine.
Create and configure a virtual machine
First, we need to prepare an image of the desired operating system that we want to install.
To create a virtual machine, click on the "File" menu button and select "New virtual machine ...". 
This will open the window for creating and configuring a new virtual machine. In the window that opens, select "Custom (Advanced)" and click the "Next >" button. 
The next window prompts you to select a version for hardware compatibility. This is necessary for the installation of lengthy tools and programs, and the selection of the necessary parameters. We do not need this, so we do not select anything and click the "Next" button. 
The next step is to select the source (image) of our operating system.
If you want to install the operating system from a disk that you have, in this case, select the "Installation disk" item.
In the event that you have an image of the operating system, then select the item "Installation Image File" and press the "Browse" button. In the window that opens, select the image you need and click the "Open" button. The image file must have an .iso extension. In our example, we will install Windows XP.
To install Windows 7/8/8.1/10 operating systems, you need to activate the hardware virtualization option (Virtualization Technology) in the BIOS. This option is available for AMD and Intel based computers. Without the activation of this technology, these operating systems will not be launched.
After choosing the method we need, click the "Next" button. 
If you know the product key, then enter it in the window that opens in the line "Windows Product Key", if you don't know it, then just fill in the fields we need (If you don't need a password, just leave this field blank). After filling in the required fields, click the "Next" button.
If the product key has not been entered, then during the simple installation process, the system itself will ask you to enter it. 
In the next window, we set the name of our virtual machine, which will be displayed in the list of virtual machines. And select the directory where the files of the virtual machine will be located.
After the done actions, we proceed to the next step. 
The next window will be "Processor Configuration".
Here you can select the desired parameters of your processor resources that the running virtual machine will use.
By default, the program automatically selects the optimal processor parameters, but if they do not meet your requirements, you can determine them yourself by selecting the desired configuration manually.
After determining the necessary parameters, proceed to the next step, click the "Next" button.
It is worth noting that the more resources you give to a virtual machine, the less of them will be left for each virtual machine or your operating system to work during its active operation.
In the Network Type window, you can configure the network settings for your virtual machine.
The Vmware Workstatio program allows you to fine-tune network access for a virtual machine.
- If you want to provide access to your machine from the Internet, you should select the First item "Use Network Bridge". When using this option, you will need to set an external (whitelisted) IP address for your virtual machine.
- In order to use a virtual machine inside the network and provide it with access to the Internet, you must select the second item "Use network address translation (NAT)".
- In the event that you want to restrict access to the Internet and use the virtual machine purely on the internal network, you should select the third option "Use host network only".
- And the last option is to refuse to use a network connection, when you select this item, your virtual machine will not have access to any network.
We need to choose the second option, for normal work. After selecting the desired option, proceed to the next step. 
In the window for selecting the type of controllers, select the driver for the SCSI controller.
To configure these parameters, you must first activate support for SCIS controllers in the BIOS, if it is not activated.
We will be given 3 types of drivers to choose from:
- Bus Logic
- LSI Logic
- LSI Logic SAS
If you have knowledge of these drivers, then you should choose the one that your operating system supports. In the event that you are not familiar with them, then we simply do nothing, the Vmware Workstatio program automatically selects the controller driver that suits your operating system.
After selecting the driver, proceed to the next step. 
In the next window, you need to select the type of virtual disk.
The system will automatically determine the type of disk that is suitable for your virtual machine and its operating system, but I recommend choosing SATA, since this type of disk is currently the fastest in comparison with others.
It is worth noting that some types of operating systems (rather old ones) will not be able to work on a SATA type disk, in which case you should choose another type of virtual disk that suits your OS, or simply trust the program, as it will automatically determine the correct type.
After selecting the desired type, proceed to the next step. 
In this window, we will be able to choose which disk to use to install our virtual machine.
- Create a new virtual disk - when choosing this option, you can specify the folder and its size where the operating system of your virtual machine will be installed.
- Use an existing virtual disk - if you have previously created a virtual machine and want to repeat its virtual disk settings or simply reinstall, then you can select this option and specify the folder of your old virtual machine.
- Use Physical Disk - Select this option if you want to use a separate local hard disk for your virtual machine.
In our case, we choose the first option and move on to the next step. 
In the next window, you must specify the size of the virtual hard disk.
The program will automatically indicate the appropriate size for your type of operating system, but if you need more or less, then indicate the size we need in the "Maximum disk size" field.
Keep in mind that the amount of free space on your disk will decrease exactly by the amount that you specify to reserve for a virtual machine. Make sure that you have enough free space for comfortable work with programs and for the correct operation of the operating system.
After determining the size, proceed to the next step. 
Specifying a wild file. We choose where the file of our virtual disk for the virtual machine will be located. Press the "Browse ..." key and specify the folder or create it. 
We have now moved on to the final step of setting up our virtual machine and its operating system.
In this window, we can once again view the list of all the parameters we have selected and, if corrected, use the "Hardware settings ..." button.
In the "Hardware settings ..." section, you can fine-tune the hardware settings for your virtual machine or, if necessary, change the previously set ones.
After installation, the system will start by itself.
Now we have a virtual machine to work with the Windows XP operating system. You can install other versions of Windows in the same way.
You can observe and launch all installed virtual machines on the left side of the program under the names that you set them during installation. 
To go to the settings of an already installed virtual machine and its operating system Right-click on the virtual machine and select "Settings ..." from the drop-down menu.
This will open the options window. 
Deleting a virtual machine
First of all, for that. To delete a virtual machine, you need to end the guest session.
To do this, right-click on the virtual machine, and in the drop-down menu, hover over the "Power" item, then select "Shut down the guest OS" in the drop-down menu. The OS will shut down, after which we again right-click on the virtual machine and select the "Delete" item, we agree with all pop-up windows.
Thus, you have completely deleted the virtual machine and all its files from your computer.
Problems starting a virtual machine
In the event that your virtual machine does not start, you should do the following steps.
- Checking BIOS settings (activating virtualization technology and SCSI controller support)
- Reinstalling the operating system.
- Installing the system from another image or disk.
- Checking the virtual machine settings (perhaps some settings are not compatible with your OS).
- Checking hard disk integrity.
- Diagnostics of the computer on the workload of the operating system.
- Disable Firewall.
- Malware check.
If none of the methods helped you, then you should carefully read the error that appears when you start the machine and understand what the problem is. After you understand what the problem is, you can solve it by following the instructions described in the error.
Conclusion
Following the instructions described in the article, you can easily install, configure and run your virtual machine with the desired operating system.
The main thing during installation is to clearly follow the instructions in order to avoid errors when starting and running the virtual machine in the future.
Also, do not forget to make preliminary settings in the BIOS for the correct operation of the Vmware Workstation program.
In this article, you will learn how to install and configure a VMware Workstation Pro virtual machine. Setting up VMware is simple and it will be easy for the average user to install the program and configure the necessary settings.
Files for download - you can also download from . After you download and unzip the program, install it on your PC.

Run VMware as administrator.


Click Install to install the program on your PC. Run the crack that is in your archive and click "Install".

Click "Create a new virtual machine".

Select custom installation.

We mark the item install the operating system later. In another tab, select the desired OS for which you want to create a virtual machine.

Specify the name of the virtual machine and select the installation location. In the next window, do not touch anything, click "Next".

In the first window, we distribute the number of cores for the virtual OS, in the second, the amount of RAM. Do not allocate more resources than your physical PC hardware will allow. Try to leave at least 2 GB of RAM for your main system.
We leave a mark "Use network address translation (NAT), in the next window we do not touch anything, everything will rise automatically, click" Next.

"We do not touch the choice of disk type", the next window select "Create a new virtual disk".

We save the disk in one file.

Open the "Hardware Settings" tab.

Go to the "Processor" menu - check the "Virtual Intel VT-x / EPT or AMD-V / RVI" item.

Go to the "New CD / DVD" menu and check the "ISO image file" item, click "Browse" and select the ISO image of the operating system downloaded from the Internet.

Many users of the VMware Workstation desktop platform and the VMware Server server platform would like to have their virtual machines automatically start when Windows starts but before they log in. This is necessary so that in the event of a computer restart, the virtual machines would automatically “raise”, and administrator intervention would not be required.
To implement this, you will need to configure the virtual machine to run as a service. So, to get started you will need:
- Utility Instsrv.exe.
- Utility Srvany.exe.
All this can be obtained in a package (rktools.exe) downloaded from the Microsoft website.
Install this package and then copy instsrv.exe And srvany.exe to catalog windows\system32. After that, you need to restart your computer.
Now locate the VMware Workstation or Server executable (for example, c:\program files\vmware\vmware workstation\vmware.exe) and the main configuration file of the virtual machine (for example, C:\mymachines\WinXp\winxp.vmx).
Instsrv vmware_winxp C:\windows\system32\srvany.exe, where vmware_winxp is the name of your new service.
After that, go to the registry editor (regedit.exe) and find this key
HKEY_LOCAL_MACHINE\SYSTEM\CurrentControlSet\Services\vmware_winxp
Create a new key Parameters(to do this, right-click on the service name, then New->Key).
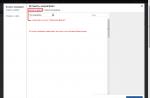
Create a new type value string value in key Parameters, as it shown on the picture:
We name the value Application.
Double click on the value and in the field value data write the path to VMware Workstation, the virtual machine startup key and the path to the virtual machine vmx file (do not forget the quotes):
"C:\program files\vmware\VMware Workstation\VMware.exe" –x "C:\mymachines\WinXp\winxp.vmx"
Now that you've created the service, you need to configure the startup options for it. To do this, run Start->Run and write services.msc.
You will see a list of available services. Find the vmware_winxp service you created and double click on it. The service properties appear. Set on tab General startup type Automatic, go to the tab log on. Here set the parameter Log on as meaning Local System account and be sure to check the box Allow service to interact with desktop.
Now you can test the autostart of the virtual machine by selecting the item from the context menu of the service Run. When starting a virtual machine, a request to change the unique identifier (UUID) may pop up, you must select select the item Create. In addition, you need to make sure that all unnecessary devices for the virtual machine are disabled (Virtual CD-ROM, floppy). Also add the following line to the vmx file to disable tooltips:
Hints.hideall="TRUE"
Now that's it - restart your computer and test autostart of the virtual machine as a service.