I have been studying AE since August 2016, started working in the field of motion design, in addition to illustrations.
I prepared a tutorial for a blog with a simple animation of shapes and lines. This tutorial is intended for those who are already more or less well versed in After Effects, so if you find it difficult, then I recommend looking at the basic tutorials on the net. For example this mini course: Introductory course Illustrator + After Effects.
Most recently, I finished and posted a project with animated callouts (callouts), and in my tutorial I will tell you how I did it using the simplest example.
1. Create a vector file with a drawing in Adobe Illustrator. We have a callout. All lines have no fill, only stroke. Do as in the picture to make it clearer to perform the animation. Save the file to ai format.

2. Import into After Effects. There are several ways. Double click in the window project and select the file in the dropdown box. Or through the explorer - select a file and drag it into the window with the mouse project. You can also in Menu File > import > file, and select our file. Note! Must stand footage in field import As And we don't tick any boxes.

3. Create a new composition in After Effects. CTRL+N or through the menu Composition > New Composition. We set the settings - we write the name, we have 30 frames (frame rate) and 15 seconds (Duration) animation duration, we also set the dimensions of the composition itself to 1920x1080. Click - OK.

4. Drag the imported vector file from the window with the mouse project on the time line- the lower section of the workspace, where, in fact, we will animate our lines.
5. Select the file layer. Let's go to the menu Effect > Generate > Fill.

We choose white color.

6. The layer is selected. Next, click on the second icon Rasterize next to the layer name (if no icons are visible, then at the bottom of the timeline there is Toggle Switches/Modes- click and the layer view will change - icons will appear on the right).

Now our lines are clearly visible. Need to ask them Scale scale. You can expand the layer in the parameters Transform > Scale enter a value, I set 450 to 450. Or a hot key S- immediately displays only one scale from all object transformation parameters. There are hotkeys for all functions and it is very convenient. Yes, each layer or object can be transformed and these settings are in each layer.
7. Then we will place our callout in the center. As in illustrator: arrow selection first Selection Tool(V), then move the object.
8. Select our layer, go to the menu Layer > Create Shapes from Vector Layer.

And after this action, we will already have 2 layers. We can delete our first vector original layer. Select and key DELETE. Don't forget to save the project - Ctrl+Shift+S. Tip - periodically press the magic ctrl+s.
9. Now we need to split one layer into several - after all, we have several lines. You can manually, but it's long and boring. It is better to download and install a free script ZI_ExplodeShapesLayers(improved new version). Select the layer and go as in illustrator File > Scripts. Click the button Explode!

All layers are broken separately and you can again delete our original layer, it is the lowest one. And manually I would have to copy (copying the layer - CTRL+D) layer as many times as there are sublayers - lines, then delete extra sublayers from the new copied layer and rename.
More details, who did not find or did not want to download the script:
We have 4 sublayers, so we need 3 more copies, we make them. Then at the first layer we delete 2,3,4 groups. And further by analogy. Then rename - select the layer - ENTER - enter a new name - ENTER or click in an empty place. You should get 4 layers with separate lines.
10. You can arrange the layers in the order of animation - first a circle, then lines, then a square. And you can leave it as you wish. Well, all the preparations are finished. Now the most interesting part is vector animation. Let's start with a circle - with a callout marker.
By the way, tips! You can zoom in - remove objects in the composition window with the mouse wheel (such familiar ctrl + - does not work here, and ctrl 0 too) or by selecting the scale in the window Composition - Magnification ratio popup(here are the numbers with percentages and the down arrow). And you can move around the composition window with a space - the same hand (as in a chandelier). Also, when animating an object, pay attention to the central anchor point Anchor Point. It must be located in the center of the object, otherwise the animation will take place from where the point lies, and in this case we need from the center. How to Fix - Press Hotkey Y, and drag the point, put it in the right place. Well, let's go.
11.
Circle animation. We animate Scale.
You can turn on the solo on the layer, then only the circle (circle or dot icon) will be visible. Then we put down the keys - this will be our animation. Move the time indicator (this line with a blue tip - Current Time Indicator) for 0 seconds 15 frames and put the key - click on the stopwatch next to Scale, leave the value (I have 450).

Move to the beginning of the composition to zero - and change the value to zero (immediately enter the size value and a new key is automatically entered). Then we advance for 3 seconds - 450, for 3 seconds 15 frames - 300, after another 5 frames - it will be 3 seconds 20 frames - 450, and again repeat at 6 seconds, 6.15 and 6.20 - set the same values - 450/300/450. Then the same way at 9 and 12 seconds at about the same distance. And now we make the fade at the end of the composition - 14 seconds 15 frames - 450, at 15 seconds at the very end - 0. Then click F9- smooth keys.

You can add a key in another way - click on the diamond next to the stopwatch and then change the value) . You can move along the timeline with the keys PAGE UP And PAGE ON. Move the indicator more carefully! Don't move the layer itself! Just in case CTRL+Z help you.
Well, now our circle has come to life - it appears at the beginning, blinks smoothly in the process and fades smoothly at the end of the composition. To view press zero 0 and to end the view also zero 0.
12.
Animation of the main line.
Select the next layer with the main line. Press twice U and reveals all the contents of the layer. Used when you need to open those sublayers that have been modified. Very comfortably. Close - one more time U. In the process of work, you will understand everything. Next, select the sublayer Group 3 - Add - Trim Path.

Revealing the parameters Trim Path and set the value of END. I put 75%. This indicator is responsible for how many percent the line will be displayed in the animation: 100% - completely, 0% - accordingly, the line will not be displayed. Optimally - from about 50 to 95%. The indicator is at the beginning of the composition. Next, we animate. We clamp ALT and click on the parameter stopwatch offset(right below end) and enter the expression in the line that appears - time*n(where n is a number indicating the number of revolutions or speed of the animation).

Play the track (zero) and see what happens. You can change the value END and compare the animation, the expression does not need to be changed. Thus, achieve the most interesting and optimal result. Now let's add the lines to fade in and fade out as well. You can also do this with transparency. Opacity. Select the layer - press the key T and at 1 second, set the value to 100, at zero at the beginning of the composition - 0. Then we move 14 seconds - 100 and at the end of the composition we set 0. F9- smooth. By the way, to select all the keys at once, you can select them with the mouse carefully and click F9 or the easiest way is to select the parameter itself Opacity and all keys will be selected at once.
13.
Animation of the second line.
Now we will learn how to work with you with the settings of the line itself. Let's make a dotted line out of an ordinary straight line and animate it. Twice U along the layer with the line, we find Stroke and expand its values by clicking on the arrow. Finding the parameter dashes and click on the plus +
twice. Values will appear Dash(amount of points), gap(distance between points), offset(animate points). We introduce, suppose, the values 5 and 5. Now again ALT+ click on the stopwatch next to the parameter offset and enter time*n(I have a value of 35).

Now select Contens - Add - Trim Path and at 1 second end key 100, at zero 0, at 14 seconds 100 and at the end 0. And select the keys and smooth F9.
14.
Square animation. Rotation.
Select layer with square, hotkey R (rotation). We allocate rotation And ALT+ click on the stopwatch. In the input line of the expression we write time*n(I have a value of 250). You can also use the keys manually - at the beginning of the key with zero initial values and at the end of the key (enter the number of revolutions 0x and degrees +0.0), let's say 8 revolutions and 360 degrees. Expressions greatly facilitate and automate the work. Well, by analogy, we add transparency at the beginning of the appearance (at 1 second 100 and at zero 0) and at the end of the decay (at 14 seconds 100 and at the end 0) and F9. Or do we fade in and out through Trim Path.
Everything! Animation is ready! Our callout came to life! Now let's save. We make a render.
Pressing hot keys CTRL+M(or go to the menu).

Click opposite output module right on the arrow and choose the format from me MOV+PNG+ALPHA(or MOV+PNG). And we press Render, wait while the render is in progress. Then we look at the result. The video will be saved in the same folder as your project.
Oksana Shilova especially for the blog
Subscribe to our newsletter so you don't miss anything new:
Perhaps you know that we have several projects in different niches, one of which is the VideoSmile.ru project. It is dedicated to the topic of video (editing, special effects, 3D, etc.) and has been developed by our team since 2011.
I know that there are people among my audience who are interested in this direction, so I asked the guys from VideoSmile to prepare a series of lessons for my subscribers on the most popular video processing program - Adobe After Effects. This is a kind of "Photoshop" in the world of video.
We decided that these should be practical lessons, after studying which a person will be able to make some useful animated elements for their videos. Such a series of lessons has been successfully created, and today I am pleased to present it to you.
Introduction to After Effects
In the first video, you will get acquainted with the features of After Effects and find out where you can download it.
Creation of 4 spectacular screensavers. Part 1
In this lesson, you will get acquainted with the interface of the program, set up the workspace, and study the main panels of the program. This is also where you will create your project and the first composition within that project.

Creation of 4 spectacular screensavers. Part 2
Here, you'll continue to create several variations of the startup screen and learn a few more important After Effects tools along the way.

Transitions and breaks
In this video, you will learn how to make high-quality transitions from the start screen to the video itself, as well as implement several breaks that will come in handy during editing. In addition, you will learn how to use the standard transitions that come with After Effects out of the box.

Lower Thirds and dies
Most likely, you have noticed that in various videos with the participation of people, animated plates appear, which display the name and surname of a person, as well as the name of his company and type of activity. These plates are easy to create in After Effects, and in this tutorial you will learn how to make them yourself.

Animated text elements
In the final lesson of this mini-course, you will learn how to create text animated blocks with which you can add any important text information to your videos.
Sometimes it becomes necessary to draw something on top of a video file, perhaps just to create a funny video, or for some serious project. In this little "manual", that's exactly what I'll tell you.
So, let's begin:
1. We create a new composition (if you are not familiar with the basics of robots in Adobe After Effects, then you can read about creating a new composition).
2. “Drag and drop” into the Adobe After Effects project window, and then into the composition itself, the video on which we will draw (in this case, it is Nature.mp4):
3. Now we “click” twice on the layer of the video file and go to the window of this separate layer (in this case it is Layer: Nature.mp4), where we will draw:

4. When we have moved to the above window, we simply select the Brush Tool (Ctrl + B). Also in the lower right corner we see the Paint toolbar, where you can configure many different options. drawing:

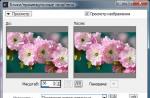
5. Now you can try to draw something. I hastily drew a gnarled tree :)
I would like to note the fact that each individual line of the drawing is created on a new"sublayer" within the video file's layer. You can flexiblyadjust each layer (Brush 1, Brush 2 ... Brush n) by setting, for example, the time of appearance of each of the parts of the picture, as well as many other parameters.To do this, you should expand the layer of the video file =>Effects=>Paint.

I, in general terms, described the process of drawing in Adobe After Effects, then everything depends on your imagination. By the way, if there are problems with saving (rendering) the finished video in Adobe After Effects, then I recommend that you familiarize yourself with this material.
The first thing we will do when moving on to drawing is change the workspace to Paint.
The Paint, Brushes and Layer panels appeared. The Paint panel is intended for setting drawing parameters. We will choose the size and hardness of the brush in the Brushes panel. Since we can't draw directly in the Composition panel, we'll use the Layer panel for this. It is best to draw at 100% scale. To do this, use the item Maximize Frame/Restore Frame Size in the side menu of the panel, or hover over the panel and press the key<~>on keyboard.
Create a solid layer of white. This will be our canvas on which we will practice. Select the Brush Tool. For example, let's draw a small circle.


This effect means that we have applied a painting to this layer. The drawn element is displayed in the layer properties as a sublayer of Brush 1. Let's add petals and a stem to our circle, so that we get a flower.

Let's take a look at the layer properties.

As you can see, for each drawing element, we have a separate sublayer. If we select one of the layers and draw something, the new element will replace the selected one. This comes in handy if you are trying to draw something specific. You can give a name to each element so as not to confuse them. Select the element, press the Enter key, enter a new name, and press Enter again.

The first property of the drawing effect we see is Paint of Transparent. It is common to all elements. If you set it to "On", the background layer will disappear and only the background in the form of checkerboards will remain (if you do not see them, click on the Toggle Transparency Grid switch, it is on both the Composition panel and the Layer panel).

Now let's expand one of the elements. Here we see two groups of properties: Transform (transformation properties), Stoke Options (drawing properties), as well as an animated Path property (shape). Expand the Stoke Options group. If you want to adjust the drawing parameters for an already drawn element, you should do it here, in the Paint panel, you set the parameters only for subsequent drawing elements.

Animate the Start property. Move the edit line to the 2 second position, and click on the stopwatch icon. The first key has been created. Create a second key by pressing the Home key. But change its value to 100%. Preview in the Composition preview panel. The element is gradually drawn, but in the opposite direction. To make it draw the way you drew it, animate the End property yourself (don't forget to unanimate the Start property).
In the Stoke Options group, we can change the brush color (Color), diameter (Diameter), rigidity (Hardness), roundness (Roundness), spacing (spacing), opacity (Opacity) and flow (Flow). As you can see, all of these properties can be animated. Now, by changing the color for each element, we will color our flower.

Another drawing tool is the Eraser. By selecting this element, the Erase item becomes available on the Paint panel, which sets the subject for erasing.

You can use the eraser not only to erase the drawn elements, but also to remove the background.
Finally, I would like to describe a method that allows you to draw a perfectly straight line. For this we need a ruler. Execute the View->Show Rulers menu command. Two scales appeared in the Layer panel: vertically and horizontally.
Now hover over one of the rulers. The cursor should change to a double-sided arrow. Hold down the left mouse button and move the cursor to the place where we want to place the line.