Many users do not like the Windows 10 operating system. For some reason, users are most annoyed by the Start menu, namely tiles (Metro tiled interface). Some immediately install a special one so that the menu takes on the familiar classic look. But I like the tiles better because they look colorful and can be customized to your liking. You can customize the Start menu in Windows 10, namely the tiles, by size, by category, and by color. If you prefer the classic look of the menu, then the tiles can be removed altogether. How to do this, I will now tell and show.
Start menu inWindows 10
The menu in Windows 10 is also opened by clicking the " Start". On the left at the very top are the shortcuts familiar from previous versions of Windows, shortcuts to frequently used programs, and below are shortcuts to all applications in alphabetical order. The right side of the menu is filled with tiles. These are the same labels only slightly larger.


the alphabet will open. You can select any letter and a list of all applications that begin with that letter will immediately open.

Above the button Start» buttons are located:
- Button " Account Settings»;
- Button " Parameters»;
- Button " Shutdown»
On the right side are tiles of a new style called METRO.
Start menu styleMETRO
METRO tiles are rectangular blocks in the form of icons and pictures.

The METRO style is not only used on the computer. It is also popular on mobile devices such as tablets and smartphones. Agree that the touch screen is much more convenient to use tiles.
How to create or remove a tile on the start menuWindows 10
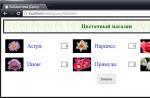
To create a tile in the Start menu, you need to right-click on the application icon on the left side of the menu and select " Pin to home screen».


If the application is in a folder, then you must first open it, and then select the desired icon.

To delete a tile, you need to right-click on it and select the "" command from the list.

Customizing the Start Menu via Settings
Customize menu " Start» possible through « Parameters". To do this, right-click on an empty space on the Taskbars and select " Taskbar Options».

In opened Parameters go to the tab on the left Start».


The menu settings will be shown on the right. Start". Seven switches:
- Show more tiles in the start menu;
- Show a list of applications in the Start menu;
- Show recently added apps;
- Show the most used applications;
- Sometimes show suggestions in the start menu;
- Open the Start menu in full screen mode (in full screen, like in the Windows 8 menu);
- Show recently opened items in Jump Lists on the Start Menu, Taskbar, and File Explorer Quick Access Window.

- Conductor;
- Parameters;
- The documents;
- downloads;
- Music;
- Images;
- Video;
- Net;
- Personal folder.
Moreover, these folders will be shown in the form of buttons in the column above the Start button, where the buttons are already shown. Parameters" And " Shutdown».
If you use one of these folders most often, then it makes sense to display its button in the Start menu.
How to change the color of the tiles
In the same settings on the tab " Colors» You can change the background color of the start menu and taskbar. In the window " Colors" in field " Color selection» set the parameter « customizable», « Light coloured" or " Dark”, and below in the color table, select the color you like for the tiles.


How to resize tiles
In order to change the size of tiles, you need to click on the tile with the right mouse button
by tile and select " Resize» and select one of the options:

- Small
- Middle
- Wide
- Large
Grouping tiles and creating categories
- Click the left mouse button on any tile and, without releasing the button, drag the tile to the desired location. Then release the mouse button.
- Give the group a name. Move the cursor just above the block of tiles and left-click on the two horizontal bars that appear on the right. A field will appear in which you can enter the name of the block category.
Tiles can be stacked in folders. To do this, try to point them at each other.
How to turn off live tiles
If you already have tiles like " Weather», « news”, etc., they can be deleted or disabled. Such tiles are called "live". .To do this, right-click on such a “live” tile and select the item in the drop-down menu - Additionally– Disable live tiles.
How to remove all tiles from the start menu
If you want your menu to look more like a classic menu, then remove all the tiles. To do this, right-click on the tile and select " Unpin from home screen" or " Delete».

From the menu itself on the left, these icons will not be deleted, and they can always be created again.
After all the tiles have been removed, move the cursor to the right border of the menu, and as soon as the cursor changes to a double-headed arrow, press the left mouse button, and without releasing it, drag this side to the left edge. Then release the mouse button.

Thus, it is possible to stretch or compress the field for tiles.
Video: How to customize the Start menu in Windows 10
Good luck to you!
Classic Shell is a free program to restore the old look of the classic Start menu in Windows 10, Windows 8.1, Windows 8, Windows 7, Windows Vista operating systems. The program changes the visual display of elements of the Windows operating system for more convenient use.
Many users experience inconvenience when using the Start menu due to the fact that the developer of Windows, Microsoft, constantly changes the settings, options, and appearance of the Start menu.
Therefore, many users want to return the classic Start menu for Windows 10, Windows 8.1, Windows 8 operating systems. In the Windows 7 operating system, users change the appearance of the Start menu in the style of the Windows XP operating system.
The free Classic Shell program returns the classic look of the Start menu, allows you to make extensive settings for displaying styles, options and the appearance of the start menu.
The Classic Shell program consists of three components:
- Classic Start Menu - the return of the classic Start menu
- Classic Explorer - Adding a Toolbar to Windows Explorer
- Classic IE - customization of panels in Internet Explorer browser
In this article, we will look at the operation of the Classic Start Menu component, which allows you to make the old Start menu in the Windows operating system. Not all users need other program components.
The Classic Shell program works in Russian. You can download the Classic Shell program from the official website of the developer. On the download page, select the "Classic Shell x.x.x (Russian)" file to download to your computer.
Classic Shell Installation
Installation of the Classic Shell program takes place in Russian and does not cause difficulties. Step through the windows of the Classic Shell installation wizard.
In the "Custom Installation" window, you must select the application components to be installed on your computer. By default, all components are selected for installation.
We want to bring back the classic Start Menu, so we only need to keep the Classic Start Menu and Classic Shell Update components (for automatic updates).
The "Classic Explorer" and "Classic IE" components change the appearance of File Explorer and Internet Explorer, respectively, and not all users need such changes. Therefore, disable the installation of these components.

Classic Shell for Windows 10
After clicking the left mouse button on the Start menu, you will see the classic Windows 7 style Start menu installed in the Windows 10 operating system. This is what the Start menu looks like with default settings.

The classic Start menu for Windows 8.1 or Windows 8 will look similar.
Customizing the Classic Shell
After installing the application, the "Classic Start Menu Options" window will open. In this window, you can configure all program parameters.
You can change the Classic Shell settings at any time. To do this, right-click on the "Start" menu, and select "Settings" from the context menu.

In the Start Menu Style tab, you can choose a classic style for the Start menu in the style of the Windows XP or Windows 7 operating systems.
At default settings, the standard Start button is displayed on the Desktop. Instead of the button image from the operating system, you can install the image from Classic Shell (two options) or add your own image if you have a similar image.
By default, the main settings in the program are made in the tabs: "Start menu style", "General settings", Cover, "Start menu customization".

Check the box next to "Show all options" to configure other options in the Classic Shell program.
After that, additional settings will become available in the tabs: "Menu appearance", "Start button", "Taskbar", "Windows 10 settings", "Context menu", "Sounds", "Language", "Control", "Main Menu", "General Behavior", "Search Box".

Although the program is optimally configured by default, the user can independently change the application settings to suit his needs by experimenting with the settings. To do this, select the settings, see what happened after changing them. If it turns out that you went too far with the changes in the parameters, you can return the default settings of the program.
In the application settings, you can hide unnecessary features, change the display of items and icons, change the order of items, remove items from the Start menu.
To do this, select an element, select a command and display. After right-clicking on the desired item, select additional functions.
In the Cover tab, you can choose a cover for the standard Start menu. By default, Windows 10 uses the "Metro" skin. You can choose other skins: Windows Aero, Metallic, Midnight or Windows 8, minimalist Classic Skin, or No Skin.

The Classic Shell parameter settings can be saved to an XML file in order to load the settings from this file on a new installation of the Classic Shell program. To do this, use the "Archive parameters" button, select the desired option: "Save to XML file" or "Load from XML file". To reset the program settings to default, select "Reset all settings".
Removing Classic Shell
The Classic Shell program is uninstalled in the standard way. If the program was not removed correctly, or some problems arose during the removal process, use a special utility that can be downloaded from here.
Conclusion
The free Classic Shell program installs an alternative (former classic) Start menu on the Windows operating system. After installing the program on a computer, the user can return the classic look of the Start menu in Windows 10, Windows 8.1, Windows 8, Windows 7, make other changes to the appearance and parameters of the start menu.
"Home Screen" in Windows 10 borrowed some elements from previous versions of the OS. With Windows 7, a regular list was taken, and with Windows 8, live tiles. The user can easily change the appearance of the menu "Start" built-in tools or special programs.
This article will discuss some applications that change the appearance "Home Screen", and it will also describe how to do this without unnecessary software.
Method 1: StartIsBack++
StartIsBack++ is a paid program that has many customization tools. Opening "Desktop" happens without the Metro interface. Before installation, it is desirable to create a "Restore Point".

Method 2: Start Menu X
The Start Menu X program positions itself as a much more convenient and improved menu. There are paid and free versions of the software. Next will be considered Start Menu X PRO.

Method 3: Classic Shell
Classic Shell, like previous programs, changes the appearance of the menu "Start". Consists of three components: Classic Start Menu (for the menu "Start"), Classic Explorer (changes the toolbar "Explorer"), Classic IE (also changes the toolbar, but for the standard Internet Explorer browser. Another advantage of Classic Shell is that the software is completely free.

Method 4: Standard Windows 10 Tools
The developers have provided built-in tools for changing the appearance "Home Screen".
The first preview of the new Windows is finally available for download. Interested users can use their Microsoft account to join the Insider Program and start downloading the .
The good old Start menu is back with Windows 10, but it's not quite the same as we know it from Windows 7. This time it includes the best of Windows 7 + dynamic tiles for universal apps (until recently, such apps were officially called modern). In particular, the left side of the menu is very similar to the Start menu in Windows 7, while the right side is made up of tiles.
If you've been using Windows 8 or Windows 8.1 for long enough to get used to the Start screen, you'll be glad to know that Windows 10 lets you turn it on.
Let me remind you that on computers with a keyboard and mouse connected, Windows 10 automatically includes a new Start menu, while on touch devices, the Start screen is used by default.
Please note that when you turn on the Start screen in Windows 10, the Start menu will be completely disabled. Thus, the Start screen will open both when you click on the "Start" button in the lower left corner of the screen, and when you press the Windows logo key on the keyboard.
So let's turn on the Start screen in Windows 10:
Step 1: Right-click on the taskbar and select "Properties".

Step 2: In the "Taskbar and Navigation properties" window, open the "Start Menu" tab. Find the option "Use the Start menu instead of the Start screen" and uncheck it. Finally, click "Apply" to turn off the start menu and turn on the home screen.

In the initial menu, the concept of searching for information and the section with system settings has changed dramatically. From now on, they are divided into two separate blocks. In addition, tiles of news and advertisements have been added. From the Seven, hierarchical lists remained, and from the Eight - a tiled structure. However, not all users are enthusiastic about these and other ideas for changing the familiar and convenient Start button. The initial menu has become more complicated, there has become more diverse information. At the same time, the previously convex Start button turned into Windows 10 into a nondescript flat tile that does not cause much emotion. It is no coincidence that users immediately began to look for ways to change the Start menu in Windows 10. Or, at least, return the time-tested style of the Seven.
Consider how to change the Start menu in Windows 10 with built-in tools and using third-party software. We will also describe some tricks on the settings. For example, how to change the look and color of the Start menu in Windows 10, and other points.
Standard Windows 10 tools
Ten has a set of built-in tools for customizing the start menu. They are not very good for a demanding user, but they can be used to easily change the look and configure other options. Procedures are carried out through the "Personalization" mode.
- Call the menu by clicking the mouse and select "Personalization", then open Start. Here you can change the color, the order of launching applications, change the background, lock screen and themes.
- To make the selected settings work, you just need to move the corresponding slider.
Important! When automatic selection is enabled, the OS will independently select changeable colors.
- In addition to these options, you can immediately change the transparency of icons, detachable applications, tile sizes, and form groups of similar elements.
Of course, these features are not enough to fully change the look of the Start menu in Windows 10. There are specialized programs for this, which we will discuss below.
With the help of programs
There are many small utilities on the market to help change our menu. Among them, we mention Start10, IObit Start Menu, etc. The principle of operation of these programs is almost identical, their difference is in the functionality. If Start10 is an extremely simple utility, then the programs discussed below have an interface with advanced settings. Let's see how it works on the example of three popular utilities.
Against the background of the undoubted conveniences of this program, there is a small drawback - it is paid. But it offers a monthly free mode with full functionality. The peculiarity of the utility is that the Desktop opens without the somewhat confusing Metro interface.
Important! Since the program can change important settings, we advise you to create a Windows restore point before starting.
When installing and running StartisBack++, it is advisable to close all windows and applications, as the program immediately opens a new desktop. The initial menu contains only one tab with settings, launch.

A window will open listing the home screen customization options.

Feel free to experiment! In addition to the external display of the start button itself, some settings from previous operating systems are allowed here, for example, Windows XP, 7. Using this program, it is easy to change the appearance of the Start menu in Windows 10 to the familiar Windows 7 style.
Like the previous one, this program is paid with the Pro extension, but the free version is also available. Let us briefly describe the paid version of this program. After installation, the icon is displayed in the tray. We click on it, select "Show menu" and then an interface with a black background opens.

To enter the changeable parameters, select the second tab "Settings" in the context menu. A dialog box will open, as in the previous program. Start with Personalization by clicking on the submenu tab. The interface is Russified, the information is presented clearly and logically.

The paid version contains such a convenient innovation as virtual groups and launching an executable file without going into a folder. Virtual groups are a grouping of programs on some basis: business, entertainment, home, gaming, etc. At the same time, the programs physically remain where they are installed, and only their virtual location in the emulated desktop changes.
Run without going into a folder allows you to assign an executable file to the selected folder, which is launched with one click. This will be appreciated by gamers, designers, webmasters who operate with many folders.
The advantage of this utility over competitors is that all settings are contained in one menu, divided into 4 tabs. When starting the program, the user immediately gets to the settings screen.

Here it changes the display of the Start button, Explorer launcher and IE toolbar. An important detail: the program is free.
What to do if Start slows down
With Windows 10, the same thing happens over time as with previous OSes: it slows down, and the menu buttons do not open. This problem did not bypass the Start. Since it is difficult to find the reason why this happens, we offer an effective general way to solve the problem.
- We start by restarting Explorer. It is the main source of hanging programs and menus, since it is the connecting center between them. Explorer executable file explorer.exe. Using the task manager or search, we find the file, call the context menu with the right mouse button, click "Overload.
Attention! All open programs, text and graphics editors, games, etc. must be closed so as not to lose data. You may need to restart your PC

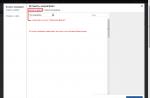
- Running an automatic PowerShell check. The program is located at Windows -> System32-> WindowsPowerShell-> v1.0. Run with administrator rights and write the complex command shown on the screenshot. The scan will start, wait for it to complete.

- Restoring the start menu with a utility from Microsoft. It is downloaded from the official MS site. The user only needs to run and click "Next", the program will do everything automatically, preparing the final report.
Questions on the topic.
- I want to remove the start menu, please tell me how.
This is not possible, since the menu is built into the Tens system shell. The same applies to Edge Browser and the Microsoft Store.
- How to add/remove tiles on the start button?
Open All Apps and select your favorite from the list. Drag the mouse over the start button. The application is deleted in the same way as any other program. You need to click on the program icon and select "Uninstall".
- How to pin and unpin an app from the start menu.
Click on the program icon and click "Pin ...". We do the same to unpin by clicking the appropriate command.
Important! If you switch to this mode from the Personalization section, you can force pin the selected applications

- How to disable changing tiles?
Disable the update function in the context menu.
- I want to go to full screen mode.
In Personalization, open the Start tab, select and enable the full screen slider. If you later open the interface using the Win button, the folder display will be in the classic Windows 8 style.
The article tells how to change the appearance of the start menu in windows 10 with standard tools and additional programs. Some difficult cases are described when the Start starts to “Glitch”, and how to fix it. Answers to common questions related to the initial Tens menu are given.