It's no secret that the use of DVDs and CDs has been declining lately, because there are more convenient analogues: various flash cards, removable hard drives and other wonders of technology. However, a technology that was developed relatively long ago - the creation of virtual drives and disks - remains without attention.
What is a virtual drive?
Distinguish between virtual drives and virtual disks.
A virtual drive is a device that has the same functions as a physically real drive: disk writing, reading, and so on.
A virtual disk is analogous to a disk that can be read or written using a virtual drive. Most often, the object of writing to a virtual disk is the so-called disk image, which is an iso file.
At the same time, the virtual drive and disk cannot be moved, scratched or folded into an envelope. These devices are virtual, that is, they do not physically exist. We emulate their presence in our computer.
What is a virtual drive for?
There are a number of reasons why using virtual drives and disks is justified:
- The ability to quickly transfer a disc to a computer without spending money on buying a DVD disc.
- Maximum security. A real disk or drive can be scratched, hit, broken. Virtual devices are devoid of such a threat.
- The ability to create as many virtual drives as you like, and even more so disks.
- Convenience in the transfer of information over the Internet.
Thus, we get a flexible mechanism for writing, reading and transferring information without spending money on buying additional drives and a bunch of disks, this approach is becoming outdated every day. You don't have to deal with packing discs, you don't need to learn how to install and configure the drive in your computer. All you need is to have Windows 7 or higher operating system installed on your computer.
How to create a virtual drive?
Having dealt with what the use of virtual drives gives us, we proceed to the most interesting stage - creating them on your computer.
To date, there are many programs that allow you to implement this. The most time-tested and easy to use are Alcohol 120 and UltraISO. Let's analyze the use of both programs, after which everyone can decide for themselves which of the programs is more convenient.
Virtual drive for Windows 7 using UltraISO
Download this program from the official or any other source. It is desirable to use the latest version 9.6.5, although the use of older versions is not critical.
During installation, at the stage of selecting additional tasks, you must check the box "Install ISO CD / DVD emulator"

Ready. After installation, go to My Computer and see that the virtual drive has already been created:
We start the program. In the upper left corner we see a disk image, which was also created automatically. To the right of it, its content is shown, which is currently empty. The file directory of our computer is available below, it is from here that we can select the necessary files and send them to our virtual disk:

We see that the data has been added to the virtual disk directory. Go to File -> Save As:

Click on the "Mount to virtual drive" icon:

We make sure that the path to the file is set correctly and click "Mount":

We go to My Computer, open the contents of the virtual disk and see that the Pactioner.php file is written to it:

Thus, in just a minute, we created a virtual drive and mounted a disk image on it. In the example, a regular file is used, instead of it there could be, for example, some game that you need to emulate from a disk so that you don’t get the disk every time and load it into a real drive. Recording such things looks the same way: select the game disc files in the directory, transfer them to a virtual drive, emulate it and you're done. You no longer need a real disk.
Virtual drive for Windows 7 using Alcohol 120
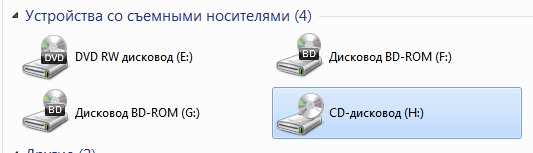
Download and install the program. After installing the program, we see that Alcohol 120 separates physical drives from virtual ones:

Virtual drive F is ready to use, just transfer the necessary ISO files to the field above and select the desired function. To burn the image to a real disc, select the Image Burning Wizard. In this case, we want to emulate our image on a virtual drive, so we add the same image that we created in UltraISO, right-click and select Mount on Device:

Ready. We will open a new disk with the recorded Pactioner.php file:

Results
We examined the theoretical basis of virtual drives and disks, figured out the programs that allow you to use this technology. Undoubtedly, the use of these things will save you time and nerves, which is very important in the age of information technology.
In Windows 7, any user can easily create a virtual disk without using third-party software. At the same time, its structure is no different from the physical carrier, as well as the principle of operation. Since all information will be stored in one file, confusion can be avoided. In addition, it quickly connects to a virtual machine, which will be appreciated by programmers and system administrators.
Instructions for creating
There are two ways to achieve your goal in the "seven". One of them is somewhat more complicated, as it involves the use of the command line. However, it provides the user with several more options.
Through Disk Management
First you need to go to the main menu of the "Start" operating system and enter the word "control" in the search bar. After completion of the operation a window will appear where you need to click on Computer Management. Expanding the drop-down menu "Storage Device", the option "Disk Management" is selected. In the central part of the window, all logical drives into which the hard drive is divided will be displayed.
To create a virtual disk on Windows 7, go to the "Action" tab located on the top panel. After that, select the appropriate item in the drop-down menu. A new window will appear asking you to configure the parameters of the future disk- the user must specify the file location, size and name. When performing these actions, you need to follow two simple rules:
- The name must not contain the word Windows.
- The virtual disk cannot be located in the folder with the installed operating system.

When choosing a format, you should prefer "Fixed", which will allow the partition to immediately occupy all the free space allotted to it and thereby reduce system load. If you use a dynamic disk, then its size will gradually increase as new information is added. As a result, when the physical partition fills up, you may experience problems with the performance of the computer.
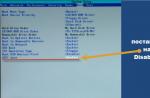
When all the necessary settings are completed, it remains to click on OK. It will take some time to create the Windows disk. When it is displayed in the central part of the window, you need to right-click and select "Initialize". To be again make a few tweaks, and the first choice will be the type of main boot area. If its size is less than 2 TB, then you can give preference to MBR. If desired, the user can quickly convert it to GPT while there is no data on the disk.
After initialization, the new disk will not have an allocated area, and this situation needs to be corrected. Right-click and select "Create Simple Volume". As a result, the volume creation wizard will be launched and the user must again set several parameters:
After completing all the operations, you should click on "Finish", and the disk can be used. If the virtual disk is no longer needed, then removing it is easy - just right-click and select the appropriate item. Checking the checkbox " Delete virtual disk”, it will not only be disabled, but also deleted along with all the information it contains. Similarly, you can delete a virtual disk in Windows 10.
DISKPART utility
It not only allows you to create a hard drive, but also offers a few more options than the first method. First, the utility must be found through the Start menu by typing diskpart in the search bar. On the line with the found utility, you need to right-click and run it on behalf of the admin.
To create a virtual partition 1. vhd of a fixed size (2000 MB) at the root of the logical D partition, you must enter the following command - create vdisk file= D:\1.vhd type=fixed maximum=2000. After that, you need to press Enter. To select a created disc the command must be entered - select vdisk file = D:\1. vhd. Then a few more commands are written:
- Attach vdisk - attaching a virtual partition.
- List disk - view the results of previous operations.
- Create partition primary - a primary partition is created.

Windows will then prompt you to format the drive. This can be done from the command line or use the appropriate operating system wizard. This completes the process of creating a virtual disk in Windows 7 and you can start using it, for example, install a second OS from a USB flash drive.
Create a virtual drive
Often there is a need to create a virtual drive. Today, many users exchange ISO images on the Internet. To use the information contained in them, it is convenient to make a virtual drive. There are many programs available to solve this problem.
Gizmo Drive
A good program for creating a virtual disk that supports not only ISO, but also other popular formats. You can easily install an image into the created drive, and its contents will be displayed in Windows Explorer or another file manager. The application can also create images and write them to optical or flash drives.

It should be noted that the program has its own file manager. The utility has become popular due to its simple interface. Developers offer PC users to create images in Gdrive format. With his help you can simulate the work of a physical hard drive with the possibility of compression and encryption. While working with a virtual DVD drive, system memory is used, which significantly increases the data transfer speed.
DAEMON Tools Lite
The program has been very popular among PC users for many years and is one of the leaders in its class. With her help you can create a maximum of four drives. It should be noted that many competitors in this regard offer more opportunities. Daemon Tools is intended for ordinary users, who should have enough of the number of disks proposed by the developer.

Particular attention should be paid to the application interface, which is as simplified as possible. With it, you can quickly open the desired image and mount it. In some similar programs virtual drive after reboot may disappear. There is no such problem in the Daemon Tool. If the user does not have enough functionality of the free utility, you can purchase a paid one. The only drawback of the program can be considered the presence in the latest versions of advertising.
There are much more programs for emulating optical drives, for example, the same UltraISO. However, it is paid, and this is definitely a serious drawback.
Creating a virtual hard disk is one of the operations available to every Windows user. Using the free space of your hard drive, you can create a separate volume with the same capabilities as the main (physical) HDD.
The Windows operating system has a utility "Disk Management" that works with all hard drives connected to a computer or laptop. With its help, you can perform various operations, including creating a virtual HDD, which is part of a physical disk.
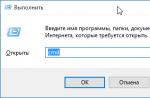
- Launch Dialog "Run" Win+R keys. In the input field write diskmgmt.msc.

- The utility will open. On the toolbar, select "Action" > "Create Virtual Hard Disk".

- A window will open in which you can specify the following settings:

- The initialized drive will appear in Windows Explorer.

In addition, autorun will be performed.

Using Virtual HDD
You can use a virtual drive in the same way as a regular disk. You can move various documents and files to it, as well as install a second operating system, such as Ubuntu.
A lot of users of personal computers on the Windows platform often ask themselves questions - what are virtual disks and how to create virtual disk. To increase our readers' awareness of these issues, in this article we will try to fully cover the topic with specific examples.
Also in our article we will consider what is virtual hard drives and where they are used. After reading the material, our readers will be able to easily create virtual hard disks and image disk in ISO format, as well as mount them on a virtual device and burn them to DVD without any problems.
Virtual optical drive and its applications
The main purpose of a virtual drive is mounting images optical discs. To understand in detail why it is needed, we will look at an example where an image disk in ISO format will be mounted on a virtual DVD-ROM. For this example, we will use the Windows 10 operating system.
A pleasant moment for owners of computers with the Windows 10 operating system will be that a virtual DVD-ROM is already installed in it. Therefore, owners of Windows 10 will not have to use third-party programs to mount images.
To mount an optical disc image into a virtual DVD-ROM, we need the image itself. For example, we will use image with Linux operating system ubuntu. You can download an image of this operating system on its official website http://www.ubuntu.com. In our example, we will use the image 64-bit Ubuntu version 15.10, which has a size of 1.1 GB.
After loading the image, you can proceed to its direct mounting. To do this, right-click on the image file to open the context menu.
Mounted "virtual disk" can be opened and copied all its contents.
As you can see from the example, we mounted the Ubuntu OS image on a virtual DVD drive. In fact, we were able to do almost what we do with a regular and optical disc, when we insert it into a DVD drive and open it, only in our version all the components are virtual.
Creating a LaserDisc Image
In the previous example, we looked at how to open an image disk in a virtual DVD drive. Now let's deal with the situation when you need to create an image of an optical disc. To create an image, we need the DAEMON Tools Lite program, which must be downloaded and installed. It is also worth noting that in addition to creating various image formats, DAEMON Tools Lite it can also mount a huge number of formats into its own virtual DVD drive. After installing the program DAEMON Tools Lite in Explorer you can see a new drive named ""

This "" is just the drive of the program in question DAEMON Tools Lite. In this example, we will create an image of the original installation DVD with the Windows 10 operating system. To make an image from the installation DVD with ten, insert it into the DVD drive. Now run the utility and go to the section " New look».
In the utility window we find the button " Create image from disk” and press it. These actions will take us to the image creation window.
In this window, you can select the DVD drive from which the ISO image will be created, as well as select the location to save it.
We will also select the image ISO format and confirm the creation by clicking the Start button, which will start creating the Windows 10 DVD image.
After creation, we will receive an ISO image file called "J_CCSA_X86FRE_RU-RU_DV5.iso", which can be mounted or burned to a regular disc and installed with it a new Windows.
The example shows how easy it is to burn an image to a virtual DVD-ROM using DAEMON Tools Lite. In the same way, you can burn images for all licensed Windows discs, be it XP or Vista. In addition, you can burn images of games or software that do not start without a disc. Apart from the program DAEMON Tools Lite I would like to advise other popular utilities that can create and allow you to open images of optical discs:
- Alcohol 120%;
- GizmoDrive;
- WinCDEmu.
It is especially important to use these utilities on an OS where there are no built-in virtual DVD drives, for example, in OS Windows XP. In addition to supporting XP, each of these programs, including DAEMON Tools Lite, will be able to burn ISO images to DVD disk. In addition to supporting the ISO format, these utilities can mount other formats, including their own, they can be written to regular discs.
Virtual hard disk
A virtual hard disk is quite often used by IT specialists, as it allows you to solve many problems with backup, virtual machines and testing various operating systems. Virtual hard disk is a container file that mimics the file structure of a hard drive.
Since such a disk is a file, therefore it is usually stored on a physical HDD or SSD. Starting with Windows 7, users have the ability to create and mount a hard disk directly in the operating system.
Consider an example of creating a virtual hard disk using Windows 10. First, let's go to the utility " Run"Using the key combination Win + R and type in it the following command: diskmgmt.msc

This command will take us to the Disk Control Panel.
To create a new virtual HDD, you need to go to the menu " Action / Create virtual hard disk", which will open a window to create such a disk.

Starting with Windows 10, it became possible to create a disk with the format " VHDX". Unlike the "VHD" format, the " VHDX» can create containers up to 64 terabytes. Let's make our virtual hard disk 100 GB in the new format " VHDX”, and also put the switch in dynamic creation mode, in which our disk will increase as it fills up.
After setting the parameters of our hard disk, press the OK button, which will allow you to write it to the specified folder on the screw. After creating the output, we will get a virtual hard disk named "virtual disk.vhdx". The image below shows that our disk is automatically mounted, but it is still not visible in the system.
In order for the system to see our VHDX disk, it must be initialized. You can do this by right-clicking on the VHDX disk and selecting " Initialize disk».

In the window that appears, do not change anything and press the OK button.

Now the simplest thing left is to choose a file system and a letter for our disk. To do this, go to it and select the item " Create a simple volume».

After that, a wizard will start in which you need to assign a drive letter and select a file system. After the wizard completes, the virtual hard disk will appear in Explorer.
The example shows that creating a virtual HDD using the OS is very simple, so we hope that you will no longer have a question - how to create a virtual hard disk. I would also like to note that with the created VHDX disk you can do the following operations:
- Encrypt it with BitLocker;
- Install an additional OS on it;
- Move and open it on another computer;
- Connect it to a virtual machine.
Computers based on the Windows XP operating system, which is still quite popular, do not support VHD disks. But do not be upset, because in the utility we reviewed earlier DAEMON Tools Lite there is support for VHD disks and it fully compatible with Windows XP.
Using a VHD Disk in a Virtual Machine
Let's create a virtual machine based on the Windows XP operating system using the VirtualBox program. At the step of creating a virtual machine for XP, you will be prompted to create or attach a virtual hard disk that will be used to install Windows XP on it.

At this point, we can attach the VHD disk that we will create using Windows 10. So we will try to attach our 30 GB VHD container that we made in ten. After creating a virtual machine, you can view the attached VHD disk in its settings.
If there is not enough space in the virtual machine on XP, then you can always attach new VHD virtual hard disk. Besides, you can connect containers with various file data to a virtual machine for XP. In the same way, you can use the virtual machine from other software products. For example, VHD containers can be installed on VMware Workstation products.
Outcome
From the material considered, it can be seen that the use of virtual drives and hard drives helps to solve many problems much better, especially since even a novice PC user will figure out how to create them. We hope that our material will help our readers to better understand the question - how to create a virtual disk and how to use it for work.
Related videos
The virtual hard disk (VHD) of Windows 7 refers to the space on the physical media (aka disk, hard drive, HDD) created by the operating system (OS) for everyday user tasks. This concept also includes an image, or cast, of the file structure, content taken from a physical medium: a flash drive, DVD, HDD. The difference between virtual media and physical media is that the former can be turned off at will, thus turning it into an encrypted storage of information.
Benefits of using virtual disks on Windows 7
Answering the question why you need a virtual disk in Windows 7, let's talk about its use and benefits. The first advantage is the expansion of storage space. Since the virtual disk is perceived by the OS on the same level as the physical one, it operates with it as a "real" hard drive.
The second positive quality is that the installation of a drive is often accompanied by the transfer of an operating system image to it. Users note the acceleration of the boot procedure (boot), although this is not confirmed by the official tests of the developer.
A useful feature for those users who have a lot of multimedia flexible media is the creation of an image on the VZD, that is, an exact "cast" of the media. When working with it, you do not need an external DVD-ROM, flash drive, etc.
With frequent reinstallation of Windows, they create and store a system image with related drivers, utilities and programs on the VZD. After the drive is started, the procedures are carried out automatically. To create such a drive, you do not need special knowledge, it is available even to an inexperienced user. Since the drive is no different from a hard drive, the same operations are performed with it, information is stored, including encrypted.
How to create a virtual disk on Windows 7? Using the built-in tools (tool) of Windows and third-party emulator applications. In this article, we will consider the first method in detail.
How to create a VZD using Windows 7?
The easiest way for a person who is not familiar with the depths of administration is to use the diskmgmt.msc command. Open the Start menu, type this command in the command line, press Enter.

The "Management Manager" section will open. Here we select the "Disk Management" tab.

Click the "Action" item, go to the option, as shown in the figure below.

A window will open in which the user specifies the location, that is, the area on one of the logical partitions of the physical hard drive.
Important! A virtual disk is created not in some ephemeral space, but on one of the HDD logical partitions. It takes away from it the amount of memory that the user determines.
Then we select the type of information storage: with dynamic expansion or fixed. The second type is recommended by default and is characterized by a fixed virtual drive size that cannot be changed. In contrast, VZhD with a dynamic format changes the volume as it is filled with information. However, if the user deletes the data, the freed up space will not be automatically compressed.

When choosing a fixed format, specify the size in Mb, Gb or Tb in the dialog box without leaving this menu. We press "Next".

If done correctly, a virtual drive will be created with the drive letter assigned. But for now it is in the "Undefined" state. To run, you need an initialization procedure.
Start initialization
Right-click on a letter to open the context menu. The first tab from the top is "Initialize Disk". We press.

The following window opens, where nothing needs to be changed. We check that the mark is on the line "Master Boot Record", then click OK.

Creating sectors
We click anywhere in the field of the created drive. Go to the top tab "Create a simple volume". This type of partition (volume) is suitable for most users.

The Creation Wizard starts. The next window prompts you to specify the capacity of the volume. A range of figures is given: from the maximum capacity of the VZhD to the minimum. After specifying the volume size, click on the "Next" button. The window for assigning an alphabetic letter to the new drive will open. It's simple here: select a letter from the drop-down menu, click "Next".


File system selection (FAT)
Among the two options to choose from, NTFS suits modern drives and a 64-bit operating system. FAT 32, as the name implies, is used on low-capacity HDDs and on 32-bit Windows 7. Leave the cluster size at the default. Here we specify the volume label (optional).

Then we move on to formatting the volume. The default is quick formatting. Then click "Next". The procedure takes a fraction of a second, and then the final window of the wizard appears. Click "Finish" to finish its work.

Now the virtual disk has taken its rightful place in menus such as My Computer, Explorer. When you right-click on the VZhD field, a menu opens that lists operations, for example, you can make the volume bootable (active), change the designation letter, etc.

Removing the VZD
The removal procedure is useful when you need to clean up your computer. Consider step by step instructions. We recommend a reliable way to remove a virtual disk from Windows. The steps are the same as for creation. Our task is to get to the virtual disk menu.

- Open the "Start" menu, "Computer" and right-click on "Management".
- We go down, we need the penultimate tab.
- Click on the drive field, in the drop-down menu, select "Delete volume". We read the warning label and click "Yes". The selected volume has been deleted.
Note! The method of deleting VZD through cmd by entering the subst [X]: /D command, where X is the letter of the virtual partition to be deleted, cannot be recommended for ordinary users. Windows 7 "swears" at such an operation, often blocks it. Therefore, you need to go into the registry, look for a line with an entry about a virtual disk and manually delete it. But this can only be done by an experienced user who clearly controls the actions. Incorrect actions in the system registry can lead to OS crash!

Virtual optical drive, applications, third-party programs
Here is a general description. The programs used to create a virtual disk are called emulators for their ability to display virtual copies of the media. These programs (Alcohol, Daemon, 120, Ultraiso, etc.) run virtual optical drives, the scope of which is identical to the virtual ones created in the OS environment. The difference is that the existence of a virtual optical drive is possible only during a session with the emulator. That is, until the emulator program is running on the computer, the virtual disk will not be activated. When you disable the emulator, the created virtual drive disappears.
Emulators are popular for their ability to handle an unlimited number of virtual drives. This function is used to emulate images of programs, games, applications and, of course, a snapshot of virtual or hard media. Archives with the *.iso extension, etc. are used as processed files.
conclusions
We have examined in detail the step-by-step process of how to create a virtual hard disk in Windows 7. The built-in tools of Seven allow you to create virtual disks with which they perform the same operations as with regular hard disks. In case of uselessness, VZD is easily removed from the OS. Emulators perform the same functions, that is, they operate with virtual drives in the Windows environment.
However, the specifics of their work is that the created images exist only when the program is running. When you disable the emulator, the virtual optical drive disappears. Because of this, it is hardly acceptable to use it as information storage, as is the case with a virtual drive running Windows 7. Therefore, emulators are used, as a rule, to activate ready-made casts from media that are suitable for one session of working with them.