This documentation has been archived and is no longer maintained.
WinPE: Creating a Bootable USB Drive
Create a bootable WinPE USB flash drive or USB external hard drive.
By default, installation is performed from RAM (from the RAM disk), so the disk can be removed while Windows PE is running.
Installing Windows ADK
Deployment Tools: contain deployment and imaging environment.
Windows PE: Includes files for installing Windows PE.
Install the following components from the Windows Assessment and Deployment Kit (ADK):
Installing Windows PE
Run Deployment and imaging environment on behalf of administrator.
Create a working copy of the Windows PE files. Specify x86, amd64 or arm:
copype amd64 C:\WinPE_amd64
Install Windows PE onto the USB flash drive using the drive letter:
MakeWinPEMedia /UFD C:\WinPE_amd64 F:
Warning
This command formats the disk.
Connect the USB device to the computer you will be working on.
Turn on your computer and press the key that opens the firmware boot menus.
Select USB storage. Windows PE will launch automatically.
Once the Command Prompt window opens, the wpeinit command is run, which configures the system. This may take a few minutes.
Diagnostics
To boot a computer that supports UEFI mode, try manually selecting the boot file from the firmware boot menu: \EFI\BOOT\BOOTX64.EFI.
Try connecting to a different USB port. Do not use hubs or extension cords.
Do not use USB 3.0 ports unless the firmware includes native USB 3.0 support.
Clean the USB flash drive and reinstall Windows PE. This will help remove unnecessary boot partitions and other boot software.
diskpart list disk select disk
clean create partition primary format quick fs=fat32 label="Windows PE" assign letter="F" exit MakeWinPEMedia /UFD C:\winpe_amd64 F: Try booting Windows PE from the DVD. Create an ISO file that you can burn to DVD:
MakeWinPEMedia /ISO C:\winpe_amd64 c:\winpe_amd64\winpe.iso
In Explorer, go to C:\winpe_amd64 directory, right click winpe.iso and select Burn to disc. Create a DVD by following the onscreen instructions.
If your computer requires storage or video drivers to boot, try adding the same drivers to the Windows PE image. For more information, see .
Install the latest computer firmware.
If the copype command is not recognized, make sure you are running the command in the Deployment and Imaging Tools environment that is included with the Windows ADK.
If Windows PE does not appear, try the following workarounds, restarting your computer each time.
If your computer does not connect to network folders, see the section.
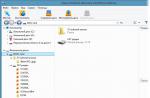
Storing Windows images on a Windows PE disk
Most USB flash drives only support one disk partition. The MakeWinPEMedia command formats the drive in FAT32 format, which supports booting computers with BIOS and UEFI. This format only supports files up to 4 GB in size.
On external USB hard drives, you can create a separate NTFS partition that supports larger files.
Hello friends. Many of our readers are familiar with LiveDisk, which is created using the AOMEI PE Builder program. As a tool, it is used to carry out various operations described in many articles on our site. And in There were even instructions on how to create the disc itself. From time to time, I update the ISO image of the already created such a disk as a ready-made solution for you, friends, and post it on my cloud. And so I decided to refresh it again. Relatively recently, the PE Builder program was updated to version 2.0 and acquired support for Windows 10. In this article, I propose to talk in detail about the capabilities and innovations of the program, as well as look at the process of creating a LiveDisk using its tools.
AOMEI PE Builder: what kind of program is it?
PE Builder is a free program from AOMEI, designed to promote other products of the developer company, but at the same time bringing real, undeniable benefits. Using PE Builder, a LiveDisk is created with two main AOMEI products - Backupper and Partition Assistant Standart - and some supporting tools. But the main feature of this method of obtaining self-loading software for resuscitating computers, and at the same time the reason why LiveDisk is not posted on the AOMEI website in the form of a ready-made ISO image, is the ability to add custom portable software to the disk. We, friends, will be able to assemble our own “live” disk and include in it exactly what we need - our programs, our folders and files.
The basis of the PE Builder “live” disk is the WinPE environment - a greatly stripped-down assembly of regular Windows. The program can generate WinPE from the environment of the current version of the operating system. Those. if we create a LiveDisk inside Windows 7, we get it based on a stripped-down version of System 7, and inside Windows 8.1, we get it based on a stripped-down version of 8.1.

Previously, this was the only way to create a “live” disk, and as for Windows 8.1, it, alas, worked properly only in its English edition. In PE Builder version 2.0, nothing has changed in this regard; recent tests have shown that problems with WinPE based on Russian-language Windows 8.1 remain. But the program began to support Windows 10, both as its installation environment and as the software basis for LiveDisk. So, we can choose the WinPE 10 environment as the basis of the disk, regardless of the version of the system in which we will work to create the disk - be it Windows 7 or 8.1.

The ready-made WinPE 10 environment is already downloaded from the Internet, and it is the program creators who recommend choosing it as a stable working option.
Advantages
The ability to create a LiveDisk with your own content is the main, but not the only advantage of AOMEI PE Builder. This program also:
A completely legal way to get a “live” disk. Initially, LiveDisk comes with only free software. This means that the program download site tomorrow will not be covered by Roskomnadzor or some other structure that defends the copyrights of licensed software developers.
Software that passes Secure Boot verification. When booting from AOMEI PE Builder media in the BIOS of modern devices, you do not need to disable the Secure Boot protocol, which checks the software for authenticity.
A method for creating a bootable USB flash drive that is compatible with both regular BIOS and UEFI BIOS. The PE Builder program provides three scenarios for completing the process of creating a “live” disk - packaging into an ISO image, burning an optical disk, and writing to a removable flash drive. In the latter case, a bootable flash drive is created from which you can start a computer with any type of BIOS.
A solution for owners of small flash drives. The output of the program is a small ISO file - 400-500 MB. If you do not increase this volume by adding unnecessary software and abandon the programs supplied by default, LiveDisk along with the Windows installation process can fit into a 4 GB multiboot flash drive.
Download
On the AOMEI official website, on the PE Builder download page
https://www.aomeitech.com/pe-builder.html
We will find two types of its installer: one without the AOMEI Backupper and Partition Assistant programs included in the disk, and the other with them. I will choose the latter option for downloading, since I often work with AOMEI backup and disk manager.

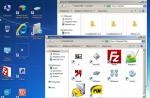
What else, besides these programs, is on board the LiveDisk AOMEI PE Builder?
Composition of LiveDisk
Of the standard operating system tools on board LiveDisk, we only have access to Explorer, command line and notepad. During the disk creation process, you can add the following third-party software:
Bootice boot record editor;
QtWeb Browser;
Network management program PENetwork;
Program for diagnosing computer components CPU-Z;
Recuva program for recovering data deleted after emptying the recycle bin;
Archiver 7-Zip;
Program for mounting disk images OSFMount;
Imagine Image Viewer;
Reader for PDF, ePub, DjVu, XPS, etc. Sumatra PDF formats;
File manager Q-Dir;
Everything data search engine.
When creating a disc, you can abandon any of these programs in favor of your own portable software. Well, now, friends, let's look at PE Builder in action.
Creating a LiveDisk
Launch the program, click “Next”.

In any version of Windows (and for the “Ten” this will be the only possible option), check the box to load the WinPE 10 environment. And select the bit depth - 32 or 64. Choose, friends, you need the bit depth for which you have portable software . Click “Next”.


And add portable software: click “Add files” if you need to add only EXE files, or “Add Folder” if the software is stored in folders. Using the same principle, we add regular files and folders. In my case, portable programs are located in folders.

We add several folders with portable programs one by one.

Click “Ok”.

Click “Next”.

This article will tell you how to manually create your own build of Windows PE, containing those features and components that are not there by default, but their presence is necessary in such a tool. I will also give important advice - do not be afraid to deviate from this instruction. Imagine. Find non-standard methods to solve a problem. It is thanks to this approach that you can create the most functional assembly.
Core
You should start creating an assembly from the kernel. The Windows PE kernel is contained in the Windows AIK for Windows 7.Next, you need to launch the deployment tools command line and run the command
copype.cmd<архитектура> <путь>However, the directory specified as an argument to copype.cmd must not exist.
You can create builds for x86,x64 and Itanium(x86,amd64,ia64) architectures
Assembly structure
Simply put, the assembly is what you get in the target folder after running the copype.cmd script. The assembly cannot work; it must first be placed on the media and a boot loader written. After this, it can already be called a customized Windows PE 3.0 system.The assembly consists of ISO folders, which contains the contents copied to the media when preparing the bootable drive, namely the base of the bootloader - the boot, efi, sources folders, the bootmgr.
There is also an empty mount folder for mounting the image.
The etfsboot.com file is also stored there, intended for creating a bootloader on a CD\DVD disk
And most importantly, this is the winpe.wim file, which stores the Windows PE system itself
So, creating a customized Windows PE 3.0 system is a two-step task.
- Editing the winpe.wim file (creating an assembly)
- Creating a bootloader
Algorithm for creating an assembly
Mounting winpe.wim
Let's start creating the assembly by mounting the winpe.wim image, which contains the Windows PE system.Mounting means that the image in the wim file is assigned to a certain folder in the file system.
When mounted, the entire contents of the image are associated with the folder, but are not physically copied.
To mount the image, use the appropriate command
Dism/Mount-Wim/WimFile:<Путь>\winpe.wim/index:<индекс образа в wim-файле>/MountDir:<Путь>\mount
Thus, the necessary information about mounting the image is indicated: the name and path to the wim file, the number of the image in the file, the path to mount.
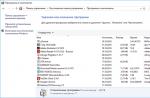
Windows PE packages
Windows AIK contains components that are used to expand the functionality of Windows PE. They are called packages. There are many packages that can be used to create an image from which to boot during OS installation, and there are also components designed to support data access, recovery tools, and WMI tools.| Package name | Description |
|---|---|
| WinPE-FONTSupport- | Additional font support for the following languages: ja-JP, ko-KR, zh-CN, zh-HK and zh-TW. |
| WinPE-HTA | Support for HTML applications. Enables you to create GUI applications using the Internet Explorer scripting engine and HTML services. |
| Winpe-LegacySetup | Media installer component package. All installer files from the \Sources folder on the Windows media. Add this package when servicing the installation or \Sources folder on Windows media. It must be added with the Setup component package. To add a new Boot.wim file to the media, add any child package in addition to the Setup and Media packages. This package is required to support the installation of Windows Server® 2008 R2. |
| WinPE-MDAC | Support for Microsoft® MDAC data access components. Allows you to query SQL servers with Active Directory Objects (ADO). Use case: Create a dynamic startup file based on unique system information. |
| WinPE-PPPoE | Includes support for the PPPoE protocol. Allows you to create, connect, disconnect, and delete PPPoE connections from Windows PE. |
| WinPE-Scripting | Windows Script Server (WSH) support. Enables batch processing of files using Windows Script Server script objects. |
| WinPE-Setup | Setup component package (parent). All installer files from the \Sources folder, shared between the client and server. |
| WinPE-Setup-Client | Client installer component package (child). Client branding files for the installer. You must add the installer component after the package. |
| WinPE-Setup-Server | Server Setup component package (child). Server branding files for the installer. You must add the installer component after the package. |
| WinPE-SRT | Windows Recovery Environment Component package. Provides a recovery platform for automated system diagnosis and recovery, as well as custom recovery solutions. |
| WinPE-WMI | Windows Management Instrumentation (WMI) support. A subset of WMI providers that provide minimal system diagnostics. |
| WinPE-WDS-Tools | Windows Deployment Services Toolkit. Contains APIs that provide multicast scripting using the Windows Deployment Services custom client and an imaging utility. |
To add a pfket there is a command:
Dism/image:<путь >\mount /Add-Package /PackagePath: "C:\Program Files\Windows AIK\Tools\PETools\<архитектура>\WinPE_FPs\<имя пакета>.cab"
Profiling
Profiling is the process of reducing the size of an image by using unused componentsProfiling is performed as follows: first it is enabled through the DISM program, then the assembly is launched, the operations required of it are performed, the profile is saved, then the assembly is connected through the DISM program and the profile is applied.
This method is quite effective in reducing image size, but it is useful in a narrow corporate environment. In this instruction, I am creating a UNIVERSAL assembly, so profiling will be performed slightly differently.
It will consist of MANUALLY removing some components, namely language packs other than Russian and English.
Also, at the final stage, the wim image will be exported to another file in order to clear the indices of outdated files (more on this later)
Thus, in the mount\Windows\System32 directory, you need to delete all directories with the names of language packs, except ru-ru and en-us.
Adding components from Windows 7
After adding packages, Windows PE functionality expands, but is not sufficient to perform most administrative tasks.Therefore, I propose to expand the capabilities by adding some components from Windows 7, namely
- Explorer Components - Allows you to call the Open dialog box from the Task Manager.
- Nslookup – utility for testing DNS servers
- Fc – file comparison utility
- Diskcomp – utility for comparing floppy disks
- Diskcopy – a utility for copying floppy disks
- Mstsc.exe is a “Remote Desktop Connection” program, thus turning Windows PE into a “thin client”
This way you will copy files from this VHD into the build
Copy the files indicated in the table.
Always keep the file in the same location as on the VHD! That is, if the file was located in the %systemroot%/system32/ru-ru directory, then you must copy it to the same subdirectory of the assembly mount directory.
| File name | Location |
|---|---|
| Conductor Components | |
| Explorer.exe | %systemroot% |
| Shell32.dll | %systemroot%/system32 |
| SHELL.dll | %systemroot%/system32 |
| Shellstyle.dll | %systemroot%/system32 |
| Nslookup | |
| Nslookup.exe | %systemroot%/system32 |
| Fc,diskcomp,diskcopy | |
| Fc.exe | %systemroot%/system32 |
| Diskcomp.exe | %systemroot%/system32 |
| Diskcopy.dll | %systemroot%/system32 |
| Diskcopy.exe | %systemroot%/system32 |
| RDC Client | |
| Mstsc.exe | %systemroot%/system32 |
| Mstscax.dll | %systemroot%/system32 |
| Msacm32.dll | %systemroot%/system32 |
| d3d10core.dll | %systemroot%/system32 |
| d3d10.dll | %systemroot%/system32 |
| Dxgi.dll | %systemroot%/system32 |
| mcm32.dll.mui | %systemroot%/system32/ru-ru |
| mstscax.dll.mui | %systemroot%/system32/ru-ru |
| mstsc.exe.mui | %systemroot%/system32/ru-ru |
Or you can download all these files from here. Contents sorted by catalogs
Adding third-party software
The following programs and scripts will be added:| Software name | Start command | Description |
|---|---|---|
| CPU-Z 1.57 | cpuz | Used to obtain hardware information |
| DnsDataView 1.15 | dnsdataview | Used to retrieve information from DNS servers |
| EasyTerm 4.3 | easyterm | Telnet client |
| Everest 5.02 | everest | Used to obtain detailed information about hardware and perform tests on it |
| Free Commander 2008 | fcom | Dual panel NC-shaped file manager |
| FirefoxPortable4.01 | firefoxportable | Portable version of the popular Internet browser |
| HDDScan 2.8 | Hddscan | Utility for checking the surface quality of hard drives |
| HD_Speed | Hdd | Utility for checking hard drive speed |
| ImageX | imagex | A utility from Microsoft designed to work with WIM files |
| IPTools 2.58 | ip_tools | A set of network utilities |
| Macview 1.13 | macview | A program to determine the manufacturer of a device by its MAC address |
| MemTest | memtest | Utility for checking RAM |
| Netagent 3.2 | netagent | A set of network utilities |
| NmapW 2.0.0.1 | nmap(console interface), nmpw32(graphical interface) | Powerful port scanner |
| PortScanner 1.0 | portscanner | Port scanner |
| Putty | putty | SSH and Telnet client |
| Radmin Viewer 3.4 | radmin | Utility for connecting to the server side of the Radmin application |
| Recuva 1.19 | recuva | Recovering Deleted Files |
| Smart Sniffer | smsniff | Simple and convenient sniffer |
| Space Monster 1.4 | spacemonger | Disk space analyzer. Works in a convenient graphical mode |
| Sysinternals | ---- | A limited set of sysinternal utilities from Mark Russinovich. Original program names retained |
| Undelete Plus | undelete | A program to recover deleted files. |
| Wdsmcast | wdsmcast | Console utility from Microsoft designed to work with a WDS server |
| WIM2VHD.wsf | cscript “Z:\Program Files\soft\wim2vhd.wsf” | Script to convert images from WIM files to virtual hard disk files |
| WinRar 3.71 | winrar | Multifunctional archiver |
List of programs from the sysinternals set (you can read about their purpose on the website http://technet.microsoft.com/ru-ru/sysinternals)
Accesschk
AccessEnum
Clockers
Contig
Dbgview
Diskext
DiskView
Du
Efsdumpo
Handle
Listdlls
Loadord
Ntfsinfo
Procexp
Features
Procmon
Delete
Streams
Strings
Tcpvcon
Tcpview
volumeid
Whois
Psexec
Psfile
Psgetsid
Psinfo
Pskill
Pslist
Psloggedon
Psloglist
Pspasswd
PSservice
Psshutdown
Pssuspend
All this software should be placed in the \mount\Program Files\soft\ folder
You can download the selection from here.
And besides this, I decided to change the standard “desktop” background. I indicated this term in quotes because it does not contain anything besides the background image, due to the lack of a graphical shell.
The background image is taken from the winpe.bmp file in the %systemroot%/system32 directory
You can download it from here
Editing the Windows PE Registry
As you know, in Windows OS registry files are stored in the %systemroot%/system32/config folder
To edit them, use the registry editor regedit.exe
To connect the Windows PE build registry, you need to run the “Mount Hive” command from the file menu of the “Registry Editor” program. In the dialog box, specify the assembly registry file and enter the section name.
After this, you can edit any Windows PE registry settings, taking into account its functional limitations.
Setting up Windows PE
Windows PE can be configured as needed by the administrator. There are several means for this.You can change the path to the work area and its size, configure an automatically executed command script, and more.
One of the configuration tools is the file Winpeshl.ini
This INI file is used to configure the shell program.
Does not exist by default, cmd.exe is used as shell
It’s a pretty good idea to set up the FreeCommander file manager as a shell, but I won’t do this, since in my opinion, the command-oriented interface is closer and more convenient for the administrator, and the graphical file manager is needed only for solving large-scale problems when cmd slows down.
Therefore, I will not create a winpeshl.ini file, but I will give an overview of its syntax
Please note that if you set up your own shell program, the startnet.cmd file will not be executed! Therefore, to increase the functionality of the environment (network and Plug and Play support), you should add the wpeinit command to the LaunchApps section.
In general, it is wiser to use the LaunchApps section, as it allows you to use command line options and run multiple commands. However, you should not use both sections at the same time, as this will lead to the configuration file not working.
AppPath = %SYSTEMDRIVE%\myshell.exe %SYSTEMDRIVE%\mydir\application1.exe, (option)
Exiting the shell program will reboot the PC. The winpeshl.ini file should be stored in the %systemroot%/system32 directory
To autostart applications or to automate any other actions in Windows PE, there is a file startnet.cmd. By default, it contains the launch line for the wpeinit program, which is designed to finally initialize the Windows PE environment, adding networking capabilities and support for plug-and-play devices. The startnet.cmd file is stored in the %systemroot%/system32 directory. Its syntax is standard for cmd files.
Also, using the DISM program, you can change the parameters of the work area, i.e. virtual disk created when Windows PE is loaded. In other words, the work area is the same as a RAM disk in MS-DOS
DISM /image:<путь >\mount /Set-TargetPath:<буква>:\ - sets the path to the work area. Default is X:
DISM /image:<путь >\mount /Set-ScratchSpace:64 - setting the size of the working area. Default - 32 MB.
It is worth noting that the working area size can be set to 32,64,256 and 512
There are also several other DISM commands for working with a mounted Windows PE image:
Dism/image:<путь>\mount /Get-Packages – display packages included in the image
Dism/image:<путь>\mount /Get-Drivers – display packages included in the image
Dism/image:<путь>\mount /Get-Intl – display the default language for the mounted image
Dism/image:<путь>\mount /Get-PESettings - display information about Windows PE settings
Dism/image:<путь >\mount /Add-Driver /driver:<путь к драйверу>– add a driver to the image
Adding drivers
To add a driver to an assembly in a more convenient graphical mode, you must use Windows Deployment Services
To do this you need:
- Open WDS Management Console
- Execute the “Add boot image” command from the context menu of the “Boot images” element of the console tree
- In the dialog box that opens, select an image
- Change the image name and description if required. I always indicate in the description the purpose of a particular assembly and the software included in it
- After completing the process of adding an image, from the context menu of the added image, call the command “Add driver packages to image”
- Set the conditions for selecting drivers, select the required drivers (meaning that they have already been added to the repository)
- Once the adding process is complete, execute the “Export image” command from the context menu of this image. Specify the path and name of the image, click the “Save” button.
I recommend adding drivers for the network adapters used in your organization, especially if they were released relatively recently. However, first test the assembly without drivers. If network adapters are “visible” anyway, then you should not add drivers, thereby increasing the size of the image.
Unmounting and optimizing the image
After completing all the above steps, you have a universal build of Windoiws PE, which you can use for various purposes, including use as a thin client.But in order for the changes made to the contents of the mount folder to be applied to the image, you need to unmount the image and confirm the changes.
This is done using the command
DISM /Unmount-Wim /MountDir:<путь>\mount /Commit The unmounting process consists of two stages - writing changes to the image, and clearing the mount folder.
At the end of the editing process, the size of the wim file will increase, but it can be optimized by updating the content indexes in the wim file.
This is done using the command
imagex /export<путь>\winpe.wim 1<путь>\ISO\sorces\boot.wim "Windows PE 3.0"
Working with Windows PE
Please note that Windows PE differs from the regular version of Windows primarily in its command-oriented interface. Do not close the Command Prompt window. This will restart your PC. You can open the task manager by entering the taskmgr command, Ctrl combination Alt Delete doesn't work. There is no standard conductor. However, if you added all the libraries listed above, you can use the Open dialog box from the Task Manager. Windows PE lacks the mmc console and snap-ins. Therefore, you should get used to working in console mode, or using third-party software.The size of the image created according to my instructions is 220MB; if you remove something you don’t need, the image can fit on a mini-CD disk. You can also put it on a bootable flash drive or use WDS to boot remotely. If Windows PE will be used as a thin client, then you can safely use diskless workstations for work.
Windows PE includes the wpeutil command, which you can use to:
Change the size of the paging file. (default, C:\pagefile.sys, 64 MB)
wpeutil CreatePageFile /path=
Note that if there is already a swap file in the specified local location, and the command creates a swap file that is smaller in size than the existing one, this may cause an error
Disable or enable the firewall.
wpeutil DisableFirewall|EnableFirewall
Reinitialize the network.
wpeutil InitializeNetwork
Set keyboard layout
wpeutil SetKeyboardLayout<код раскладки клавиатуры>
Set language
wpeutil SetMuiLanguage<язык>[;<язык>]
You can set multiple languages in priority order.
Set the user's regional settings.
wpeutil SetUserLocale<язык>[;<язык>]
You can set multiple regional settings in priority order.
Turn off computer
wpeutil shutdown
To restart a computer
wpeutil reboot
This is where I will finish looking at the wpeutil commands. For more information, see the help for this command, accessed by typing wpeutil /?
Bottom line
This completes the assembly creation process.System requirements for this build are minimal.
Processor – 1 GHz.
RAM – 384 MB.
The assembly created when writing this article can be downloaded from here.
I repeat, reminding you that this article is not strict instructions. This is the basis for further creativity. The only thing you are not allowed to do is disassemble and rewrite the Windows PE kernel code. Otherwise, it all depends on your imagination and requests. I continue to work on improving and increasing functionality in order to expand the scope of the environment. So, on the immediate agenda:
- Unlocking WiFI support
- IE9 integration so you don't have to use Firefox
- Putting things in order in system libraries, since many third-party programs do not work in Windows PE
- Writing a convenient graphical shell, similar to GNOME, but convenient and containing only what the administrator needs, or partial integration of the explorer.exe shell
- Management Console Integration mmc.exe
- Creating a multi-boot distribution of Windows PE, that is, you can choose what to download - a specific assembly of Windows PE, or setup.exe to install full-featured Windows
Good afternoon, dear blog readers, we finally got around to writing the third part of the article, in which we create our own build of Windows 10. If anyone is not reading from the beginning, then I am sending you to the first part in which . I would like to note that in the first part we already installed the ADK, but since Redstone was released and Microsoft now has its own ADK for each ten, I’ll show you where and how to download the one you need, who already has it, just scroll a little lower and go to the point with WinPE.
In the second part, we anonymized all personal data in Windows 10 redstone and turned it off in OOBE (out of box experience) mode. Now you and I need to get a wim image from this virtual machine, which we will then integrate into our distribution.
To solve this problem, we need the windows adk kit for windows 10, and some of its utilities.
- WinPE > a stripped-down version of the operating system from which we will boot.
- ImageX > wim image capture utility
This is what it looks like in the diagram, we boot from a bootable USB flash drive or ISO with the WinPE Windows 10 environment onto our virtual machine (The one that is turned off, you may have a reference computer), and using the command line and the imageX utility, capture the wim image. This wim image will essentially be your entire system that you previously prepared to create an image with Windows 10 redstone.
You can install this distribution either on another computer or another virtual machine, not on the one we sealed

So let’s download ADK for Windows 10 with you. You can download it from the link below. Please note that you need to download it specifically for your version of the assembly.
https://developer.microsoft.com/ru-ru/windows/hardware/windows-assessment-deployment-kit
Recently we installed windows 10 redstone, its version was 1607.

As a result, you will download a small file, one and a half megabytes, this is an online installer

Run adksetup.exe and the installation wizard window for the Windows adk kit for Windows 10 opens. You can change the installation directory, or simply download it for further deployment. (Download the Windows 10 Deployment and Assessment Toolkit for installation on another computer) I leave it as is and will install it on my computer.

We say no, since there is no need to participate in the Microsoft program.

We agree to the ADK license agreement and click accept.

We select two components:
- Deployment Tools
- Windows PE Preinstallation Environment
Click install. Please note that you will need access to the Internet and will download about 3.5 gigabytes.

The ADK download process will begin.

Everything was working fine for me, you can now look for ADK in our launcher.

Open the start button and find this item Windows kit
- Installation Manager
- Deployment Tool Environment
The next step will be for you and me to create an ISO Image with Windows PE, with which we will boot onto the reference computer to create an image of the operating system.

Create winpe for windows 10
Our task is to create an ISO image containing the winPE preinstallation environment for tens; to do this, open the Deployment Tools Environment as an administrator. To do this, right-click on the shortcut, then select Advanced > Run as administrator.

Since my future assembly has x64 architecture, I enter the following command
copype amd64 c:\winpe
where c:\winpe is the folder to be created on the C: drive, and amd64 is an indication of the architecture
copype x86 c:\winpe
For 32-bit systems, the command is higher, there is the x86 parameter. As a result of executing the required command, in your winpe folder, the entire directory structure necessary to create a bootable ISO with winPE will be copied.

Going to drive C: you will see these three folders in the parent folder:
- fwfiles
- media
- mount
Each of them has its own purpose, we will talk about this below.

Now we need to copy the necessary utilities into our winPE, go to the folder with the installed ADK.
C:\Program Files (x86)\Windows Kits\10\Assessment and Deployment Kit\Deployment Tools
Select the folder with your architecture, for me it is amd64. Go to the DISM folder and copy these two files from it:
- dism.exe
- imagex.exe
Copy path C:\winpe\media

We have already met. But we haven't covered the process of creating installation media with Windows PE. Therefore, as promised, we will try to create this very bootable Windows PE.
As I said, Windows PE is included in the Windows AIK. We will now look at creating such bootable media with Windows PE along with the ImageX utility, which allows you to capture and deploy images. And we will need this program soon.
How to create a Windows PE image?
First of all, we naturally need to install the package. If you have not changed anything, then by default it is installed in the folder " C:Program Files\Windows AIK", and if this is not the case for you, then adjust subsequent commands accordingly. We need to create a Windows PE build folder: the folder “ C:\Windows PE". You can create any other folder in any other place, it does not matter.
The main thing is not to forget to correct your addresses with those presented below. After creating the folder, open a command prompt with administrator rights and run the following commands and actions:
- cd c:\program files\windows aik\tools\petools\
Thus, we went to the folder in which the files necessary to create the Windows PE image are stored
- copype.cmd x86 c:\Windows PE
x86 is the architecture of this computer. Can also take values amd64 And ia64. ia64- these are computers based on processors Itanium, but you are unlikely to find one like this. Well, if you meet him, then you should recognize him. As you can see, the second path is where Windows PE is built. If you created a different folder for building Windows PE, then please adjust the path.
- copy "c:\program files\windows aik\tools\x86\imagex.exe" "c:\Windows PE\iso\"
Quotes are used here because there are spaces in the directory names. If you do not use quotes, the command line will read up to the first space after the unrecognized command. In the presented case, he will say that he does not know how to respond to the command
Copy c:\program
In the team itself, you need to know that X86 here also, depending on the computer architecture, it should be (if necessary) replaced with either amd64, on either ia6 4. This command copies the program to the Windows PE build folder.
How to create an iso image of Windows PE?
The build of Windows PE ends here, all that remains is to make bootable media out of it. And for this you need to create its iso image. To do this, you need to open the menu, find Microsoft Windows AIK, select the field in this folder Deployment Tools Command Line and in the command line window that opens, enter the command:
- oscdimg -n -bc:\Windows PE\etfsboot.com c:\Windows PE\iso c:\Windows PE\winpe_x86.iso
And as you can guess, in the folder C:\Windows PE there will be an iso image of Windows PE. This means that we completed the task and created a Windows PE image. Next we need Windows PE, after which you can use Windows PE.