Moving your system to an SSD is an effective way to organize your computer.
Content:Please note that depending on the version of Windows and the parameters of the purchased flash drive, transfer methods may vary.
What data can be transferred to SSD
Storing the operating system on an SSD not only speeds up its operation, but also improves the response of other programs and files that are stored on the disk.
The user can transfer the following types of data to a flash drive:
- Operating system . It is added to the SSD with all ready-made drivers and settings. In essence, a duplicate of it is created, which was previously stored on the HDD;
- Programs – choose yourself which applications you want to add to and which you want to leave on (HDD). We advise you to leave extensive programs for video editing and software development/testing on your computer - this way they will work many times faster;
- User files . This can be any of your documents, photos, music, videos and other types of data.
Components to move
To add used Windows to the SSD, the following objects are required:
If you only work with OS resources, you won't need to install a third-party utility to transfer.
Computer requirements
Before you perform any OS migration steps, make sure that your device meets all the minimum requirements that allow the utility to interact with the SSD and transfer large amounts of data.
The minimum requirements are shown in the following table:
| Parameter name: | Minimum value: |
|---|---|
| OS | · Windows XP (32x only); · Windows Vista (all bits); · Windows 7 (all bits); · Windows 8\8.1 (all bits); · Windows 10 (all bits). |
| RAM | At least 1GB |
| Types of drives you carry | GPT or MBR |
| Copied sections | Standard. Without the ability to transfer RAID arrays |
You can compare your computer's settings with the specifications listed above using the About window.
It displays correct data about the main hardware and software components of the device:
We use the built-in capabilities of Windows
Follow the instructions to transfer the operating system to a flash device:
- Open the window "Disk Management". To do this, enter the command diskmgmt.msc in the Run window and confirm the action;

Fig.3 - launching disk management tool
- Now you need to reduce the size of the OS on the disk. You can perform this action using the Shrink Volume function. All data will remain in the same state, only the space occupied on the HDD will decrease. Right-click on the “System” section, and then on “Shrink Volume”;

Fig.4 - Volume compression
- After successfully reducing the size of the OS, a free partition will appear in the disk layout. This means that everything was done correctly;
- Connect the drive to your computer and reboot the window "Disk Management";
- Now click on the “Wizard” tab and select “OS SSD Transfer” from the list;

Fig.5 - “Master” tab
- The standard utility for . Click on the "Next" button to go to the settings;
- Click on the item "Unoccupied space" and go to the next window;

Fig.6 – disk space selection
- Now you can independently change the size of the future disk or leave all parameters unchanged;

Fig.7 - changing the disk partition size
- After clicking the “Next” button, the wizard will begin moving the system. After completing the action, you can turn off the computer and the next time you boot, select the OS that is located on the SSD.
Windows will also remain on the hard drive. You can delete it or use it as a backup copy when you need to restore the system.

Fig. 8 - the result of a successful Windows move
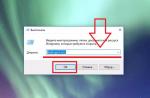
Don't forget to click on the "Apply" button in the upper left part of the window "Disk Management", otherwise all changes made will not be saved.
If you encounter error windows or freezes during the transfer, you should reset the settings, restart your PC, and try the transfer again.

Fig.9 - applying changes
Instructions for SSD from Samsung
The company has released an official utility that allows you to quickly move the OS from your hard drive to a purchased flash drive.
The utility is called Samsung Data Migration. You can download it for free from the company’s official website (section “Memory” - “SSD”) or using the disk that comes with the device.
The initial program window looks like this:

Fig. 10 – Samsung Data Migration utility window
Immediately after launching the utility, connect the SSD to your computer using the appropriate adapter. Click on the “Start” button.

Fig. 11 – analysis of a disk with an installed copy of Windows
After analysis, the program will automatically detect the SSD connected to the computer and display it on the screen:

Fig. 12 – reconciliation of the source and destination disk
If the space occupied by Windows on the HDD does not exceed the available space on the SSD, you can immediately begin the transfer by clicking on the “Start” button.
The automatic movement of all components will begin. The procedure can take from 30 minutes to 1.5 hours, depending on the version of Windows used.

Fig. 13 - successful system transfer
As a result, you will receive a success notification. Close the window and delete all Windows data from the HDD.
The advantage of using Samsung Data Migration is its simple interface. The program will do all the work for you and minimize the likelihood of errors or bugs appearing after transferring the OS.
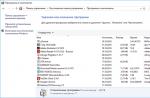
What to do if during the analysis stage you find that there is not enough space for the OS on the SSD? In this case, you need to clean Windows of unused data and applications.
You can do this directly in the Samsung Data Migration utility window.

Fig. 14 - Error. Not enough SSD space
After the error text appears (highlighted in red), click on the “Next” button and in a new window, delete all library files that are cluttering the system.
Clean the OS until the text appears in the main utility window "Ready to clone to SSD".

Fig. 15 - successful cleaning of unnecessary files
Acronis True Image utility
Acroins is the most popular utility for transferring an OS to removable media. It recognizes all SSD brands. The application is supported by all versions of Windows, so there will be no compatibility problems.
Remember, you can only use the application if your PC hardware has a disk from the manufacturer Acronis.
If a component is missing, the utility will not start, and the user will be notified that it is impossible to work with the program.

Fig. 16 – main window of the Acroins application
To move the system, connect the removable drive to the computer and click on the tile in the program window "Disk cloning"-"Copying partitions".
In the window that opens, select automatic movement mode. It is suitable for all tasks and copies data quickly.

Fig.17 - selection of cloning mode
All sections will be copied to . All data that was on the SSD before cloning will be deleted.
The disk itself will become bootable and can only be used to run operating systems installed on it.

Fig. 18 – copying process
Seagate DiscWizard utility
The utility completely replicates the Acronis interface. It must be used if your PC has at least one hard drive from the manufacturer Seagate.
To clone, you should follow the same steps as described in the previous paragraph of the article.

Fig. 19 – Seagate Disc Wizard main window
Changing bootloader configuration
After cloning the system, a copy of the OS will remain on the computer, and every time you boot, a window will appear with a boot selection. After the transfer, we recommend that you perform a number of actions:
- Without deleting the original copy from the HDD, test the operation of Windows on the HDD. There are times when the system starts to slow down and performance deteriorates. This happens extremely rarely and depends solely on the selected SSD. As long as the first copy is not deleted, you will always have the opportunity to return to using it and remove the OS from the SSD;
- Change your system bootloader settings.
The boot manager is a built-in component that helps your computer determine which installed operating system to run. You can also configure the startup order of hardware components.
Immediately after, the manager will show two systems with identical names - the original and the copied one.
If Windows runs normally on an SSD, you need to remove the version that remains on the computer’s hard drive. Follow the instructions:
- Restart your PC and run the version that was moved to the flash drive;
- Open ;
- Enter the command shown in the figure below, giving the OS copies on the SSD a unique name;

Fig.20 - command for renaming the bootloader component
- Now configure the dispatcher so that it always launches the new OS first. You can do this using the following command:

Fig. 21 – automatic launch of the cloned OS
- To remove the old system, enter the following command (where ID is the number of the old copy of the OS in the bootloader list):

Fig. 22 - deleting the original copy of Windows
Bottom line
As you can see, to transfer the system to a removable flash drive, you just need to use a universal utility for duplicating components or perform the move yourself.
Don't forget to delete the boot record of a disk that is no longer in use. If this is not done, errors may occur when turning on the OS.
Users who have migrated their system to an SSD note increased computer performance and faster completion of complex tasks and processes.
The loading speed of the operating system increases by 2-3 times.
Thematic videos:
How to connect an SSD to a desktop computer. Transferring Windows from HDD to SSD
Correctly connecting an SSD drive to a personal desktop computer. How to quickly transfer Windows OS from a hard disk drive (HDD) to a solid state drive (SSD). Practical advice, performance assessment after replacing with an SSD.
Laptop hard drive HDD SSD system transfer free
Laptop hard drive HDD SSD system transfer + system cloning program
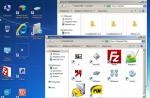
There are many instructions on how to transfer windows to an ssd, but they all relate to desktop PCs and the process of transferring the operating system to a laptop is technically different due to the architecture of the laptop itself. If on a desktop PC you can simply connect a new SSD drive to any SATA port, then on a laptop you will need one of two devices - also known as a hard drive pocket, with which you can install a second HDD in the laptop. Or a special one with which you can connect any SATA storage device via a USB port.
In the first case, it is quite logical to buy optibay along with a brand new SSD in order to install a replaceable hard drive in place of the DVD drive. If you use an optical drive and sometimes need it, you can buy an adapter with which you can connect the optical drive via a USB port. And in this way, with the help of optibay, you installed two hard drives in your laptop and now you can clone the drives. But what should you do if, for example, you have an ultrabook that initially does not have an optical drive or you do not need a second hard drive - in this case you need a SATA to USB adapter.
My main goal is to use free programs to transfer windows to ssd, or trial versions that allow you to clone without having to purchase the full version of the program. You will not need to look for any hacked versions of programs that can harm your computer.
How to transfer windows to ssd
We've figured out connecting the second drive, now let's move on to the actual transfer of windows from hdd to ssd.
Let's look at 3 free programs for transferring the system to an SSD: Acronis TrueImage, EaseUS Todo Backup, Samsung Data Migration.
To work with the Acronis TrueImage and EaseUS Todo Backup programs, it doesn’t matter what manufacturer or model of your SSD drive it is, and it doesn’t matter what hard drive the Windows or Linux operating system will be cloned from. The main thing is that the amount of data transferred from the hdd to the ssd matches, that is, if your “drive C” takes up about 180Gb of free space, and the new SSD drive is only 120Gb, then you will need to transfer or delete unnecessary files up to a volume of 110Gb, because for normal operation the system needs at least another 10Gb of free space on the “C drive”. The cloning process is similar for any Windows 7/8/8.1/10 system and any Linux distribution.
Transferring windows to SSD using Acronis True Image
Go to the site acronis.com and download the trial version of Acronis True Image
We install Acronis TrueImage itself on your laptop and launch the program. In the “tools” section there is a disk cloning function, but it is not available in the trial version of the program, so we will perform cloning by creating a system backup.
Go to the “Backup” section and select the backup source; you can first specify the name of your copy.
At this stage, you can select the entire computer with all disks or selectively, exactly those disks and partitions that contain the operating system.
-min.jpg)
By selecting “disks and partitions”, select the partitions that you want to transfer to your new ssd drive. In my case, “drive D” is not needed on the new SSD, so I uncheck it and leave the partitions only with Windows. Click on OK.
-min.jpg)
Now we select the location where the backup will be recorded. Click on “Browse” and set the location for the backup copy.
-min.jpg)
It is recommended to save the backup image to drive D, but if in your case it is not possible to save to drive D, you can save to drive C, and the restored copy on the new SSD drive will not contain the backup image itself.
-min.jpg)
Having selected a partition, click on “Create a copy” and wait for the process to complete; this will take from 10 minutes, depending on the volume of your data.
-min.jpg)
Now that a copy of your disks has been created, let's start transferring them to the SSD drive. Go to the “recovery” tab and click on “recover disks”.
-min.jpg)
You will be given a choice of disks or partitions. You can select specific partitions to restore or go to select disks and restore the entire disk.
-min.jpg)
My laptop has Windows 8 pre-installed with recovery partitions, which I also want to transfer to an SSD, so I’ll choose to restore the entire disk with all the partitions it contains. In the next window, select your SSD to which the system will be transferred. Finally, click on “Restore”. You can choose to turn off your computer after the recovery is complete.
-min.jpg)
As you can see, the recovery partitions were copied one-to-one; the Windows partition on the SSD drive became larger, because the remaining free space was redistributed to the disk with the operating system.
-min.jpg)
After the recovery is successfully completed, you can install the SSD in place of the old hard drive and turn on the laptop. If for some reason Windows does not boot from the SSD, go into bios and set your new SSD as the main device to boot the operating system.
Transfer Windows from HDD to SSD using EaseUS Todo Backup
Go to the site easeus.com and download the Todo Backup Free program. In the pop-up window, enter any email and in the next window download the free version of the program. Install the program on your laptop. At the first pop-up window that requests activation, click on the “Later” button.
The program in free mode provides two ways to clone your data “Clone” and “System Clone”.
-min.jpg)
In the "Clone" mode, you can clone only the entire hard drive, without the ability to select a specific partition of the disk. This approach may not be convenient if your HDD has a “D drive” that does not need to be transferred to a new SSD drive.
-min.jpg)
In the "System Clone" section you can clone partitions with the operating system. The program itself will select a partition with Windows and all additional partitions for its operation; you only need to indicate the target SSD disk to which the system will be transferred.
-min.jpg)
Transfer windows to SSD using free Samsung Data Migration program
Please note that the Samsung Data Migration program will only work if the system is transferred to a Samsung SSD drive.
Go to the site where you can download the program Samsung Data Migration and in the drop-down menu under the inscription “DATA MIGRATION” we download the Data Migration Software program itself.
Below you can see how to use this program. The guide describes all cloning steps and supported SSD media. The program works under any operating system and transfers Windows XP SP2, Windows 7, Windows 8 / 8.1, Windows 10 with any 32bit or 64bit.
Samsung Data Migration is completely free and very easy to use. When launched, the program itself selects the source disk with the operating system and the final SSD disk to which Windows will be transferred. You can easily add or remove additional partitions from the original disk, and resize them on the fly on the SSD disk.
-min.jpg)
There is also a very useful advanced cloning feature - if the size of the original disk is larger than the size of your new SSD. In this case, the program offers to exclude the files you have selected that will not fit on the new drive and after transferring the system to an SSD, the program will offer to copy these files to another drive.
-min.jpg)
I don’t see any point in further disassembling this program, because each step is very carefully described in the instructions that are attached.

Using an SSD drive instead of a hard drive increases the speed and comfort of work, making information storage reliable.
It is understandable that users want to change the OS from a hard drive to a solid-state drive.
How to competently clone information with all partitions onto a faster SSD drive without reinstalling the OS?
How to transfer the system to SSD
Read also: How to Migrate Windows to SSD - 6 Best Migration Softwares
There are several ways to transfer your system to an SSD. Let's look at each of them.
The first method is to transfer the user folder during installation.
To implement it, follow the instructions:
1 During the installation process, at the option selection stage (step #10), instead of choosing to use standard options or customize them, press CTRL + SHIFT + F3.
The computer will reboot into the so-called "Audit mode" , you will be logged into your built-in account. "Administrator" .

3 After completing the previous step, you need to simultaneously press the “Win” + “R” keys. A command line will open, where you need to enter “net stop wmpnetworksvc”. After that, enter again in “%windir%\system32\sysprep\sysprep.exe /oobe /reboot /unattend:d:\relocate.xml”

5 After completing the previous step, the User Folder will be transferred to your desired SSD drive.
- Create a response file using the instructions that were described in method number one.
- Run the System Preparation Tool in the same way as method number one.
- Despite the fact that the system is already installed, using this method will boot into audit mode and initial system setup; you do not need to enter the product key if such a request appears, just click the button "Skip" .
You will not be able to sign in to a previously used account, so during the user sign-in step you will be prompted to create a local account.
The new account will be used for initial setup after migrating the profile folder and can be deleted later.
Transfer OC from HDD to SSD
Read also: TOP 15 Programs for Windows disk defragmentation: choosing the best utility
Before starting cloning, it is necessary that the SSD capacity must exceed the one from which we plan to clone.
AOMEI Partition Assistant Standard Edition
Read also: TOP 10 disk cloning programs: their advantages and disadvantages
First of all, let's look at the steps of cloning an OC with an additional application that offers an easy way to copy an OC.
We suggest using the AOMEI Partition Assistant program as a sample. The application is freely available in Russian.
The functional program has a simple option for copying the OC to any disk. Download and install the program on your computer.

- Find the section on the panel "Masters" , located on the left, and select the line “ Transferring OC SSD or HDD".

- A window with information about the transfer opens, read the message and select the tab . Let's move on to the third step.

- We select the location where we will copy the operating system. Particular attention must be paid to the fact that the drive must be unpartitioned, there should be no partitions and, especially, file systems, otherwise you will end up with a blank list. After selecting the target disk, select in the tab .

- The next step is to mark the drive where we transfer the OC. You can adjust as necessary, but remember that the volume of the allocated partition should not exceed the one on which the OC is located. Here you can assign a designation to the created section, if necessary. When all parameters are set, select the tab.

- Here the program recommends finishing the installation of the AOMEI Partition Assistant application to copy the OC to the SSD drive. It is suggested that you study the warning. After a reboot, the OS may not load. In such a situation, be sure to disconnect the old disk or swap drives. Confirm your actions by clicking the tab "End" .

- To start moving, press the button.

- A window will open with a list of pending operations, click tab .

- An additional message follows: by clicking on the tab "Yes" , we confirm all our actions. Once the reboot is complete, the process of migrating the OS to the solid-state memory drive will begin. The duration of the action depends on several reasons, such as the size of the data being cloned, the speed of the drive and the capabilities of the computer.

Once the information is transferred to the computer, it will reboot again and you need to format the hard drive to remove the OS and the old bootloader.
- Works with all media
- Free
- Average Transfer Speed
Standard Windows tools
Read also: “NTLDR is missing” - what to do? Solving Windows boot problem
Another option is to copy the system to another drive using typical Windows tools.
This operation is possible only when the Windows program is installed at least 7. Otherwise, you cannot do without additional programs. Let's look at the OS transfer step by step using Windows 7 as an example.
The OC copying operation itself is not difficult using typical means - it is performed in 3 stages:
- Create an OC image;
- Create a boot disk;
- Unpack the OS image to another drive.
- To reproduce the OS image we use the Windows program . Open the menu "Start" , Then "Control Panel" .

- Click on the line "Archiving computer data" and start creating a Windows backup. In the window "Backup or restore files" There are 2 necessary commands that we will use to create an OC image, and follow the required link.

- We choose where we plan to write the OS image. There are two options: disk partition and DVD. It is worth recalling that Windows 7, even without additional programs, has a large volume. And when you decide to copy the OC to DVD, you may need several drives.

- Select the location where the image will be stored and click on the tab. The program recommends selecting sections for archiving. Since we are not copying anything other than the OC, we do not make a choice; the system itself has marked all the necessary disks. So let's click tab.

- We confirm the required archiving formats. Select the tab "Archive" and wait for the archiving to complete.

Request to create a disk
- After creating a copy, Windows recommends making a boot disk.

- Another way to create a disk using a string "Create a system repair disc" in the window "Archive or restore" .

- Initially, the boot disk creation program recommends selecting the drive where you need to install a blank disk for recording. Click and move on.
If your computer does not have writeable drives, you will not be able to burn an OS image to an optical drive.

- If the disk has files, the system will definitely ask you to format it. If the drive cannot be formatted, use a blank drive.

- To do this, open the window "My computer" and right-click on the drive. Mark the line.
- Further steps to create a drive for copying the OS on the selected drive, click the line and wait for the action to end. When finished, a window will appear:

Let's summarize. An OS image has been created, as well as a boot disk for transfer, let's move on to the final stage.

- We set the computer to reboot, and when finished, go to the boot device selection menu.
This is usually done by pressing the F11 key, but there may be other ways.

- The OS recovery environment is loaded. First, select the desired language (in our case, Russian), continue by pressing the tab "Next" . After this, a search for installed systems will begin.

- Once the OS image is made, we move the switch to the second position and continue by pressing the tab.

- Choose “Restoring your computer using a previously created system image” and continue by pressing tab .

- To set additional parameters as necessary, select the tab.

- At the final stage we will see brief information about the created image. You can start unpacking, to do this, press tab . We are waiting for the action to complete.

- The system reboots on its own after unpacking is completed. Transferring Windows to SSD can be considered complete.
- No need to download.
- The transfer process is very complicated
Hello, friends! I often had the opportunity to transfer Windows 7 and Windows 8 from a simple HDD to an SSD. I mainly used the following programs: Acronis True Image, Paragon Migrate OS to SSD, Paragon Home Expert 12 and AOMEI Partition Assistant Home Edition. The longest, but most interesting, way to transfer Windows 7 from HDD to SSD using the tools built into Windows.
- If you are interested in the article, visit where they are collected all publications on our site on the very interesting topic of transferring operating systems from one storage device to another.
The easiest and surprisingly fast waytransfer Windows 7 from HDD to SSDusing the program Paragon Migrate OS to SSD , with the help of this program I suggest that you today transfer the system to an SSD.
The program is paid, it costs a fortune 390 rubles. If you have Windows 8, then only the latest version of the Paragon Migrate OS to SSD 3.0 program is suitable for migration.
Website http://www.paragon.ru/home/migrate-OS-to-SSD

Important Note: If you have Paragon Home Expert 12 installed, then the Paragon Migrate OS to SSD utility is included in the package of this program.

If you want to transfer Windows 7 from HDD to SSD using Paragon Home Expert 12, go to the end of this article, there are short instructions there.
After transferring the operating system from the HDD to the SSD, you need to check the correct alignment of the disk partitions relative to the SSD architecture. Aligned partitions ensure maximum performance, speed and longevity of your SSD, trust me, this is very important. We will check the correctness of partition alignment using the free AS SSD Benchmark utility.
How to migrate Windows 7 from HDD to SSD using Paragon Migrate OS to SSD program
So, pay attention to the Disk Management window of my computer, there is a 250 GB hard drive, divided into two partitions, on one of them - drive (C:) there is a Windows 7 operating system, we will transfer it to a 120 GB SSD solid state drive, representing unallocated space.

Launch the Paragon Migrate OS to SSD program. Next.

The program automatically found my SSD drive and is ready to transfer the operating system. Pay attention to the item “Use all available space for the partition with OS”, be sure to check the box here and all the space on the solid-state drive will be allocated to create one new disk (C:) with the transferred Windows. After all, solid-state drives are used mainly only for installing the operating system.
If you click on “Please select what folders should be copied”, then you can select the folders you need to copy. I need the whole Windows, so I'll leave everything as is. 

Click on the Copy button.

A suspiciously short migration process occurs without any reboots.

I couldn’t help but remember the good old Acronis True Image, where you had to create an image of the operating system, then deploy it to an SSD, although Acronis works flawlessly, it takes several times longer.
While we were talking about Acronis, the Paragon Migrate OS to SSD program had already transferred our Windows 7 to an SSD. The final window in which we are offered to boot from the SSD. Let's reboot.

Now you need to enter the BIOS and set it to boot from the SSD. Select Boot Menu (F8).

Using the arrows on the keyboard, select our solid-state drive and press Enter. The computer is booting from the SSD.

Note: What I like about UEFI BIOS is that it has its own bootloader, which accommodates all existing bootloaders and will never get confused in them. The UEFI BIOS remembers the last operating system you loaded and will load it exactly next time. Switching between operating systems (no matter how many of them you have installed) is simple, fast and error-free.
If you have a regular BIOS, then the transfer should also occur without problems. The only thing you need to do is to find in it the parameter responsible for the primacy of Hard Disk Drives (AMI BIOS) or Hard Disk Boot Priority (AWARD BIOS) and set your SSD as the first device. How to find these parameters can be found in.


I think you managed it and booted from the SSD into the transferred system. We go to Disk Management and see this picture - the system has been transferred.
SSD drives are becoming more and more popular. This is due to an increase in their reliability, a decrease in cost and an improvement in the characteristics that they possess. Therefore, it is great for installing an operating system. But in order not to reinstall it again, you can transfer Windows 10 from HDD to SSD, saving all the data.
Why transfer?
If you decide to use an SSD as a drive to store data (photos, video or audio files), it's a moot point since these devices have a limited overwrite limit. Active use will very quickly destroy it, unlike the HDD, which has been serving me for over 10 years and is still in excellent condition. But it has a SATA II connection interface, a small buffer size and low response time. Therefore, it was decided to purchase a solid-state drive to transfer Windows 10 to it.
SSD drives are great for OS installation because they have the following advantages:
- high read/write speed;
- silent operation;
- low level of heat generation.
In addition, Windows is “static files” that do not require constant rewriting, but only reading. Therefore, if you install the OS on a solid-state drive, this will speed up its operation several times and at the same time the resource of the device itself will be used very slowly.
Another reason why I decided to install an SSD in my PC was participation in the insider program.
Microsoft releases a new build for Fast Ring approximately once a week. It took about 1-1.5 hours to install it on an old HDD. If we add to this the startup time of Windows - about 1.5-2 minutes, it becomes clear that the solution has long been obvious.
SSD selection
Details on how to choose an SSD disk for a computer are described in the article “”. In my case, three parameters were priority:
- number of rewrite cycles before failure;
- memory type;
- manufacturer.
As for capacity, if you are going to use the SSD only to install Windows 10, choose models from 120 GB and larger.
Why shouldn't you buy 64 GB drives?
There are several reasons.
- For stable and normal operation of the SSD disk, it must have up to 20% free space of the total volume. If you use a 64 GB model (in fact, its volume will be slightly smaller - 58-60 GB), only 40-45 GB will be available for active use. Microsoft's recommendations for free disk space for Windows 10 are 16 GB for 32-bit and 20 GB for 64-bit OS. And this is already half of the specified space.
- After installing a new build or updating Windows 10, a copy of the old OS remains on the system disk, which is used during recovery. This is an additional 15-20 GB.
- In addition to the browser and audio and video players, the average user uses various programs and utilities. Installing them also requires quite a lot of space (for me it’s about 8 GB). For a gamer or person involved in video processing, you will need even more free space on the system disk.
Therefore, in modern conditions, the minimum size of the SSD drive that is used in the device to install the OS is 120 GB.
Connection and setup
The transfer process will be shown using a solid state drive as an example. 
- Turn off the computer → disconnect it from the network by unplugging the plug from the socket → press and hold the PC power button for 4 seconds (this will completely cut off the power to the device).
- Open the case and install the SSD. The new cases have bays for installing SSDs in the 2.5-inch form factor. Older models do not have them, so you can use a special adapter frame.

- Connect power and SATA cable to the SSD → close the case.
- Turn on your computer → enter BIOS → set the AHCI SSD drive mode → save changes and launch Windows 10.

- RMB on the Start menu → Disk Management.

Important! The table at the bottom of the window will display the connected SSD drive. It will be marked in black and labeled “Not distributed.”

- RMB on SSD → Create simple volume → Next.

- Set the maximum simple volume size → Next.

- Select the volume letter → Next.

- Set the radio button to “Format this volume as follows” → leave all default values → Next → Finish.

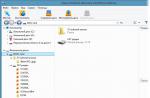
After this, Explorer will display a new drive under the letter that you set in the settings.
Transfer Windows 10 to SSD
To transfer Windows 10 to a solid-state drive, we used a program that has a wide range of functions. The choice fell on it because the SSD included a key for free activation. However, the program is paid, so it is not suitable for everyone.
There are other programs (paid and free) that can be used to transfer (clone/copy) a Windows partition to another drive:
- Seagate DiscWizard (works if the device has a Seagate drive installed);
- Samsung Data Migration (designed to work with Samsung solid-state drives);
- Macrium Reflect is a free program for cloning an entire disk or its individual parts, which has an English interface;
- Paragon Drive Copy is a paid program that has wide functionality.
The interface of all programs is different, but the operating algorithm is the same: they transfer data from one disk to another while maintaining all settings. There is no need to study instructions for their operation - everything is done so that the user intuitively understands what he is doing.
- Launch Acronis True Image → Tools section → Clone disk.

- Select the cloning mode: automatic or manual.
Good to know! In order not to worry that you will do something wrong, select the “automatic” mode and the program itself will transfer all the data from one disk to another. In this case, the SSD drive must be no less than the amount of data stored on the HDD. To configure transfer settings, select the “manual” setting.
I chose the "manual" cloning mode to transfer only the OS.

- Specify the source disk from which data will be cloned.

- Specify the drive to transfer information to.

- Exclude files that do not need to be cloned to the SSD. To transfer only the OS disk, check the boxes for files on other disks to exclude.

Important! The process of calculating information can take a long time (about 15-20 minutes).
- Change the disk structure if necessary. In my case, it was left unchanged.

- Review all source data → Proceed.

After completing the preliminary operations, the program will ask you to restart your computer. Then, instead of starting the OS, the Acronis True Image program window will open and display the cloning process. Wait until the operation is completed and then the computer turns off.
Selecting the primary drive in BIOS

Setting up the OS after the transfer
More details on how to configure an SSD disk after installation on a computer are described in the article “”. In general, you need to check the following parameters:
- whether the TRIM function is enabled;
- Is disk defragmentation disabled (it is not needed due to the way solid-state drives operate);
- Is file indexing disabled?
As for the hibernation file, many advise disabling it in order to reduce the amount of information written to the SSD drive to extend its “life.” I didn’t turn it off because I often use this mode at work. But you can do as you see fit.
Please note that due to the settings that I specified during cloning, disks will be created on the solid-state drive, as was the case on the HDD. You can merge them in the Disk Management utility.
- RMB on the Start menu → Disk Management → select SSD drive.
- RMB on an empty disk on a solid-state drive → Format.

- RMB on this disk → Delete volume → Yes.

- RMB on this disk → Delete partition → Yes.

Delete Windows 10 files located on the HDD by formatting the drive. This will eliminate confusion in the future and free up space for storing files.
Results
| Parameter | Before | After |
|---|---|---|
| Windows 10 boot time | 1.5-2 minutes | 17-20 seconds |
| Windows 10 update time | 1-1.5 hours | 20-30 minutes |
| Program/application response time | low (3-15 seconds) | high (1-5 seconds) |
| Data copying speed (within a separate disk) | 50 Mb/s | 300 Mb/s |
In addition, in the Winaero WEI tool, which calculates OS performance (similar to how the system score is determined in Windows 7), the “Primary Hard Drive” indicator increased from 5.6 to 7.95. (you can find out how else to determine the performance of the OS in the article “Determining and increasing the performance of a Windows 10 computer. “Pleasant” surprises
The warranty period is 3 years with a total number of written bytes of 113 TB. The volume is quite large. BUT!
Every day, much more information is written to disk than it might seem. This is service information, wear leveling algorithms. Thanks to them, the same SSD memory blocks are not constantly rewritten. Periodically, unused (or rarely used) files are moved to areas of the drive that are actively used. The free space that appears after redistribution is then used to record new information. This is a cyclical process that happens constantly.
As a result, in the worst case, 1 GB of useful data accounts for 1.5 GB of recorded information. Plus data cache in browsers and other information. As a result, on average, about 15 GB of information is recorded on my SSD every day. But even with such indicators, the resource of the solid-state drive will last approximately 15-18 years.
For people who actively write/erase data, this figure will be significantly lower. But even in this case, the relevance of the purchased SSD drive model will disappear faster than it fails. So stop believing the myth that SSDs are unreliable! In modern conditions, they are the best choice for installing Windows 10.