Business Solutions
If using an online recovery service is not possible, you can download one of the following utilities:
In addition to the ability to recover information at home, they also provide unlimited capabilities for recovering large numbers of files, professional support and many other options useful to corporate users.
Video guide to using the OfficeRecovery Online service
“Due to a RAID controller failure, we lost the ability to boot our ESXi server. It seems that although the RAID 5 hosting the VMDKs was okay, when the RAID 1 boot drive crashed, it caused the VMDKs to corrupt.
We used your tool to pull about 6GB of user data out of the VMDK. Worked like a charm.”
Director, IT Infrastructure
“After a power outage one of my VMWare servers wouldn't boot. I was able to recover the data with MediaHeal and was back in business in just a few hours. Really it took longer to find the right recovery tool than it did to get the server recovered.”
“I just purchased MediaHeal for Virtual Drives and it worked perfectly. I had to email and tell you how much I love your product and will be telling everyone I know how awesome this product is. I was able to recover some corrupted VHD files without any problems. Thank you for saving months of data in hours.”
About OfficeRecovery for Virtual Drives Online
OfficeRecovery for Virtual Drives Online recovers damaged virtual drives (.vhd, .vmdk, .ova, .xva).
Supported virtual disk formats:
VMDK, VHD, IMG, OVA, XVA with FAT or NTFS file system
The recovered data is saved in a new user-selected location to avoid damaging the original data.
After the file recovery is complete, you can evaluate the demo results and register to receive the results for free or purchase them immediately. If the file could not be recovered, you can order its analysis by our experienced team of specialists.
Examples of using
The service for repairing damaged virtual disks can be used when the virtual disk does not open in applications and you see errors or warnings during opening.
In order to quickly recover a damaged vhd, vmdk, ova or xva file, upload a virtual disk/image to our cloud recovery service using the form on this page.
It is important to note that if the recovery process is successful, you will end up with ready-to-use virtual disk/image data. You can get fully recovered virtual disk/image data by choosing paid or free options.
Standard features:
- Support for virtual disks created using Xen, Citrix XenSource (Citrix XenServer, Citrix Xen)
- Support for VMDK disks created using QEMU and Sun xVM VirtualBox
- Support for binary disks or partition dumps (RAW, IMG)
- Restoring damaged file systems (FAT, NTFS) of virtual disks
- Support for VHD disks created using Microsoft VirtualPC, Sun xVM VirtualBox
- Support for VMDK disks created using VMware Workstation, VMware Player, VMware Server, VMware ESX Server
- Support for virtual hard disks (*.vhd) of fixed, differentiated and dynamic types
- Supports the following types of virtual machine disks (*.vmdk): monolithicSparse, monolithicFlat, twoGbMaxExtentSparse, twoGbMaxExtentFlat, vmfs, vmfsSparse, streamOptimized
- Recovering VMDK snapshots
- Support for Xen Virtual Appliance VM Import Format (*.xva, *.ova) compressed and regular types
- Support FAT12, FAT16, FAT32, NTFS 1.0, NTFS 2.0
Description of file recovery using OfficeRecovery for Virtual Drives Online
Corrupt virtual disks are files that have suddenly become unusable and cannot be opened. There are a number of reasons why a virtual disk can become corrupted. And in some cases it is possible to fix and restore a damaged vhd, vmdk, ova, xva (Virtual Drives VMDK, VHD, IMG, OVA, XVA XVA with FAT or NTFS file systems) file.
If your vhd, vmdk, ova or xva virtual disk suddenly becomes corrupted or unopenable in the program in which it was created, do not despair! You no longer need to buy expensive software to restore just one damaged virtual image. OfficeRecovery for Virtual Drives Online presents you with a new online service that will help you recover a damaged virtual drive instantly. All you need to do is simply download the damaged vhd, vmdk, ova or xva file using a browser, evaluate the quality of the recovery demo results and choose the solution that suits you best.
OfficeRecovery Online for Virtual Drives supports virtual images VMDK, VHD, IMG, OVA, XVA with FAT or NTFS file systems. The recovered data is saved in a new user-selected location to avoid damaging the original data.
OfficeRecovery for Virtual Drives Online offers free and paid options to get complete recovery results. The free option means that full results can be obtained absolutely free within 14-28 days. All you have to do is simply sign up for free results after the virtual disk recovery process is complete. If you need to get a recovered vhd, vmdk, ova or xva file immediately, instantly, you need to choose a paid option instead of a free one.
What to do if there is no recovery data identified in your virtual image? You can request a non-refundable analysis of your file by our experienced technical team. In some cases, data recovery is only possible manually.
Recovery from image implies the replacement of all personal data on your hard drive with files from the image or in other words, if you used the Data Archiving tool to create an image of the local disk (C:), then by deploying this image in place, you will replace all your existing files on this disk with data from the image.
The article is written as a continuation, where we learned how to create an Image of the Windows 7 operating system in case of a serious malfunction; here we will restore our data to its place, even when our Windows 7 will not boot at all.
Note: If you are interested in the process on DVDs and a portable USB hard drive, as well as on an old IDE hard drive (connected to a laptop via a special adapter), follow the link and read.
Recovery from image
According to my observations, serious users install Windows 7 and divide the hard drive into two volumes and call them, for example, (C:) and (D:). On the drive (C:) they have the Windows 7 operating system, and on (D:) all their personal data. Next, they create a disk image (C:) and save it on another partition of the hard drive, that is, on (D:). Disk (D:) is not archived, because according to users, it usually happens rarely, which actually happens.
And then there was a problem with the Windows 7 OS, the system takes a long time to load, freezes and is unstable, our users, in the language of motorists, kick the wheels for a while (use a rollback using restore points), but the car still does not drive, and Windows 7 does not work ok then they restored from image drive (C:) and a working Windows 7 from the archive replaces the inoperative one, that’s all.
- The most serious ones create an image of both the drive (C:) containing the operating system files and the drive (D:) with personal data. You may notice that if you have one hard drive, where then should you store the image of the two partitions (C:) and (D:)? For this purpose, an additional SATA hard drive or a portable USB hard drive is specially purchased, which must be formatted in the NTFS file system. Restore In this case, your data from the image must be carefully, together with the faulty Windows 7 located on the drive (C:), you can replace all your files on the drive (D:), which means you first need to copy everything you need, for example, to the same The most portable USB hard drive. All this is written and shown in the article Creating a system image, now let's restore.
How to restore Windows 7 from the archive image we created
Windows 7 still works and starts, but with significant errors (below we will look at cases when the operating system does not load at all), rolling back using restore points did not lead to success, and we decide to restore the entire operating system from a disk image (C:).
Start -> Control Panel->Backing up computer data->
Restore system parameters or computer->

Advanced recovery methods->


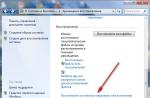
in this dialog box, you can select the Archive button and the archiving setup will start, using it, you can create an archive of your data from those disks on which you will deploy the system image, thereby saving them, read more in our article. If we copied our data previously, click the Skip button.

Restart, the computer will restart and this keyboard layout selection window will appear

Russian

Selecting a user


The second option, you and I cannot boot into a running Windows 7 at all, how then can we start recovery from the image?
We turn on the computer and, for example, a black screen or a blue screen appears with a critical error. Launch the Windows 7 Recovery Tool, press F-8 in the initial phase of booting the computer. A menu opens, select Troubleshooting your computer.

The third option is the most difficult, but you can handle it: the screen is black, Windows 7 Recovery Tool cannot be launched, Additional download options are not available, nothing happens when you press the F-8 button. How to get to the created image with a working Windows 7. In this case, only the Windows 7 Recovery Disk, on which the Recovery Environment is located, will help us.
- Note: you can learn how to create and how to use a Recovery Disk from our article. Also in this case, the Windows 7 installation disk can help, it also contains a recovery environment.
So I'll show you how to restore Windows 7 from an image using a recovery disk. We insert it into the drive, reboot, the BIOS should be set to boot from the drive, then the System Recovery Options program starts.

Press Enter quickly, otherwise the prompt to boot from the disk will disappear.

The recovery environment starts, again you need to select the keyboard layout,
Ispol download the latest system image and our Windows 7 is restored.
The system image is always created with a VHD extension and is located in the WindowsImageBackup folder.

We use the system image as an additional hard drive
For example, we need to extract a file from an image, and not restore the entire image; we just need to connect our image as a virtual hard disk in Disk Management.
Start -> Computer -> right-click and select Manage from the context menu -> Disk management->Action -> Attach a virtual hard disk

Veeam Backup & Replication allows you to restore individual files of a virtual machine - VHD, XML, etc. . - directly from its backup copy. This feature can be useful if one of the virtual machine files has been deleted or damaged and you want to restore it.
You can restore virtual machine files to the state of any restore point. You can select the original or any other location as the location of the recovered files. There is no need to restore the virtual machine image first.
In this section
- Operation conditions
- Basic steps
- Final actions
Virtual machine files can be recovered from anycorrectly createdbackup. Open presentation Home and click on the node Backups in the object hierarchy. Deploy the backup job and ensure that there is at least one recovery point for the virtual machine.
To restore virtual machine files from a backup:
- Open a view Backup & Replication.
- In the object hierarchy, click on the node Backups > Disk . In the workspace, expand the desired backup job, right-click the virtual machine and select Restore VM files.
- At the Restore Point step select the desired restore point.

- At the Restore Destination step in the Server list select the server to which you want to restore the virtual machine files.
- In the Path to folder field specify the path to the folder where you want to save the recovered files. For example, C:\Restored .
- In the list of VM files to restore set the flags next to the files you want to recover.

- At the Reason step specify the reason for restoring the virtual machine files and click Next.
- Click Finish , after which the process of restoring the virtual machine files will begin.
- Open a view Files.
- In the object hierarchy, expand the file structure tree of the machine to which you restored files.
- Select the desired folder and make sure that it contains the recovered files.

The Windows 8 operating system provides extensive data backup capabilities, including management capabilities and functionality that allows. The concept of the system developers is this: functionality File History needed for convenient and quick everyday recovery of user data, the image of the system is created not so often and will allow you to completely restore the partition data (including system files) to a certain one with working OS parameters.
It is recommended to create a backup copy of the system image before making changes to the hardware configuration of the computer, when performing a system update, installing new drivers, etc. Having a backup copy of the system image will allow you to roll back to a working Windows state at any time if something goes wrong. However, when restoring from such an image, all existing information on the system disk is overwritten by the image files. What should you do if you only need to restore some files from the system image?
Fortunately, this task is quite simple. The fact is that the standard system for creating a system image backup in Windows 8 is based on the concept virtual disks (Virtual Hard Drive). Those. images are recorded and stored as virtual disk files in the (Virtual Hard Drive) format. Such virtual disks can be easily mounted using standard Windows 8 tools and worked with them as with regular system disks. By mounting such a disk into the system, the user will be able to restore individual files and directories from the system image backup.
Connect a VHD disk with a backup copy of the system image
System image backup is usually performed to a separate physical disk or network folder. Therefore, first of all, you need to connect the media with a backup copy of the Windows 8 image to your computer (or connect a network folder).
Open your computer management console Computer Management and go to Disk Management Manager Storage->Disk Management(the same console can be called from the WinX menu by pressing the key combination Win+X and select item Disk Management). To mount a virtual vhd disk, select Attach VHD on the menu Action.
In the window that appears, click the button Browse and specify the path to the vhdx file. This file is stored on the disk containing the system image backup in a directory named in the following format :\WindowsImageBackup\\Backup xxxx-xx-xx xxxxxx. In our example, the full path to the vhdx file is as follows: F:\WindowsImageBackup\Oberon8\Backup 2013-08-14000203.

This directory contains two vhdx files, select the larger vhdx file (in our example, the file size with the image is about 120 GB).
Note. If, when performing a backup, an image of not only the system disk was saved on the computer, but also other disks, then this directory may contain more than 2 vhd files, and it is not at all necessary that the maximum size disk will contain an image of the system disk. You can understand vhdx disk image files only by their contents, for which you will have to mount them all in the specified way.
Once the virtual disk is mounted, it needs to be assigned a drive letter. To do this, right-click on the disk and select the menu item “ Change Drive Letters and Path»

In the window that opens, click the button Add and assign the drive any letter, for example G:.

After this operation, a new disk will appear in the system, to which the letter G:\ is assigned. Open it in Explorer or any file manager and find the files you need to recover.

Advice. User documents (photos, videos, music and other documents can usually be saved in the user profile in the G:\Users\(user_name) directory.

After you have found and copied the necessary files, you can disconnect the external disk, as a result of which the virtual vhd disk will also disappear from the system.
Individual files from the system image can be restored in exactly the same way in Windows 7.
Read, how to restore a Hyper-V virtual machine that has been deleted or the contents of a Hyper-V virtual machine disk. Which built-in tools of the virtual machine or third-party programs to use to restore it. Programs for creating virtual machines are designed to create on one computer, in addition to the main operating system, one or more virtual machines with their own independent operating systems and disks, space for which is allocated on the main disk of the computer.
There are many third-party virtualization programs, but the most popular among users are VMware Workstation and Oracle VirtualBox. To enable virtualization of its own operating systems, Microsoft has also developed a tool – Windows Virtual PC. But, Windows 10 already introduces a new generation virtualization application - Manager.
Content:
Hyper-V Manager is easy to use, but its only drawback is the ability to create virtual machines only with Windows operating systems.
Support for virtual machines using the Hyper-V tool is available in Windows 10 Pro and Enterprise editions. By default, it is not activated and to use it, the tool must be activated and connected.
For this:

Hyper-V virtual machine system files
Unlike other virtual machine managers, Hyper-V does not store all virtual machine files (system files and virtual disk file) in one folder. They are stored in different places:

These folders are set by default by the tool, but you can change the location of these folders if desired.
It should be noted that the main files responsible for the configuration and data of the virtual machine, and thus for its performance, are:
- *.vhdx– virtual machine disk file. Has the name that was assigned to the virtual machine when it was created. Default location:
C:\Users\Public\Documents\Hyper-V\Virtual hard disks - *.vmcx– file of virtual machine configuration parameters. Default location:
C:\ProgramData\Microsoft\Windows\Hyper-V\Virtual Machines
If these files are restored, it is possible to restore a working virtual machine, including all files from its disk.
How to recover a Hyper-V virtual machine that has been deleted
Virtual Machine Export/Import Function
In case a user uses the Hyper-V virtual machine to work with important data or it is valuable to him for other reasons, Microsoft provides the ability to create a backup copy of the virtual machine. The Export and Import functions of a virtual machine using Hyper-V Manager are designed for this purpose.
To export a virtual machine:

Moreover:

To import a virtual machine:

Recovering a virtual machine with Hetman Partition Recovery
If for some reason a virtual machine is deleted or lost from the user’s computer or other storage medium and needs to be returned, this can be done by restoring the disk and configuration files of the virtual machine, and then importing them into Hyper-V using the Import virtual machines function.
For this:

How to recover the contents of a Hyper-V virtual machine disk
As we have already stated, all files that are saved on the disks of the virtual machine are located in .vhdx virtual disk files. Hard drive data recovery program Hetman Partition Recovery has the function of mounting virtual disks and restoring data from them.

If for some reason your virtual machine has lost its functionality, and important files were stored on its disks, they can be restored. For this:

How to recover a Hyper-V virtual machine disk file from the virtual machine itself
As a result of the experiments, it was discovered that files that were deleted or lost inside the virtual machine cannot be restored.