On July 28, Microsoft began sending Windows 10 installation files to the computers of users who reserved an upgrade to the new operating system. The next day, users were able to install Windows 10 on their computers through Windows Update. After completing the procedure, many noticed that system partition I lost several tens of gigabytes of free space. Find out how to free up space on your system after installing Windows 10 in our instructions.
The disappearance of gigabytes is explained simply: during the update process, the OS saves system files the operating system from which the upgrade was made, so that if necessary, you can return to it without problems. For Mac users who initially did not allocate too much space for the Windows partition, this can turn into a real problem.
If you have finally decided that you will stay on Windows 10, then it makes sense to delete temporary files by following a few simple steps. We emphasize that what is described below should only be done if you do not plan to roll back from Windows 10 to a previous version of the OS.
How to free up space after upgrading to Windows 10:
Step 1: Click on the search button on the taskbar, find the Disk Cleanup utility and run it. How Alternative option, you can press Win+R, enter the command cleanmgr and click on the “OK” button.
Step 2: In the small window, select the system partition and click OK.
Step 3: In the window that appears, click “Clean up system files”.
Step 4: Select the system partition again and click OK.
Step 5: In the window that appears, scroll through the list, check the box next to “Previous Windows installation(s)” and click on the “OK” button.
Upon completion of this procedure, you will receive several tens of gigabytes of free space.
Many people ask me a very pressing question - how to clean the C: drive with Windows - on the system Windows disk There is too little space left, you need to install Windows 10, there is not enough space for applications, etc.? Windows takes up 15-20GB of disk space, and how can I clear the Windows folder of unnecessary files and reduce its size to the original 10GB? Upgrading to Windows 10 requires more free space on the C: drive, how can I clear it to install Windows 10?
Yes, indeed, for installation Windows update 10 requires 8GB of free space on the C: drive, and for owners of devices with system disks on 16GB, 32GB and even 64GB, very often the issue of free space on C: it becomes very painful, then what Windows folder"swells" up to 20GB...
go through the list installed applications and remove everything unnecessary - through Control Panel and Settings Windows systems 8.1.
Control Panel / Programs / Unistall Programs – to view and remove classic Windows applications
Key combination Win+C / Settings / Change PC Settings / PC and devices / Disk space/ See my applications’ sizes - to view and remove modern Windows applications (installed from the Microsoft Store). When you click on an application in the list, the Uninstall button is displayed to remove an unnecessary application

Copying the entire contents of the directory C:\Windows\Installer to drive D: (conditionally in the folder D:\WinFiles\Installer) - run the command from the CMD (Administrator) command line robocopy c:\Windows\Installer d:\WinFiles\Installer /E /V /Z /ETA
After successful copying, make sure (how to do this - ) that all files have been copied and remove the Installer directory from the c:\Windows folder
create in the c:\Windows folder a link to the new directory with the installation files that you transferred (conditionally to d:\WinFiles\Installer) - run the command from the CMD (Administrator) command line mklink /D c:\Windows\installer d:\WinFiles\Installer
A SMALL ADDITION to cleaning up the C drive:, which is not in this video (but the question has already been asked
Does it load quickly? HDD or solid state drive? Want to free up space on your Windows 10 PC? In this guide, we will discuss all the ways to free up hard drive space in Windows 10.
You can free up gigabytes (GB) of disk space on your computer - it's not difficult at all. In this article we will list everything possible ways Free up space on your Windows 10 PC.
Here are 16 ways to free up disk space in Windows 10.
You know about this and have probably already done it. If not, delete unnecessary programs and applications at once to free up disk space. Some of the programs may reserve GB of valuable disk space.
By going to the application " Options» → « Applications» → « Applications and features", you can view the disk space occupied by applications and programs. You can also uninstall apps and programs directly from this page.
You may want to consider deleting not-so-useful installed apps to free up disk space in Windows 10. Refer to our Windows 10 guide for instructions.
2. Turn off hibernation mode to free up disk space
Before you start, let's clarify that we only suggest disabling the hibernation feature if you don't use it or don't know what the hibernation feature is.
The hibernation feature creates a file when enabled hyberfil.sys, which takes up the size of RAM, on your PC. For example, if your computer is equipped 8 GB RAM, the sleep mode function takes about 7 GB disk space, decent size, isn't it.
Remember that the feature is enabled by default in Windows 10, but it is not added to the Start menu by default. So make sure it is disabled if you are not using it.
Here's how to turn off the hibernation feature.
Step 1: Open a command prompt as administrator by typing CMD in the search field "Start/Taskbar", right-click the element "Command line" and select "Run as administrator".

Step 2: At an elevated command prompt, enter:
and press the key Enter to turn off the hibernation feature and free up space.
You can use instead Command line - PowerShell
3. Disable or delete system restore points
System restore points come in handy if you want to restore your Windows 10 PC to an earlier date to fix possible problems. Depending on the number of restore points and the allocated space for the Create System Restore Point feature, this takes up GB of disk space. Again, disabling System Restore is not recommended, especially if you know how to use it!
But there is one thing, you can delete all restore points except the last one if you do not want to disable this feature. There are also ways to delete individual restore points.
Here's how to disable System Restore.
Step 1: In the search field Start/Taskbar enter and press key Enter.

Step 2: Go to the tab "System protection". In chapter "Protection settings" select the drive and click the button "Tune".
Step 3: In the dialog box that appears, select and click the button "Apply".

Repeat steps 2 And 3 for other drives to completely disable System Restore for all drives and free up disk space in Windows 10.
4. Empty Trash
You probably know that when you delete a file in Windows 10, by selecting the file and then pressing the Delete key, the file is moved to the Recycle Bin. While the file is in the Recycle Bin, it continues to occupy disk space. You can recover valuable disk space by allocating less space on the drive for the Recycle Bin and delete all files from the Recycle Bin.
If you frequently use the Shift + Del keyboard shortcut to delete files without moving the files to the Recycle Bin, you should probably disable the Recycle Bin. We also recommend setting up Windows 10 to automatic removal old files from the trash.
Same as old versions software, old drivers are not needed and take up disk space. Luckily, Windows 10 allows you to easily remove old device drivers. Please see our instructions for removing old device drivers in the Windows 10 Guide for step by step instructions.
Step 1: Open This computer. Right-click on the drive where Windows 10 is installed, and then click "Properties".
Step 2: Click the button "Disk Cleanup".
Step 3: In the next dialog box, click " Clean system files".
Step 4: When you see the results, check the box next to "Device Driver Packages" and press the button "OK" to remove the Driver Packages files.

6. Delete the Windows.old folder
If you recently upgraded to Windows 10 from Windows 7/8.1 or upgraded to latest version Windows 10, you will most likely have a folder called Windows.old in the root directory of your system drive.
The Windows.old folder contains data from previous Windows versions and it takes no less 10 GB disk space. If you are sure that you do not need the data from previous Windows installations, you should delete the Windows.old folder to free up a significant amount of disk space.
10. Deleting unused user accounts
The new user account usually takes up very little disk space. Depending on the number of files and size, a user account may take up several MB or GB of disk space.
In short, if you have an unused user account on your PC, you can delete it, although you may get very little space by doing so. You can always create a new one account when you need it. To delete an account, open "Options"→ "Accounts" → "Family and Other People". Select the account you don't need and click the button "Delete".
Compressing disks is probably not a good idea, especially if you don't want to reduce overall performance. However, if you are severely short on space, you can do this to free up some space.

12. Find large files and delete them if you don't need them.
Find large files quite simple. Find out how to find large files in Windows 10 for step-by-step instructions. Delete large files as well as small files that you no longer need.
Step 1: Open File Explorer. Navigate to the drive or folder where you want to search for large files.
Step 2: Click on the search field to see the tab "Search".
Step 3: Click the Search tab to view all search options.
Step 4: Click "Size", and then select one of the filters. As you can see, there are a total of seven filters: Empty (0 KB), Tiny (0-10 V), Small (10-100 KB), Medium (100 KB - 1 MB), Large (1-16 MB) , Huge (16 - 128 MB), Giant (> 128 MB).
If you select the Giant (>128MB) filter, File Explorer will automatically search for all files larger than 128MB.
What if you want to search all files larger than 500 MB? Just. In the search field, enter size:> 500 MB to view all files larger than 500 MB. Likewise, use size:>1 GB to find all files larger than 1 GB.
Finally, to find all files larger than 1 GB, but less 5 GB(you can set any size), just type in the search field size:>500MB<5GB . Of course you can change these values!

Delivery optimization files are files that have previously been downloaded to your computer. You can delete these files to free up disk space in Windows 10. To delete Delivery Optimization files:
Step 1: Open This computer. Right-click on the drive where Windows 10 is installed, and then click "Properties".
Step 2: Click the button "Disk Cleanup".
Step 3: When you see the results, check the box "Delivery Optimization Files" and press the button "OK" to remove delivery optimization files.

Temporary files that applications do not use can also be deleted. Here's how to do it.
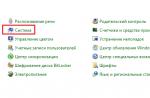
Step 1: Open the application "Options". Go to section System → Storage.
Step 3: Select Delete temporary files not used by my applications.

Make sure no other options are selected, and then click "Clear Now"
With enviable consistency, Windows 10 users are faced with a problem and... a corresponding notification that “disk space is full”, frequent annoying messages like “Not enough disk space” pop up. Disk space is running low."
What to do when "Not enough disk space"? how to clean the disk - i.e. free space? ...let's look at all this in more detail in the text below...
However, in some cases, disk cleanup is not the only thing that needs to be done (and not always useful!), while in some cases it is most advisable to turn off low space messages...
That's about it in order... and to the point...
Text by points:
Why is there not enough disk space?
Like previous versions of the OS, Windows 10 also, by default, from time to time checks the system for available space on local disks. And that is why - as soon as the free space of drive "C" is reduced to critical - the notification "Not enough disk space" pops up - so how to fix it..?
Options:
1 - A common example with drive “C”: this drive stores user data, i.e. system data, the tools he uses - all sorts of browser caches, data on temporary files, various backups, etc. - in this case it would be a good idea to clear the system disk from outdated data...
In general, such cleaning of junk data is very advisable at certain intervals (how to clean browsers is described in the articles in this section).
2 - you also need to know: in the system - in the disk partition - there is space for system recovery files, which is usually filled with completely useful data from the starting OS! This “storage location” does not need to be changed or cleared!! it is useful in case of an accident or failure of the working system! however, in such cases of notification, it is very useful to get rid of the hint, namely, turn off notifications (more details below).
...solution 1:
Windows 10 disk cleanup
As mentioned, to get rid of the system notification type not enough free space on the disk, in some cases, cleaning the “C” drive will help - we’ll get rid of everything unnecessary!
System garbage leads, among other things, to the fact that (see this article for more details on how to clean Windows system disks - this will lead to faster system operation)
Cleaning is also useful for those disk partitions that are somehow used by the system itself: for example, if you personally (allocated) configured space for the cache, or for swap files... so: to get rid of alerts... you should adjust the allotted amount of space in depending on how and what you use most often.
Or!! If you think that everything is in order and the space is being used as it should be, in this case, it may be worth turning off the notifications, which are so annoying.
Disable low disk space notifications in Windows 10
After the next Windows 10 update (1803 line), the recovery partition (manufacturer OS) is visible!! when it should be hidden! And, as explained above, this partition is by default filled with useful data for recovery... and if this partition of the disk is full - and, moreover, “overridden” by the disk fullness monitoring system - then it is its “fullness” that signals insufficient free space on the disk...
And here’s another thing - often, after the procedure hiding the recovery partition, notifications appear as before...
...or, for example, we have a disk partition on our computer that we have purposefully dedicated entirely to storing valuable data - in this case - in both the first and second sections. It’s useful to turn off notifications so that you don’t get a notification that there’s not enough space on drive C, etc....
turn off notifications - there is not enough disk space
The interpreter “Run” and Win + R will help
In the input window in execute we write: regedit (can be copied) “Enter”...
(read more about working in the “Run” window - a complete list of commands).
7 - Windows 10.?.
What we need will open: the so-called registry editor (screenshot below).
Here - in the registry editor - we need to go to the path to the section indicated below (look for the folder in the panel on the left)
HKEY_CURRENT_USER\Software\Microsoft\Windows\CurrentVersion\Policies\Explorer

...next... in the Explorer folder, select (on the right side of the registry editor window) “Create” (as in the screenshot above) ... set the parameter “DWORD Value 32 bits”! important! if you have 64-bit Windows 10, then in this case we select the shown option in 32...
Now the screenshot is below: you need to set the parameter to the created partition - the name NoLowDiskSpaceChecks (No - disable notification...).


All!! close the registry editor window.
Restarting the computer...
...after the work has been done - annoying notifications from the Windows 10 system that there is not enough space on the disk!! will not pop out.
Which is exactly what we need. ...and note: blocking notifications for all disk partitions!
...And all I can do is say goodbye... and wish you useful work on the network
As a result of these manipulations, the properties window for the drive installed in the system will open.
So, we got to the cleaning mechanism. All groups of files that are listed in the list that opens can be safely deleted. As you tick the boxes, the system calculates the amount of freed up space. However, the utility's capabilities do not end there. Since we are going to carry out a total cleaning, we will also clean the system files.
The parameters indicated in the screenshot allow you to:
- Remove programs that have not been used for a long time. Selecting the first item "Clear", we will move to the standard software management menu. As a result, it works as an interactive reminder for especially forgetful users;
- The second point is much more interesting. If you have System Restore enabled on your computer, which creates restore points, you can delete them. In a long-running system, they can take up significant space.
Actions taken when selecting the second item will need to be confirmed additionally.
Go to the main tab and confirm the selection again.
The system is deleting temporary files. The operation time will depend on their volume and type of drive.
New cleaning menu
In addition to the classic method that we just looked at, a new one has appeared in Windows 10. To use it, let's go to the options menu.
We will use the search function as a universal option suitable for any user.
Select the item highlighted in the screenshot to go to the new system settings.
In the quick jump menu located on the left side, select the item "Vault". Click on the stylized image of the system disk, which shows how full it is.
Disk space usage statistics open, showing the size occupied by each file category. We are interested in deleting temporary files, so let's move on to the appropriate item.
We tick the required boxes and confirm our actions. After making sure that the operation is completed, we return back to the section "Vault". In it we still have one more option that has not been considered. Pay attention to the position of the slider in the “Memory Control” section. His position answers the question: why temporary files are not deleted, accumulating in the system over time. By default it is always disabled.
Move the slider to the on position to allow Windows to automatically clean up temporary files. Open the link "Change the way you release" and look at what exactly falls under the automation.
If you're not using the trash can as a storage area for unnecessary files, you can leave the sliders in the on position. Click on the highlighted button to make sure that there is no “garbage” left in the system. At this point, the cleaning can be considered complete.
Cleaning the system after updating
After the next Microsoft update, called the Fall Creators Update, Windows 10 received additional settings and the first elements of Fluent Design. The main changes concerned the optimization of the executable code and are practically invisible from the outside. That's where the good news ends. After installing it, the user may be faced with the fact that the disk "WITH" crowded.
Let's figure out where the space went after the update. First, let's see how long Windows 10 takes after installation. Open the system drive in Explorer.
Note the highlighted folder Windows.old – We will return to it a little later. Find the directory with the installed OS and right-click the context menu.
We are interested in the item marked in the screenshot. By clicking on it we will open the properties of the selected folder.
Now let's go back and check the size by analogy Windows.old.
Now you understand how it turned out that the disk is full.
At the time of installing the update, Windows makes a complete copy of the previous version so that the user can go back if something does not suit him. Microsoft allows 10 days for testing. After they expire, the copy should be deleted automatically. If there is really not enough space on the system disk, you need to delete the Windows.old folder before the allotted time.
We go to the section in which we configured the settings for automatic cleaning of temporary files.
After installing the Fall Creators Update, its appearance has changed somewhat. Auto-cleaning of the downloads folder has been added, and the sliders have been replaced with checkmarks. We go down and see additional options related to the latest OS update. To delete a saved copy, check the corresponding box and press the highlighted button. As a result, we get back almost 20 GB of disk space.
The order of interaction between the OS and RAM
A few more gigabytes can be taken away from the system by changing the way it works with memory. During operation, Windows creates and uses two hidden files with the “sys” extension:
- Pagefile- the so-called “swap file” or virtual RAM. To take advantage of RAM's processing speed advantages, non-urgent data is cached into it. By default, the size of this file is controlled by the operating system. If the amount of RAM is large enough, 8 GB or more, it is practically not used. The smaller the RAM value, the larger the page file becomes;
- Hiberfile- intended for storing the contents of RAM at the time of transition to “deep sleep” or hibernation mode. Accordingly, in order to successfully save information, it must have a size within 75% of RAM.
The use of the settings listed in this section depends on the tasks for which you are using the computer and its hardware configuration. The fight for free space should not come at the expense of performance.
Changing the size Pagefile
To change the size of the paging file, you will need to open system properties (Win + Pause / Break).
Select the marked item and move to the additional parameters window.
Go to the desired tab and open the performance parameters.
Change the tab again and move on to managing virtual memory.
We follow the sequence shown in the screenshot, first of all unchecking the automatic size selection. After this, the remaining items are activated. To determine how much space to allocate for pagefile, we will use the OS recommended value. In this case, we agree and reduce the size of the paging file by setting it to a fixed value. On click "OK" A warning will appear indicating that a reboot is required.
We confirm our decision. After restarting, the computer will use the limited amount of disk space allocated to it to organize virtual memory.
Disable hibernation
Users who prefer to turn off their PC after each work session can safely get rid of Hiberfile. It is worth warning that this may slightly increase the overall OS loading time. If ten seconds are not critical, then launch PowerShell in administrator mode.
The menu shown in the screenshot is called up by right-clicking on the button "Start". If you did not agree to switch to a new shell at one time, the command line will be located in this place. PowerShell has superior functionality, but using either tool will produce the same results.
Entering the command shown in the screenshot instantly deletes the Hiberfile from your hard drive. Replacement « off" on "on" returns it to its place. No reboot is required.
Compression mode
You already know how and what you can delete from the disk to free up space, without deleting programs. Let's look at another useful feature available in Windows 10. It's worth mentioning right away that it can be used successfully only on computers with a modern configuration. In this case, in accordance with Microsoft recommendations, the presence of an SSD as a storage device is implied. According to the technical documentation, the Compact OS feature is automatically enabled when it does not cause an overall performance hit.
The meaning of its work is to “transparently” compress system files. As a result, the space required to accommodate the OS on the drive is reduced. You can check whether compression is working on your computer using the following command (enter it on the command line or PowerShell):
compact /compactos:queryYou can see the result of its execution in the screenshots below.
Now let's see how much space it took to install Windows 10 in both cases.
It can be seen that in the right screenshot the space occupied by the OS on the disk is 2.5 GB less than the actual size of the folder.
The result fully corresponds to the declared one. In the documentation, Microsoft promises savings of 1.5 to 2.5 GB, depending on the bit depth.
If Compact OS does not start automatically, but you decide to check how it will work in your configuration, you can force it. In the above command, after the colon, type not « query", A "always". After some time spent on compactification, you will see the result.
We check how much space the system folder takes up to make sure the actions taken are effective.
If you are not satisfied with the result of operating the OS in a compressed state, you can perform the reverse process. Enter the parameter into the command after the colon « never" and return the system to its original state.
Third party cleaning programs
Users who are too lazy to do the work manually can use third-party programs to clean Windows. When installing such software, be sure to read the license agreement.
It says in black and white that developers are not responsible for the consequences of using the software.
Reg Organizer
The product is produced by domestic developers and is distributed on a paid basis. The cost of a personal license is 650 RUR. However, you can find version 7.52 from September 2016, which is free for non-commercial use.
You cannot update the program for free, but you can use it as much as you like.
The screenshot shows the main window with a list of options expanded on the left side. You can download the program on its official website.
CCleaner
The most popular utility among Windows users. Developed by the British company Piriform Limited and distributed under a shareware license. More than 50 languages are supported, including Russian. At the time of installation, it offers to additionally install the Chrome browser.
As you can see, the program offers quite a lot of possibilities. “Safe” items are checked. How inactive sections look, showing what can be deleted additionally.
In any program designed for automatic cleaning, the main thing is not to overdo it. Do not repeat the mistake of users who, having discovered the OS view settings, first of all try to delete hidden files. Mark only those items that you are sure of.
Finally
Reasonable use of the above methods will allow you not only to restore order to your computer one-time, but also to maintain its stable operation for a long time.
Video
For those users who like visual material, we have prepared a video on the topic.