The abbreviation "NT" stands for "New Technologies" marketing, but in the project documentation, it meant something completely different. The fact is that Windows NT was designed for the new, not yet released in 1988, Intel processor i860. Its code name was "N10" ( N T en).
The first version - Windows NT 3.1, was released 5 years later, in 1993. At this point, there were already 250 developers in the team.
Windows today
- 1 billion users
- 140 million lines of code (including test code and toolkit)
Windows code is very different. Some parts were written 20 years ago, some appeared only in the current version. For example, the Web Services on Devices (WSD) code in Windows Vista exists in its first version, the GDI code is in its final stages of development and hardly changes, the DirectX code is already well developed, but it is actively changing at the present time. - 8000 developers
- 36 localization languages
- 20 years of development
Windows development
20-30 years ago, only one programming methodology, "Waterfall", was used. It is a sequence:
Specifications → Design → Implementation → Testing → Delivery.
But this methodology only works for small projects. For a product like Windows today, different methodologies are needed:
- Product Cycle Model
- Team Software Process
- "Extreme programming"
All of these methodologies have both advantages and disadvantages. Depending on the size of the team and the development stage of the component, different Windows development teams use different development methodologies.
For Windows, as a product in general, the Product Cycle Model is used:
- Periods of 3-4 months
- Inside the period - "waterfall"
The biggest challenge in developing a product of this magnitude is that development takes time. At the initial stage, the problems that exist in the current time and existing means are solved. But the only thing that's permanent is that everything will change. Over the years of development:
- Requirements will change
- Opportunities will change
- The work schedule will change
- The project will change
- Users will change
Despite the fact that different teams develop in different ways, there are "universal" rules:
- Release of intermediate versions (milestones, beta, CTP) for a wide range of testers
- Release of internal assemblies with short cycles (1 day)
- Simplicity and reliability of design
- Personal and team code revisions
- Unit tests
- Build Verification Tests
- Any intermediate assembly should be of high quality (what is written should work)
On my own behalf, I note that after a month of working with Windows 7 build 6801 as the main OS on my home computer, I have a positive impression of this build.
The entire Windows development process is built around a daily build:
- This is the pulse of the product
- Development never stops
- Daily automated testing
- Early integration
- Responsibility of developers
- Obvious product condition
Once upon a time there was only one branch before source code, and all the developers made changes directly to it. Now the development team is so big that it doesn't work. Many branches are supported, among which there is the main one - WinMain. Each laboratory has its own local development branch into which changes are integrated. Proven changes are integrated into WinMain over time.
Daily development cycle:
- 15:00 - Changes allowed for integration into the source code control system
- Build 6 versions (Free / Checked - x86, x64, IA64)
- 18:00 - New versions are available for testing
- The new version is installed on several thousand workstations and servers for testing
- Automated stress test
- 05:00 - Test protocols are analyzed, failures are diagnosed
- 09:00 - Summary reports are automatically sent to teams
- 09:30 - Team Leaders Summary Meeting to Set Goals
All project participants, including the most senior executives, use intermediate versions on their work (and usually home) computers.
What is Windows written on?
- C, C ++, C #, Assembler (x86, x64, IA64)
Assemblers are used to a fairly limited extent in situations where you cannot do without it. - Visual Studio, Source Insight, build, nmake
- Source Depot - source control system
- WinDbg, KD, NTSD - debuggers
Many internal tools such as build can be downloaded from microsoft.com/whdc/devtools.
Windows 7 kernel changes
The Windows 7 kernel has undergone the following changes:
- Refactoring
Why can't you uninstall the graphics subsystem in Windows?
The answer to this question from a technical point of view is that the graphics subsystem in Windows is not independent, it is part of the Win32 subsystem.
Windows 7 refactored many of the low-level components to break dependencies. Users will not notice this, only new Dlls will appear, for example, kernel32.dll is divided into kernel32.dll and kernelbase.dll.
This partitioning made it possible to allocate a minimal kernel called MinWin (20 megabytes on disk). - EFI support for x86 and x64 (as in Vista SP1)
Many manufacturers are trying to get rid of BIOS in favor of EFI. - Boot from VHD (virtual hard disk)
- Parallel initialization of devices and start of services
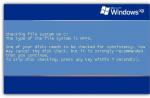
When Windows boots up, it takes quite a long time to build the device tree. The PNP manager should poll bus drivers (PCI, USB, FireWire, etc.) for what devices they have. And most of the time the processor waits for the devices to respond (or not). Indeed, in order to identify devices on the bus, you need to interrogate them. If they are, then they will answer, but if not, then you have to wait, and the processor is idle. Performing these tasks in parallel will reduce load times. - Removing Dispatcher lock from scheduler and PFN lock from memory manager
last few years clock frequencies processors do not grow, and the development goes towards increasing the number of parallel executable instructions both at the level of one core and at the system level (multicore). In this regard, a lot of work has been done to improve scaling.
The two hottest locks in the kernel, the Dispatcher lock and the PFN lock, have been removed.
Dispatcher lock was used by the scheduler when the state of threads changed. This lock was removed, and the "waiting" state of the thread was split into several:- Waiting: In progress
- Waiting: Completed
- Waiting: Canceled
- Supports 256 logical processors
Previously, Windows used a machine word as an affinity mask. This was done because it was so easy to find free processors - every bit represents a processor. Accordingly, 32 logical processors were supported in a 32-bit system, and 64 in a 64-bit system.
In Windows 7, as a result of the transition to the segment affinity mask model, support for 256 logical processors became possible. Processors began to be grouped into groups / segments. Each group can contain up to 64 processors. As a result, backward compatibility is obtained, old programs "see" only processors in one group, and new programs using new interfaces work with all processors in the system. - Improved Energy Saving: Disabling Processor Sockets Today, there is a serious problem of energy saving, not only for laptop owners, but also for data center owners. In the US, 2% of electricity is consumed by computer data centers. Many of them turn off some of their servers during periods of low user activity (weekends).
It was found that it is much more profitable to disable the entire processor socket than one core at a time on several, because in this case, you can also disable the entire socket support infrastructure (memory controller).
Windows maintenance, updates
In the past, updates were often cumulative (cumulative). This meant that if the erroneous code was contained in an early update of the component, then later versions will contain this code. But not all users need all updates, they have different configurations.
Now after release (RTM) on Windows there are 2 versions of the source code:
- RTM GDR (General Distribution Release)
Includes those few changes that are meant for everyone. Mostly security fixes. - RTM LDR (Limited Distribution Release)
During update installation Windows client Update picks the branch it needs and installs the code from it.
Creating a security update
The work on creating a security update begins with identifying a vulnerability. There is a mass different ways detection - internal security teams, security partners, developers. When a vulnerability is found, 2 parallel processes start:
- Developing a fix for all platforms
- Search for "options"
Extensive search for similar vulnerabilities across all platforms. Searching not for an identical code, but for a similar one.
After a fix is developed, code reviews begin. When they complete, the fix is integrated into the build and the build is sent for testing:
- Manual and automatic component testing
- Automatically test for distortion of file formats, network components, etc. (over a million options)
- System testing as a whole, including backward compatibility testing
Only fixes that meet all quality criteria are allowed for release on Windows Update and Download Center.
- Forward>
Operating System 0 to 1 is published on GitHub and has over 2,000 stars and 100 forks. As the name implies, after reading it, you can create your own operating system- and, perhaps, few things in the world of programmers can be cooler.
Through this book, you will learn the following:
- Learn how to create an operating system based on hardware technical documentation. This is how it works in the real world, you can't use Google for quick replies.
- Understand how computer components interact with each other, from software to hardware.
- Learn to write code yourself. Blind copying of code is not a learning curve, you really learn how to solve problems. By the way, blind copying is also dangerous.
- Master the familiar tools for low-level development.
- Get familiar with assembly language.
- Find out what programs are made of and how the operating system runs them. We gave a small overview of this topic for the curious in.
- Figure out how to debug a program directly on hardware with GDB and QEMU.
- Programming language C. You can quickly master it by following.
- Basic knowledge of Linux. It is enough to study on our website.
- Basic knowledge in physics: atoms, electrons, protons, neutrons, voltage.
What you need to know to write an operating system
Creating an operating system is one of the most difficult tasks in programming, as it requires extensive and complex knowledge of the operation of a computer. Which ones? Let's look at it below.
What is OS
The operating system (OS) is software, which works with computer hardware and its resources and is the bridge between the hardware and software of the computer.
First generation computers did not have operating systems. The programs on the first computers included the code for the direct operation of the system, communication with peripheral devices and calculations for the execution of which this program was written. Because of this alignment, even programs that were simple in terms of logic were difficult to implement in software.
As computers became more diverse and complex, writing programs that worked both as an OS and as an application became simply inconvenient. Therefore, to make programs easier to write, computer owners began to develop software. This is how operating systems came to be.
The OS provides everything you need to run custom programs. Their appearance meant that now programs did not need to control the entire volume of the computer's work (this is a great example of encapsulation). Now the programs needed to work with the operating system, and the system itself took care of the resources and work with the peripherals (keyboard, printer).
Briefly about the history of operating systems
C language
As mentioned above, there are several high-level programming languages for writing an OS. However, the most popular of these is C.
You can start learning this language from here. This resource will familiarize you with the basic concepts and prepare you for more complex tasks.
Learn C the Hard Way is the title of yet another book. In addition to the usual theory, it contains many practical solutions. This tutorial will cover all aspects of the language.
Or you can choose one of these books:
- Kernighan and Ritchie's The C Programming Language;
- "C Programming Absolute Beginner's Guide" by Perry and Miller.
OS development
After you have mastered everything you need to know about computer science, assembly language, and C, you should read at least one or two books about direct OS development. Here are some resources for doing this:
Linux From Scratch. Here's how to build the operating room. Linux systems(the textbook has been translated into many languages, including Russian). Here, as in the rest of the textbooks, you will be provided with all the necessary basic knowledge. Relying on them, you can try yourself in creating an operating system. To make the software part of the OS more professional, there are additions to the textbook: “
Reading Habr over the past two years, I saw only a few attempts to develop the OS (specifically: from users and (postponed indefinitely) and (not abandoned, but so far looks more like a description of the protected mode of x86-compatible processors, which is undoubtedly also you need to know to write an OS for x86); and a description of the finished system from (though not from scratch, although there is nothing wrong with that, maybe even the other way around)). For some reason, I think that almost all system (and part of the application) programmers at least once, but thought about writing their own operating system. In this connection, 3 OS from the large community of this resource seems like a ridiculous number. Apparently, most of those who think about their own OS do not go anywhere further than the idea, a small part stops after writing the bootloader, few write pieces of the kernel, and only the hopelessly stubborn create something remotely resembling an OS (when compared with something like Windows / Linux) ... There are many reasons for this, but the main one, in my opinion, is that people quit development (some of them not even having time to start) because of the small number of descriptions of the process of writing and debugging the OS, which is quite different from what happens during development applied software.
With this small note I would like to show that, if you start correctly, then there is nothing particularly difficult in developing your own OS. Below the cut is a short and fairly general guide to the action of writing an OS from scratch.
How no need start off
Please do not take the following text as an explicit criticism of someone else's articles or OS writing guides. It's just that too often in such articles under loud headlines, the emphasis is on the implementation of some kind of minimal preparation, and it is presented as a prototype of the kernel. In fact, you should think about the structure of the kernel and the interaction of parts of the OS as a whole, and that prototype should be considered as a standard "Hello, World!" - an application in the world of applied software. As a small excuse for these remarks, it should be said that below there is a subsection "Hello, World!"No need to write a bootloader. Smart people came up with the Multiboot Specification, implemented and described in detail what it is and how to use it. I don’t want to repeat myself, I’ll just say that it works, it makes life easier, and it should be applied. The specification, by the way, is better to read in full, it is short and even contains examples.
It is not necessary to write the OS completely in assembly language. This is not so bad, rather the opposite - fast and small programs will always be held in high esteem. Just since this language requires much more development effort, then using assembler will only lead to a decrease in enthusiasm and, as a result, to throwing the OS sources on the back burner.
There is no need to load a custom font into video memory and display anything in Russian. There is no sense in this. It is much easier and more versatile to use English, and leave changing the font for later, loading it from hard disk through the file system driver (this will give you an added incentive to do more than just get started).
Preparation
 To begin with, as always, you should familiarize yourself with the general theory in order to have some idea of the upcoming volume of work. Good sources on the issue under consideration are the books by E. Tanenbaum, which have already been mentioned in other articles on writing OS in Habré. There are also articles describing existing systems, and there are various guides / mailing lists / articles / examples / sites with a bias in OS development, links to some of which are given at the end of the article.
 After the initial educational program, you need to decide on the main questions:
- target architecture - x86 (real / protected / long mode), PowerPC, ARM, ...
- kernel / OS architecture - monolith, modular monolith, microkernel, exokernel, various hybrids
- language and its compiler - C, C ++, ...
- kernel file format - elf, a.out, coff, binary, ...
- development environment (yes, this also plays an important role) - IDE, vim, emacs, ...
- video memory and work with it - conclusion as proof of work is necessary from the very beginning
- HAL (Hardware Abstraction layer) - even if support for several hardware architectures and it is not planned to competently separate the lowest-level parts of the kernel from the implementation of such abstract things as processes, semaphores, and so on will not be superfluous
- memory management - physical and virtual
- execution control - processes and threads, their scheduling
- device management - drivers
- virtual file systems - to provide a single interface to the contents of various file systems
- API (Application Programming Interface) - how exactly applications will access the kernel
- IPC (Interprocess Communication) - sooner or later the processes will have to communicate
Instruments
 Taking into account the chosen language and development tools, you should select such a set of utilities and their settings, which in the future will make it possible, by writing scripts, to maximally facilitate and speed up the assembly, image preparation and launch of a virtual machine with a project. Let's dwell in a little more detail on each of these points:
 - any standard tools are suitable for building, such as make, cmake, ... Here scripts for the linker and (specially written) utilities for adding a Multiboot header can be used, checksums or for any other purpose.
- preparing an image means mounting it and copying files. Accordingly, the format of the image file must be selected so that both the mount / copy utility and the virtual machine support it. Naturally, no one forbids performing the actions from this point either as the final part of the assembly, or as preparation for launching the emulator. It all depends on the specific tools and the chosen options for their use.
- starting a virtual machine of labor does not represent, but you must not forget to first unmount the image (unmounting at this point, since there is no real sense in this operation before starting the virtual machine). Also, it will not be superfluous to have a script to start the emulator in debug mode (if there is one).
 If you have completed all the previous steps, you should write a minimal program that loads as a kernel and displays something on the screen. If inconveniences or shortcomings of the selected means are found, it is necessary to eliminate them (shortcomings), or, in the worst case, take them for granted.
 On this step you need to check as many features of the development tools that you plan to use in the future. For example, loading modules in GRUB or using in virtual machine physical disk / partition / flash drive instead of an image.
After this stage has passed successfully, the real development begins.
Providing run-time support
 Since it is proposed to write in languages high level, care should be taken to provide support for some of the language features that are typically implemented by compiler package authors. For example, for C ++, this includes:
 - function for dynamically allocating a block of data on the stack
- work with heap
- data block copy function (memcpy)
- program entry point function
- calls to constructors and destructors of global objects
- a number of functions for working with exceptions
- stub for unimplemented pure-virtual functions
Naturally, the standard library should be mentioned right away. A complete implementation is not necessary, but a major subset of the functionality is worth implementing. Then coding will be much more familiar and faster.
Debugging
 Don't see what it says about debugging towards the end of the article. In fact, this is a very serious and difficult issue in OS development, since the usual tools are not applicable here (with some exceptions).
 You can advise the following:
- for granted, debug output
- assert with immediate exit to the "debugger" (see next paragraph)
- some semblance of a console debugger
- check if the emulator allows you to connect a debugger, symbol tables or something else
- some of the standard debugging operations: breakpoints, call stack, outputting values, printing a dump, ...
- commands to display various useful information, such as the execution queue of the scheduler or various statistics (it is not as useless as it might seem at first)
- commands for checking the consistency of the state of various structures: lists of free / used memory, heap or message queue
Development
 Next, you need to write and debug the main elements of the OS, which at the moment should ensure its stable operation, and in the future - easy extensibility and flexibility. In addition to memory managers / processes / (anything else), the driver interface is very important and file systems... Their design should be approached with special care, taking into account all the variety of device / FS types. Of course, you can change them over time, but this is a very painful and error-prone process (and debugging the kernel is not an easy task), so just remember - think about these interfaces at least ten times before you start implementing them.
 Similarity to SDK
 As the project develops, new drivers and programs should be added to it. Most likely, already on the second driver (possibly of a certain type) / program, some common features will be noticeable (directory structure, build control files, specification of dependencies between modules, repeated code in main or in system request handlers (for example, if the drivers themselves check their compatibility with the device) )). If so, then this is a sign of the need to develop templates for various types of programs for your OS.
 There is no need for documentation describing the process of writing this or that type of program. But it's worth making a blank from standard elements. This will not only make it easier to add programs (which can be done by copying existing programs and then changing them, but this will take more time), but also make it easier to update them when there are changes in interfaces, formats, or something else. It is clear that such changes, ideally, should not be, but since OS development is an atypical thing, there are many places for potentially wrong decisions. But the understanding of the erroneousness of the decisions made, as always, will come some time after their implementation.
Further actions
 In short, then: read about operating systems (and primarily about their device), develop your system (the pace is actually not important, the main thing is not to stop at all and return to the project from time to time with new forces and ideas) and it is natural to correct errors in it (to find which it is sometimes necessary to start the system and "play" with it). Over time, the development process will become easier and easier, errors will be less common, and you will be included in the list of "hopelessly stubborn", those few who, despite some absurdity of the idea of developing their own OS, still did it.
 A guide to building a kernel for an x86 system. Part 1. Just the core
Let's write a simple kernel that can be loaded with the x86 GRUB bootloader. This kernel will display a message on the screen and wait.

How does an x86 system boot?
Before we start writing the kernel, let's understand how the system boots and transfers control to the kernel.
In most of the processor registers, at startup, certain values are already found. The register pointing to the address of instructions (Instruction Pointer, EIP) stores the memory address at which the instruction being executed by the processor lies. EIP defaults to 0xFFFFFFF0... Thus, x86 processors at the hardware level start working at 0xFFFFFFF0. This is actually the last 16 bytes of the 32-bit address space. This address is called the reset vector.
Now the chipset memory card ensures that 0xFFFFFFF0 belongs to a specific part of the BIOS, not RAM. At this time, the BIOS copies itself to RAM for faster access. Address 0xFFFFFFF0 will only contain the instruction to jump to the address in memory where the BIOS copy is stored.
This is how the BIOS code starts executing. First, the BIOS looks for a device to boot from, in a preset order. Looking for a magic number that determines whether the device is bootable (the 511th and 512th bytes of the first sector must be equal to 0xAA55).
When the BIOS finds a boot device, it copies the contents of the first sector of the device into RAM, starting at the physical address 0x7c00; then navigates to the address and executes the loaded code. This code is called bootloader.
The bootloader loads the kernel at a physical address 0x100000... This address is used as the starting address in all large kernels on x86 systems.
All x86 processors start in a simple 16-bit mode called real regime... GRUB bootloader switches mode to 32-bit protected mode by setting the lower bit of the CR0 register to 1 ... Thus, the kernel boots in 32-bit protected mode.
Note that in the case of Linux kernel GRUB sees the Linux boot logs and loads the kernel in real mode. The kernel automatically switches to protected mode.
What we need?
- x86 computer;
- Linux;
- ld (GNU Linker);
Setting the entry point in assembler
As much as I would not like to limit myself to one C, I have to write something in assembler. We will write a small file on it that will serve as the starting point for our kernel. All it will do is call an external function written in C and stop the program flow.
How can we make sure that this code is exactly the starting point?
We will use a linker script that links the object files to create the final executable. In this script, we will explicitly indicate that we want to load data at 0x100000.
Here is the assembler code:
;; kernel.asm bits 32; nasm directive - 32 bit section .text global start extern kmain; kmain is defined in the c file start: cli; block interrupts mov esp, stack_space; set stack pointer call kmain hlt; halt the CPU section .bss resb 8192; 8KB for stack stack_space:
The first instruction, bits 32, is not an x86 assembly instruction. This is a directive to the NASM assembler to generate code for a processor running in 32-bit mode. In our case, this is not necessary, but generally useful.
The section with the code begins on the second line.
global is another NASM directive that makes source code symbols global. This way, the linker knows where the start symbol is located - our entry point.
kmain is a function that will be defined in the kernel.c file. extern means that the function is declared somewhere else.
Then comes the start function, calling function kmain and stopping the processor with the hlt instruction. That is why we disable interrupts in advance with the cli instruction.
Ideally, we want to allocate some memory and point to it with a stack pointer (esp). However, it looks like GRUB has already done this for us. However, you will still allocate some space in the BSS section and move the stack pointer to its beginning. We use the resb instruction, which reserves the specified number of bytes. Immediately before calling kmain, the stack pointer (esp) is set to the desired location by the mov instruction.
Core in C
In kernel.asm, we made a call to the kmain () function. Thus, our "sish" code should start execution with kmain ():
/ * * kernel.c * / void kmain (void) (const char * str = "my first kernel"; char * vidptr = (char *) 0xb8000; // video mem begins here. unsigned int i = 0; unsigned int j = 0; / * this loops clears the screen * there are 25 lines each of 80 columns; each element takes 2 bytes * / while (j< 80 * 25 * 2) { /* blank character */ vidptr[j] = " "; /* attribute-byte - light grey on black screen */ vidptr = 0x07; j = j + 2; } j = 0; /* this loop writes the string to video memory */ while(str[j] != "\0") { /* the character"s ascii */ vidptr[i] = str[j]; /* attribute-byte: give character black bg and light grey fg */ vidptr = 0x07; ++j; i = i + 2; } return; }
All our kernel will do is clear the screen and print the string “my first kernel”.
First, we create a vidptr pointer that points to the address 0xb8000... "Video memory" begins from this address in protected mode. For displaying text on the screen, we reserve 25 lines of 80 ASCII characters, starting at 0xb8000.
Each character is displayed not by the usual 8 bits, but 16. The character itself is stored in the first byte, and the attribute-byte in the second. It describes the formatting of a symbol, such as its color.
To display the green s character on a black background, we will write this character to the first byte and the value 0x02 to the second. 0 means black background, 2 means green text color.
Here is the color chart:
0 - Black, 1 - Blue, 2 - Green, 3 - Cyan, 4 - Red, 5 - Magenta, 6 - Brown, 7 - Light Gray, 8 - Dark Gray, 9 - Light Blue, 10 / a - Light Green, 11 / b - Light Cyan, 12 / c - Light Red, 13 / d - Light Magenta, 14 / e - Light Brown, 15 / f - White.
In our kernel, we will be using light gray text on a black background, so our byte attribute will be 0x07.
In the first loop, the program outputs an empty character over the entire 80x25 zone. This will clear the screen. In the next loop, characters from the null-terminated string “my first kernel” with the attribute byte equal to 0x07 are written to the “video memory”. This will print the string to the screen.
Connecting part
We have to compile kernel.asm into an object file using NASM; then use GCC to compile kernel.c into another object file. Then they need to be attached to the executable bootable kernel.
To do this, we will use a bind script that is passed to ld as an argument.
/ * * link.ld * / OUTPUT_FORMAT (elf32-i386) ENTRY (start) SECTIONS (. = 0x100000; .text: (* (. text)) .data: (* (. data)) .bss: (* ( .bss)))
First, we will set output format as 32-bit Executable and Linkable Format (ELF). ELF is a standard format binary files Unix systems of x86 architecture. ENTRY takes one argument specifying the name of the symbol that is the entry point. SECTIONS is the most important part. It defines the markup of our executable file. We define how the different sections should be connected and where to place them.
In parentheses after SECTIONS, a period (.) Represents the position counter, which is 0x0 by default. It can be changed, which is what we do.
We look at the next line: .text: (* (. Text)). An asterisk (*) is a special character that matches any file name. The * (. Text) expression means all .text sections from all input files.
Thus, the linker connects all sections of the object file code into one section of the executable file at the address in the position counter (0x100000). After that, the counter value will be equal to 0x100000 + the size of the resulting section.
Similarly, everything happens with other sections.
Grub and Multiboot
All files are now ready to create a kernel. But there is one more step left.
There is a standard for booting x86 kernels using a bootloader called Multiboot specification... GRUB will only boot our kernel if it meets these specifications.
Following them, the kernel should contain the header in its first 8KB. In addition, this header must contain 3 fields, which are 4 bytes:
- magical field: contains a magic number 0x1BADB002 to identify the kernel.
- field flags: we don't need it, set it to zero.
- field checksum: if you add it with the previous two, you should get zero.
Our kernel.asm will become like this:
;; kernel.asm; nasm directive - 32 bit bits 32 section .text; multiboot spec align 4 dd 0x1BADB002; magic dd 0x00; flags dd - (0x1BADB002 + 0x00); checksum. m + f + c should be zero global start extern kmain; kmain is defined in the c file start: cli; block interrupts mov esp, stack_space; set stack pointer call kmain hlt; halt the CPU section .bss resb 8192; 8KB for stack stack_space:
Building the core
Now we will create object files from kernel.asm and kernel.c and link them using our script.
Nasm -f elf32 kernel.asm -o kasm.o
This line will run the assembler to create the kasm.o object file in ELF-32 format.
Gcc -m32 -c kernel.c -o kc.o
The -c option ensures that no hidden linking occurs after compilation.
Ld -m elf_i386 -T link.ld -o kernel kasm.o kc.o
This will launch the linker with our script and create an executable called kernel.
Configuring grub and starting the kernel
GRUB requires the kernel name to match the kernel-
Now put it in the directory / boot... This will require superuser rights.
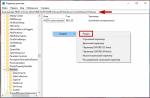
In the GRUB config file grub.cfg add the following:
Title myKernel root (hd0,0) kernel / boot / kernel-701 ro
Don't forget to remove the hiddenmenu directive, if there is one.
Restart your computer and you will see a list of kernels with yours as well. Select it and you will see:

This is your core! Let's add an I / O system.
P.S.
- For any kernel trick, it is better to use a virtual machine.
- To run the kernel in grub2 the config should look like this: menuentry "kernel 7001" (set root = "hd0, msdos1" multiboot / boot / kernel-7001 ro)
- if you want to use qemu emulator use: qemu-system-i386 -kernel kernel