In this article we will talk about the procedure for migrating user settings and data from a system running Windows 7 to a new computer running Windows 8. And although this article is written on the Windows 8 Consumer Preview, there is every reason to believe that after the final release of Windows 8, the data transfer procedure from Windows 7 to Windows 8 will not change.
Let's start by launching the Transfer Wizard in Windows 7 by typing Windows Easy Transfer in the search box. Windows Easy Transfer is a native Windows 7 utility that allows you to transfer files, system settings and user settings from one computer to another. It is a simple wizard that allows you to select the files and settings that need to be transferred and transfer the specified data to another PC. The whole procedure of transferring information from Windows 7 to Windows 8 can be divided into two stages: the first step is to unload and save Windows 7 settings on external media, the second step is to import the saved settings to the Windows 8 computer.
Save files and settings on an external hard drive
After starting the transfer wizard, click Next and select a method for transferring data to another PC. The first two methods assume a connection between two PCs, but we want to first save the transferred data to an external drive, and then connect this drive to a new computer. Therefore, we will select the option: An external hard disk or USB flash drive (External hard disk or USB flash drive).


Next, you will see a list of all profiles and shared directories stored on this computer that you want to migrate. By default, the standard directories are selected, and if you want to specify additional folders and files, you must click the Customize and Advanced buttons.

In the window of a simple file browser that appears, you need to select additional directories (or entire disks) that you want to migrate.

The Window 7 Easy Transfer Wizard saves all settings and data as a MIG file. In addition, a password can be set for this file in order to protect it from third parties. By clicking the Save button, the wizard will ask you to select the external drive to which you want to save the data. Please note that the external drive must be formatted with the NTFS file system. the FAT-32 file system can store files up to 4GB in size (and in most cases the archive will be larger than this value).

After the directory is specified, copying data and settings to the migration file will begin. This process usually takes a long time, depending on the size of the copied data and the speed of access to the internal and external drives.

After the copying procedure is complete, you can remove the hard drive and connect it to your Windows 8 computer.

Transferring settings and data to a new PC running Windows 8
After we have saved the settings and information from the old computer using the data transfer wizard, it is time to deploy them to the new one. As in previous versions of Windows, Windows 8 has a utility for transferring data from one PC to another, called Easy File Transfer. With it, we will expand all the information from the archived MIG file to its original location on the computer disk.
Open the Windows Search menu and enter easy transfer in the search box, and select Apps.

In the Data Transfer Wizard window, select An external hard disk or USB flash drive.

Then we will indicate that this is my new computer.


Click the Transfer button, after which the transfer of information and user settings (including accounts, themes, etc.) will begin.

After the end of the process of restoring files and data on the new PC, you will be able to view the list of files transferred during the migration process, as well as the list of applications that need to be installed.

By clicking the See what was transferred button, we will open the report on the operation of the Windows Easy Transfer utility, which displays a list of accounts, documents, and system / program settings that have been transferred.

On the Program report tab, you will be able to get acquainted with the list of applications that were previously installed on the old PC, and which will need to be additionally installed on the new one.
Hello dear readers of the blog www.site. Today we will return to the topic of moving a Windows user profile to another drive.
Why transfer user profiles to another drive
The need to transfer profiles from the Windows boot partition to another volume can be dictated by various reasons. For example, the desire to place the operating system itself on a fast striped raid (RAID 0), and move user data to a fault-tolerant array (RAID 1, 5, etc.).
However, the increased interest in moving user profiles to Windows in recent years is mainly driven by the increased popularity of fast solid state drives.
As has been repeatedly noted earlier, greatly gaining in speed, while SSDs are significantly inferior to their mechanical counterparts in terms of capacity and price. Placing Windows 7 - Windows 8.1 system files and user data on one small SSD makes working on such a computer uncomfortable in the long term and forces you to look for solutions to the problem of insufficient disk space.
The process of transferring user profiles from SSD to HDD in Windows 7 was discussed in sufficient detail in previous blog posts in a series of articles under the general title "Transferring Windows 7 to a small solid-state drive."
The second part described a not very successful attempt to use the standard Windows Transfer Tool for these purposes.
The third part, which has become very popular with readers, describes a variant of just a very successful transfer of user profiles using symbolic links.
Today, after several months of active operation of such a system, we can confidently say that Windows 7 in a two-disk configuration (SSD + HDD) feels great. Everything works quickly and there was not a single problem due to the transfer of working profiles to the second disk.
Reasons that prompted to re-turn to the topic of transferring user profiles
By now, several new considerations have appeared that I would like to share:
Complicated process of backing up moved folders
With all the positive that was said about the two-disk configuration of Windows 7, in the process of real work there was one significant inconvenience. It is associated with the creation of backups.
Many people back up their system partitions with or Acronis... This method does not take much time and guarantees quick system recovery in the event of a disaster.
And this is where the problem arises - what to do with the folders of the moved user profiles? System catalogs are added to them, additionally transferred to SSD to save space (Installer, MSOCache, Search).
Making a backup of the entire disk on which these directories are located is not an option at all. Firstly, there is a lot of things on the disk, and, mainly, that you do not need to backup. Secondly, where to get so much space on the target media?
V Acronis the ability to create backup copies of individual files and folders has been declared. However, it is unlikely that it will be possible to use this opportunity to create a backup of the migrated user profiles, since it copes Acronis with such a task is clearly not the best way. Even if the program manages to complete the task to the end and does not terminate abnormally, the total running time will exceed all reasonable limits.
It remains only to "pens" to copy the transferred profiles and system folders. Their volume can be several tens of gigabytes. Accordingly, such file-by-file copying takes a lot of time.
You can try to reduce the time it takes to create duplicate backups using the command robocopy... It must be run with elevated privileges (as administrator):
robocopy X: \ Users \ Y: \ Backup \ Users \ / COPYALL / MIR / XJ X: \ Users \- disk and folder with transferred computer user profiles;
Y: \ Backup \ Users \- the target disk and the folder on which copies of user profiles will be recorded.
/ MIR- the key through which the source and destination folders are synchronized.
In the process of executing the command, not only new and changed files will be added to the destination (target) folder, but files that no longer exist in the source folder will also be deleted from it.
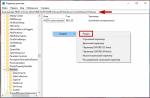
Additionally, to save space on the target media, you can pre-create empty target folders and set the attribute “ Compress content to save disk space" v " Properties” / “Additionally”:

In my case, enabling compression of destination folders reduced the backup size by 13% (52 instead of 60 GB). Unfortunately, I cannot say how the inclusion of compression affected the average recording and the total operation time. I think that in this case it is not very important.
The backup process must be performed in a “non-migrated” user session. Otherwise, a large number of files of the current profile will be blocked and they will not be copied.
If, in addition to the profiles, some system directories were transferred, for example, Installer, MSOCache, Search, then they can also be backed up using robocopy:
robocopy X: \ SystemFoldersC \ Y: \ Backup \ SystemFoldersC \ / COPYALL / MIR / XJ
In order to be able to make a backup copy of the contents of the folder Search, you need to stop the search service before copying Wsearch.
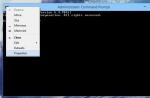
This can be done in Task manager opened with elevated privileges - command taskngr in a command line running as administrator:

Or, which is much simpler, in the command line with administrator rights, execute the command:
net stop wsearch
After creating a backup, you need to restart the computer or enable the search service with the command:
net start wsearch
Ultimately, you can create a batch file that contains all of the listed commands. This will greatly simplify the backup task.
However, it should be noted that robocopy works with user profile content rather oddly. This manifests itself in incorrect processing of links, such as “Application Data”, “Local Settings”, etc. When copying for the first time using the above command, they simply do not appear in the target folders.
To solve this problem, we recommend using the FAR file manager. Unlike the team robocopy it does a great job of copying the content of a profile.
Probably some kind of sharing plan can be developed FAR and robocopy... For example, first execute console commands, and then "copy" using the file manager FAR in the option “New / updated files only”.
In a word, there are questions with profile backup. This is also added to them - what to do with such a backup in case of problems with the second disk? If, for example, Windows does not start without the transferred folders, then it is not very obvious how to expand them back. Of course, there will be a solution, but not the fact that it will turn out to be trivial.
In general, creating backups and data backups does not at all guarantee the possibility of quickly restoring the system's performance after a disaster if the very possibility of such a recovery has never been checked before and there is no clear plan. For example, the backup was made by Acronis directly from the Windows environment, and there is no bootable Live-CD. Ultimately, you will somehow do it with the help of another computer, but it is not at all a fact that this instance will see its own image on your medium. There are many such examples.
Let's summarize what has been said. I would like to be able to make a backup of the moved folders in the same way as the system drive. This is what we will do today.
Windows 8.1 release
The next reason to look back at migrating user profiles is the recent release of Windows 8.1. Judging by the increased popularity of publications dedicated to this latest operating system, many users are thinking about installing it.
I am also no exception. If I didn’t plan to install Windows 8 on my work computer and looked at it as if “from the outside”, then in relation to Windows 8.1 it could be very much.
I would not want to buy a new SSD with a larger capacity at the same time as the new operating system. Therefore, you need to make sure that Windows 8.1, like Windows 7, will work properly in a two-disk configuration.
2. Mounting a volume as an NTFS folder
Create an empty folder on the C: \ drive in any usual way. Let's call it “Disk2”, for example. You can connect a new volume to it directly at the stage of its creation:

If the volume for placing the roaming user profiles and, possibly, some system folders, already exists on the second disk, then in Windows 8.1, click Win + X(or " Computer management” –> “Disk management”). Select the required disk partition and through the context menu by the right mouse button or through the menu item “ Action” –> “All tasks"Open" Change drive letter or drive path” –> “Add”:

Once the volume is mounted as an NTFS folder, the drive letter can be removed. This should be done only after there are no resources associated with the drive letter on the disk. These include, for example, the paging file, or the folder Search... After completing the connection of the folder, it will take the form of a link in the explorer. In fact, this is a symbolic link to the entire volume:

3. Transfer of user profiles
Create, if it does not already exist, a new local “service” user, whose profile will remain in the original location on the C: \ drive, and add it to the Administrators group. It is in the session of this user that we will do the transfer of user profiles.
This can be done directly in “ Computer management"Or in Windows 8 / 8.1" Options” –> “Change computer settings"(Right pop-up panel) ->" Accounts”.
We reboot the computer and enter the session of the new local administrator. As we said, the process for migrating user profiles is the same as described earlier for Windows 7.
Suppose you want to move the user profile “User-3”.
Problem using command robocopy for copying user profiles was discussed above. Command xcopy did not cope with the task at all. Hopefully these are temporary difficulties.
For now, we will again use the wonderful program for our purpose. FAR... The program is still free and works great on Windows 8.1. You need to run it with administrator rights:

The main thing is not to forget to set the copy of access rights mark before starting the task.
After copying is complete, you need to make sure all files are copied and delete the original profile folder. In this case - “C: \ Users \ User-3” (I hope it was done before the start of the transfer operations).
Just in case, before deleting the folder of the moved profile, it is worth restarting the computer - sometimes it is impossible to delete some files without it.
After deleting the original profile, make a link to the new location of the user profile in the “C: \ Users” directory. The link can be made on the command line:
mklink / D "C: \ Users \ User-3" "C: \ Disk2 \ Users \ User-3"
or in the manager FAR on " Alt + F6”.
The question of the advisability of changing the paths to user directories in the registry was discussed in the first article. There is practically nothing to add to this, except that on a working machine with Windows 7, I did not change anything in the registry and this did not lead to any negative consequences for the entire period of operation.
I will also not dwell on moving the Installer, MSOCache and Search system folders to a new location - there is nothing new here.
Testing Windows 8.1 with Roamed User Profile
Testing was carried out in a Windows 8.1 x64 virtual machine on the system Oracle VirtualBox... The guest machine was allocated 2.5 GB of RAM and 256 MB of video memory.
The first login to User-3 after the profile transfer went completely smooth. That is, it was no different from logging into a session before transferring:

Several files were created on the desktop and in the Documents folder before moving the user profile. Needless to say, all these files remained in place after the transfer.
First of all, we launch the “Store” with the performance of which some problems were promised:

The “Store” has started up properly and at first glance is working successfully - you can freely navigate and select applications.
Let's launch a few more “tiled” applications:

There were no problems with launching programs. As with switching between them.
A short test of Windows 8.1 running on a virtual machine in a user session with a profile moved to the second disk, of course, cannot be considered exhaustive and complete, however, it does give a definite idea of the health of the Windows 8.1 two-disk configuration. I hope that after a while it will be possible to do this on a work computer.
Many probably wondered how to transfer Windows OS to a computer from another computer whose hardware is radically different from the hardware of the old computer.
An example is given for porting Windows 8, and the same can be done with other versions of Windows starting from Windows 7.
And so, we will transfer using a utility from Microsoft called sysprep.
This utility allows you to create a customized Windows image along with the installed programs, which can then be deployed on another computer, preferably with a similar architecture, but very often I had to deploy such an image on a computer with completely different components and everything went well. And in our situation, although the motherboards were from different manufacturers, the processors were both from INTEL.
After the system is successfully deployed on another machine, you only need to enter the activation key (that is, as with a normal system installation), otherwise Windows 8 will be installed, but it will only work for 30 days. If activation fails, activate Windows 8 by phone, see the link to our article above.
Extensive information about the sysprep utility is available on the official Microsoft website, required.
Run the command line as administrator
and enter the command:

a window opens in which you can see the limit on the number of transfers Windows to other computers. In our case 1000.

Then we enter the command
C: \ Windows \ System32 \ Sysprep \ Sysprep.exe

In the window that appears with the parameters, set everything as on the screenshot and click OK.

- Putting the system into OOBE mode - the operating system transfer mode is activated the next time the system is started.
- Preparation for use - all data will be deleted from the system that should not be copied along with the image (security identifiers (SID), activation information, etc.), but the installed software should be transferred without problems.
Windows 8 gets ready for transfer to my friend's computer in a few minutes. The computer shuts down. We dismantle the hard drive from my system unit and put it in its rightful place in the system unit of my friend. We disconnect my friend's computer from the Internet (below it is written why). We connect the cables and turn on his computer, everything is ready for transfer.
And so, if you now back up Windows 8 prepared in this way in Acronis True Image or Paragon and save this image on DVD-disks or a USB portable hard drive, then you can successfully deploy this image to other computers, you can do without Acronis, use the Dism or ImageX tools built into the operating system, () the only thing you will need to do after installation is to enter the system license key or Windows will only work for 30 days and will ask for activation (everything is fair).
We turn on the computer, the priority of loading from the hard disk must be set in the BIOS. Immediately after switching on, the devices are being prepared.

You can activate Windows 8 after installation, click Next.

We accept the license agreement. Computer name.
Here friends attention! Microsoft itself advises to avoid conflict when transferring the system in this place, be sure to disconnect the computer from the Internet, and assign a new name to your computer, and also create a new user. Then, when transferring, you will keep your old profile with all installed programs and some settings. If you remember, during a fresh installation of Windows 8, we gave our computer the name Makar-PK,

and created an account Makar-77

choose another name now, for example Fedot-PK. As a result, after migrating Windows 8, you will have two user profiles. The old Makar-77 profile with all the programs and the Fedot-77 profile will be saved - it turns out to be temporary and is needed only for transferring Windows 8. Click Next.

Use standard parameters.

We select Login without a Microsoft account (if you previously logged into your Windows 8 using an email address, then you cannot enter it here, again, to avoid a conflict when transferring the system, and so that your old Makar-77 profile is not overwritten).

Create a new user, that is, an additional local account, different from the one already on this system. For example, before transferring Windows 8, you logged in under the Makar-77 account, now in this window create a Fedot-77 username, then assign a password with confirmation and a hint. Ready.


And finally, Windows 8 is loaded. Naturally, the system is not activated until the Internet is connected, if you do not know how to activate with a license key, read our article "How to activate Windows 8".
We signed in to the Fedot-77 account we just created,

there is not a single program here, an empty desktop, that is, a clean profile,

but I installed the programs and they did not go anywhere. Selecting the Makar-77 account

and we get into the configured operating system, where almost all the programs I have installed are launched.

We go into the properties of the computer. We see all the information about the "new" components of the system unit.

Cloning is definitely not a new idea, and there are quite a few techniques and different ways that you can use to move or clone a hard drive, or even clone an existing Windows operating system onto a new hard drive. Also, most of us have already updated our system to the latest version of Windows 8.1, which is the latest operating system from Microsoft. Windows 8.1 has gained so much popularity in a short time due to its performance and speed. A few days ago, we thought about cloning our Windows 8.1 to a new hard drive, we just needed to make a backup. Good habit, by the way.
Cloning Windows 8.1 will ultimately save you a ton of time and effort as we don't have to install all of the apps and settings from scratch. We did some research on how to clone Windows 8.1 to a new hard drive and were completely shocked to see that there was no detailed tutorial. So, we wrote this article here to fill that gap, so if you are looking for a guide on how to move your existing installed operating system to a new hard drive, including Windows 8.1, or more simply, if you want to clone windows 8.1 to a new one hard drive, below is a complete tutorial.
Is this cloning worth a try?
Some of you may be asking why we are cloning Windows 8.1 to a new hard drive rather than choosing a fresh or clean installation? Well, there are some technical advantages to cloning hard drives. However, let's be simple on simple ground. Yes, a fresh or clean installation takes much less time compared to the cloning process. But, if you decide to clone Windows 8.1 to new hard drive which already has applications and tools installed, you will end up with a clean install, saving you time installing each application. So cloning is the only solution to get it done quickly and efficiently.
Basically, in a new installation of Windows 8.1, we need to install all the main applications, such as MS Office, browsers, mail client applications, video players, PDF reader and dozens of other applications, and if you combine the installation time of these applications, then it will be about 1 hour ... But if you are going to clone Windows 8.1, it only takes a few minutes to get the system working. After the cloning process is complete, you will be ready to use the same applications and pre-configured settings that you used on the original PC.
Can I use cloning a disk image as a backup?
So, you want to know if there is such a solution or not? After you finish cloning Windows 8.1 to a new hard drive, you can use the same disk image to recover your system in the event of a disaster. You can use the Windows 8.1 disk image created with the image utility, which does the same thing with the iso file, and you have the key to restore your PC anytime. Quick and easy!
Method Will “Copy” and “Paste” work instead of cloning?
We know that many of you think the same. You may be asking why not copy and paste the entire drive onto a new drive and clone Windows 8.1, because it really is a much easier method, right ?. Yes, you can do it, but we strongly do not recommend doing it, as this is not the correct way. It is possible that when copying, some files are not copied, since they may be used by the OS at this particular time and as a result you will receive an error about corrupted OS on a new disk. In addition, a boot record without the MBR of the system can be installed on Windows 8.1 and it will not boot. When you clone any partitions, cloning applications must clone the MBR from the source hard drive and again from the target hard drive to eliminate the error process.
How much hard disk space is required?
This is a very important point, pay attention to this because you must make sure that the target hard drive must have enough space to accept the cloning source. You can check the current OS in "My Computer" and select the target hard disk location. As you can see in the image below, the Windows 8.1 hard drive that we will be cloning consumes 27 GB of space in just 48.7 GB of hard drive. This means that you must have at least 30 GB of space on the target disk where you are going to clone. It would be better to have more space in 50GB to avoid any future problems. You can use this feature to manage the disk and manage hard disk partitions, or you can even shrink or expand the existing partition space.
What programs or applications can we use to clone Windows 8.1?
Finally, we are in the main topic of this article, how can we clone the Windows 8.1 operating system? As mentioned earlier, there are tools that can be used to clone a hard drive. You can use Windows software or bootable applications to completely clone Windows 8.1 to any other hard drive with the same hardware configuration.
AOMEI Backupper
AOMEI Backupper is a free tool that is perfect for cloning your hard drive. We chose this app because it is neat, clean and very straight forward and is free to download. With this tool, you can freely clone Windows 8.1 OS to a new hard drive within minutes. It comes with two great features called Partition Clone and Disk Clone. If you are just looking for cloning partitions, then you can use the clone partition function or you can use the clone disk option to clone the entire hard disk to another. Unlike simple copy and paste, cloning will allow you to get your computer and all programs up and running, usually without reinstalling your system or other applications. Cloning is just an optional feature in AOMEI Backupper and you can use this tool to perform Windows 8/8 backup and restore operations .1.
How to use AOMEI Backupper?
To clone Windows 8.1, we have created a few simple steps that you can follow:
Note: Make sure you connect the second hard drive to the computer you want to clone Windows 8.1 to.
1 Let's start with the Windows 8.1 partition you want to clone by downloading the AOMEI Backupper freeware software. After finishing the installation, open the Cloning section of this application, and start the cloning process. Here we are just discussing about the cloning section, so click on the option Cloning a Partition - Partition Clone.
2. Under Partition Clone, select the source partition you want to clone. We installed Windows 8.1 on our C: drive. So, we clicked on the C: drive. Click the Next button.
3 In the last step, you have selected the source partition and in this part you have to select the target partition where you want to clone the source operating system. Click on the Next button to go to the next step.
Note: please delete all important data from the destination partition, because this operation will overwrite all files.
4 This is where you will see the final window, which will display information about the source and target section. You can click on the "Close" icon to cancel the operation or click on Start Clone - Start Clone to start the cloning process.
5 You can check the progress of the cloning and click on the "Finish - Finish" button when 100% is shown.
In the Utilities section of this app, you can create bootable media because it performs better than cloning on a live system.
DriveClone
DriveClone is another tool that can be used to accomplish the same task as AOMEI Backupper can do. You can also use this tool to copy the entire contents of a partition to a new disk or SSD (Solid State Drive) in a few simple clicks. You can use the new disk to boot the system and use your applications as if you were using your regular hard disk. We have done a number of studies on the use and functionality of AOMEI Backupper and DriveClone and found that DriveClone performs better and is easier to use than AOMEI Backupper.
DriveClone is available for non-commercial use by users. Non-commercial versions for users are free to download and use. You can download it online!
By following the step-by-step method outlined above, you can clone Windows 8.1 to any other hard drive in a matter of minutes, without the hassle of installing every application and software, over and over again, making cloning your hard drive more productive.
Many of us sometimes face a very subtle problem when modernizing a personal computer. A hard disk is a priori the slowest component of a personal computer, especially if it is made in the form of a conventional HDD. And you always want to somehow speed up your computer. And then, one day, you decide and get a small but smart SSD and it seems that now life is about to get better. But, an inexperienced user immediately faces an unobvious task - how to transfer everything from an old HDD to a new SSD? There may be several options here.
Since many computers now run Windows 8.1, we will consider just such a configuration, when a new SSD drive is installed in a computer with Win 8.1 installed. On this path, the user actually faces three problems:
- How do I directly transfer the operating system, installed programs and data to a new disk?
- Usually SSDs have a much smaller volume than the HDD already installed in the computer, and there is a risk that everything will simply not fit.
- Windows configured to boot via UEFI simply won't boot from another drive. And difficulties may arise even with a simple reconnection of the disk to another port of the controller.
Let's try to figure out what to do and how to act when there is a purchased SSD, but it's not clear how to switch to it.
Reinstall the operating system again
Probably the most sensible option is reinstalling the operating system and all software again. In this case, all the problems that have accumulated in the system will disappear, and no one has canceled the degradation of the operating system. But, sometimes, the user categorically does not want to reinstall, because in this case everything acquired and configured over the years will disappear and you will have to spend days, weeks, and maybe months setting up all the components and programs again.
Use built-in Windows tools
The 21st century is already in the yard, but in the most popular desktop operating system Windows there is still no built-in tool for migration within a single computer. Although there are a couple of workarounds that can partly help a particularly patient and thoughtful computer enthusiast who strongly distrusts third-party software vendors.
Option 1 . In this case, you still have to install Windows from scratch on a new disk, as well as install all the programs that you need to use. And transfer data and settings using the built-in Windows Easy Transfer tool. This tool not only allows you to carry out the transfer within the operating system of the same generation, but also between systems of different generations, for example, migrate from Windows XP to Windows 8.1.
Using Easy Transfer, you need to export all the necessary data and settings to a folder on your hard disk (just do not erase it), an optical disk or a USB flash drive. And then, already on the freshly installed system, it will be necessary to carry out the reverse operation, i.e., directly restore. Of course, this is not a completely fair migration from HDD to SSD, but it's still better than nothing.
Apply a specialized product
And for an ordinary user, not a computer science sensei, third-party vendors come to the rescue, offering a wide range of software for migrating operating systems from disk to disk. Among the most famous are the companies Acronis and Paragon. Both have specialized tools for easily transferring the installed operating system from one disk to another, and without the need to perform ritual dances with a tambourine. However, before the transfer procedure itself, you should think carefully, at least 7 times, and carry out the transfer only once. First, it's worth taking care that you already have backups of your invaluable data. This can be either a regular backup, created by any means and saved on a device separate from the experimental computer, or it can be a cloud storage like OneDrive in which you store all your work and private documents. Secondly, due to the fact that usually SSD drives are smaller in volume than HDDs, you need to make sure that the filled volume of the transferred partition on your HDD is less than the capacity of the partition on the SSD. If necessary, you can (and even need to) uninstall unnecessary programs and clean the operating system from "garbage".
Cleaning the operating system from "garbage"
You can clean your hard drive quite successfully with the built-in Windows cleaning utility. It will be useful to clean up the system files, especially if the operating system has been in operation for a long time.
To migrate the operating system, you can choose one of the products from the manufacturers listed above or any other, but trustworthy. Whether to use the pirated version downloaded from the nearest torrent tracker, or to honestly purchase the program - each user decides for himself (especially the software from Paragon, which has inexpensive products designed exclusively for transferring the system from one disk to another). However, it should be borne in mind that by installing a pirated program, you not only rob the manufacturer, but also risk losing your data during the transfer due to the not up-to-date version of the software. Although, losses and other troubles can occur with the just purchased official program. It is for this reason that I strongly recommend that you do not forget about backing up your data.
Select the section "Migration"
So, to migrate an operating system from a hard disk to an SSD within the same computer, I will use a professional tool from Paragon Hard Disk Manager Pro version 15. Yes, this tool allows not only transferring, but also many other functions, for example, backing up hard drives. But, in this context, we are only interested in the transfer of the system.
Select the disk to which the migration will take place (left). We select additional options, especially the "UEFI boot record" if you need a full boot from the SSD (right).
In just three steps of the wizard, the data is transferred from my old HDD to the new SSD. Both drives are connected to the computer at the same time and during the transfer I can continue to work with my applications, although this is not recommended. The transfer is completed completely after restarting the computer, when Windows starts already with an SSD.
And, as a conclusion. After migration, you will need to reactivate not only Windows, but also Office, since one of the elements to which these products are bound is the hard drive. And yet, after a successful transfer, you still have an old partition on the HDD, you can either completely delete it or clear it by formatting.