Modern laptops have a built-in microphone. This is actually a very handy device! You do not have to make a complicated connection of a microphone to a laptop, as it is necessary to do on personal computers. For a PC, there are models of external microphones, it can be a headset or a simple microphone, so it needs to be connected to a computer, configured, and then checked.
A large amount of time can be spent on all of the above procedures, but since in mobile computers there is a built-in microphone, everything is much easier. Today you will learn how to set up a microphone on a laptop. Let's look at a few simple methods.
Support
Before you start setting up the microphone, you will definitely need to find out if this component is present on your device. Of course, nowadays almost all modern laptops are equipped with a microphone, but we still recommend that you make sure that yours has a microphone. In order to do this, you just need to take the documentation from your device and read it carefully.
If there are no documents on hand, then you can find out about the presence of a microphone in another way. To do this, you just need to go to the "Device Manager" menu. You can also check if there is a microphone or not through the "Control Panel".
If you are already in this folder, you should find the "Sound" category, and in the new window that opens, select "Record". In the menu that opens, you can find information regarding whether you have a built-in microphone or not. If it is, then it will be displayed in the menu.
If the microphone on your laptop does not work for you, then most likely the drivers are not installed correctly on it. Or they are not on the device at all.
Choice

So, if you find in the menu that you have more than one device displayed, but several at once, then you should determine which device is the microphone. Understanding which device is a microphone is very simple! To do this, you just need to tap on the case where the microphone output is located.
Where the device icon is set, you will be able to notice green bars. While tapping on this icon, you will see fluctuations. So we decided - it is this device that we will need! Let's go further.
Instruction

Now let's move on to the most basic question - the question of how to set up a microphone on a laptop.
If you have the Windows XP operating system installed, then you need to start setting up by checking the drivers for the sound card. It also happens when the drivers are installed, but the microphone still does not want to work. In this case, you may need to reinstall the drivers, or you will need to look for the problem elsewhere.
You can download the microphone driver for a laptop on the official website of the manufacturer, and if you have a disk that came with your laptop, then we recommend using it.
If the drivers that were installed from the disk still do not allow the microphone to work, then most likely they will need to be updated. You will need to go to the "Control Panel" menu through the "Start" menu, and then find the "Sounds and Audio Devices" tab.
In the "Audio" tab, select the sound recording function, then install the device, which is the microphone. Now go to the “Volume” mode and select the “Advanced” tab there. Now open a new window by clicking the "Options" link, then select "Properties". After completing these procedures, you will notice the inscription "Microphone", where you will need to check the box, and then be sure to save the settings.
Options
When all the above settings are set, you will be able to see the volume slider. Now you need to configure it yourself. If you have done everything correctly, then the question of how to set up a microphone on a laptop will be resolved. As you can see, there is nothing complicated in this, the main thing is to do everything in stages. Differences in the settings may be in different operating systems, but in fact they differ slightly.
Conclusion

It is important to know that if you plan to use additional programs to work with a microphone (for example, it can be Skype), then you will also need to make additional settings already in the program itself.
Accordingly, in each program, the settings may be different. In order to do everything right, the easiest way is to go to the "Instructions" or "Help" section and follow the prompts.
Now you know how to set up a microphone on a laptop. Even if you have a different operating system, you can make settings according to the instructions we recorded or simply use specialized programs to work with the microphone.
Dear blog visitors, we will talk about this with you. Getting to the disclosure of this topic, I would like to remind you that at the time of adjusting the microphone built into the laptop, you did not forget to install the driver package.
This package "comes" on the disk, along with the new "beech", but it can also be downloaded from the manufacturer's website.
Naturally, entering the brand of your computer and the required drivers in the search bar.
So you have turned on SKYPE, or another program where there is a need to use a microphone. But on that
to the side of the "wire" they say that you can not be heard, or barely audible.
You started recording a video tutorial on creating and, the same result, poor soundtrack.
The question is why?, but because you have not yet set up the microphone.
Adjusting the Microphone Volume of an ASUS Notebook
So let's start setting up the microphone of a laptop equipped with a "mouse" and for this we hover over the sign
volume, as you know, it is located in the lower right corner of the monitor (in the tray). After that, by clicking the right button, we open this menu.

Where, as shown by the frame, open the "Recording Devices".

After double-clicking on the MICROPHONE field, open the Levels. Here, as you can see, there are two sliders for
Settings-Microphone and Microphone Gain.

After you set the settings, do not forget to click the Apply button and OK. And after setting the settings as in the figure, try to make a test recording. And after playback, make adjustments to your liking.
Well, after laptop microphone volume adjustment don't forget to update your knowledge on the topic:" ". After all, this is also very necessary knowledge for the comfortable use of your iron friend, isn't it?
I can’t chat with friends on Skype due to lack of sound, a new microphone is connected, but the device is not detected, the recording is too quiet… All these are quite common troubles, but easily solved. Below we will talk about how to properly configure the device.
At present, microphones of various types and shapes have become widespread. By way connections are analog, with USB output (connect to any USB input of the computer), wireless- will be mentioned later. Well, of course built-in, in the case of laptops or a webcam, which is also analog.
How to connect the device
First, let's find out where to insert the connector of a conventional analog device - the most common one at the moment. The recorder has a plug for a jack 3.5 jack, the same as for simple headphones.

The microphone jack must be pink colors, it may be on motherboard on the back panel or at front panel system block, on the sound card, keyboard.
How to set up the microphone
It’s not enough just to connect, you still need to configure it. Before proceeding with the setup, make sure that audio driver installed. For this in dispatcher see if all sound devices are defined and enabled. 
If the device is not found, try reinstall its driver. 
After checking, we proceed to the configuration itself.
Through Control Panel go to section Equipment and sound.
In the next window, click on Sound and in the settings dialog choose Recording.
In this tab, select the microphone that we want to configure and click Properties.
Connect your headphones and click on the tab Listen, there you will need to check the box next to the words: Listen with this device
, then press Apply.
After that, the headphones will hear with what sensitivity our recorder transmits sound. Then open the tab Levels for optimal gain setting. 
When you get the sound that suits your requirements, uncheck the option auditions.
How to connect a wireless microphone
 An extremely convenient device is a wireless microphone that has a built-in Bluetooth. More often it is used in conjunction with a laptop, because it usually has a built-in bluetooth module. In the case of a computer, it will need to be purchased separately.
Go to settings window laptop bluetooth and execute Search new device. Install required driver if it is not automatically detected by the system. If there are no problems with the drivers, and the laptop still does not see the acoustic recording device, check if it is turned on, if the batteries are dead.
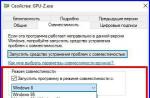
How to turn on the built-in microphone in a laptop
Go to Control Panel/Equipment find it there Realtek HD Manager.
The sound manager will open, in the window of which, with the built-in microphone disabled, go to Additional settings device and mark the item there: Divide all input jacks as independent input devices. 
Next, go to the tab that displays your Built-in Mic.
Here you can adjust the volume and gain.
After that in the window Sound your device will appear if it was not there before. 
Now you can configure its settings.
There are many programs that use the capabilities of the microphone, for example, various online services. Optimal setup of your recording device will ensure the most comfortable communication
This question is very often asked by inexperienced users, although in fact one does not need to have special knowledge to give an exhaustive answer to this question.
How to find out if a microphone is built into a laptop
1. Modern laptops in 99% of cases have a built-in microphone, but in order to make sure of this, it is enough to inspect the laptop case.
2. In addition, such information must be indicated in the laptop specification. It is worth taking into account the presence of a built-in webcam in a laptop. If it takes place, then there is certainly a microphone in such a laptop, otherwise it would be impossible and simply not logical to conduct, for example, an online conference, without purchasing a separate microphone.
3. Data on the presence of a microphone in a laptop can also be viewed through the "Device Manager".
4. If any recording utility is installed on the laptop, then by opening it you can see the program settings, which usually indicate the microphone model and its sensitivity. If the settings are active, they can be changed, so there is a microphone.
5. Finally, the easiest and most common way to find out if your laptop has a microphone is to look into the properties of the speakers.
It happens that you urgently need to use the microphone on Skype or record an important message, but the microphone refuses to work. The causes of this malfunction can be very different: whether it is a pet that walked on your computer, or a system error. There is no need to contact specialists because of such a problem. It is very easy to fix this problem yourself. In this article, I will explain in detail how to enable the built-in microphone on a laptop.
There are many reasons why the microphone built into a laptop may not work. It is important to correctly determine what exactly was wrong before trying to fix something. Here are the most common problems:
- another device is selected;
- system error;
- mechanical damage to the microphone;
- malfunction of the microphone cable;
- hole contamination.
Reason 1: Another device selected
Perhaps this is the most common cause of this problem. These methods are suitable for all versions of operating systems, including Windows 7, Windows 8 and 10.

Method 1: Manual microphone setup on a laptop
- To do this, in the lower right part of the screen, find the speaker icon.
- Click on it with the right mouse button and in the drop-down menu, click on the item "recording devices".
- In the window that opens, there are images of microphones. Finding the right one is very easy. It is enough to knock or talk into a special hole on the case. Opposite the desired device, the level will jump to the beat of the noise.
- Then you need to select the found microphone as the main one by pressing the "OK" button
In the same menu, you can adjust the microphone volume on the laptop. Very often it is at zero because of this, it seems to users that it does not work.
Method 2: automatic search problems

- To do this, you need to open the control panel.
- Then click on the "Troubleshooting" section in the "System and Security" category.
- In the "Hardware and Sound" section, select "Troubleshoot Audio Recordings".
- Next, follow the instructions in the troubleshooting wizard. All faults will be identified and corrected.
Reason 2: System error
Due to unexpected system errors or viruses, the microphone settings may go wrong, and you will need to configure everything again. You must use one of the methods described above to resolve this issue. For prevention, you need to clean your computer from unwanted programs, update regularly operating system and have an antivirus with real-time protection.
Reason 3: mechanical damage
Common cause. The fact is that the microphone in the hole is not protected by anything and it can fail from a blow or from hitting a solid object. Then in the "Recorders" tab, when tapping on the hole, the level indicator will remain at zero or will always be at maximum. To solve this problem, you can contact a specialized service center or buy an external wired microphone.
Reason 4: Loop failure
The microphone is connected to the board by means of a cable with a connector. The connector can snap off from the duckweed and the contact is broken. You need to contact the service or buy a separate device.
Reason 5: hole pollution
Very banal, but this is something that many users do not pay attention to. The microphone hole is often in an awkward position. Dirt from hands can get there and completely block the passage of sound waves. In this case, the microphone either does not function at all or works very quietly. You need to clean the hole using a cotton swab or a vacuum cleaner and continue to monitor its cleanliness.