ASUS RT-N12 is a very popular device that belongs to the budget options. It contains all the necessary characteristics for successful work your usual home, community, or work network. The device is a portable Wi-Fi access point, which has a data transfer rate of up to 150 megabits per second (possible Internet speed). The operating frequency of this device is 2.4 GHz. According to the standard, it has 4 network (ordinary cable) ports, these are standard characteristics for the ASUS RT router, which are needed for direct connection to a desktop computer.
Overview of all bulbs and connectors
The front part contains 7 indicators that will give you an idea of the state of the device at this moment.
Number 1 we have marked the most important LED indicator. This is a power indicator. The indicator can have several configurations:
- The light is off. This means that there is no power, or the device is simply turned off.
- The light flashes with great amplitude. This means that the router is just starting up.
- The light flashes with a small amplitude, quickly. This means that automation is taking place.
- The light is on without flashing. This means that the system is loaded and can be used.
Number 2 we have designated an indicator that determines states Wi-Fi router ASUS RT N12 D1 at the moment. It has three configurations:
1. The light is off. No power or wireless mode may be disabled.
2. The light flashes. This means that information is being transmitted.
3. The light just burns. The device is ready to transfer data, but no packet exchange is currently taking place.
Number 3 we marked the indicator that determines the connection of the router to Internet networks... Only two configurations:
1. Off - there is no Internet. This may be due to non-payment, due to communication problems, due to disconnection from the Internet in equipment installations.
2. Lights up - everything should work properly.
By numbers 4-7 Indicates the status indicators of the local ports. Three configurations for each:
1. Off - the cord is disconnected.
2. Light flashing - communication is in progress.
3. The light is just on - this is a sign that the port is busy with the cable connecting the PC to the network.
The rear panel contains connectors and switches. There are no indicators on it.

1. WPS button (starting from the right side), which is used to quickly access the network.
2. WAN port, it is designed to connect the Internet cable to the router.
3. Four network ports which are needed to directly connect the PC to the router via cables.
4. Micro connector for power cord.
5. On and off key.
6. Key for resetting settings. It is inside the hole, hold it for seven seconds to reset to factory settings. The factory settings have a standard password and login.
How to install a router
Installing a router is not tricky and does not take much time. Connecting and configuring takes longer. First, it is worth checking the presence of all components, so that the installation is correct:
· The router itself.
· Power Supply.
· Internet cable, which must be provided by the company or provider.
· For the first installation, you need to use a local (direct) internet connection so that there is no interference.

Once you have found everything you need, you can proceed with a fairly simple installation. First you need to figure out how to connect the Internet to the router using an Internet cable. We designated the connector for this cable with number 2. After that, you need to connect using a network LAN cable. All that remains is to connect the router to the power supply by inserting one end of the power cord into the 220-watt power grid, and the other side into the connector number 4. Then press the power button. We act in this order.
Install, as you can see, is not difficult. After these steps, the router should start to start up. This completes the installation of the router, further debugging is done using a specific page built into the router.
Setting up ASUS RT-N12
You need any browser to set up a router. Write "192.168.0.1" or "192.168.1.1" as the site address - without quotes.
Attention! The PC or laptop must be connected to the router, and not to the Internet cable.
After switching to the page, a window with data entry fields will appear.
 Here you need to register the user name and password. When the router is just purchased, the default login and password are the same - “admin”. After full debugging, it is recommended to change both username and password to exclude the possibility of hacking.
There are times when the router has already been operated before, then the name and password sometimes differ from the standard ones. In order to fix the ASUS RT N12 device, the firmware is returned to its original state. To do this, you need to hold down the key, which was designated above as number 6. You need to clamp it with some thin object, the easiest way is with a paper clip. Hold the key for 7 seconds. After that, all changed router settings will return to their initial state.
If these manipulations do not help, the router does not return to the standard settings, then the setting should be performed by a specialist whose range of work includes the ASUS RT N12 firmware. You can cope with this task on your own, but the firmware of the router is not a standard situation for an ordinary user. It is much more difficult to reflash a router.
Internet connection with full setup
In order to connect the Internet to the router, on the opened site you need to go to the router settings. Then - "additional settings". We select the "WAN" item we need (this is an Internet connection setting).

In the main settings, you need to set the following data:
· Type of WAN connection - choose here PPPoE (the most popular) or L2TP for Beeline (check with your provider).
· Enable WAN - our choice is "yes".
· Enable NAT - our choice is "yes".
· Enable UPnP - our choice is "yes".
In the next window, under the name of setting the WAN IP address, opposite the line “Obtain WAN IP address automatically” we need to mark the answer - “yes”.
Configuring DNS WAN, similar to the points that went before, opposite to "Connect to DNS server automatically" you need to put the option - "yes".
In the username field, as you might have guessed, you need to register your number or login, which is provided by the Internet provider to log into the Internet.
The password is identical.
Some fields are allowed to be skipped. V VPN server enter the one provided by your Internet provider. If the ASUS RT N12 router is configured for beeline, then this is “tp.internet.beeline.ru”, nothing needs to be marked for Rostelecom.
After all this procedure, click on the "Apply" button. This completes the setting of the Internet itself on the router.
Internet connection using quick setup
The ASUS RT N12's quick setup can dramatically reduce the time it takes to full customization router. On the main page of the router, press the "Go" or "Go" button.
The router will then automatically detect your connection type. Although he himself will determine the necessary parameters, the login and password to the Internet will still need to be entered with knobs in the WiFi settings.
Configuring Wireless Mode
Configure ASUS RT N12 in wifi mode can be done quite simply thanks to the "quick setup". The final stage quick setup- debugging of the wireless network parameters. Here you can set the SSID and network key or password.
They also perform tuning in manual mode. Here we go to the "Wireless network" window, we only need to set a few parameters. Among them:
· “SSID” is the name to detect your ASUS RT N12 Wi-Fi router. Prescribe in Latin letters (English).
· The field "Authentication method" - here we must highlight WPA2-Personal, it will help to secure your Internet from unwanted users.
· "Pre-Shared WPA Key" - a key or password from your Wi-Fi. Enter when connected to Wi-Fi. The key must be at least eight characters long.
Now you can save your settings. Now setup WiFi router and ASUS RT N12 is absolutely complete. You can connect all the devices that are in the apartment and use Wi-Fi even on a washing machine.
Small addition
How do I perform port forwarding? Let's talk about how to open ports on the ASUS RT N12 C1 router, here the setup is quick. Since this is just an add-on, the instructions will be very concise. We act according to the following scheme:
192.168.1.1 (address) -> Local network tab -> DHCP server window -> Enable manual assignment field - "Yes" -> MAC address (here you need to select required computer, which will be assigned a static address) -> Select and apply (after you have selected the desired PC).
If that doesn't work, then check your antivirus and firewall software.
Related Videos
Fast Internet for you!
Setting up a router is something that intimidates most inexperienced users. But, this fear is completely unjustified. Modern routers are very easy to configure. Now we will prove it by examining the process of configuring the ASUS RT-N12 router. This manual is also suitable for modifications of ASUS RT-N12 VP, ASUS RT-N12 D1 and ASUS RT-N12E.
Preparing to configure ASUS RT-N12 router
Before you start configuring the ASUS RT-N12 router, you need to connect it correctly. Fortunately, connecting your router is easy. The first thing you need to do is connect the router to the power supply. After that, connect the cable from your ISP to the WAN port of the router. On the ASUS RT-N12 router, this port is marked in blue (photo below).
You also need to connect your computer to one of the yellow LAN ports (photo below). To connect the computer, use the network cable that comes with the kit.

Another important point. Your computer should use automatic IP address acquisition. In most cases, this is exactly the case. But, before you start setting up the router, it is better to go in and check, so that later you will not be distracted by such trifles.
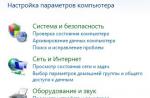
To do this, after connecting the router, go along the path: Start - Control Panel - Network and Internet - Network Control Center and general access- Connection by local network- Properties - Properties for the IPv4 component. In this window, the automatic acquisition of IP and DNS addresses should be selected.

Automatic configuration of ASUS RT-N12 router
To start automatic configuration of ASUS RT-N12 router, you just need to open a browser. If you have correctly connected all the cables to the router, then the automatic configuration should appear in the browser window by itself. If a window like the one in the screenshot below appears in the browser window, then everything is fine. Click on the "Go" button and continue configuring the router in automatic mode. If, for some reason, the automatic configuration did not start, then enter 192.168.1.1 in the address bar of the browser and the page with automatic configuration of the router should appear. If the router has already been configured before, then you can start automatic configuration using the "Quick Internet Setup" button in the web interface.

After clicking on the "Go" button, a page for setting a password will appear. Here you need to choose a new password to enter the router. This password will be entered every time you want to change the settings of the router. Therefore, you need to choose something that will be easy for you to remember. At the same time, the password should not be too short or too simple. Enter the password and click on the "Next" button in order to proceed to the next stage of automatic configuration.

Next, the router will start automatic detection of the connection type. Depending on the connection method of your provider, this step may take place automatically, or a window will appear asking you to enter the connection data. In our case, the connection type was determined automatically. It should be noted that in some cases, the determination of the connection type may be wrong and select the wrong connection type that is needed. But, it can always be corrected manually.

The next step is setting up Wi-Fi networks... Here you only need to enter the name of your Wi-Fi network (you can just leave it as ASUS or enter any other name) and the password for accessing Wi-Fi (network key). The router will automatically install the rest of the settings. By default, the WPA2-Personal AES security method is used. This method protection is optimal for home use. Therefore, in most cases, no manual adjustments are required after the automatic configuration is completed.

This completes the automatic configuration of the ASUS RT-N12 router. Information about the current settings will appear on the screen. Here we just click on the "Next" button.

After clicking on the "Next" button, a window will open asking you to enter your username and password to enter the router. Enter the login admin (the login did not change during the automatic configuration stage) and the password that you have chosen. After entering the username and password, the router's web interface will appear on the screen.
Manual configuration of ASUS RT-N12 router
After the automatic configuration is complete, you should test the Internet connection on your computer. If the Internet is available, then no additional manual configuration is needed. You have already done everything that was required of you in terms of configuring the router at the stage of automatic configuration.
But, quite often there are situations when the Internet does not work after the completion of the automatic configuration. The most common problems are incorrectly detecting or configuring the connection type and binding to the MAC. We will now consider both of these cases.
Setting the Internet Connection Type
In order to manually configure the type of Internet connection, you need to go to the "Internet" settings section. The link to this section of settings is in the left side menu web interface, in the "Additional settings" section.

In the "Internet" section, you can configure all the parameters that relate to your Internet connection. Different internet providers use different settings... Therefore, you should check with your ISP's tech support what settings you need to use.
The most important thing is not to be mistaken with the choice of the connection type (in the screenshot below it is highlighted in red). After selecting the connection type, the list of available settings changes. Therefore, if you correctly indicate the type of connection, then further configuration will go much easier for you. For example, we demonstrate how the settings for the Beeline Internet provider should look like (see screenshot below).

MAC address setting
It is not uncommon for the automatic configuration of the ASUS RT-N12 router to correctly determine the type of connection, but the Internet still does not work due to the fact that the Internet provider is tied to a different MAC address. In order to solve this problem, you need to change the MAC address in the router settings.
To do this, you need to go to the same section of the "Internet" settings, which we talked about above. At the very bottom of the "Internet" page there is a "MAC address" field in which you can enter the MAC address to which your Internet provider is bound.
If the Internet provider is tied to the MAC address of the computer from which you are configuring, then you can simply click on the "Clone MAC" button. In this case, the router will automatically copy the desired MAC address and you will only have to click on the "Apply" button.
Multifunctional 802.N Wireless Gigabit Router. Powerful processor, high speed of packet processing. Supports up to 300 thousand concurrent sessions to support P2P clients. The presence of a USB 2.0 port in the router for connecting peripheral devices opens up new possibilities of use: it can be used to connect a network printer / MFP or external data storage for organizing a file server. Updated program Download Master: Fast download speed and maximum ease of use.
Instructions for configuring the Asus RT-N16 router
Authorization
In order to get into the web interface of the router, you need to open your Internet browser and type 192.168.1.1 in the address bar, Username - admin , Password - admin(provided that the router has factory settings and its IP has not changed).

Setting up Wi-Fi on the router
In the router interface, go to the tab on the left Extra options Wireless network.
We set the parameters as follows:
- Field SSID: enter the name of the wireless network. The value in this field can be left unchanged.
- Authentication method: WPA2-Personal
- WPA encryption: TKIP or AES
- WPA Preshared Key: you must enter any set of numbers from 8 to 63. They also need to be memorized so that you can specify them when connecting to the network.
- Press the button below Apply

Setting up an Internet connection
In the router interface, select the tab on the left Extra options, in the list that opens, select WAN.

PPPoE connection setup
- WAN connection type: PPPoE
- Obtain WAN IP address automatically: Yes
- Username: Your login by agreement
- Password: Your contract password
- MTU: 1472
- Save the settings with the button Apply.
Configuring L2TP connection
- WAN connection type - L2TP
- YES
- automatically- put a point on YES
- Username and Password- login and password from the contract
- VPN server -
- The rest of the parameters can be left unchanged. Write something in English in the hostname. Save the settings.

Configuring PPTP (VPN) when automatically obtaining a local IP address
- WAN connection type: PPTP
- Enable WAN, Enable NAT, Enable UPnP - set everywhere YES
- Get IP address and connect to DNS automatically- put a point on YES
- Username: Your login by agreement
- Password: Your contract password
- enter the ip-address or the name of the vpn-server under the contract
- Save the settings with the button Apply.

Configuring PPTP (VPN) with a static local IP address
- WAN connection type: PPTP
- Get IP address and connect to DNS automatically- put a point on Not
- IP address: We drive in your IP address under the contract
- Subnet mask: We drive in the mask under the contract
- Main gate: We drive in the gateway under the contract
- DNS server 1: and DNS server 2: enter the servers of your provider (Rostelecom Omsk DNS 1: 195.162.32.5 DNS 2: 195.162.41.8)
- Username: Your login by agreement
- Password: Your contract password
- Heart-Beat Server or PPTP / L2TP (VPN): enter the ip-address or the name of the vpn-server under the contract
- Save the settings with the button Apply.

NAT when automatically obtaining an IP address (DHCP)
- WAN connection type: Dynamic IP
- Save the settings with the button Apply

Checking the Internet Connection Status

Saving / restoring router settings
After setting up, it is recommended to save them so that in case of problems, you can restore them. To do this, go to the tab Additional settings, menu Administration ;, the Restore / Save / Load settings tab.
- To save the current settings of the router, press the button Save... The settings file will be saved to the specified location on the hard disk.
- To restore the settings from the file, you must click the button select a file, specify the path to the file with the settings, then click the button send.
Attention! Button press Restore will restore factory settings!

Hey! We will now configure the Asus RT-N12 + router. You can read a small review, photos, characteristics and reviews about this router (do not forget to leave your feedback, it is very important to us :))... I am sure that this instruction will work for other Asus RT-N12 routers as well. different versions, there are many of them, wrote about this in the article at the link above. But what is there, according to these instructions it will be possible to configure almost any router from Asus. At the moment I only have RT-N12 +, so we will torment him. There will be an opportunity, I will definitely write about other models.
Now we will quickly set up our Asus RT-N12 +, tell you how to connect everything, go to the settings, configure the Internet, set the name of the Wi-Fi network and change the password. I will give a link to the instructions for updating the firmware. In a few minutes you will already be drinking tea and surfing the Internet via Wi-Fi :)
I will not review this router, as I wrote about it in detail on its page (link at the beginning of this article)... I'll just write that the router looks very nice and stylish, it works stably, and we intend it mainly for home use. Suitable for connecting tablets, phones, laptops, TVs, etc. via Wi-Fi, and if there is no wireless connection, then you can connect 4 devices via cable. For a small apartment or small house, this is a great option.
We will configure it according to the scheme:
- Connect and enter settings
- Configuring Asus RT-N12 with Quick Setup Wizard
- Setting up an Internet connection with a WAN provider (if it did not work through the quick setup wizard)
- Setting the Wi-Fi password and changing the wireless network name
- Change of password for access to settings.
To configure the router, we will definitely need information about what type of connection your provider uses, and whether it binds by MAC address. And if the connection type is PPPoE, L2TP, or PPTP, then you will need additional data, such as username, password, possibly IP, etc. All this data is provided by the provider. How do I know the type of connection, i.
Connection and quick setup of Asus RT-N12 +
Connect power to the router. If the power indicator does not light up, then check if the power is turned on with the button on the back of the router. Connect a network cable from your provider or modem to the WAN connector. And into one of the 4 LAN ports, connect the cable, which will connect the router to the computer. If you don't have a computer or laptop, or don't have a network cable, then you can configure the router via Wi-Fi. But, better by cable, then it can be disconnected from the computer.

If you will be configuring via Wi-Fi, then just connect your laptop (or another device, you can configure it from a tablet or phone) to the wireless network, which appears immediately after turning on the router. The network will be called Asus and will not be password protected.

It may be that the default network will be named differently, or it will be with a password. Perhaps someone has already tried to set up our Asus RT-N12. I always advise you to do a factory reset before configuring. Press and hold the button on the back for 10 seconds (showed her in the photo above)... When released, all indicators will go out and the router will start to turn on.
We go to the control panel
After everything is connected, open any browser and type in the address 192.168.1.1 ... Settings should open immediately. If this does not happen, or something went wrong with you, then take a look. We should see a quick setup wizard. First, press the button Go to.


On the next page we need in the field Network name (SSID) specify the name of your Wi-Fi network, and in the field Network key set a password to connect to this network. Also write this password somewhere.

The router will think and reboot. A Wi-Fi network will appear with the name we just set. Connect to it with the new password that we just set.

After connecting, go back to the settings again. A window should appear with information about the connection. Click on Further.

The router will ask you for a username and password to access the settings (which you set during setup).

If everything is exactly as I described above, then you are very lucky. Most likely, this means that your ISP is using connection technology. Automatic IP, and the router set everything up by itself. By the way, the Internet through the router should already work. This completes the router configuration.
But, if you have a connection type L2TP, PPPoE, or PPTP (providers: Beeline, Dom.ru and others), then the setting will go a little differently. You just need to manually set some parameters.
Configuring the Internet PPPoE, L2TP, PPTP (Dom.ru, Beeline) on Asus RT-N12
If your provider uses PPPoE, PPTP, L2TP, or Static IP technology, then after starting the quick setup wizard, after checking the connection, the router should prompt you to select your connection type.


You may need to specify some more parameters. IP address, service name, etc. It all depends on the type of connection and your provider.
During the setup process, as soon as the router establishes a connection to the Internet, it will prompt you to set up a Wi-Fi network, etc. Perform these settings as I showed above in this article.
You can always yourself change WAN settings(internet connections)... Just go to the main settings page (there is a button in the quick setup wizard), and open the tab Internet - Connection.

On this page, you can always configure the most important Internet connection settings. If the Internet is already working through the router, you have changed the name of the wireless network and the password, then you can finish setting up the Asus router here. And I'll show you where and how you can change the most important settings.
Wi-Fi setup and password change
If you want to change the name of your Wi-Fi network, or change the key that you use to connect to Wi-Fi, you can do this at any time in the router settings right on the main page. Just enter a new name and / or password and click the Apply button.

More wireless settings, including channel settings, can be found on the tab Wireless network(left).
After changing the network name or password, do not forget to reconnect your devices to Wi-Fi. If you have any connection problems (usually after changing the password) then delete your network and reconnect to it.
Protecting the settings of the Asus RT-N12 router
During the configuration process, we have already set a new password to access the control panel. But, if you have not done this, or want to change your password, then go to the tab Administration - System... Enter the same password twice and click Will apply b.

Now, to enter the admin panel, you will use this password. Don't forget it :) On this page, you can also change the time zone, assign an action to the WPS button, enable Telnet, etc.
If you have read this article to the end, and you still have a desire to do something, then you can update the firmware of your RT-N12. There is very much on this topic.
For creating home network you need a router. It has been noticed that most of the buyers are interested in ASUS WiFi router. When planning to purchase it, it is necessary to clarify the required characteristics with the provider, and also decide which additional functions you will need. When choosing certain options, remember that they need to be configured.
Router models
Networked technologies have taken strong positions in all spheres of life. ASUS is not the last in the networking equipment market. Routers of this brand are considered one of the most reliable and easy to use. The most common home models are:
- ASUS WL-500W;
- ASUS WL-330N;
- ASUS RT-N66W;
- ASUS RT-N53;
- ASUS RT-N18U;
- ASUS RT-N16;
- ASUS RT-N15;
- ASUS RT-N12;
- ASUS RT-N10;
- ASUS RT-G32.
Comparison technical characteristics will help you choose the right ASUS router model. The "Wi-Fi" router of this brand with the simplest functions is inexpensive. The variety of external characteristics should not confuse you. Often this is just an original case that houses a standard ASUS router. Feedback from other buyers may indicate the best deal.

Router appearance
If the router is provided by the provider, then the necessary settings have already been set. It is useful for owners to know where and what buttons are located, how the ASUS router works.
Setting up in this case will not be difficult. The majority of home routers have the following external interfaces:
- Resetting the settings - the Reset button. To reset the router settings and return to the standard one, press with a thin object (stylus, needle, pencil lead) on this button, drowning it deep into the body, but not too hard.
- Power button - turns off and on the power of the device, it will be needed to reboot the router if it hangs. If the network slows down or stops functioning, turn off the power to the router for a minute or two, and then restart the device.
- Power connector - connects to the device's power supply.
- WAN port (internet) - The internet cable is inserted here.
- LAN ports (1-4) - for connecting various devices to the Internet via a wire: computers, laptops, TVs, set-top boxes.
- WPS - designed for automatic connection to Wi-Fi, requires special configuration on the computer.
- USB port - allows you to connect additional devices to the router: modem, memory storage or printer. Almost every ASUS router is equipped with such a port. Setting up a 3G modem is a topic for a separate article.
- Antennas - depending on the model, there can be from one to three.
How to install ASUS router
For correct and safe operation of the device, it is important to connect it correctly. When buying a router for your home network, be prepared for what you need:
- Connect the device to the power supply. You will need an outlet located near the installation site of the router, as well as an extension cord.
- Connect the WAN cable through which the Internet is connected to the apartment. Pay attention to its condition, it must be compressed, not have any breaks, breaks in the shell, otherwise the connection may not work correctly.
- It is necessary to connect the LAN wire to the computer, and possibly also to dissolve wired Internet to multiple devices. You will need sections of the LAN cable crimped on both sides, corresponding in length to the distance from the location of the router to the desktop with the computer. Better if the wires are slightly longer. To connect the router to a computer, you need a straight-through cable. It is unacceptable for it to dangle freely, and long wires must be secured.
- Connecting additional devices: printer (if there is a USB port), network storage, game console and other similar devices.
- Install the mounts for the router. You can of course leave the router on the table, but it's much safer to mount it to the wall. Compliance with the rules will help keep your ASUS router in working order for a long time. Setting up the network is possible only after the end of the installation.

Help for beginners
Please note that it is not so easy to complete all the points on your own, without special equipment. For the installation of equipment, you can ask for help from specialists. But setting up a home network on your own is quite possible. One has only to study the instructions. For example, if you have a question about how to connect an ASUS RT-N10 router, your ISP can provide help. Also, we hope the information presented in our article below will be useful.
Setting up a network connection on a computer
After you have connected the router, you can start setting up. This can be done from any computer connected to it via a LAN cable. You can also get into the settings via Wi-Fi. Although most manufacturers recommend using a wired connection. Be sure to ask your provider about the network settings.
If a router is installed in the home network, then the computer will receive all the parameters automatically. No LAN connection setup is required. In Windows 7, you need to go to the "Network and Sharing Center" either through "Start" and "Control Panel", or through the network connection icon in the lower right corner of the monitor. In the "Changes to adapter settings" item, find "Local Area Connection". Right-click to open its properties, then locate Internet Protocol tcp / ip version 4, select it and click the Properties button below. Check the boxes “Obtain an IP address automatically”. Set the same in the DNS retrieval line. Save your changes.

Downloading the firmware from the official website
For some models, you need to download a special software... Such as, for example, the ASUS N12 model - a router popular with users and providers. To do this, enter www (dot) Asus (dot) ru in the address bar. The browser will open home page manufacturer's website. Find the "Download Center" item in the "Tools" menu. In the search, type in the name of the router model. In the files found, select the version indicated on the sticker on the back of the device. Set the desired type of operating system. Download the firmware. It will need to be installed by going to the router interface. Some items may differ in different modifications, but in general they are similar. You can enter the interface of most routers by typing 192.168.1.1 in the address bar. In the authorization window, drive in the password admin and the username admin. On the Administration tab, find the Update Firmware item. Set the path for the update where you saved the firmware downloaded from the official site. Update the program, after which you can proceed with the settings.

How to set up a router ASUS?
Let's consider setting up a router via the WEB interface. An example is the ASUS RT-N10 WiFi router (12, 15, 16, 56). These are popular models that are often used by the largest Russian providers, having previously provided them with their own firmware. The interface looks different, but the main settings are practically the same. First, you will be taken to the general settings tab. Additional sections can be seen on the left. Typically, this will require a name for your network. In the case of ASUS RT-N10, the speed of the Wi-Fi signal is set on the main tab, and the very possibility of its distribution is disabled or enabled. It also displays basic settings, such as the IP address, after receiving them by the router.
Providers such as Rostelecom and Beeline send the network settings for the router automatically. For them, the checkboxes "Receive automatically" are put everywhere. The VPN server name is provided by the provider, as well as the username and password. For Rostelecom, the type of WAN connection will be PPPo3, for Beeline - L2TP.

Manual input of network settings
In the case of other companies, it may be necessary to drive in the settings manually. First, go to the appropriate tab and configure the WAN connection. The provider is obliged to provide information about the IP address, gateway and DNS servers. The subnet mask for all routers will be 255.255.255.0. An exception is the setting of a fixed external IP address. This is extremely rare, the service is not provided free of charge. In this case, the mask value is also provided by the provider. If the service is connected, then all data must be indicated in the contract or an annex to it. Having understood the documentation, you can easily decide the question of how to set up an ASUS router. All changes are saved with the "Apply" button.
Setting up a wireless network
To configure Wi-Fi, go to the side tab "Wireless". Here you need to give the network a name in the SSID item. Then set the type of encryption supported by your wireless devices... Then come up with a password for the wireless network. Do not change other parameters unnecessarily. Save your changes. In addition, for Wi-Fi to work, you will need to set up a wireless connection on your computer and laptop. Most modern routers have two Wi-Fi bands: 2.4 and 5 MHz. You need to configure both tabs, as well as protect them with a password.

Other settings
Additional settings may be needed if you have a set-top box or TV connected with a wired LAN connection. In this case, on the appropriate tab, find the IPTV STB port selection item. Set the number of the LAN port to which the set-top box is connected.
A DHCP server is a tool that distributes IP addresses to computers on a home network. They may be needed to access the local network of the provider or the so-called ball. In order for the computer to correspond to a strictly defined IP address, check the box that enables identification by MAC addresses on the tab. You can see the latter in the network connection details. The function of translating physical addresses is useful if they are recorded by the provider. In such cases, when connecting a new device to the network, it must be bound. When setting the translation of the physical address of the computer, it will be transmitted to the ASUS router. The setup is simple - you need to check the box to activate this function. Now you can easily connect your laptop or computer directly to the WAN cable without registering it with your provider every time.
The DHCP server must be enabled to assign addresses to computers on the network. The assignment must be assigned manually if you want to access the provider's local network from all computers. Set the range of IP addresses by specifying the end and start addresses of the pool (see your ISP for settings). Leave all other items unchanged. In the drop-down list of physical addresses of devices on your home network, add each one in order. After making all the changes, you need to restart the ASUS router. The setup is complete. After the next download, check the Internet from all devices. If everything is in order, by going to the "Administration" - "Manage settings" item, save the router settings to your computer just in case.