There are only a few problems that beginners face. And one of them is the BIOS setup for installing Windows from a USB flash drive. This is the first step that starts everything, and this is where almost everyone stumbles.
The problem is that there are different BIOS versions. And, having studied the instructions on how to enable booting from a USB flash drive in the BIOS, a beginner may still not be able to cope. And all because he simply has the wrong BIOS version, there is no such line as in the screenshot and, accordingly, nothing happens.
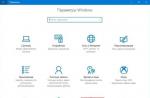
It doesn't matter what brand of laptop or computer you have. The version of the operating system (Windows 10, 8, 7 or XP) also does not play a role. Only the BIOS version matters. And the easiest way to find out about it is by running it.
How to enter BIOS settings
Before entering the BIOS settings, you need to insert a bootable USB flash drive with the installation image into the USB port. At the same time, the main thing here is to write it down correctly. Otherwise it just won't load.
After that, restart your PC or laptop and constantly click the Delete or F2 button until the BIOS window opens. The button may differ depending on the brand of laptop or motherboard on the computer, so see the hint on the first black screen.
Then the BIOS is configured.
Award BIOS setup
How to understand that you have an Award BIOS? From the screenshot below:

If you have the same blue screen, then this is an Award. Most often this option is found on the PC.
Management in BIOS is carried out only using the keyboard - arrows and corresponding buttons (their list is usually indicated at the bottom of the screen).
Before setting the BIOS to boot from USB, you need to check that it is enabled (otherwise the USB flash drive simply will not be displayed). For this:

The instruction is as follows:


In the screenshot above, the HDD is in 1st place, and the USB flash drive is in 2nd place. It needs to be lifted up. As you can see from the prompts at the bottom of the screen, you can set the boot priority in BIOS using the + and - (plus and minus) buttons. Select the USB flash drive and press the plus sign - it should move to the first line. Then press Esc to go back.
Then highlight the item "First Boot Device", press Enter and select "USB-HDD". Press the Esc button again. To exit the BIOS, click the F10 button and then Esc (Save and Exit).

AMI BIOS Setup
AMI BIOS looks like this:

And most often it is found on laptops. Again, you first need to make sure that the USB controller is enabled. For this:

 Now let's look at how to boot a USB flash drive through BIOS on a laptop:

Sometimes, in order to change the device boot priority (put the USB flash drive in first place), you need to press other buttons. It can be not only + and - (plus / minus), but also F6 / F7, etc. Focus on the tips where it says what a particular button does (this little instruction is always either on the right or at the bottom).
Phoenix-Award BIOS setup
The Phoenix Award looks like this:

This is a rare (or rather, old) version, but for the full picture, let's look at the Phoenix-Award BIOS through the BIOS.
First, go to the "Peripherals" tab and check that the first two items are set to "Enabled". If necessary, expose the desired.


After that, go to the "Exit" tab (in the top menu) and select the "Save & Exit" line to exit the BIOS.
UEFI BIOS Setup
The UEFI BIOS is a new and improved version of the old BIOS. It has a user-friendly interface, so setting up the BIOS for installing Windows is very simple here.
All you need to do is find the USB device icon, use the mouse to move it to the 1st position, and then click the “Exit” item (in the right corner) with the mouse. And don't forget to save your settings!
In this simple way, booting from a USB flash drive through the UEFI BIOS is carried out. Undoubtedly, this method is the simplest and most understandable. Actually, it was for this that a new graphical interface was developed.
When the PC or laptop reboots for the first time during the Windows installation process, you need to go into the BIOS again and restore the previous settings. That is, put the HDD-drive in the first place, and lower the flash drive to the second or third.
Or when a black screen appears after the reboot with the line "Press any key ..." ("Press any button") - do nothing.

Otherwise, Windows will start installing from the very beginning. And you can go around in circles for hours.
Once again: during the installation process after the first reboot, either go to the BIOS and return all the previous settings, or simply do not press anything. Alternatively, you can also simply pull the USB flash drive out of the USB port (but only when the PC or laptop reboots).
When buying a new computer or laptop, as a rule, in specialized stores, the buyer can immediately use the paid service for installing the operating system on the purchased PC, as well as some programs, including antivirus programs.
Working according to the standard scheme, in this case, the specialist will install the OS by default, without dividing the hard disk volume into sections. As a result, the system local disk will contain both the OS, the software package, and all kinds of multimedia files that are completely unrelated to the system.
And when the time comes for the next reinstallation of the OS, the user may permanently lose all data on this computer. Of course, before that, you can copy the contents of the disk to another medium, but you need to take into account that the decision to reinstall the OS is not always made in advance, as in the case of a sudden failure, the so-called "" (complete failure of the system without the possibility of its recovery).
Therefore, you should learn how to install Windows yourself. In fact, it is not as difficult as it may seem to a beginner, and even more so it will save money, gain the necessary knowledge in working with a computer and save yourself from trouble with the loss of valuable information on your hard drive.
How to remove windows 7 and install windows 7: necessary steps before installing the OS
So, it is important to emphasize that during the installation process, immediately before changing the OS, all information on the system local drive C will be erased. Therefore, the necessary data will have to be transferred either to another local drive or to external media (CD, flash drive, removable drive or backup hard drive).
Accordingly, all files displayed on the desktop will also disappear, and the work of previously installed programs will be impossible in the future, since before installing a new OS, drive C must be completely formatted, eliminating not only old data and system errors, but even unwanted, virus software, if any (and often it is viruses that cause system failure, in fact, they are developed for these purposes).
The next step is to have Windows OS (Windows 7 in this example) recorded as an image on the media. To the question of where to purchase this software:
- buy a licensed version in a computer store;
- download the OS distribution kit from the Internet;
- overwrite the OS image from another external media or borrow it for a while from friends.
You should immediately determine the bitness of the operating system: 32 or 64 bit.

To find out which one is currently installed, go to the Start menu - Computer - right-click on the general background - Properties.


Also, you need to write down or remember the total size of the local drive C and the amount of free space on it. This is done in order not to confuse partitions with each other when reinstalling the OS.

Then, it is advisable to make sure that there are disks with drivers for the equipment (or the driver versions can be stored on the PC, on another local disk).
A driver is the necessary software for launching and further stable operation of special PC equipment: input-output system (monitor; manipulators - keyboard, mouse, gamepad, etc.; sound and video card), external equipment (printer; scanner; uninterruptible power supply, etc. .)
If there are no drivers, you can successfully download them from the network even after installing the OS.
In the event of reinstalling the OS, the user must be aware that Windows, recorded as an image on the media, gives the latter the name “bootable” (boot disk or bootable USB flash drive). And, since the image of the operating system is recorded in a special mode, the entire amount of bootable media memory is intended exclusively for Windows, and the installation of the system is possible only through displaying and changing the settings of the "heart of the computer" - the BIOS.
Windows 7 Initial Setup: BIOS Settings
If the OS image on the bootable media has already been purchased and the bit depth of the system is known, then you can proceed with the installation process.
Working with the boot disk, we use the drive; if the OS is on a bootable flash drive, plug the latter into the appropriate USB connector and reboot the system.
As soon as the title image of the motherboard logo familiar to the eye appears on the monitor, we begin to repeatedly press a certain key to display the BIOS, most often it is the "Delete" or "F8" key. However, there are other options: "F1"; "F2"; "F3"; F10; F12. In any case, in order not to waste time guessing the right button, it is enough to carefully look at the commands indicated at the bottom of the screen at the time the computer boots up, where the “hot keys” of calling not only the BIOS, but also the general system management menu are located.

If the user did not have time to press the BIOS call key at the right time, you should wait for the system to boot and reboot it again, trying again. A successful press is accompanied by a special sound signal and displays the general BIOS menu on the monitor screen.
So, the BIOS menu has opened, now you need to select the "Advanced BIOS" item.

In the next window, we find a list of priorities when loading the PC system, as well as the connection statuses of individual equipment. In this list, it is important to select the “First Boot Device” column of primary priority, opposite which “Hard Disk” (hard disk) is entered, that is, the settings indicate that when the system boots, the primary reading of information occurs through the data of the hard disk, in particular the registry and local disk WITH.
But in order for the PC system to bypass loading the old copy of Windows to start scanning and processing information from the boot disk, for this you will have to change the primary priority of reading data. We replace the “Hard Disk” request with “CDROM” if the image of a new copy of OC is written to a CD and to “USB-HDD” if we install the operating system from a USB flash drive.


As for the older version of the BIOS, the changes in the settings are almost the same, although in general the appearance of the interface is different.

There is also an "Advanced" menu, and switching priorities for the initial reading of information is located in the "Boot" menu.

Selecting a volume to install Windows 7
Now you should wait for the Windows 7 setup menu to appear while the system copies data from the boot disk.

As soon as it appears, select the item "Install Windows 7";

architecture (bit depth) - in accordance with the current one (or based on the indicators of the processor and video card during the initial installation);

installation type - complete;

accept the terms of the license agreement.

In the menu that appears with partitions for installing Windows, by the type and size of the volume, we find the one that is currently the local system drive C (just for this it was necessary to write down the volume of this disk before installation).

Let's start formatting it: select the required volume and click on the "Disk Setup" - "Format" button - in the warning message, click "Ok" and "Next".

Provided that the OS is installed for the first time, in the menu with partitions, only one of the main volumes will be indicated with a size equal to the size of the entire hard disk. In this case, through the "Disk Settings" button, you will need to delete this partition and create a new one with a size of 100 GB in its place, which will later become the system local disk. You should install a copy of Windows on it. The remaining large part of the volume of the hard disk will fill the niche of another volume, which we will also create next to the first one. Thus, we managed to divide the hard disk into sections.
When you click on the "Next" button, the automatic process of unpacking the OS files and installing components and updates will start, which will take approximately 30 minutes until it is completed. Each further installation step will be accompanied by a PC restart to save and accept the data.
Completing the installation of Windows 7
In the final stage, before the first display on the desktop screen of a new copy of Windows 7, in the system settings windows that appear, you will need to enter: username; OC product key; your account password, optional; interface language and keyboard layout. Next, another reboot of the system will follow, and then the desktop will open in a low resolution of 800 * 600 pixels. After that, you can remove the boot disk (or bootable USB flash drive).
Then, in order for all components and system updates to take effect, we find a shortcut on the desktop with the Windows activator and open it.

After activating the OS, we reboot the system manually and call the BIOS again, where we return the priority to the Hard Disk in reverse order; save the changes through the "F10" key and confirm the actions with the "Y" and "Enter" buttons.
So, the new operating system is installed on the PC, it remains to connect the necessary drivers and update them to more recent versions via the Internet.
Often on the Internet you can see the question “How to install Windows through the BIOS?”, It makes an experienced user smile, but its essence is: what needs to be done in the BIOS to start installing the operating system?
First of all, we need to have an image of the installation disk with the Windows operating system. Then choose from what we will install our operating system (DVD drive / external DVD, or flash drive).
Now let's go directly to the settings in the BIOS. Depending on the manufacturer, after turning on the computer, press the Del key, or F2, or F10, or Esc in order to get into the BIOS settings (now there may be other combinations, you can find out which one you need to use from the hardware manufacturer).
Next, we need to find the Boot section in the BIOS, or Boot device priority, or Boot Device Configuration in which we will set the boot priority (from which the system will boot when it is turned on and in what sequence). Here you can install the first DVD drive (internal, external USB), flash drive or floppy (this is not a joke in my experience was installing Win98 using 147 floppy disks)
Then you need to save the changes and restart the computer.

In new equipment, and especially on laptops, in order to ensure intellectual property rights in the BIOS, there is a UEFI mode that must be enabled / disabled in order to be able to boot from a USB flash drive or optical drive.


It is important to remember that the boot priority on a large number of equipment can now be selected without changing the BIOS, at startup you need to press Esc or F10, or F12.
You can determine the BIOS settings for a particular motherboard by looking at them in the motherboard passport.
Important! Incorrect BIOS settings can damage the computer or reduce the power rating.
Information for management.
How to install Windows via BIOS, booting from DVD, USB, HDD depends on several Boot Menu keys
You need to get into the BIOS system: restart the PC and enter "Setup" - the software that is responsible for the initial boot of the computer.
During the reboot, carefully monitor the inscriptions on the monitor screen, you need not to skip the line that appears below, with the following text:
"Press ____ to enter SETUP".
The program tells you how to get into the BIOS, you must press the key that is written on the screen, it can be:
F1, F2, F3, F10, Del, Esc - they differ on different computers, depending on the BIOS version.
Hold down the key until the system redirects to the Basic Input-Output System. A list of tabs will appear on the screen, you need to select the one that says about booting devices - “Boot devices” or “Advanced BIOS Features”.
If it was not possible to perform the prescribed actions the first time, do not despair, you need to repeat all the steps a couple of times.
We select a tab, in order to enter, you need to press the "ENTER" button. After that, in the drop-down list, find the “Boot Sequence” tab and check the correctness of the choice with the information that appears on the right side of the monitor screen. It should be said that the selected tab is responsible for device boot priority.
After the boot tab is determined, by controlling the enter keys, it is necessary to set the priority so that the first in the list is "CD-ROM" or that boot device.
With the help of which the whole process will be carried out. To do this, select "First Boot Device" in the list and after that there was a hard drive.
You need to confirm the correctness of the choice and click the "OK" button.
Thus, all BIOS system settings for loading and reinstalling Windows are ready. This was all done so that the next time the PC is restarted, the OS itself will redirect Windows to boot from the previously selected disk.
In order to start the download, you must restart your computer.
To install Windows via the Basic Input-Output System from a USB flash drive, in fact, the whole procedure is similar to the one described above, but you need to select Secure Boot from the list of suggested tabs in the BB BIOS system or select the appropriate menu item in the OS with a simple option of “overlaying” versions.
The process of installing Windows from a USB flash drive does not start and a black screen is shown on the monitor:
UEFI mode enabled;
The flash drive is formatted in the NTFS system;
BIOS BB only supports NTFS partitions, UEFI - FAT 32.
With a new version of the system to boot from a USB flash drive, it asks for permission for automatic mode. It is best to refuse such an offer, otherwise the OS may be installed on the wrong partition or delete some of your personal files.
Before setting the BIOS settings, you must select using "+" or "-" and click on the "Boot" tab.
When choosing settings, you must save them. To do this, you need to press the "F10" key - "Save and Exit". Also, this action can be performed by pressing the "->" key - "Exit Saving Changes", i.e. "quit and save changes".
After the approved and selected option and device boot priority, you need to select the F10 option, and then restart the computer.
For novice users who need to reinstall Windows through the BIOS, experts have developed some tips for a competent and fast process.
For a successfully configured BIOS system, special attention should be paid to these recommendations:
PC requirements (assuming Windows 7):
Memory - at least 1 GB;
Processor - minimum 1 Hz;
Video card - at least DirectX 9.
Time to work in the BIOS.
How long does it take to set up and configure a new version of Windows? It all depends on the technical parameters of the PC:
Speed \u200b\u200b"Clock Speed";
Number of Cores;
Main frequency "800/1066/1333/1600 MHz".
On average, it will take one hour to install Windows through the BIOS.
Clean and simple Windows installation processes
A clean installation is the launch of a disk with the system in manual mode, during computer startup. After that, start, press any button, after the inscription “Press any key” appears on the tap.
The BIOS indicates the location of the new OS, for example, on a CD / DVD or on a hard disk, so that the old version is not used at all, or has been deleted. The clean version is used for any operating system: Unix, DOS, Windows XP, as well as Linux, Windows 8 and Windows
Downtime is rarely used and is not recommended. This is due to the fact that the new version is launched from a CD / DVD disk already installed with the old OS. So a simple installation is more like an "overlay" process, as the new version is overlaid on the old version.
Installation Process Difference
Easy Windows installation:
Starting the computer;
BIOS;
Operating system;
BIOS;
Installation.
Clean install:
Starting the computer;
BIOS;
Installation.
Clean install.
Operating system hard disk partitions.
Often, during a clean install, all partitions are formatted and old versions and files are deleted. If you need to reinstall a system with several partitioned drives where important files are stored, you can leave the information unchanged.
It is not necessary to format the D drive, however, the C drive with the files of the old version of Windows will be formatted.
Analysis of the hard drive during installation.
Before starting the installation of Windows (with an idle OS, crashes and glitches), you need to try to use the last chance to restore and clean up malware.
In case of pronounced problems with the operation of the PC, it is necessary, first of all, to check the condition of the hard disk, analyze the operation of the segments, otherwise, even during the installation of the system, the formatting process may freeze or work unstably.
Retention of personal information.
Personal data and information is a very important component that is not always recoverable in case of deletion or damage, so before you reinstall anything, you need to take care of their safety.
To save information and personal data when reinstalling Windows, you need to copy and transfer all the necessary files to portable media (disk, flash drive, etc.). It is also very important to save passwords, for this it is recommended to use the Backup program or do it the old fashioned way, manually.
By following the rules and advice exactly, you can understand how to install Windows through the BIOS on a computer, even for a person, without special skills and experience, in situations of this kind.
BIOS setup under Windows 7
During the BIOS settings for installing any operating system, difficulties arise, since versions may differ from each other. First you need to enter the BIOS interface - restart the computer and before the operating system logo appears, press one of the keys in the range from F2 to F12 or Delete. In addition, key combinations can be used, for example, Ctrl+F2.
The next steps depend on the version.
AMI BIOS
This is one of the most popular BIOS versions that can be found on motherboards from ASUS, Gigabyte and other manufacturers. Instructions for setting up AMI for installing Windows 7 are as follows:
Once you have entered the BIOS interface, go to the "Boot" item located in the top menu. Moving between items is carried out using the left and right arrows on the keyboard. The selection is confirmed by pressing Enter.
A section will open where you need to set the priority of booting the computer from certain devices. In the "1st Boot Device" item, by default, there will be a hard drive with the operating system. To change this value, select it and press Enter.
A menu will appear with devices available for booting the computer. Select the media where you have the Windows image. For example, if the image is written to a disc, you need to select "CDROM".
Setup completed. To save the changes and exit the BIOS, press F10 and select "Yes" in the window that opens. If the F10 key does not work, then find the "Save & Exit" item in the menu and select it.
After saving and exiting, the computer will restart, booting from the installation media will begin.
The BIOS from this developer is in many ways similar to that from AMI, and the setup instructions before installing Windows 7 are as follows:
After entering the BIOS, go to "Boot" (may be called "Advanced" in some versions) in the top menu.
To move "CD-ROM Drive" or "USB Drive" to the top position, highlight the item and press the "+" key until the item is placed at the very top.
Exit BIOS. Here, pressing the F10 key may not work, so go to the "Exit" item in the top menu.
Select Exit Saving Changes. The computer will restart and the installation of Windows 7 will begin.
In addition, nothing needs to be configured.
Phoenix BIOS
This is already an outdated BIOS version, but it is still used on many motherboards. The instructions for setting it up are as follows:
The interface here is represented by one continuous menu, divided into two columns. Select the "Advanced BIOS Feature" option.
Navigate to "First Boot Device" and press Enter to make changes.
In the menu that appears, select either "USB (name of the flash drive)" or "CDROM" if you are installing from a disk.
Save the changes and exit the BIOS by pressing the F10 key. A window will appear where you need to confirm your intentions by selecting the “Y” item or by pressing a similar key on the keyboard.
In this way, you can prepare a computer with a Phoenix BIOS for installing Windows.
UEFI BIOS
This is an updated graphical BIOS interface with additional features that can be found in some modern computers. Often there are versions with partial or full Russification.
The only serious drawback of this type of BIOS is the presence of several versions in which the interface can be greatly changed, due to which the items you are looking for can be in different places. Consider setting up UEFI to install Windows 7 on one of the most popular versions:
In the upper right part, click on the "Exit / Additional" button. If your UEFI is not in Russian, then the language can be changed by calling the drop-down language menu located under this button.
A window will open where you need to select "Additional mode".
The advanced mode will open with the settings from the standard BIOS versions that were discussed above. Select the "Download" option located in the top menu. You can use a mouse to work in this BIOS version.
Now look for "Boot Option #1". Click on the value set opposite it to make changes.
In the menu that appears, select the USB drive with the burned Windows image or the item "CD / DVD-ROM".
Click on the Logout button located on the top right side of the screen.
Now select the "Save changes and reset" option.
Despite the large number of steps, there is nothing complicated in working with the UEFI interface, and the probability of breaking something with an incorrect action is lower than in a standard BIOS.
Installing an operating system is one of the most difficult, but at the same time, one of the basic skills associated with maintaining a personal computer. The system installed on the computer may fail at any time, as a result of which it will be possible to continue working with the device only after restoring Windows. Even though the system is constantly being improved, and its resistance to failures and errors is increasing, the user still needs to be ready at any time to be able to restore the PC to working order.
Installing through the BIOS, as a special case, is the most reliable way to get rid of problems in the previous installed operating system by formatting the hard drive and installing everything from scratch. If the user decides to install Windows through the BIOS, then he will need to prepare drivers for all computer devices in advance (most often they are supplied on a disk bundled with the PC), as well as have the operating system distribution kit on hand. Also, when changing the parameters of the computer's basic input / output system, you should be very careful, since incorrect BIOS settings can also lead to computer failure.
Quick article navigation
Training
Before starting the reinstallation, you will need to examine the contents of the disks that came with your laptop or computer. One of them should have software for the video card, sound card, network adapter and other devices. It is also important that the versions of the drivers on the disk are designed specifically for the operating system that is being installed on the computer.
If there is no disk, or if the software versions are outdated, before installing it is recommended to visit the laptop manufacturer's website (device manufacturers' websites) and find the download section, from where you can download the latest software versions to removable media.
It is also worth taking care of the availability of the desired version of the operating system itself. It must comply with the characteristics of the computer and the requirements of the user himself, and also be licensed. So, it can be a boxed version of Windows from the store, or an installation media created using official tools (Media Creation Tool program).
Reinstallation
In fact, the BIOS itself is only indirectly involved in the installation process. In it, the user specifies which device should be scanned first for operating system files. By default, the hard drive is listed there, so the computer boots exactly the installed system. The user must point the host device to a floppy drive or USB drive in order for the computer to run the installer.
To do this, you will need:
- Turn on the computer.
- Carefully follow the inscriptions on the very first screen, which is shown immediately after pressing the power button. Usually at the bottom of the screen it says which button you need to press to get into the BIOS. Some computers also provide a button that allows, bypassing unnecessary settings, to change only one parameter associated with the main device.
- Go to the BIOS itself using the indicated button.
- Open the "Boot" or "Device Priority" section.
- Use the keyboard controls to set the USB or DVD-ROM as the First device.
- Use the Esc key to return to the BIOS main screen.
- Select the "Save and Exit" option.
This will restart the computer. When the inserted media is detected, the computer will ask you to press any button to start the installation.
Further, the process will go in semi-automatic mode and will require only minimal user participation. The installation program is accompanied by Russian-language prompts and will explain at every step what needs to be done. At the end of the Windows installation, you only need to install all the drivers from the previously prepared media (if they were not installed automatically with the system) and install all the programs necessary for daily work.

We have repeatedly considered the functions and capabilities of this operating system. Today we will talk about what, of course, almost every user will encounter. It will be about. And we will consider the method of installing it through the BIOS.
We will not tell you what BIOS is, since there have already been references to it more than once. All we can say is that every computer has this basic I/O system.
So, first of all. This is done differently on different computers. But still, very often, when starting the computer, you need to press the Del key when the computer boots. After that, you will be taken to the BIOS.
After entering the BIOS, find the menu section that is responsible for installing the OS. The location of this section may be different, since the computers have different motherboards and, accordingly, different BIOS versions.
You need to find the menu FIRST BOOT DEVICE, BOOT or BOOT DEVICE. Why exactly them? It is through them that you need to start installing the operating system through the BIOS. Now you must set up the DVD drive or HDD (flash drive). This completes the preparatory installation process.
Now you need to exit the BIOS, saving all the changes made before that. Most often this is done like this: the F10 key to exit and the Y key to save the changes made. After that, restart your computer. After the reboot, you may see the following message: Press any key for load from CD...". This inscription will appear if in the previous paragraph you selected a DVD disc as the carrier of the OS distribution kit. If a flash drive was used, the OS will start automatically after restarting.
How do you know if Windows installation has started? If everything is done correctly, then something similar to this should appear on your monitor.

All this is just preparation for installing the operating system. Upon successful completion of the preparation, you should see the inscription " Starting Windows". And almost immediately the Windows installation window will appear. Select all the parameters the same as in the screenshot below, and then click on the button" Further". Immediately another window will appear in which you will need to click on the button " Install".

Next, a window with license terms will appear. You need to check the box next to " I accept the license terms", and then press the button " Further". Everything is the same as with any other program installations. Next, you will be prompted to select the type of installation. It is better to select " Full installation".
The matter remains small. Now you will need to select the hard drive where the operating system will be installed. There will be no difficulties with this. Next, the system will prompt you to choose a partition for the OS, but since there are none yet, you will need to create it yourself.

Next, select the size of the partition, that is, set it yourself and click on the " Apply". After that, a window will appear with information that Windows can create additional partitions. Just click the " OK", and then " Further". The installation process will begin.
After all the necessary system components are installed, the computer will restart. At this point, remove the OS distribution media from your computer.
As soon as the computer restarts, a window will open with the installation completed. You should have a window like this.

This process will take several minutes. After it, the initial setup of the operating system will begin. Here you will be prompted to enter a username, a computer name, and a user password. You can also skip this one by clicking on the " Further". In principle, the main stage of installing Windows through BIOS is over. You will only have to enter the key, accept the recommended settings and you can use the computer. As you can see, although this process is lengthy, there is actually nothing complicated in it.