While working with the Windows OS, the user may encounter an error message that mentions an unknown "RunDLL" file, as well as some missing module (for example, KBDPopc.dll, ). The appearance of the message "RunDLL encountered an error while starting" is usually a litmus test for finding any malware(for example, adware), which dlls cannot be accessed by the system. In this article, I will consider the essence of the problem “The specified module was not found”, as well as ways to solve it.
Causes of RunDLL Dysfunction
The problematic message can be conditionally divided into two conditional parts - the mention of "RunDLL", as well as a notification about the impossibility of finding the module. What does this mean?
rundll is system file OS Windows, designed to run (check) dll-libraries. These libraries can be both useful system and malicious (as part of a virus program) in nature.
The message "RunDLL encountered an error while starting" appears in a situation where dll file, which should be launched at system startup (or at the scheduled time) is not in its usual place (on disk). This absence is explained by the previous removal of this file during the operation of the antivirus, damage to the file itself, incorrect installation or unstable operation of any software. Windows is trying to load given file(after all, there is a link to it in the system registry), but cannot find it, so it gives the above error message.

Among more complete list The causes that cause the RunDLL problem are the following:
- Some dlls are corrupted or missing;
- Malicious attack by virus, adware or spyware;
- Incorrectly installed applications;
- "Worn out" or damaged system registry;
- Outdated system drivers that need to be updated;
- Bad (broken) sectors on the hard drive.
How to fix RunDLL error "An error occurred while starting"
Most of the tips on the level of a “clean” launch of Windows, using the functionality of the sfc utility, running a problematic program as administrator, and other analogues that exist in this topic are ineffective. There are only a couple of ways that can fix this problem, and they will be listed by me below.
Since, as we have already found out above, the RunDLL error occurs due to the fact that there is a link to the missing file in the registry, there are two ways in this situation:
- Remove the link to the missing file from the registry;
- Put the missing file in its "rightful" place.
Since in most cases the missing file is some malicious file, previously removed by the antivirus, then in this situation we need to focus on the first of the proposed options, namely, working with viruses and the system registry.
Method number 1. Antivirus toolkit
The first step I recommend doing is checking your PC for virus malware. To do this, we need the best antiviruses for and, with which you need to check your PC for malicious software. After checking and removing the malignant files, reboot your machine and check if the error I'm considering "RunDLL encountered an error while starting" reappears.
Method #2. Product functionality "Autorans"
If the error “The specified module was not found” continues to occur, we will use specialized software called Autorans. This program not only displays a detailed list of programs launched by the system, but also highlights in yellow those running programs whose files are missing from the system. Thus, it remains for us to remove or disable the system input highlighted in yellow, which will help get rid of the problem in question.
So, do the following:

Method number 3. Let's use CCleaner
Another way to restore the normal operation of the registry is to use programs to work with the registry of the "CCleaner" or "RegCleaner" level. They will check the registry for incorrect entries, fix it, and thereby help get rid of the resulting dysfunction.
Conclusion
The most effective solution to the RunDLL problem will be to use the capabilities of the Autorans utility, which will allow you to get rid of damaged or non-working entries in the system registry. I also recommend checking the system with some anti-virus toolkit, since in most cases specified error causes any viral malware.
The last version of the Nvcpl.dll file is the 8.17.13.3788 version released on 2014-07-31 for 32bit and 8.17.13.3788 version for 64bit. There have been 3 versions previously released. All versions of the Dll file are listed below from newest to oldest.
- 8.17.13.3788 - 32 Bit (x86) ( 2014-07-31 )
- 8.17.13.3788 - 64 Bit (x64)
- 5.13.1.1520 - 32 Bit (x86) ( 2003-07-31 )
- 5.13.1.1520 - 32 Bit (x86)
Steps to Download Nvcpl.dll File
Methods to Solve the Nvcpl.dll Errors
ATTENTION! Before starting the installation Nvcpl.dll file needs to be downloaded. If you have not downloaded it, download the file before continuing with the installation steps. If you don't know how to download it, you can immediately browse the dll download guide above.
Method 1: Solving the DLL Error by Copying the Nvcpl.dll File to the Windows System Folder
- The file you downloaded is a compressed file with the extension " .zip". This file cannot be installed. To be able to install it, first you need to extract the dll file from within it. So, first double-click the file with the " .zip" extension and open file.
- You will see the file named" Nvcpl.dll" in the window that opens. This is the file you need to install. Click on the dll file with the left button of the mouse. By doing this, you select the file.
 Step 2:
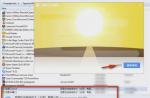
 - click on the " Extract To" button, which is marked in the picture. In order to do this, you will need the Winrar software. If you don't have the software, it can be found doing a quick search on the Internet and you can download it (The Winrar software is free).
- After clicking the " Extract to" button, a window where you can choose the location you want will open. Choose the " Desktop" location in this window and extract the dll file to the desktop by clicking the " Ok"button.
 Step 3:
 - Copy the " Nvcpl.dll"file you extracted and paste it into the" C:\Windows\System32"folder.
 Step 3:
 - If you are using a 64 bit operating system, copy the " Nvcpl.dll"file and paste it into the" C:\Windows\sysWOW64"as well.
NOTE! On Windows operating systems with 64 Bit architecture, the dll file must be in both the " sysWOW64"folder as well as the" System32" folder. In other words, you must copy the " Nvcpl.dll" file into both folders.
 Step 4:
 - In order to run the command line as an administrator, complete the following steps.
NOTE! In this explanation, we ran the command line on Windows 10. If you are using one of the Windows 8.1, Windows 8, Windows 7, Windows Vista or Windows XP operating systems, you can use the same methods to run the Command Line as an administrator. Even though the pictures are taken from Windows 10, the processes are similar.
- First, open the start menu and before clicking anywhere, type " cmd"but do not press Enter.
- When you see the command line" option among the search results, hit the " CTRL" + "SHIFT" + "ENTER" keys on your keyboard.
- A window will pop up asking, " Do you want to run this process?". Confirm it by clicking to " Yes"button.
 Step 5:
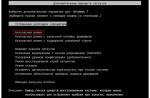
 - Let's copy the command below and paste it in the command line that comes up, then let's press Enter. This command deletes the Nvcpl.dll file "s problematic registry in the Windows Registry Editor (The file that we copied to the System32 folder does not perform any action with the file, it just deletes the registry in the Windows Registry Editor. The file that we pasted into the System32 folder will not be damaged).
%windir%\System32\regsvr32.exe /u Nvcpl.dll
 Step 6: Deleting the Nvcpl.dll file"s problematic registry in the Windows Registry Editor
 - If you have a 64 bit operating system, after running the command above, you must run the command below. This command will clean the Nvcpl.dll file's damaged registry in 64bit well (The cleaning process will be in the registries in the Registry Editor only. In other words, the dll file you paste into the SysWoW64 folder will stay as it)
.
%windir%\SysWoW64\regsvr32.exe /u Nvcpl.dll
 Step 7: Uninstalling the Nvcpl.dll file's broken registry from the Registry Editor (for 64 Bit)
 - We need to make a new registry for the dll file in place of the one we deleted from the Windows Registry Editor. In order to do this process, copy the command below and after pasting it in the command line, press Enter.
%windir%\System32\regsvr32.exe /i Nvcpl.dll
 Step 8:
 - Windows 64 Bit users must run the command below after running the previous command. With this command, we will create a clean and good registry for the Nvcpl.dll file we deleted.
%windir%\SysWoW64\regsvr32.exe /i Nvcpl.dll
 Step 9:
 - If you did all the processes correctly, the missing dll file will have been installed. You may have made some mistakes when running the command line processes. Generally, these errors will not prevent the Nvcpl.dll file from being installed. In other words, the installation will be completed, but it may give an error due to some incompatibility issues. You can try running the program that was giving you this dll file error after restarting your computer. If you are still getting the dll file error when running the program, please try the 2nd method.
- Determine the bit depth of your operating system(32 or 64 bits)
- Choose the appropriate language and latest version DLL
- Download and unzip the archive to the folder with the program
If it didn't help me
Do not worry! There are many more options for installing the file. Read more about this in a separate article.Download nvcpl.dll for Windows
We have found 3nvcpl.dll versions for youErrors Related to nvcpl.dll
If you've landed on this page, you've most likely encountered one of the following messages:- Entry point not found nvcpl.dll
- nvcpl.dll is missing
- Error loading nvcpl.dll. The specified module could not be found.
- nvcpl.dll is either not designed to run on Windows or it contains an error.
- Starting is not possible because there is no library on the computer
- The program cannot be started because nvcpl.dll is missing
- The program can"t start because nvcpl.dll is missing from your computer.
- Procedure entry point dll not found nvcpl.dll
- There was a problem starting nvcpl.dll. The specified module could not be found
- DLL entry not found
DLL- This is a file with a specific set of functions necessary for the operation of a particular program. In our database, nvcpl.dll is responsible for:
NVIDIA Display Properties Extension
Without this file, the program that requires it will not run.
Why is nvcpl.dll not found on my computer?
If it is not on your computer, then there can be many reasons for this:- First run of the program
- Developer miscalculation
- Wrong OS setup
- Unlicensed Windows
- Illegal copy of the program (game)
The NvCpl.dll file belongs to a program unknown from an unknown manufacturer. Его задача: NvCpl.dll ДобавлÑет пункт в контекÑтное меню рабочего Ñтола, Ð NVIDIA вñ ð¿ðlish ”ð½ñ ñ ñ ð ° ð ð ðorn ° ñ ñ ñññññ ðµñƒƒñž ñ ð ðµð yet »ÐµÐ½Ð¸Ñ Ñкрана при запуѺе приложенÑøй иР€.
NvCpl.dll is usually located in the %sysdir% directory. If this file is located in a different folder on your computer, you may have chosen that location during the installation of this software. However, it can also indicate a virus infection.
Fix NvCpl.dll Error
If NvCpl.dll is causing errors, the cause may be corrupted registry entries.
In most cases, it helps to check the Windows registry for NvCpl.dll errors!
If this does not fix NvCpl.dll errors, we recommend uninstalling the program using the Control Panel and then rechecking Windows registry.
NvCpl.dll slows down my computer!
Programs and files can severely limit Windows performance. In some cases, the NvCpl.dll file also causes this effect. If in doubt, uninstall the corresponding program.
If NvCpl.dll is in the Windows startup list, it can slow down your computer. Ð ðµðºðices software ñ ñ ð²ð ññññ ‡ ð¸ñ ð ð ° ° ð · · ° ð °ƒñ ñ ñ ñ ñ ñ ð¿ñ € ð € ° °ññ ‹.
Our advice: AVG TuneUp disables unnecessary auto-loading programs and also windows processes thus reducing the load on the computer.
Is NvCpl.dll dangerous for my computer?
NvCpl.dll is considered to be a bug. If it is not in the default directory, it may indicate a virus infection. Check your computer with the latest antivirus program. Our advice: AVG Anti-Virus Free.
All information about NvCpl.dll:
Many users after upgrading from Windows 8 to Windows 8.1 get this error: “RunDLL encountered an error while starting. The specified module was not found." If this happens every time you start the system, then you can try to find a solution in this article.
There are several solutions, for example,. Moreover, this is done quite quickly in our time, and you still have to spend a little time to install some programs.
The advantage of this installation, as opposed to updating the old Windows version to a newer one, is that there is no damage to the system and no extra records, so this method is very effective and preferable.
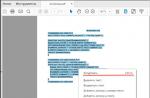
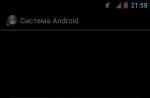
On the forums Microsoft, from users, just appears messages about this error. It looks like this:
As you can see, there is nothing in the error message that could solve this problem, that is, it is not known which way to dig. Also, users can see even up to 3 messages about this error.
You can, of course, check the disk using the command that you need to enter in command line on behalf of the administrator. This may or may not fix the problem. Therefore, we will move on to the next method, just create a restore point first so that there are no more problems later.
- Download the utility called autoruns, for this go here . This tool is recommended by Microsoft developers themselves, as it does a good job of analyzing the system and will be able to identify any problems. After downloading, open the archive with any archiver.
- Once you have unpacked the tool, you can see two files, from which we run autoruns.

- Excellent. Now, in the window that opens, look for the tab Everything and in the window below, find such entries that are highlighted in yellow. Next, just delete them by right-clicking on them and then Delete .

- After deleting all these entries, close the Autoruns program and restart your computer. Most likely the problem will be fixed.