Replacing one operating system with another is not at all a complicated procedure; even a novice user can handle it with the help of the instructions.
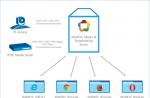
Figure 1. Endless OS3 application logo
What is Endless OS 3
The names "Windows", "Linux" and "Mac" are familiar to most computer users. These are the most common operating systems. But there are others. Endless OS 3 is one such alternative. True, she developed on the basis of Linux, but has conceptual differences.
It's a free OS designed for poor countries where not everyone can afford 24/7 internet.
Note:Endless OS is installed on cheap computers that are imported there.
Endless OS initially contains various information, for which you usually need to “go” to a particular site.
For example, articles from Wikipedia, tutorials, and more. The interface is made as intuitive as possible so that a person can easily master working with a laptop without outside help (Figure 2).
Part of the equipment with pre-installed "Endless" also enters our market. And the question arises: having Endless OS 3, how to install Windows and work in the usual mode?

Figure 2. Appearance of the boot screen in Endless OS 3
How to install Windows 7.10 if Endless OS 3 is installed
Removing an operating system that is of little interest to a domestic user from a laptop is no more difficult than replacing the standard Linux with Windows.
Here is a typical instruction in the case of "Endless OS 3 how to install Windows 10" (or another version).
Preparing a bootable flash drive / disk
Any serious operation with the OS begins with this step. We prepare bootable media using special programs from third-party developers or Microsoft itself (designed for the "tens"). The interface of such utilities is extremely simple. But still, you need to approach the creation of a distribution kit with knowledge of the matter.
First, you need to understand what system bit depth is suitable for your computer - 32-bit or 64-bit? This parameter is set in the corresponding box. Secondly, the OS must match the type of file organization on the hard drive - MBR or GPT.
Solving the question: “Endless OS 3: how to install Windows 7?”, For applications to work adequately, it is better to reformat the disk to the older “MBR”, since the “seven” was developed based on it. However, this is a separate issue (Figure 3).

Figure 3. Disk Formatting and MBR System Type Selection
BIOS setup for installing Windows 7
In order for the new boot to occur from the distribution media, we will configure the BIOS (or a newer UEFI bootloader) to choose the correct location where the system is located. To do this, we enter it in the way provided by the manufacturer.
Usually this is pressing the Del, F2, F10 keys (sometimes others) immediately after turning on the computer. Otherwise, having Endless OS 3, it makes no sense to figure out how to install Windows on Acer or other brand equipment - everything is very similar.

Figure 4. Selecting a priority boot device in BIOS
BIOS setup for installing Windows 8/10
Unlike the "seven", later versions of "Windows" are often "sharpened" for slightly different work parameters. If the laptop is new, most likely it does not have BIOS, but UEFI. By default, it assumes GPT data organization and a 64-bit system.
Note: Most UEFIs have a traditional bootloader mode that you can switch to if necessary.
For example, owners of Endless OS 3, when deciding how to install Windows on Acer, do not have to worry at all: the BIOS is automatically loaded if UEFI is not suitable for installation (Figure 5).

Figure 5. Laptop with Endless OS 3 installed as a working system
Switching from GPT to MBR and vice versa
Depending on the version of Windows you choose, you may need to convert from one file table of contents standard to another. The task is completely solvable. The procedure is this.
- Insert your disk or flash drive with the install version of Windows.
- Restart your laptop or desktop.
- Use the selective installation of the operating system.
- In the partition selection menu for installation, select the partitions and delete them.
- The cleared space will be automatically organized by the computer in accordance with the settings of the distribution.
You can also do everything manually. To do this, at the installation stage, call the command line (Shift + F10). Then type the following commands.
1. open the partition menu diskpart;2. now - the list of disks list disk;3. specify the desired disk select disk

Figure 6. Command line call and the process of converting the system to gpt type
Partitioning/formatting a hard disk
Now we need to allocate space between the system and the data storage, traditionally denoted by the letters C and D. We do the following. Again we get to the command line and print the already mentioned commands, including points 1-3. Then:
- make a partition for the operating system: create partition primary size=n (replace the letter with a numerical indication of the size);
- assign system status: format fs=ntfs label="System";
- make active (active);
- give it a name (assign letter=C).
Create an account
This is the final stage of the system installation. We go to manage the parameters of an already installed OS and open the “accounting” settings menu. We trust the prompts of the computer. We enter the name of the entry, come up with a password - and it's done.
Why is the hard drive not visible after installation?
Sometimes the procedure fails. What's the matter? The reasons are varied (Figure 7). For example:
- you incorrectly indicated the bitness of the system (for example, "seven" is not friendly with the 64th bit);
- the hard drive is not converted to the correct format or is converted incorrectly;
- Incorrect installer options were selected at the stage of its creation. programs and drivers for Windows 7 and 10. Just go to the device manager, right-click on the desired driver and start updating the drivers. We offer the computer an automatic search.
That's all - now your laptop has a full-fledged Windows!
When choosing a new laptop (usually the Acer or Asus brand), the user may encounter an unfamiliar Endless OS system installed on such a PC. The creators of the product promise a user-friendly platform, high speed of its work, free nature and actual immunity of the system to viruses. Is everything so rosy, and what are the real advantages of this product? Below we will analyze what Endless OS is, what are the advantages and disadvantages of this system, and whether it is worth making a choice in favor of this OS on your PC.
What is Endless OS?
« Endless OS» (literally - "Infinite operating system") is a Linux-based operating system that runs on Linux Kernel and other open technologies (Chromium, GNOME, GTK, PulseAudio, Rufus, Systemd, XOrg, Yelp, etc.). Like most Linux distributions, the root file system is read-only, and OSTree and Flatpak are used to deliver and update applications. The user interface is based on a heavily modified GNOME desktop environment.
The developer of "Endless OS" - the American company "Endless Mobile, Inc" positions its offspring as a convenient tool for developing computer literacy in developing countries. In addition to countries like Brazil and Guatemala, we can find Endless OS installed on ASUS and ACER laptops sold in many electronics stores in Russia, Ukraine and a number of other post-Soviet countries.
The first public release of Endless OS (version 2.1.0) took place in July 2014, and since May 2018 the latest version 3.4.0 is available.
 The current OS version is 3.4.0
 "Endless OS" is presented in two main modifications:

Now everyone can freely download the Endless OS distribution on their PC from the developer's website store.endlessm.com. At the same time, it is possible to install the product both as the main operating system and in parallel with the Windows OS already installed on the PC.
Endless OS System Requirements
Despite its simplicity and free nature, Endless OS will not run on every PC. Let's take a look at the minimum PC hardware requirements for this OS, which will allow us to complete the answer to the question of what Endless OS is.
Minimum Requirements this OS has:
- 64-bit processor (will not work on 32-bit). ARM processors are not supported;
- 2 GB of memory or more;
- 32 GB hard drive (can work on 16, but without installing new applications);
- It will also work on an integrated video card;
- Standard network card (supports most cards from Intel and Atheros)
On Chromebooks and Apple products, this OS usually does not work.
Endless OS - first look
After we have sorted out what “Endless OS” means and what are its system requirements, we will also consider what the specified system is in general. Having launched this OS for the first time, the user may catch himself thinking that her desktop looks like the desktop of some tablet on the Android OS. Several icons and folders on the desktop, a search bar (search on the disk and Google), the taskbar with a set of system icons. Everything is familiar and familiar.

By default, a number of programs are already installed in the system, which can be accessed by clicking on the Application Center icon. Thanks to the latter, you can also add Applications, Folders and Websites to the system (in the latter case, this will be a link to the website you need).
Clicking on the "Custom Menu" at the bottom left will allow you to customize your system by changing its personal, hardware and system functionality.
The taskbar contains a clock and a calendar, sound and network icons, quick access to the system menu and other similar (and familiar to Windows users) tools.
If everything is so simple and convenient, then what about the disadvantages of Endless OS? They are roughly as follows:

In general, this is a simple, functional, and most importantly free product, which is a convenient basis for learning the basics of computer literacy.
Conclusion
Above, we found out what kind of OS “Endless OS” is, and what are the main advantages and disadvantages of this system. This OS will become a convenient tool for those people who are taking their first steps in the field of computer literacy, and at the same time are limited in funds for the purchase of licensed software. It will also appeal to users who want to get acquainted with the functionality of Linux, but who may be intimidated by the abundance of its settings. In this regard, "Endless OS" will become an effective intermediate link that allows you to combine the functionality of Linux and the convenience of desktop system management.
Free operating system based on Linux. It offers a beautiful user interface, a somewhat limited application manager, and tons of educational software.
Endless OS is mainly used to teach computers all over the world, so the company made an imitation of the smartphone interface. Instead of an application menu, it uses shortcuts arranged in a grid on the desktop. It looks like an iPhone. You can add/remove applications and create folders to organize them.
Right above the apps is a search bar where you can search for files and apps. At the top of the screen is a minimized applet that displays informational notes such as "masterpiece of the day", "quote of the day" and "word of the day".

Endless OS Apps
Endless OS has a long list of supported apps, and it's up to you to determine the length of the default app list by choosing either a basic or full install.
The basic install contains core applications such as Google Chrome, WhatsApp, VLC, LibreOffice, and more, while the full install contains a complete set of educational software designed for Endless OS users.

Google Chrome comes with a custom start page created using the File Explorer plugin. It also comes with Adblock preinstalled.
Graphical environment EndlessOS
EndlessOS uses what I guess you could call "Endless Desktop" - a custom fork of GNOME 3. The desktop environment is really pretty and easy to work with.

Some may say that you don't have the ability to view all your installed apps in one place at once, but that's not on my list of must-haves if I can get the job done and feel comfortable.
The Endless OS icon at the far left of the taskbar does not bring up the application. It toggles between desktop view and "last used app". The only way to see all installed apps at once is to visit the app store.
In any case, the collection of apps is amazing and you can always easily add/remove any of them from the app store.
Endless OS App Store
Endless OS uses a read-only root filesystem. This means that the app store is good for managing only the apps available in it.
The file system that Endless OS runs on only supports Flatpak applications and is managed by OSTree.
When buying a laptop or computer, usually Windows 7/8 or Linux is already installed on it (the latter option, by the way, helps to save money, because Linux is free). In rare cases, cheap laptops may not have any OS at all.
Actually, this happened with one Dell Inspirion 15 3000 series laptop, on which I was asked to install Windows 7, instead of the pre-installed Linux (Ubuntu). I think the reasons why they do this are obvious:
- most often, the hard drive of a new computer / laptop is not partitioned very conveniently: either you will have one system partition for the entire volume of the hard drive - the “C:” drive, or the partition sizes will be disproportionate (for example, why do 50 GB, and on the system "C:" 400 GB?);
- there are fewer games in linux. Although today this trend has begun to change, it is still far from Windows of this OS;
- it’s just that Windows is already familiar to everyone, and there is neither time nor desire to learn something new ...
Attention! Despite the fact that the software is not included in the warranty (only hardware is included), in some cases, reinstalling the OS on a new laptop / PC can cause all sorts of warranty issues.
1) Preparing a bootable USB flash drive / disk with Windows
The first and most important thing to do is to prepare a bootable flash drive (you can also use a bootable DVD, but it’s more convenient with a flash drive: the installation is faster).
To burn such a flash drive you need:
- installation disk image in ISO format;
- flash drive 4-8 GB;
- a program for writing an image to a USB flash drive (I usually always use UltraISO).
The algorithm of actions is simple:
- insert the USB flash drive into the USB port;
- format it in NTFS (attention - formatting will delete all data on the flash drive!);
- run UltraISO and open the installation image with Windows;
- how to create a bootable USB flash drive with Windows: XP, 7, 8, 10;
- correct BIOS setting and correct recording of a bootable USB flash drive;
- utilities for creating a bootable USB flash drive with Windows XP, 7, 8
2) Network drivers
Ubuntu was already installed on my "experimental" DELL laptop - therefore, the first thing that would be logical to do is to set up a network connection (Internet), then go to the manufacturer's official website and download the necessary drivers (especially for network cards). Yes, he actually did.
Why is this needed?
Simply, if you do not have a second computer, then after reinstalling Windows, most likely neither wifi nor a network card will work for you (due to the lack of drivers) and you will not be able to connect to the Internet on this laptop in order to download these very drivers. Well, in general, it is better to have all the drivers in advance so that there are no various kinds of incidents during the installation and configuration of Windows 7 (even funnier if there are no drivers at all for the OS you want to install ....).

- software for updating drivers
3) Backup documents
Save all documents from the laptop hard drive to flash drives, external hard drives, Yandex drives, etc. As a rule, the partitioning of the disk on a new laptop leaves much to be desired and you have to format the entire HDD completely.
2. BIOS setup for booting from a USB flash drive
After turning on the computer (laptop), even before Windows boots, the first thing the PC takes over is the BIOS (English BIOS is a set of firmware needed to provide the OS with access to the computer hardware). It is in the BIOS that the computer boot priority settings are set: i.e. first boot it from the hard drive or look for boot records on the USB flash drive.
1) To enter the BIOS - you need to restart the laptop and press the button to enter the settings (when turned on - this button is usually always shown. For Dell Inspirion laptops, the entry button is F2).
Buttons for entering the BIOS settings:

Here, to install Windows 7 (and older operating systems), you must set the following parameters:
- Boot List Option - Legacy;
- Security Boot - disabled.
By the way, not all laptops have these parameters in the BOOT fold. For example, in ASUS laptops - these parameters are set in the Security section (for more details, see this article: .

3) Changing the download queue…
Pay attention to the download queue, at the moment it is (see the screenshot below) as follows:
1 - the Diskette Drive will be checked first (although, where does it come from ?!);
2 - then the installed OS will be loaded on the hard disk (then the download sequence simply will not reach the installation flash drive!).

Using the "arrows" and the "Enter" key, change the priority as follows:
1 - boot from the USB device first;
2 - the second boot from the HDD.

4) Saving settings.
Actually, that's all, the BIOS is configured, you can proceed to install Windows 7 ...

3. Installing Windows 7 on a laptop
(DELL Inspirion 15 series 3000)
1) Insert a bootable USB flash drive into a USB 2.0 port (USB 3.0 - marked in blue). Windows 7 cannot be installed from a USB 3.0 port (be careful).
Turn on the laptop (or restart). If the BIOS is configured and the USB flash drive was properly prepared (it is bootable), then the installation of Windows 7 should begin.

2) The first window during installation (as well as during recovery) is an offer to select a language. If it is correctly defined (Russian) - just click next.

3) In the next step, you just need to click the install button.


5) In the next step, select "full installation", point 2 (the update can be used if you already have this OS installed).

6) Disk partitioning.
A very important step. If you do not correctly partition the disk into sections, this will constantly interfere with you when working at the computer (and you can lose a lot of time to restore files) ...
The best way, in my opinion, is to split the disk into 500-1000GB, thus:
- 100GB - on Windows OS (this will be the "C:" drive - it will contain the OS and all installed programs);
- the remaining space is the local disk "D:" - it contains documents, games, music, movies, etc.
This option is the most practical - in case of problems with Windows, you can quickly reinstall it by formatting only the "C:" drive.
In cases where there is one partition on the disk - with Windows and with all files and programs - the situation is more complicated. If Winows does not boot, you will need to boot from the Live CD first, copy all documents to other media, and then reinstall the system. In the end, you're just wasting a lot of time.
If you install Windows 7 on a “blank” disk (on a new laptop), then the HDD most likely does not have the files you need, which means you can delete all partitions on it. There is a special button for this.

When you delete all partitions (attention - the data on the disk will be deleted!) - you should have one partition “Unallocated disk space 465.8 GB” (this is if you have a 500 GB disk).
Then you need to create a partition on it (drive "C:"). There is a special button for this (see screenshot below).

Determine the size of the system disk yourself - but I do not recommend making it less than 50 GB (~ 50,000 MB). On my laptop, I made the size of the system partition about 100 GB.

Actually, then select the newly created partition and press the button next - it is into it that Windows 7 will be installed.

7) After all the installation files from the flash drive are copied to the hard disk (+ unpacked), the computer should go to reboot (a message will appear on the screen). You need to remove the flash drive from the USB (all the necessary files are already on the hard drive, you won’t need it anymore) so that after rebooting, the download from the flash drive does not start again.

8) Parameter setting.

Automatic update - I recommend disabling it altogether, or at least checking the box next to the item - “Install only the most important updates” (the fact is that auto-update can slow down the PC, and it will load the Internet with downloadable updates. I prefer to update - only in manual mode).

9) Installation completed!
Now you need to configure and update the drivers + configure the second hard disk partition (which will not be visible in "my computer" yet).

4. Formatting the second partition of the hard disk (why the HDD is not visible)
If you completely formatted your hard drive when installing Windows 7, then the second partition (the so-called local hard drive "D:") will not be visible! See screenshot below.

To fix this, you need to go to the Windows control panel and go to the administration tab. To quickly find it, it is best to use the search (on the right, above).

Then you need to start the "Computer Management" service.

This tab will show all drives, both formatted and unformatted. Our remaining hard drive space is not used at all - we need to create a “D:” partition on it, format it in NTFS and use it ...
To do this, right-click on the unallocated space and select the "Create Simple Volume" function.


Then choose the NTFS file system and volume label: give the disk a simple and understandable name, such as "local".

That's all - the disk connection is complete! After the operation, a second disk "E:" appeared in "my computer" ...

5. Installing and updating drivers
If you followed the recommendations from the article, then you should already have drivers for all PC devices: you only need to install them. Worse, when the drivers begin to behave unstably, or suddenly do not fit. Let's look at several ways to quickly find and update drivers.
1) Official sites
This is the best variant. If there are drivers for your Windows 7 (8) laptop on the manufacturer's website, install them (it often happens that the website has either old drivers or none at all).
DELL - www.dell.ru/
ASUS - www.asus.com/UK/
ACER - www.acer.ru/ac/ru/RU/content/home
LENOVO - www.lenovo.com/ru/ru/
HP - www8.hp.com/en/en/home.html
2) Update in Windows OS
In general, Windows OS, starting from 7, is quite “smart” and already contains most of the drivers - the main part of the devices will already work for you (perhaps not as well as with “native” drivers, but still).
To update in Windows, go to the control panel, then go to the "System and Security" section and launch the "Device Manager".

In the device manager, those devices for which there are no drivers (or some conflicts with them) will be marked with yellow flags. Right-click on such a device and select "Update drivers ..." from the context menu.

3) Spec. programs for finding and updating drivers
A good option for finding drivers is to use special. programs. In my opinion, one of the best for this is Driver Pack Solution. It is a 10GB ISO image - which has all the main drivers for the most popular devices. In general, in order not to hurry, I recommend that you read the article about the best programs for updating drivers -

Every year there are more and more systems based on Debian. Each of them tries to get closer to the convenience and ease of use of GNU / Linux at home, which their “ancestor”, suitable for server solutions, cannot boast of. This article will cover how to install Endless OS from a flash drive.
System features: supports only 64-bit architecture, has its own desktop based on GNOME, automatic disk partitioning during installation.
| RAM | 2GB+ |
| CPU | x86-64 |
| video card | 128 MB |
| HDD | 16 GB+ |
Preparing to Install Endless OS
To install the OS, we will use a USB drive. Go to the Endless website. In section Free Download select the tab with the system on which you will burn the flash drive (for example, Windows) and click Download Now.
For Mac or Linux, specify the base system type (Multilanguage).

To use the Etcher utility, which is supported on Windows and GNU/Linux. First you need to specify the file, then the recording location and click Flash!.

Step 1. Launching the installer
Insert the drive and restart your computer. During the POST test, press the boot device selection button (usually F11 or F12 depending on the BIOS model) and select the flash drive with the OS → Enter.
Step 2. Language selection
Select Endless OS language to be used after installation → Further.

Step 3Format the drive
Press the button. The system will make the markup automatically, without the possibility of manual distribution.

Step 4. Confirmation of the selected OS
A unique step in all existing GNU/Linux OSes, it will ask you to confirm if the Endless OS distribution is indeed the system you want to install. Based on your choice of image when downloading from the site. Click to continue Further.

Step 5. Selecting a drive
Specify the disk or partition where the system will be installed and the size of which must be at least 25 GB. Confirm that you agree with the complete deletion of all files on the selected partition by checking the appropriate box → Further.

Step 6 Installation
The system installation process will begin.

At the end of the process, click power off. During the restart, remove the flash drive from the computer.

Step 7Customize the Keyboard
After the system boots, the installation of additional components will continue. First, specify the language for which keyboard layouts will be selected → Further.

Choose a specific layout. Please note that here, by analogy with Deepin OS, Russian keyboards differ slightly in the location of some buttons. Click preview for familiarization. Once selected, press Further.

Step 8. Selecting a time zone
Set your time zone by selecting the city closest to you → Further.

Step 9. Set up online accounts
If necessary, add accounts of available social networks or services for integration with the OS. Click Skip to delay or not perform this action.

Step 10. Create a user
Write the account name. Turn on the toggle switch for password protection Password protected → Further.

Step 11. Create a password
Enter a password and confirm it. If necessary, in the field password reminder write a phrase to remind you of your password if you forget it → Further.

Step 12: Finishing the installation
This will complete the installation. Click Get started with Endless.

Endless OS installation is complete and the system is now ready to use.

conclusions
This article has covered how to install Endless OS. The system is based on Debian GNU/Linux and provides more user-friendly and user-friendly management. The OS works only with 64-bit architecture and automatically partitions the disk, so you should prepare the partition yourself before installation.