The new Windows 10 operating system from Microsoft has already gained popularity among millions of PC users around the world. But like all new products, Windows 10 is not without its flaws. Many users of this OS have bootloader problems... Most often, this problem occurs due to a new operating system update policy.
Now in Windows 10, you cannot turn off updates, as it was in Windows 7 and XP.
The problem with the bootloader itself manifests itself when the user does not wait for the end of the system update and turns it off the POWER button.
After the user turns on the computer again, he sees such a message on his monitor screen.
This message indicates that your bootloader is damaged and should be restored. It is also worth noting that shutting down the computer during the update is not the only reason for the breakdown. The bootloader can still be damaged viruses and various malware... Still quite common reasons for its breakdown are faulty HDDswhich are broken sectors, that is, the boot record will be located on these sectors. Also, the cause of the bootloader breakdown may be installing a junior OS over Windows 10... To help our readers restore the bootloader, below we have prepared examples in which we will describe in detail how to restore it.
The easiest way to recover
Seeing a message about a malfunctioning bootloader, the first thing a PC user has to ask is how to restore the Windows 10 bootloader. In this example, we will describe the easiest way to restore it. For this example, we'll need.
If you do not have this disk and Internet access, you can create it on another computer with the same OS.
Also for this task, you can use the original installation disk with Windows 10. Well, let's get started. Insert the recovery disc into the drive and boot from it when the computer starts.

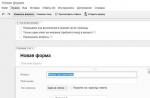
In the first window of the recovery drive wizard, you must specify keyboard layout, after which the wizard menu will open.

In this window we will select the second tab " Troubleshooting"And immediately go to the next" ".

In additional parameters, we are interested in the "" tab. After clicking on this link, the wizard will ask you to select an OS to restore it to start.

One operating room is installed on the studied computer. windows system 10, so there is only one choice in the wizard. After selecting the OS, the system will begin the procedure for finding computer malfunctions and must restore the damaged bootloader.

If using this method you cannot restore Windows 10 to work, then in the following examples we will describe a detailed process for restoring the boot sector using system utilities DiskPart and BCDboot.
Repair Windows 10 bootloader using command line
For this method, we also need Windows 10 recovery disc... Let's boot from the disk, as in the previous example to the point "". In this menu, we are interested in the "" tab, on which we will go.

First of all, we will run the console utility on the command line DiskPart... To do this, enter the command diskpart in the console
We need this utility to displaying information about all local disks in the system... Now we need to find the bootloader partition number. This is usually a hidden partition with a size of 500 MB. This partition is created automatically by the Windows 10 installer. Next, to search for it in DiskPart, we will enter the list volume command
From the image you can see that the partition with the boot record is in the first volume on the C drive. Also in the image you can see that Windows 10 itself is installed on the D drive. Now we must exit the disk program. This can be done with the exit command
After exiting DiskPart, enter the command bcdboot.exe D: \\ Windows Also note that the command uses drive D, since it is on it that a dozen is installed.
This command completely restored dozens of boot files. The principle of this command is to use the utility BCDboot... The developers specially created this utility to work with Windows boot files... It is also worth noting that thanks to the same utility, the Windows installer creates a hidden partition and copies boot files to it.
Repairing the Windows 10 bootloader using the command line (Method two)
In the second method, we will also use the utilities DiskPart and BCDboot and try to overwrite the bootloader. To do this, launch DiskPart and find out which disk contains our hidden partition and the partition on which Windows 10 is installed. Launching this utility is described above.
Now we need to format the hidden partition that is in the first volume. To do this, we will type the select volume 1 command which will select our hidden encrypted 500 MB partition.
The next step will be to format the selected section. This is done in order to erase all files from it. For this operation, enter the command in the console format fs \u003d FAT32
After formatting our partition, exit the disk utility and enter the new command bcdboot.exe D: \\ Windows which was entered in the previous example.
This command will not fix the bootloader files as in the previous example, but will create new... As you already understood, this method is used if the first one did not work.
Another way to restore Windows 10 boot using command line
This method requires a utility Bootrec... Unlike the previous utility, this utility does not restore bootloader files, but restores boot record... That is, she rebuilds MBR - the first sector on the HDD. It is very important for the operating system that the MBR is safe and sound. When a computer starts up, its BIOS first of all looks for the MBR to start the operating system from. For this example, let's run the command line as in the previous examples. The utility in question has two main commands / FixMbr and / FixBoot The first command is required to fix MBRand the second creates a new... First of all, consider the situation when our MBR is damaged. To do this, enter the first command in the console.

In the image above, you can see that the operation was successful, which means that the MBR has been recovered.
Now let's consider the situation when the first method does not work, that is, we will create a new MBR sector. To do this, we will use the second command.

From the image above, you can see that the new MBR sector was created successfully.
The examples show how easy it is to recover the MBR sector using the Bootrec console utility. If you have problem with startm Windows 10, we advise you to use this example first.
We clean the system from malicious software before restoring the bootloader
If the cause of the bootloader failure is malwarethen this the malicious code must be removed before recovery... In this situation, it will help you. This is the rescue disk that has many tools for recovering your computer, as well as treating it from viruses... You can download Dr.Web LiveDisk on its official website www.drweb.ru. This Live CD is linux based and free. This disc is distributed as iSO image, which can be recorded both to an optical disc and to a USB flash drive. After the image is written to the disk, launch Dr.Web LiveDisk.

In the start menu, select the first item and continue loading Dr.Web LiveDisk. After a few seconds, the Linux-based OS should start, which is actually Dr.Web LiveDisk.

In this operating system, you can completely clean your computer from viruses and even make a backup of all information.
Also useful is the fact that this OS has full Internet support and a built-in browser. Firefox.
Summing up
In conclusion, I would like to say that if you know all the intricacies of bootloader recovery, then you can quickly fix your computer. It is also worth paying attention to the situation when it is impossible to restore the boot sector and the bootloader itself. In this case, you need to play it safe and use the full system recovery tools. Such means are complete system image, created by means of the Windows 10 operating system itself, as well as a program such as Acronis True Image... We hope that our material will help you recover the bootloader from MBR, and your computer will function as before.
Related Videos
When preparing to install Windows 10, or during the process itself, you may encounter problems that prevent you from completing the update procedure. There are times when the installation hangs, interrupts, gives an error and other similar situations, which you can get out of on your own using the instructions below.
Problems before installing the system
To install the system, you need an installation media, which is recommended to be created using the official Microsoft program. After you install it, go through the first steps with the choice of parameters and bitness of the system, you will be prompted to choose which of the connected media to turn into installation. The list provided by the program may not include the flash drive that you wanted to use to further install Windows 10. This may happen for the following reasons:
- the flash drive was not properly prepared. The flash drive must be empty, formatted in FAT32 or NTFS format and have at least 4 GB of total capacity. If at least one of the parameters is not met, then the Windows 10 setup program will not see the USB flash drive;
- The USB port into which the flash drive is inserted is faulty, try moving it to another port and check the result, remembering to restart the program;
- restart the computer, it is possible that some unfinished operations are being performed with the flash drive, so you cannot work with it, and after restarting the device they will all end;
- check if the computer itself sees the USB flash drive, if not, then the problem and the reason lies in it;
- if all else fails, then replace the flash drive or use any other way to turn it into installation media, for example, download the system image and write it manually.
Endless updates
If, during the process of creating bootable media with a new operating system, updates are looking for an infinitely long time, you must close the update center:
Problems during installation
All of the following errors and problems occur during installation: freeze, interruption, incorrect process output, etc.
The disk contains an MBR partition table
This error occurs during the selection of a disk or its partition set aside for the installation of the operating system itself. It appears due to the fact that hDD formatted in a format that does not match the mode set in the BIOS. There are two ways to get rid of this error: change the operating mode in the BIOS or reformat the disk. The second option is recommended, since the default BIOS mode is the most optimal. You can reformat the disk in the standard way, but at the same time losing all data from it, or using a third-party program, while interrupting the installation process, but retaining all the information.
 The error “Windows cannot be installed on this disk. The selected disk contains the MBR partition table "
 BIOS Settings Changes
By default, EFI mode is activated in the BIOS, which only works with disks in GPT format. Since your disk is in MBR format, you will need to change the mode to Legacy. To do this, turn off your computer, start turning it on, and as soon as the first boot signs appear, press the F11, F12 or ESC key to activate the Boot Menu. Which of the possible buttons will be assigned in your case is described in a small footnote that appeared on the screen during the start of the download. In the list that opens, you will need to select your USB flash drive, but without the UEFI or EFI prefix in the name.
 Change the boot order so that in the first place there is a flash drive without UEFI and EFI
 You can also change the boot order in the BIOS itself, in the Boot or Boot section, putting in the first place the name of the flash drive without UEFI and EFI prefixes. After that, it remains only to exit the Boot Menu or BIOS, having previously saved the new parameters. Done, you can proceed with Windows installation.
 We put a USB flash drive without a UEFI and EFI prefix in the first place
 Changing the disk format to MBR using the standard method
Format changes will be made through the command line. The disadvantage of this method is that you have to delete all the data on the disks, so copy it to another medium in advance to save it.

Changing disk format to MBR using a third-party program
To convert using a third-party program, you can use the Minitool Partition Wizard Bootable application, the image of which must be downloaded from the developer's official website and written to a USB flash drive formatted in FAT32 format. The advantage of this method is that you do not have to delete data from the disk to convert it.

After the disk is converted to GPT format, re-enter the Boot Menu and boot from the installation media to return to installing Windows 10.
System won't install on SSD
The reason why it is impossible to install Windows on an SSD is most likely because the BIOS is set to IDE mode instead of the required ACHI. To fix this, follow these steps:
- While turning on the computer, press the Delete key on your keyboard several times to enter the BIOS. Another button can be used to enter the settings menu, it depends on the motherboard model, but when the computer boots up, a footnote appears on the screen, which will tell you how to enter the BIOS.
 Enter BIOS
 - After entering BIOS, you will see either the standard BIOS or a newer version of it UEFI. There are also options for the presence of the Russian language and its absence. Partitions in different BIOS versions may have different names, so your main task is to find the mode switch from IDE to ACHI. One version of UEFI does it like this: first go to the Setting section.
 Go to the Setting section
 - Go to advanced settings.
 Opening additional settings
 - Open the “Onboard Peripherals” subsection.
 We enter the section "Built-in peripheral devices"
 - In the "SATA Configuration" section, find the required line and change the mode to ACHI. Done, it remains to exit the BIOS, saving all the changes made, and you can return to installing the new OS.
 Change SATA Mode to ACHI
If changing the mode did not help, then the reason can be looked for in the following parameters:
- several disks are connected to the computer, this may cause a failure during installation, so leave only one of them and try the installation again;
- the USB flash drive from which the installation is performed was formatted in NTFS format, and not in FAT32, suitable for SSD drives. In this case, you need to reformat the media again and write the system image to it again;
- if none of the above helps, then try installing from disk, sometimes it helps to solve the problem.
Blue screen appears during installation
A blue screen with text and a description of the error occurs when the installer encounters an insurmountable error and cannot continue the process. In this case, it will automatically erase all already installed update files and roll back the system to the point where the installation procedure has not yet begun.
 Installation aborted due to blue screen
 After the rollback is complete, you can restart the installation. Perhaps this time it will be stable. If not, the blue screen appeared again, you need to go back to the system that already exists on the disk and delete all unnecessary applications in it and disconnect all unnecessary devices connected to the computer. Most likely, the system cannot correctly install updates precisely because of third-party programs and devices.
If this does not help, then copy all the important information from the disk to third-party media, and proceed to the manual installation, during which you can delete all information from the disk. Do so, erase all data from the disk partitions and install Windows 10 on a clean partition.
A black screen appears during installation
If during the installation of the system a black screen appears on which nothing is displayed or only the mouse cursor is displayed, then there may be several reasons for this behavior of the computer:

But before solving the problem, just wait, perhaps the system is still performing the update process in background... It is worth thinking about the time to solve the problem manually only if the black screen does not move for more than half an hour.
Updating drivers
- To enter safe mode, we will use the command line. To call it, return to the Windows 10 setup program again, to do this, turn off the computer by holding the Power button for 10-15 seconds, and turn it on. After the program is open, use the Shift + F10 key combination to launch the command line.
 We activate the command line with the combination Shift + F10
 - Run the bcdedit / set (default) safeboot network command, then the shutdown / r command, and when asked, confirm the action by pressing the Enter key again. The computer will restart itself and turn on in Safe Mode.
 We execute the commands bcdedit / set (default) safeboot network and shutdown / r
 - When the inclusion is completed, open the device manager, find the video card in the general list and, by right-clicking on it, select "Update drivers". Go through the process automatic update or, if the computer cannot find the drivers by itself, download them from the official website of the company that created the video card and install them manually.
 We update the video card drivers manually or automatically
 - After finishing the driver update, run Command Prompt as an administrator, run the bcdedit (default) / deletevalue safeboot command to deactivate automatic startup in Safe Mode, shut down the computer and return to the Windows 10 upgrade process.
 We execute the command bcdedit (default) / deletevalue safeboot
What to do if the installation process freezes
The installation process may freeze at the following stages:
- during the appearance of the Windows logo;
- at the stage of preparing files;
- right during installation, when the screen shows that the process is complete at 0, 10, 99, 32% or another percentage.
Keep in mind that the installation process can last from one percent to several hours if the computer is not very powerful or overloaded with files. Therefore, first, wait at least two hours, and only if after that nothing happens, you can proceed to manual elimination of the problem.
It is impossible to say for sure why the freeze occurred in your case, so check all the options that can cause the freeze, one by one:
- Disconnect all unnecessary devices from the computer, leave only the keyboard, mouse and monitor connected. Also remove any extra SATA cables going to the CD port and USB stick.
- Verify that the BIOS settings are correct and that the installation media is correct. Please remember that for SSD and HDD disk, BIOS and UEFI, GTP and MBR format, the parameters will be different. Somewhere you need to enable ACHI mode, and somewhere IDE, somewhere to format in FAT32, and somewhere in NTFS, and so on. Focusing on type and format hard disk, as well as the BIOS version, find the characteristics suitable for your build on the Internet and install them.
- Before proceeding with the upgrade to Windows 10, do not forget to install all available updates on the already installed operating system. This can be done through the built-in Update Center program, which is present in Windows 7, and in Windows1, and in older versions.
- If the installation hangs when using a USB stick as installation media, then try installing from CD.
- Don't forget to make sure your computer meets the minimum Windows 10 requirements, they are presented on the official Microsoft website.
- If you cannot install the system over the old, already installed, Windows, then at the step of managing hard disk partitions, format all blocks and install Windows 10 on a completely blank disk.
- If you are installing the system not on a blank hard disk, then remove the antivirus, it may interfere with the update. Also erase all programs that make changes to the interface and other system parameters of the system.
Error "Failed to create new partition"
When installing Windows manually, sometimes an error occurs that says that it is impossible to create or find an existing partition. It appears because there is no unallocated memory and partitions on the disk that could be given for installing the operating system. A way out of this situation: create the necessary partitions manually. This can be done in two ways: by deleting existing partitions and creating new ones, or by reducing existing partitions and distributing the freed memory.
 Error "We could not create a new or find an existing section"
 Standard method
You can delete partitions and create new ones right in the same window in which you received the error.

Through the command line
Using the command line, you can not delete partitions, but compress them without losing the files that are on it.

Installation causes repeated computer restart
The computer restarts during installation - this is normal, it can restart five to six times to correctly configure all the necessary items. But if this operation is repeated too many times, then you need to interrupt the process manually, return to the already installed system and do the following:

The installation program window does not appear
If you are faced with the fact that the window of the installation program does not appear, then follow the instructions from the item "What to do if the installation process freezes" described above in the article.
 The installation window did not appear after booting from a USB flash drive
 No device drivers found
An error stating that no device drivers were found appears when trying to install Windows 10 for the following reasons:
- A USB0 flash drive is connected to a 3.0 port or, conversely, a USB 3.0 flash drive is connected to a 2.0 port. Switch it to the correct port and repeat the installation.
- The system image was not recorded correctly or was damaged initially. Overwrite it. Better use a non-standard microsoft program, and burn the image with UltraISO.
- Use a disk for installation, not a USB flash drive.
Bottom line: use a different media, port or image to get rid of this error.
Errors with code when installing Windows 10
If during the installation of Windows errors occur, in the description of which there is a unique code, then the best way out in this situation is to search for a solution using this code. Focusing on a unique number, which usually looks something like 0xc1900101, you can find a solution specifically for your case. If it is not available on the Internet, then contact the official Microsoft support service and tell them this code, they will provide you with instructions on further actions.
 An error with a code may appear during the installation of Windows 10
 Video: Windows 10 installation problems and solutions
So, if errors occur during the installation of Windows 10 or the process does not reach the end, freezes or is interrupted, then first of all you need to check the correctness of the BIOS settings, installation media and hard drive. The next step is to check the computer components and drivers for them. The best way out is to clean up the disk by formatting and install the system on a clean partition using the official Microsoft program.
Dear Readers! I know that many of you follow the latest hardware and software. The release of the new Windows 10 operating system is a breath of fresh air for PC and laptop users after the controversial Windows 8. However, the transition to a new operating system is not so easy and easy. Many users face a variety of problems and challenges.
Why Windows 10 won't start
If you are faced with a black screen after installing or updating Windows 10, then the most likely reasons are:
- Nvidia or AMD graphics driver conflict
- Problem waking the computer from sleep or hibernation mode
- Connected second monitor
You can disconnect the second monitor, and connect the first to the integrated video card instead of the discrete one. You can also boot into Safe Mode. If Windows 10 starts, then you should uninstall the video adapter driver that caused problems in Win 10.
Windows 10 black screen after login
If you see the login screen when the system boots, and later a black screen appears, then try on the login screen by pressing the on-off button at the bottom right, and then holding Shift, press "Restart". In the menu that appears, select "Diagnostics - Advanced Options - System Restore".
If a Windows 10 black screen appears after removing viruses, then you should try the following solution to the problem: press Ctrl + Alt + Del to start the task manager. Then go to the menu "File-New Task-Run", type the command "regedit". The Registry Editor will open. In the HKEY_LOCAL_MACHINE \\ SOFTWARE \\ Microsoft \\ Windows NT \\ CurrentVersion \\ Winlogon branch, look at the value of the Shell parameter. There should be explorer.exe, and the parameter is the userinit parameter, its value should be c: \\ windows \\ system32 \\ userinit.exe.
Windows 10 won't boot after changing disk partitions
If you have performed operations to change the structure or size of partitions on the disk on which the system is installed, then the appearance of a black screen after the boot logo may mean that the disk volume is not available with the system.
If you have a bootable Windows 10 flash drive or recovery disc, you can boot from the installation disc and try to restore the system startup settings.
Depending on whether you made a system recovery image, whether the system recovery service is enabled, you can try to use various OS boot recovery options.
Windows 10 won't install
There can be a lot of reasons why windows 10 won't install. Each problem can have a different cause. In this case, you need an appropriate solution to successfully install Windows 10 on your computer. Possible problems include an error on the disk with the system - damaged DVD media, incorrect BIOS settings and operating modes of the storage controller.
sam-elektronik.ru
If Windows 10 doesn't work after installing
- 1 What is the reason
- 2 How to start Windows in Safe Mode
You have installed Windows 10 and, in anticipation of trying out the new system, clicked on restart. It is interesting to know how much space the new OS takes, what programs it offers by default, what advanced system configuration is capable of.
The start screens have changed each other, but Windows won't start or work. Instead of the desktop, you see a black screen with a cursor or something similar. Thus, after installing Windows 10, you received some kind of global error that prevents the system from starting correctly.
What is the reason
If the newest operating system does not work, there may be many reasons. Among them:
- incorrect operation of hardware drivers (often video cards, less often - other components);
- damage to system files (in case of updating Windows from an old version);
- software conflict (also when updating).
By the way: this can happen due to the connected second monitor (in this case, the image simply does not work). So if this is your case, turn off the second display and reboot. May I help.
If there is only one monitor and the system is not working, the first thing to take care of is to try to start the freshly installed OS in safe mode. From there it will be possible to configure Windows settings.
But first, some experts recommend checking if the problem is the result of a malfunctioning video card driver. In this case, the system starts up, it simply does not display the picture. And since it is fully functional, you can load the desktop and do some blind manipulations.
It is worth trying to reboot. This can also be done “barbarously” - by pressing the button, but it is better to do the following, carefully monitoring which keys you press:
- Click on Backspace several times.
- Enter your password to log in (you may need to switch the layout - the Win (with the Windows logo) + Space key combination should work).
- Wait a minute or two (for the OS to boot 100%, if it starts at all).
- Press Win + R to launch Command Prompt.
- Without touching the mouse, enter the shutdown / r command from the keyboard and press Enter.
- Wait 10 seconds and press Enter again.
See also: PPPoE Settings on Windows 10
If the problem really was with the video driver, the computer will restart and you will see a working screen (possibly). In such cases, the reason is a conflict with the so-called fast startup of Windows 10 and the only way to avoid repeating the error is to turn it off, replacing it with a normal start and full shutdown of the PC.
If nothing happens when doing the above manipulations, you can take a chance and turn off the PC by holding down the power button. If, upon restarting, the image appears, without delay, launch the control panel: there you will find a setting for the actions of the power buttons (in the “Power supply” section).
How to start Windows in Safe Mode
Safe Mode is so called because it only loads Microsoft programs and nothing else. By starting the system in safe mode, you can remove the “wrong” video driver or other program that, in your opinion, may lead to a startup conflict in the operating system.
“Okay,” if Windows 10 greets you with a visual error message instead of just a black screen. In the first case, you can turn on safe mode visually, and in the second, you will again have to act blindly. You need to know the exact places of all buttons and labels in order to navigate with the arrows and how many times to press the "Enter" key.
Or maybe you have a bootable USB flash drive or DVD with a "ten"? Then the task is simplified and the system startup setting becomes closer. Boot from the media and on the start screen of the installation, hold down the Shift + F10 key combination.
The command line will start. Use the bcdedit / set (globalsettings) advancedoptions true command.
Reboot. Entering safe mode will be available by pressing "4" or "F4". Command: bcdedit / deletevalue (globalsettings) advancedoptions - cancels the previously introduced changes (additional boot parameters will not appear at system startup).
See also: Ways to restart Windows 10
This setting is not so easy if you do not have bootable media, and the picture on the screen does not work for some unknown reason. Do it step by step (the places of settings and lines, in theory, are always the same - only the last steps differ):
- After booting the system with a black screen, press Backspace several times.
- Now press Tab 5 times and Enter 1 time.
- Press the up arrow.
- Hold down Shift and press
- Wait at least a minute.
- Click the down arrow 3 times and press Enter 1 time.
- Press the down arrow 2 times and Enter 1 time.
- Click the left arrow twice.
- 1 time down (if you have BIOS) or 2 times down if you have UEFI and Enter.
It will reboot and this time you should see alternate boot options. Since normal boot doesn't work for you, use Safe Mode with Networking. In it, you will have access to the Internet and you can try various variations of fixing problems with loading fresh Windows.
Here you will find out how much space the system takes up, and you can remove all unnecessary things that may interfere with the launch. The first step is to try 2 things: uninstall the video card driver (if the screen was black) or run System Restore from the Control Panel. It is worth removing the antivirus that remained after the “seven” or “eight” (if the “ten” was installed by an update), as well as all sorts of tweakers and system optimizers.
(Visited 585 times, 1 visits today)
windowsprofi.ru
Fixing Windows 10 Startup Error After Upgrade
Often the user is faced with a problem windows startup 10 after installing the next updates. This problem is quite solvable and has several reasons.
Remember that if you do something wrong, it can lead to other mistakes.
Fix blue screen
If the error code CRITICAL_PROCESS_DIED appears in front of you, then in most cases a regular restart will help fix the situation.
The INACCESSIBLE_BOOT_DEVICE error is also resolved by rebooting, but if this does not help, then the system itself will start automatic recovery.

Black screen fixes
There are several reasons for a black screen after installing updates.
Method 1: Correcting virus activity
The system may be infected with a virus.

Method 2: Fix video system problems
If you have an additional monitor connected, then the cause of the startup problem may lie in it.
- Log in and then press Backspace to remove the lock screen. If you have a password, then enter it.
- Wait about 10 seconds for the system to start and run Win + R.
- Click the right key and then Enter.
In some cases, it is quite difficult to fix the startup error after an update, so be careful when fixing the problem yourself.
We are glad that we were able to help you solve the problem.
Reading time: 7 minutes
If Windows 10 does not start, then remember what you installed on the system before. This will help find the cause and eliminate it.
First steps
First you need to remove all devices from the computer: disks, "", memory cards. Check if there is power.
Freezing when loading the operating system (OS) is mainly due to damage to the boot sector. Common reasons:
- Viruses.
- Incorrect updates.
- Installing new programs.
Viruses will help destroy the boot disk of Kaspersky Rescue. If you reinstalled the OS with a complete defragmentation of the C drive, do not forget to check the rest of the hard drive for viruses after entering Windows.
How to fix Win 10 blue screen problem
If, when starting the OS, a blue screen appears instead of loading the graphical shell, then some problem has occurred and the system suggests ways to fix it. There are several of them. The most effective is the following option.
Overwrite
From the proposed solutions to the problem, select "Diagnostics".
The window will change. Then select "Restore".

This will overwrite all system data. An installation disc or flash drive is required. The same process will take place as during the installation of Windows 10, with one difference: the OS is not removed, and the files of the new system will be poured over the old ones with replacement.
This will fix corrupted files, drivers and boot sector. All your data, folders, photos, videos, music on C and other drives will be saved. This feature should not be confused with restore, which is launched from the control panel when a rollback occurs.
Update
If the previous method did not help, then in the "Diagnostics" window select "Reset". This option will erase the system and re-install it. However, you can save the files that are in the user profile. To do this, click "Save my files".

Either of the two described options fixes the OS boot. But you can try other methods.
Extra options
The third in the "Diagnostics" is the "Advanced Settings" button. Click it and you will see a whole list of options for fixing Windows 10 boot.

Reverting to an old configuration
Clicking the System Restore button will return you to your previous configuration if you have restore points. In the next window, click "Next".

Then choose a restore point.

The system should boot itself after returning to the previous configuration.
But if there are no saved points, then you need to configure their automatic creation in the future. To do this, in the explorer, right-click on the C drive and select "Properties" from the context menu. This window will appear.
![]()
Select drive C and click "Configure".
In the new window, check the box "Enable protection ...". Use the slider to adjust the size you allow Windows 10 to use for restore points.

Using an OS image
The second button in the "Additional parameters" (see the figure at the beginning of the chapter), you can restore from a system image, if it was created earlier. To do this, you just need to click this button and specify the location of the image file. Windows 10 will do the rest on its own.
If there is no such file, create it for the future. In the control panel, find and enter "Backup".

This method is disadvantageous in that it takes up a lot of disk space.
Safe mode
Clicking in the "Advanced Options" button on the right "Boot Options", you will see options for logging in.

Go to safe mode using the arrow keys. If, after pressing Enter, the download is successful, then they interfere with entering Windiws 10 in the usual way incorrect drivers.
Safe mode does a lot: it checks the system with an antivirus, removes programs that, in your opinion, spoiled the download. If this is not enough, restore the OS using the methods described earlier.
More ways
When you click the Startup Repair button in the Advanced Options, automatic troubleshooting occurs.
This method, and the one that involves using the command line, rarely gives positive results, but it kills a lot of time.
For desperate users, there is a "Return to Previous Build" button located at the bottom right. Using it, the user goes to the operating system, which stood before the "ten".
If the blue screen does not appear when the download hangs, then it can be forced by doing a reboot. To do this, follow these steps:
- Click the Reset button.
- Otherwise, power off the PC. Reapply power and start the computer.
- Hold the Shift key while loading.
If the listed methods did not help, then it is better to reinstall the OS by inserting the installation disc into the DVD drive and booting from it.
The performance and capabilities of a system are dictated by its complexity. The more complex the structure, the more constituent mechanisms in it, and this entails the appearance of various problems. Each of the gears is potentially vulnerable, and if one fails, the system will not function normally, and failures will begin. Windows 10 is a prime example of how an entire OS reacts to any minor problem.
For what reasons Windows 10 may not boot (black or blue screen and various errors)
The reasons why Windows 10 may not start or "catch" a critical (semi-critical) error are very varied. This can provoke anything:
- unsuccessfully installed update;
- viruses;
- hardware errors, including power surges;
- poor quality software;
- all sorts of failures during operation or shutdown and much more.
If you want your computer or laptop to work correctly for as long as possible, you need to blow off dust particles from it. And both literally and figuratively. This is especially true when using old system units with poor ventilation.
Software reasons
The software causes of Windows crash are the leaders in the number of possible options. Errors can appear in every area of \u200b\u200bthe system. Even a minor problem can lead to serious damage.
The most difficult thing is to get rid of the consequences of a computer virus infection. Never follow links from unfamiliar sources. This is especially true for emails.
Viruses can re-encrypt all user files on the media, and some have the ability to even cause hardware damage to the device. For example, infected system files can instruct the hard drive to run at a speed higher than it is intended. This will damage the hard disk or magnetic head.
Installing another operating system
Each operating system from Windows has one or another advantage over others. Therefore, it is not surprising that some users do not neglect the possibility of using several operating systems at once on one computer. However, installing a second system can damage the boot files of the first one, which will make it unable to start.
Fortunately, there is a method that allows you to recreate the boot files of the old OS, provided that Windows itself was not damaged during the installation, was not overwritten or replaced. Using the "Command Line" and the utility in it, you can return the necessary files to the loader service:
Video: how to change the boot order of operating systems in Windows 10
Experimenting with disk partitions
Various kinds of manipulations with hard disk partitions can also result in boot problems. This is especially true of the section on which the operating system is installed.
It is not worthwhile to perform actions related to volume compression with the disk on which the operating system is installed, as this can lead to failures
Anything you do to shrink a volume to save space or increase other partitions can cause the OS to crash. Decreasing the size is discouraged, if only because the system may need much more space than it currently occupies.
Windows uses a so-called swap file - a tool that allows you to increase the amount of RAM at the expense of some amount of hard disk space. Also, some system updates take up a lot of space. Shrinking a volume can result in an "overflow" of the allowed amount of information, and this will lead to problems when requests for files are made. Consequence - problems during system startup.
If you rename the volume (replace the letter), all paths to the OS files will be simply lost. The bootloader files will literally go to the void. The situation with renaming can be corrected only if there is a second operating system (the instructions above are suitable for this). But if only one Windows is installed on the computer and it is not possible to install the second one, only flash drives with an already installed boot system can help with great difficulty.
Unqualified editing through the system registry
Some instructions on the Internet offer to solve some of the problems by editing the registry. In their justification, it is worth saying that such a solution can really help in certain cases.
But the trouble is that the Windows registry is a delicate area of \u200b\u200bthe system: one incorrect deletion or editing of a parameter can lead to dire consequences. Registry paths are virtually identical in their names. Getting to the file you are looking for and fixing it correctly, adding or removing the required element is almost a surgical job.
Imagine a situation: all instructions are copied from each other, and one of the authors of the articles accidentally specified an incorrect parameter or an incorrect path to the desired file. The result will be a completely paralyzed operating system. Therefore, it is not recommended to make edits to the system registry. The paths in it may differ depending on the version and bitness of the OS.
Using various programs to speed up and decorate the system
There is a whole market cluster of programs that are designed to improve the performance of Windows in many ways. They are also responsible for the visual beauty and design of the system. It should be admitted that they do their job in most cases. However, if in the case of decorating the system, the standard textures are simply replaced with new ones, then to speed up the work, such programs disable "unnecessary" services. This can be fraught with different kinds of consequences, depending on which services have been disabled.
If the system needs optimization, then it must be carried out independently in order to know what and for what exactly was done. In addition, knowing that you have disabled, you can easily enable the service back.

As a result, disabled services will stop starting and working. This will save CPU and RAM resources and make your computer run faster.
A list of services that can be disabled without harming Windows performance:
- "Fax";
- NVIDIA Stereoscopic 3D Driver Service (for nVidia video cardsif you are not using 3D stereo images);
- "Net.Tcp Port Sharing Service";
- "Working folders";
- AllJoyn Router Service;
- Application Identity;
- BitLocker Drive Encryption Service;
- "Bluetooth Support Service" (if you are not using Bluetooth);
- Client License Service (ClipSVC, Windows 10 Store apps may not work properly after being disabled);
- "Computer Browser";
- Dmwappushservice;
- Geographic Location Service;
- Guest Shutdown Service (Hyper-V);
- Heartbeat Service (Hyper-V);
- "Session Service virtual machines Hyper-V ";
- Hyper-V Time Synchronization Service;
- "Data Exchange Service (Hyper-V)";
- Hyper-V Remote Desktop Virtualization Service;
- "Service for monitoring sensors";
- "Sensor Data Service";
- "Sensor Service";
- "Functionality for Connected Users and Telemetry" (This is one of the items to disable tracking Windows 10);
- Internet Connection Sharing (ICS). Provided that you do not use Internet sharing functions, for example, to distribute Wi-Fi from a laptop;
- "Xbox Live Networking Service";
- Superfetch (assuming you are using an SSD);
- Print Manager (if you are not using print features, including Windows 10 built-in PDF printing);
- Windows Biometric Service;
- "Remote registry";
- Secondary Login (assuming you are not using it).
Video: How to manually disable unnecessary services in Windows 10
Incorrectly installed Windows updates or shutting down the PC during the installation of updates
Windows Updates can be measured in gigabytes. The reason for this is the ambiguous attitude of users towards system updates. Microsoft Corporation actually forces users to update the top ten, in return guaranteeing the system's operability. However, updates do not always improve Windows performance. Sometimes trying to make the OS better turns out to be big problems for the system. There are four main reasons:
- the users themselves, who neglect the message "Do not turn off the computer ..." and turn off their device during the update process;
- small-scale hardware fails: old and rare processors on which Microsoft developers simply cannot simulate update behavior;
- errors while downloading updates;
- force majeure: power surges, magnetic storms and other phenomena that can affect the operation of the computer.
Each of the above reasons can lead to a critical system error, as updates replace important components. If the file was replaced incorrectly, an error appeared in it, then an attempt to access it will lead to the OS freezing.
Viruses and antiviruses
Despite all the protection measures, constant warnings to users about the safety rules on the Internet, viruses are still a scourge in the work of all operating systems.
In most cases, users let malware onto their devices themselves and then get hurt. Viruses, worms, Trojans, ransomware - this is not the whole list of types of software that threatens your computer.
But few people know that antiviruses can also damage the system. It's all about the principle of their work. Protective programs operate according to a specific algorithm: they search for infected files and, if found, try to separate the file code from the virus code. This does not always work, and corrupted files are often isolated if an attempt to cure them fails. Options for deletion or transfer to servers are also possible antivirus software to cleanse the malicious code. But if viruses damage important system files, and the antivirus isolated them, then when you try to restart your computer, there is a high probability of receiving one of the critical errors, and Windows will not start.
"Damaged" applications at startup
Another reason for problems with loading Windows is poor quality or containing errors in autorun programs. But unlike damaged system files, startup programs almost always allow the system to start, albeit with some time delays. In cases where the errors are more serious and the system cannot boot, you must use the "Safe Mode" (BR). It doesn't use autorun programs, so you can boot the operating system and uninstall bad software without any problems.
In the case when the OS cannot be loaded, use the "Safe Mode" using the installation flash drive:

After entering the BR, remove all questionable applications. The next restart of the computer will take place as usual.
Video: How to Enter Safe Mode in Windows 10
Hardware reasons
Hardware reasons for not starting Windows are much less common. As a rule, if something breaks inside the computer, then it will not even work to start it, let alone load the OS. However, minor problems with various kinds of manipulation of equipment, replacement and addition of some devices are still possible.
Changing the order of polling bootable media in the BIOS or connecting the hard drive to a wrong port on the motherboard (INACCESSIBLE_BOOT_DEVICE error)
During a superficial home repair, cleaning the computer from dust, or adding / replacing an operating board or hard drive, a critical INACCESSIBLE_BOOT_DEVICE error may occur. It can also appear if the order of the media for loading the operating system has been changed in the BIOS menu.
There are several methods of dealing with the above error:

The problem should go away after the bug finder finishes his work.
Video: how to set the boot order in BIOS
Faulty RAM
With the development of technology, each individual element of the "filling" of the computer becomes smaller, lighter and more productive. The consequence of this is that parts lose their rigidity, become more fragile and vulnerable to mechanical damage. Even dust can negatively affect the performance of individual chips.
If the problem concerns the ramps, then the only way to solve the problem is to buy a new device
RAM is no exception. DDR strips every now and then fall into disrepair, errors appear that prevent Windows from loading and working in the correct mode. Often breakdowns associated with rAMare accompanied by a special signal from the motherboard speaker.
Unfortunately, memory stick errors are almost always beyond repair. The only way to fix the problem is to change the device.
Failure of elements of the video subsystem
It is very easy to diagnose problems with any element of the video system of a computer or laptop. You hear that the computer turns on, and even loads the operating system with characteristic welcome sounds, but the screen remains deathly black. In this case, it is immediately clear that the problem is in the video sequence of the computer. But the trouble is that the video output system consists of a set of devices:
- video card;
- bridge;
- motherboard;
- screen.
Unfortunately, the user can only check the contact of the video card with the motherboard: try a different connector or connect another monitor to the video adapter. If these simple manipulations did not help you, you need to contact the service center for a deeper diagnosis of the problem.
Other hardware problems
If you think about it, any hardware failure inside your computer will lead to errors. Even violations in the form of a broken keyboard can prevent the operating system from loading. Other problems are possible, and each of them is characterized in its own way:
- problems with the power supply will be accompanied by a sudden shutdown of the computer;
- complete drying of thermoplastics and insufficient cooling of the system unit elements will be accompanied by sudden Windows restarts.
Some Ways to Deal with Software Causes of Windows 10 Not Starting
The most the best way Windows resuscitation are System Restore Points (TVS). This tool allows you to roll back the OS to a specific point in time when the error did not exist yet. By doing this, you can both prevent the problem from occurring and restore the performance of your system to its original position. In this case, all your programs and settings will be saved.
System recovery using TVS
To use system restore points, you need to enable them and set some parameters:
- Call the context menu of the This PC icon and select Properties.
Call the context menu of the icon "This computer"
- Click on the "System Protection" button.
The "System Protection" button opens the environment for configuring restore points
- Select the disc labeled "(System)" and click the "Configure" button. Move the checkbox to "Enable system protection" and move the slider next to the "Maximum use" setting to a value convenient for you. This parameter will set the amount of information used for restore points. It is recommended to choose 20-40% and at least 5 GB (depending on the size of your system disk).
Turn on the system protection and configure the allowed amount of fuel assembly
- The "Create" button will save the current system configuration in the fuel assembly.
The "Create" button will save the current system configuration in the fuel assembly
Apply the changes with the "OK" buttons.
As a result, we have a fixed working OS that can be subsequently restored. It is recommended that you create restore points every two to three weeks.
To use TVS:

Video: How to Create, Delete a Restore Point, and Roll Back Windows 10
System restore using sfc / scannow command
Taking into account that system restore points are not always convenient in terms of creation, and they can also be "eaten" by viruses or disk errors, it is possible to restore the system programmatically - using the sfc.exe utility. This method works both in the system recovery mode using a bootable USB flash drive, and using " Safe Mode". To start the program for execution, run the "Command Line", enter the sfc / scannow command and run it for execution by pressing the Enter key (suitable for BR).
Performing a troubleshooting task for Command Prompt in recovery mode looks different due to the fact that one computer may have more than one operating system installed.

It is necessary to keep an eye on the drive letter if the OS is not installed in the standard directory of the C drive. After the utility completes, restart the computer.
Video: how to restore system files using Command Prompt in Windows 10
Recovery using a system image
Another opportunity to restore Windows to work is to restore using an image file. If you have a tens distribution kit stored on your computer, you can use it to return the OS to its original state.

Restart your computer and enjoy a working system in which all damaged and incompetent files have been replaced.
Video: how to create a Windows 10 image and restore the system using it
Ways to deal with hardware reasons for not starting Windows 10
Only a specialist can provide qualified assistance with a hardware breakdown of the system. service center... If you do not have the skills to handle electronic equipment, it is strongly not recommended to untwist, remove, solder anything.
Fixing a hard drive problem
It should be noted that most of the hardware reasons for not starting are related to the hard drive. Since most of the information is saved on it, the hard drive is often attacked by errors: files and sectors with data are damaged. Accordingly, access to these places on the hard disk leads to system freezing, and the OS simply does not boot. Luckily, Windows has a tool that can help with simple situations.

Cleaning your computer from dust
Overheating, poor contacts of bus connections and devices can be triggered by an abundance of dust in the system unit.
- Check the connections of the devices to the motherboard without using excessive force.
- Clean and blow out any dust you can reach using a soft brush or cotton swab.
- Check the condition of the wires and tires, for defects, swellings. There should be no exposed parts and plugs without connection to the power supply.
If cleaning from dust and checking the connections did not work, system recovery did not help, you need to contact the service center.
Video: how to properly clean the system unit from dust
Windows may not start for various reasons. Both software and hardware errors are possible, but neither one nor the other in most cases is not critical. This means that they can be corrected without the help of specialists, guided only by simple instructions.