Good time everyone!
In many cases, it is much more convenient to connect your smartphone to a Wi-Fi network (than to use 3G / 4G Internet). Firstly, it is often unlimited, and secondly, the speed and stability are much higher.
But ..., in some cases, the phone stubbornly does not see Wi-Fi, creating discomfort (and in some cases, for example, on the road, at the airport, on vacation, it is completely impossible to access the Internet).
Actually, in this article I wanted to give the most common reasons why a smartphone (on Android) may not find Wi-Fi network... I think this post will be useful for many users.
Note: I emphasize that this article deals with the issue of "invisibility" of Wi-Fi. If you have connected to Wi-Fi, but you do not have the Internet, then this is a slightly different problem (to solve it, use this note :)
What can be done if Android does not see the Wi-Fi network
Sometimes, due to various errors, it can happen that the router (for example) stops distributing the Internet. Therefore, one of the very first tips in this case is to reboot the router (for this it is enough to disconnect its power supply from the network for 20-30 seconds).

2) Which channel (region, if any) is selected in the Wi-Fi settings
Each of the radio devices operates at a specific frequency (and the router is no exception). So, the channel (region) * influences the frequency in the router settings, and I will immediately note that different countries use a different number of channels: in Russia from 1 to 13, in the USA up to 11, in Japan up to 14.
The bottom line is that if your device is localized to work in another country, then it may not see some channels. For example, if your phone sees only from 1 to 11 channels, and auto-mode is selected in the router settings (and it chose channel 13), then your phone simply cannot work with such a Wi-Fi network.
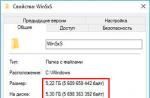
The channel and region are set in the settings wireless network(Wireless) in the web interface of the router (see a couple of screenshots below).
To help! How to enter the router settings -
How to choose the "best" channel for work (instructions), how to change it in the router settings -


Important!
Now most of the classic routers operate at a frequency of 2.4 GHz, but recently new routers with a 2-frequency frequency have appeared on the market: 2.4 GHz and 5 Ghz (5 GHz allows you to offload the 2.4 GHz frequency, and improve wifi quality networks in homes where there are too many routers running at 2.4 GHz). But here the whole point is that not all laptops, tablets, phones support 5 GHz.... Pay attention to this too!

3) Does the phone see Wi-Fi networks at all (at least some?)
If the above does not help, pay attention to the phone: does it see any other Wi-Fi networks?
If the phone does not see any Wi-Fi networks at all(although other devices find them) - perhaps it has a hardware problem (the Wi-Fi module could become unusable). I recommend restarting your phone, removing the case and trying to find Wi-Fi again. If this does not work, contact the service center.
If the phone actually sees Wi-Fi networks, but does not find only one specifically yours - then pay attention to the channel and region (I indicated this a little higher), the coverage area (perhaps you are too far from the router and the signal in this place is weak), some parameters of the router (a little about them below ⇓).
4) Does he distribute Wi-Fi router network (can other devices see it?)
Next, I recommend checking if the Wi-Fi network (which you want to find on your phone) can be seen by other devices, for example, a laptop or tablet. It is possible that the problem is still in the settings of the router. For example, a reset of the router settings could occur (this sometimes happens with power surges).

Another important point: there may be a "white" list in the router (blocking of unknown devices is usually carried out by). This is done for security reasons so that "unknown" devices cannot connect to the Wi-Fi network. Therefore, pay attention to the "Security" tabs, " Parental control"," Bandwidth Control "," Configuring Wireless Network "in the web interface of your router.
In some cases, it is much easier and faster to restore factory presets (they usually do not have any locks or restrictions).
5) About the radius of Wi-Fi coverage
Pay attention to the location of the router. The fact is that the quality of the signal and the radius of Wi-Fi coverage very much depends on where the router is located and where the receiving device is (each "extra" concrete wall or other obstacle greatly reduces the signal). And if the phone is behind two concrete walls from the router, it is quite possible that it will not find this network.
To help! Ways to Boost Your Wi-Fi Signal - Improving Reception and Increasing Network Range at Home -

6) If you distribute a Wi-Fi network from a laptop
If, then in some cases it is necessary to make some settings in the control center Windows networks (the fact is that security settings in Windows 7+ by default can block the Internet for other devices) .
First you need a tab: Control Panel \ Network and Internet \ Network and Sharing Center.

Then open one by one several profiles that will be in this tab (private, guest, all networks) and disable password protection, enable network discovery, allow general access to files and folders.

Then double-check the Wi-Fi operation (it is advisable to restart Windows and the phone before doing this).
7) The last resort is a factory reset (the so-called Hard reset)
The last thing I can recommend is to reset the phone settings, try to return it to the factory presets (the so-called Hard Reset). I draw your attention to the fact that with this operation: all phone book, phone parameters and settings - will be reset and will need to be set again!
To reset the device settings for Android - just go to the "Restore and reset" section, and open the "Reset settings" item (see the screenshot below).

That's all for now, additions on the topic are welcome ...
The problem when a mobile device (smartphone, tablet) cannot find a wi fi network and, accordingly, connect to it is not uncommon. Operating room devices Android system not an exception. If android does not see wi-fi, what are they doing? b? Let's consider the possible options for which such a problem may arise. Does the mobile device see your network specifically, and does not see the rest of the networks (neighbors, cafes, etc.) or does not see any network?
- Check the router through which the Internet connection is provided (it may be frozen and needs to be rebooted, or simply not turned on) It is possible that your Android mobile device tries to connect and the connection process stops at the stage of obtaining an IP address. In this case, the problem can be solved by restarting the router.
- Android does not see your wi fi network, but it does catch other networks. In this situation, reconfiguring the access point (router) can help you. You need to go to the settings of the wi fi access point. Find the section "Wireless Network Settings", then select the item "Enable Auto Channel Selection".If there is a check mark next to this item, you must remove it. After that, the field will become active. "Wireless Channel" with drop-down lists where you can select the default options.
- If android still can't see wi fi, what to do then? Try resetting your settings mobile device(smartphone, tablet) to the factory ones. If this option did not work, then it is worth contacting a service workshop. It is possible that your device has a damaged antenna or built-in module that provides wi fi operation.
Quite often, people are interested in the question of why the phone does not find WI-FI laptop... Its settings are no different from the router, since their work is similar in principle.
Their difference lies only in the fact that the router has the broadest parameters. Also, the access point can be configured only for connecting computers. Thus, any other device simply won't see the network.
Why can't Android see WI-FI?
There are many reasons for this. If the network is through a router, then you need to go into the parameters, if through a laptop, then into the OS settings, while on another device there is no need for settings.
This is because the settings in Android are automatic. It's all pretty simple. That is why the reason should be considered in a router or laptop.
Setting options:
Most often, the error is quite simple. It's all about the wrong settings. In order to fix it, you need to change and make some amendments. It is important to register the computer's IP in any convenient browser.
The IP can be found on a sticker with all the data about the laptop, if there is none, then just look at the instructions for use or follow the following points:
Press simultaneously Windows buttons and R. A window will appear on the screen in which you need to register CMD, which will launch command line after clicking "OK".
Here you can see all the information you need. By writing ipconfig it will be possible to view the connection. The column "Default gateway" will contain information that should be entered in the browser.
Next, you need to enter the data: username and password. Basically, "admin" should be entered in both fields, this is the initial data. If they have been changed, you must add your own. Thus, you are logged into the router.
All settings depend on the model, but they look about the same. Sections and item names may vary slightly.
In order to enter additional parameters, click "Advanced settings". You need to select WI-FI and find the basic settings.
First of all, it is necessary to check whether the connection is on, that is, the presence of a check mark in the required window while saving the parameters. After that, you should check the location of WI-FI.
Router
You need to check the channel and, if necessary, replace it. You should also set up automatic detection. Next, select a mixed network. This will allow you to see WI-FI not only for computers, but also for other devices that support WI-FI.
If you have a tablet with Android OS, then most likely it will have a built-in Wi-Fi module. I have never seen a tablet without Wi-Fi, even the cheapest Chinese models are equipped with this type of wireless connection.
The instruction will be presented in two parts, first, the modem / router is configured, then - connecting the tablet to the point Wi-Fi access... If you have been using this technology for a long time, but only don’t know how to set up Wi-Fi on your tablet, you can skip the first part and go straight to the second.
Part 1. Enabling Wi-Fi on a modem or router
I assume that you have no idea at all what this "Wi-Fi" is, how to turn it on and how to use it. If I'm right, then you did the right thing to start reading the article from here, from the first part. I repeat, if you have everything set up for a long time, you use Wi-Fi on a laptop, then read part 2.
Before using home Wi-Fi on your tablet, you need to enable it on your modem. I hope your modem can create Wi-Fi networks. To make sure of this, read the instructions for the modem or see its characteristics on the website. Look for words like "802.11" or "Wi-Fi" there. The easiest way to find out is to find a light indicator on the modem with the inscription "WLAN". If it is there, then there is Wi-Fi.
If you do not know what to write here, try to find out this data from the one who set up the Internet for you or from the one who sold you this modem. Alternatively, you can contact your Internet service provider.
Further steps depend on the model of your modem. You need to find a menu item with a name like "WLAN" or "Wireless Lan". Search on the left in the menu. Check the box next to "Active Wireless LAN" or "Enable". Set the network security type to "WPA2-PSK". Enter the name of your Wi-Fi network in the "SSID" field and enter the password of whatever you want your network in the "Pre-Shared Key" field. Click the "Apply" or "Submit" button to save the settings.
But that is not all. We go to the DHCP settings (this thing somehow distributes IP addresses to everyone who connects to the network). Depending on the model of the modem, these settings can be in the most different places... The screenshot shows a possible location for such settings. Although in my modem from Zyxel they are hidden along the Network -> LAN -> DHCP Setup path. Enable DHCP, if disabled, by switching the checkbox to Enable. If DHCP is enabled, read the next paragraph. If there are no checkmarks, but there is a list, select the Server item opposite the DHCP item. After turning on, restart the modem (this can be done as in the modem settings interface, in which you are now actually located, or simply by pressing the button on the modem.
Part 2. Connecting the tablet via Wi-Fi
All that remains is to connect the tablet to the newly created network. The actions will depend on the version of Android on your tablet. If you have version 4 or higher, the first Wi-Fi item is right in the settings. We include. If you have Android version 3, you also need to go to the wireless settings item. And there already turn on Wi-Fi.
After the device thinks, it will show you a list with found networks. Choose the network that you created in the 1st part (this network will be named as you named it in the “SSID” field), or which you already have and to which you have been connecting your laptop for a long time. Next, you will be asked to enter a password for her. Again, enter the password that you specified in the “Pre-Shared Key” field. After all the actions, the tablet should connect to the network, which you will recognize by the antenna icon that appears next to the clock.
Part 3. Endless IP address acquisition ...
The most common problem that users have when connecting the tablet via Wi-Fi is the constant “Obtaining an IP address” message. Its connection does not go further. There are several solutions to this problem:
- Rename the Wi-Fi network to English. As suggested in the comments, sometimes tablets do not connect to networks with Russian letters in their names.
- Enable DHCP server. How to enable it, read above, in the 1st part of this article at the very end.
- Change the type of encryption of the Wi-Fi network. You can change the type of protection in the settings Wi-Fi security(this is where you set the password and network name). Try to set some other value in the highlighted items. Fear not, you won't mess up the modem with your experiments. Restart the modem for the changes to take effect.
- Manually register IP addresses and DNS servers in the connection settings on the tablet. When connected to a Wi-Fi network, in the window where you are asked to enter the password, open the advanced settings menu. And there you will select IP Settings -> Custom. In the IP address field, enter your address, it looks like 192.168.1. *** (for example - 192.168.1.128). In the Gateway field, enter 192.168.1.1 or 192.168.0.1 (check with your right-hand driver). And it remains to enter DNS, which are different for everyone, but which you can also find out from your Internet provider.
This article will focus on common problems when connecting your phone to a wireless Wi-Fi network, among which the most common are Android freezing to "obtain an IP address" or authentication error when connecting. Less common, but it occurs when your Android phone or iPhone simply cannot see the Wi-Fi network.
V step by step instructions in order, the following variants of the problem will be considered and what to do in each case.
- Authentication failed (or phone writes Saved WPA / WPA2)
- Endless IP address acquisition on Android
- The phone does not see the Wi-Fi network
Wi-Fi Authentication Error on Android
If your Android phone or tablet, when connected to Wi-Fi, reports "authentication error" or writes "Authentication" for a while, after which it still does not connect to the wireless network (when the android writes Saved WPA / WPA2, this is usually the same situation) , then in most cases the problem is with the password on Wi-Fi, and the problem can arise even when you enter it correctly (but, of course, this is what you should first check, the article can help with this, you can also just look at router settings).
But it is not always a matter of incorrect input: it happens that you are guaranteed to enter the password correctly, but an authentication error still occurs.
The first thing to try here:
- Delete the Wi-Fi network (forget) in the phone settings, try to connect to it again by entering the password.
- Reboot the router (unplug it and plug it back on).
If none of this helped, go to the settings of the router (any of the instructions for setting up the router on this site will help with this, they all start with how to go into the settings of the router), and then into the Wi-Fi network settings and try the following ( after each change, save the settings, delete the previously saved network on the phone and try to reconnect):
If even these points do not help, once again make sure that WPA / WPA2 (Personal) authentication is set in the security settings of the Wi-Fi network in the router settings, and not some other type (this option should be supported on any android phone). It also sometimes helps to change the network mode from b / g / n or auto to 802.11 n only or 802.11 b / g.
Android keeps writing Obtaining IP address and won't connect to wifi
The second most common problem with connecting a phone (namely Android) is endless attempts to connect with the text "Obtaining an IP address".
What could be the cause of the situation:
- The DHCP server is disabled in the router settings.
- Just an Android glitch.
If you are not sure about the first point, then first, just restart the router, perhaps this will already solve the problem. If it does not help, then the following steps:
- Check if DHCP is enabled on the router, if not, enable it.
- If it is enabled, but still "Obtaining an IP address", then try to set a static IP address on the phone.
And now more about how to do both.

To enable the DHCP server, you need to go to the router settings (any instructions for setting D-Link routers, Asus, TP-link, Zyxel begins with a description of how to enter its settings) and make sure that the DHCP server is enabled (as a rule, there should be such a mark): on almost all router models this option is located in the LAN section or LAN (local area network):
- On ASUS routers - LAN - DHCP server tab
- On TP-Link routers - Additional settings - DHCP settings
- On Zyxel Keenetic routers - In " home network"- Networking, enable" Server "for the DHCP option. Or, on Keenetic Lite, in Home network - Segments, check if DHCP is enabled.
- On D-Link - in the "Network" or "LAN" section, item or tab "DHCP server"
The second option is to set a static IP address on Android, for this:

Save the settings and try to connect to the Wi-Fi network from your phone again.
Android phone or iPhone can't see Wi-Fi network
If your phone does not see the desired Wi-Fi network, but at the same time sees other networks, then in most cases the problem is in the Wi-Fi channels used. The fact is that by default in the settings of the router in the parameters of the wireless network there is usually "Region: Russia" and channel: auto, which forces the router to select channels from 1 to 13. But: some devices do not support channels greater than 10. (On this topic there is a separate instruction :)
Thus, the first thing to try is to go to the router settings in the wireless network settings and change one of two:
- Region - put USA, supported by almost all devices, only 10 channels.
- Manually change the channel (set within 10).
After that, save the settings and check if your phone can see the network now. If this did not help to solve the problem, then it makes sense to also try changing the channel width in the router settings, and for old phones, try also changing the network operating mode to 802.11 b / g.