Setting the date and time in the operating room Android system- a simple thing, but in some cases the user may have difficulties with it. They can be associated with both ignorance of some things, and with failures of the operating system itself.
How to set up date and time on Android
The correct date and time not only help the user to be more punctual - few people want to miss the bus due to the incorrectly set time - they are also important for the operation of some applications, which, if the data is incorrect, can start to crash and work with errors. Therefore, it is strongly recommended to set the correct date and time on the device.
The very process of setting the date and time in different versions Android is about the same: except that in new devices, the system asks you to configure data immediately, even before you start using applications. In addition, the names of the menu items responsible for the time and date may slightly differ from each other in different OS versions.

After these simple manipulations, the date and time should change.
Video: Setting the Time and Date
If problems arise
It happens that when setting the date and time, errors occur: the changes are not applied, the newly set time and date are reset, or even throw them out of the "Settings" with an error. There can be many reasons, but the most common ones are:
- you have automatic time synchronization enabled, and therefore attempts to manually change it will not lead to anything. To disable auto-sync, you need to uncheck "Use network date and time" in the date and time settings;
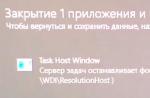
- the problem is related to a single malfunction of the system and should stop after a factory reset or reboot;
- a defect in the firmware of the device - in this case, if you are not an experienced user, it would be best to contact the master at service center, because when you try to reflash the device yourself, there is a high risk of damaging it;
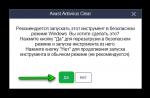
- there was a conflict between the time zones of the phone and the SIM card (most often this happens with the Tele2 operator).
To fix the problem with the conflict between time zones and SIM card, do the following:

Auto sync date and time
If you do not want to manually adjust the time and date, you can use the built-in Android function automatic time synchronization with the network. Or, if maximum accuracy is important, its improved version, for the implementation of which you will need root rights.
Regular auto-sync
To synchronize the date and time with the network data, you need to tick only one item located in the "Date and Time" settings menu. It is usually called "Use network date and time", but options for "Automatic date and time", "Synchronize with the network" and others are also possible.
After a check mark is placed in front of this item, the date and time on the phone or tablet are synchronized with the network data and will henceforth be determined automatically. While this function is enabled, manual setting of the date and time is not possible.
 When the checkbox "Use network date and time" is checked, the system itself checks the date and time with the network
Smart sync
Standard sync is not very accurate and works with an average of 500 milliseconds (that's about half a second). This is due to the fact that when it was created, old and rather slow data transfer protocols were used. As a result, information about the current time simply does not have time to arrive on time and is slightly late. This leads to an error, which is corrected by numerous applications for "advanced" time synchronization.
For normal operation, applications need to interfere with Android settings, but by default they do not have this right. Therefore, in order to carry out smart synchronization, you need to have superuser rights on your device, or root-rights. However, those applications that are the most advanced, with a sin in half, but do without them.
The algorithm for obtaining root access is unique for each phone model, of which there are hundreds at the moment. There is no general way that would allow you to get superuser rights on any device: even the most popular applications for "hacking" root-rights operate with a limited set of models, and it is not known whether a particular application is suitable for you. To obtain root access on a specific device, you need to familiarize yourself with the technical documentation on rooting it on a specialized resource.
There are several smart sync apps out there, and they are all similar to each other. Let's analyze how to work with them using the ClockSync application as an example.

ClockSync can be downloaded from official page v Google play... However, this application is one of the most resource-intensive and multifunctional: for example, in it you can change the server with which the time is checked. If you are not that advanced user, then you can use some simpler analogue: for example, Smart Time Sync.
Time zone setting
You can change the time zone defined on the device in the same settings item, "Date and Time". The time zone line allows you to change the default zone.
A time zone, just like a date with time, has an auto-sync parameter. You can enable it if you are not sure about your own time zones, but in older versions of Android this setting sometimes fails, so it is recommended that you configure it manually there.
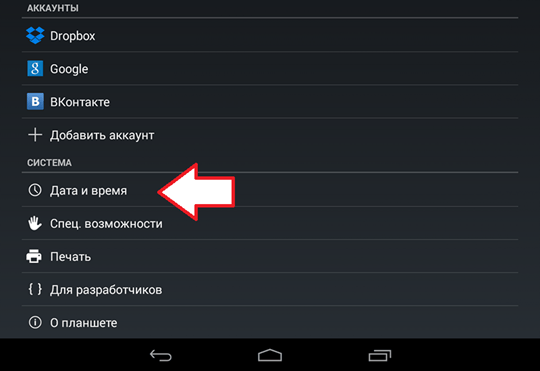
 To synchronize the time zone with the network, you need to enable the "Use network time zone" option
 What time zone is used in your area, you can find out using the media in your place of residence, including the Internet. The Moscow belt is GMT + 3, in St. Petersburg and central Russia it is also mainly used. In general, in Russia, time zones are used from +3 to +12.
To select a time zone, you need to click on the "Time zone" button and select from a huge list the one that is used in your region. After that, the time will be set in accordance with the selected zone.
 To select a time zone, just find the desired one in the list and click on it
 The time zone gets confused
The time zone can get lost in several cases: either incorrectly working auto-sync (in this case, you must enable manual zone selection), or an incorrectly set region in the phone or tablet settings.

In addition, a database error can be the cause of the failure. In this case, only one of the applications for "smart" synchronization, which has already been mentioned, will help; the servers they use usually detect the time zone without error. However, these applications require root access to use them. In the settings of such applications, there is an item "Auto-sync", which can be enabled only with "root". If the automatic synchronization of time zones is enabled, the zone will also be detected by the application automatically - and this will be done more accurately than the system menu.
 In the main settings menu of ClockSync and similar applications there is a button "Auto time zone synchronization"
 Video: "fixing" the time zone through the application
Setting the time and date on Android is easy - if the phone does not require maximum correctness of the result. If you want your watch to be extremely accurate, you have to try. In any case, the correct timing is a valuable feature of the phone, which is extremely important for its normal operation.
As a rule, there is no need to change the date on an Android device. But, if you have such a problem, then you have come to the right place. In this article, you can learn how to change the date in Android. We will demonstrate the process of changing the date using the example of Samsung's TouchWiz shell, as well as using pure Android from Google as an example.
How to change the date in Android on a Samsung smartphone
If you have a Samsung smartphone, then most likely you are using the TouchWiz shell. In order to change the date in the TouchWiz shell, you need to take the following steps.
Step # 1. Open the settings of your smartphone. This can be done using a shortcut on the desktop, the top curtain, or by going to the list of applications.
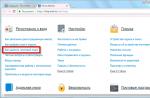
Step # 2. Go to the "Options" tab. The Options tab is the last tab in the settings. Here you can find settings related to GPS, security, applications, battery, device storage, and date and time.

Step 3. Open the menu item "Date and time". The Date and Time menu item is located at the bottom of the Options tab. By opening this menu item, you will have access to the date and time settings on your Android device.

Step 4. Open the menu item "Set date". In order to change the date in Android, you need to open the "Set date" menu item. If you want to change the time on your Android device, then open the next item called "Set time".

If you cannot open the "Set date" menu item (this item is inactive, and it is not pressed), then you need to uncheck the box next to the "Automatic date and time detection" function.
Step # 5. Change the date in Android. After that you will see a small menu where you can change the date. Select the date that you need and click on the "Install" button.

All these simple steps are enough to change the date in an Android smartphone or tablet with Samsung's TouchWiz shell.
How to change the date in an Android smartphone from Google
If you have an Android device without any non-standard skins (Android device with a Google skin), then in order to change the date in Android, you need to follow these steps.
Step # 1. Open Android settings. You can open Android settings using a shortcut on the desktop, the top curtain, or through the apps menu.

Step 2. Open the "Date and time" section of the settings. The "Date and Time" section is at the very bottom of the list of sections.
Step # 3. Open the "Date" section. In the "Date" section you can change the date on your Android device. If the "Date" section does not open (it is not active), then you need to uncheck the box next to the "Date and time of the network" function.

Step # 4. Change the date in Android. After you have opened the "Date" section, a small window should open in front of you in which you can change the date in your Android device. After selecting the desired date, click on the "Finish" button in order to save the changes.

That's all, this is enough to change the date in Android, the settings can be closed.
Suppose you have been using Android for a long time, and therefore it may seem that it does an excellent job of synchronizing time - alarms go off on time, there are no obvious time deviations, etc. However, are you completely sure where Android is from? actually getting the exact time and time zones? If you have any doubts about how it works, welcome to cat.
There are two problems with time in Android: its unpredictable synchronization and the need to update time zone data even in the most recent version of the OS.
Background: Android is a mobile OS based on Linux kernel, it easily connects to the Internet and, of course, it can be assumed that the time synchronization is carried out using NTP, however, this is not the case. Historically, Android was intended to be used exclusively in mobile phones(remember version 1.6). At the same time, only by the 3rd major version, he acquired an interface for tablets and other progress began towards unification of the interface and OS filling. However, even versions 4.4 and Android L receive accurate time signals using the same methods that the Nokia 3310 and other, earlier GSM / 3GPP phones received them, i.e. from towers cellular when registering on the network (when connected to a tower). At the same time, tablets or other devices without a communication module, in principle, do not have the ability to synchronize the time automatically.
Unfortunately, in order to teach Android to synchronize the time completely automatically using NTP, we need root access because there is no API for setting the exact time in Android now.
Let's get started. The first thing to do is turn off time synchronization with mobile network... At the same time, I recommend leaving the time zone setting in automatic mode, and turning it off is worth it only if there is a guarantee that the device will work in stationary mode.
Screenshot of the settings window "Settings -> Date and Time" version of Android 4.x:

Next, you need to install the ClockSync application, which will act as an alternative for us to the time synchronization daemon using NTP.
Screenshots of the ClockSync program window before synchronization (left) and after (right):


The screenshots show that the difference with exact time turned out to be small enough, however, there are different situations, for some, the time on the device can even float back and forth since the operator did not bother to put things in order on his BS.
After making sure that everything works, let's set up automatic synchronization in the ClockSync program. To improve accuracy, I recommend enabling the High Accuracy Mode and WI-FI Only options. If everything is clear with the first option from the description in the program (see the screenshot below), then I recommend enabling the second option in the first place, not for reasons of economy mobile traffic, but due to the fact that Mobile Internet is unable to guarantee any stable delays.
A little more detail on accuracy:
The still widespread mobile Internet 2 (GPRS / EDGE), in principle, is not able to provide stable transmission delays. Even the Internet of the 3rd (3G) and, to some extent, the 4th (LTE / LTE-advanced) generations with a strong load of the network or communication channels between BSs, which is a typical situation for large settlements, cannot guarantee stable delays. Therefore, even with approximation, the final time setting accuracy can be worse than fractions of a second and even easily reach several seconds.
Screenshot of automatic synchronization settings in ClockSync:

In connection with large-scale changes in time zones in the Russian Federation in the fall of this year, it is necessary now to think about updating information about them on all devices, and if there are no problems with supported desktop operating systems, then even the latest version of the operating system in Android contains outdated data. In order to make sure of this, install TimeZone Fixer and observe an unsightly picture.
Screenshot of TimeZone Fixer running on Android 4.4.4 (Cyanogenmod firmware dated August 4, 2014), which clearly shows that the data in the firmware is out of date:

A bit of common concern and concern for users:
The author of TimeZone Fixer warns us that updating time zone data files can completely "break" the device and even gives recommendations on how to protect yourself from additional problems, although the cases of problems are isolated and very specific - this is really good concern for ordinary users.


This is the only reason why I added this piece to the article, although it is not directly related to the problem, but it is a really good example of taking care of users. At the same time, the warning about versions 4.3+ is caused by only a small number of reviews about the program for devices with new versions of the OS, so please, after using it, be sure to write a review about this application.
After updating the time zone data, the program will offer to reboot, however, I recommend rebooting the device yourself through the system menu, since the program performs a reboot that is actually equivalent to reset, which, albeit with a low probability, can lead to problems and data loss.
I will be happy to answer any questions or make additions that the community deems necessary, however, I want to avoid overloading the article additional information to adhere to a compact problem-solving guide format.
UPD: This instruction completely solves the problem of time zones only for versions earlier than 4.4... Since version 4.4, additional patching is needed, while the issue is at the stage of exploring the possibilities for creating a user-friendly solution.
The question of how to change the date in Android is usually quickly resolved through the settings, but sometimes you can set right time fails the first time: the value is constantly getting lost or incorrectly displayed on the tablet or phone.
It does not matter which version of Android and with which shell is installed on the tablet or phone, you can set the date and time using one algorithm.
- Open the main Android menu. Go to "Settings".
- Go to the "Date and Time" section.
- Pay attention to the auto-tuning parameters. If the date and time is determined over the network, but you see incorrect values, connect to the Internet, deactivate the auto-configuration option by selecting “Disable”, and then enable it again.
If after the update the time is still displayed incorrectly, disable auto-tuning by unchecking the checkboxes for using network data, and set the values manually. The corresponding items will become available for making changes immediately after deactivating automatic configuration.
To set the date and time, open the items of the same name one by one. Move the numbers up and down to change the set value and then press “Done” to save. 
The time zone is configured in the same way. You can enable its detection over the network or change it manually. You can also customize how the date and time are displayed on your tablet or phone. Time can be displayed in 12-hour or 24-hour format, and date in different order of day, month, and year.
Why does the time go astray?
Usually, the time on Android is adjusted automatically after installing the SIM card and turning on the device. But why does it periodically go astray on a tablet or phone when the system has enough tools to constantly check and maintain the correct value? The phone does not have a CMOS battery, which is responsible for keeping the correct date and time on the computer. Therefore, there can be two reasons:
- Using auto-tuning.
- The difference between the operator's time zone and the time zone on a tablet or phone.
How to disable automatic date and time detection over the network on Android is described above. But if after carrying out these manipulations the time still gets lost, try applying the following algorithm:
- Turn off the device, remove the SIM card.
- Turn on the device, go to settings. Open the "Date and Time" section, disable automatic time zone detection.
- Set the correct time zone, apply the changes.
- Turn off the phone, insert the SIM card.
If this fails, and the screen still displays incorrect values, try. The procedure will be the same, only after removing the SIM, you must first reset the settings, and only then manually set the time zone. 
When using a gadget - phone or tablet - based on Android, some users have problems setting the date. The problem is solved simply.
Hello, today we will touch on the topic of how to change the date in an Android gadget, such as a phone or tablet. For some reason, many people have problems with this.
To start working on a smartphone or tablet, first of all, you need to open the device menu. To this end, you need to click on the button located at the bottom of the screen in the middle.
You need to scroll to the left and find the "Settings" section, which has an icon in the image of a gear. Here you need to find the item "Date and time". And in turn you need to click on it... In the LG G2 mini smartphone, this item is in the "General" section, and on the tablet, it is located in the "System" subsection.
Customization
After the last action, you will find yourself in the menu. Here you can customize the date, select the date format and set other settings. Here you will need to select the "Set date" item and set the year, month and day you need. At the very beginning, for ease of perception, you prefer to set the desired date format more preferable.
Initially, it is in digital format, in which the year, month and day follow in order, although there are excellent options to choose from. Then you need to open the "Date" section and in the future you will need to sequentially scroll through all the columns, thus setting the correct values. Then click "Finish" for the configuration settings to take effect.
Good to know that some android versions you will not be able to change the date, since it is automatically configured. The element "Date setting" is grayed out there. In such a situation, you will need to uncheck the "Auto-adjust date and time" checkbox.
Then everything will start to change. On the tablet, in order to acquire the ability to change the date, it is important to disable its synchronization over the network. To do this, uncheck the box opposite the item "Date and time of the network". From model to tablet model and in different versions of the android OS, the location of the menu items and their name may differ.
Mismatch between device and operator