Android is a modern operating system that never ceases to develop. It is very convenient to use and sufficient simple. Of course, there are launchers in which it is easy to confuse, but these are isolated cases.
Despite everything, some users do not know how to change the date or time in your smartphone or tablet base android OS. Today we will tell how to do it right.
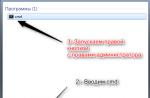
We go to the device's desktop and find the "Settings" icon. Tada on her.

Thus, we fall into the section with numerous settings. Do not worry. Lower the page down until you see the "Date and Time" item. Click on it.

At the top of the screen you can see the inscription "Use the network time". This suggests that the device is synchronized with the network, so you can't change the date or time - the specified points are inactive.

What to do? That's right, disable synchronization over the network. Tabay on this item and put a checkbox "OFF".

After that, we see that the items "date" and "time" became active. To change the data, you need to click on one of the specified items.

This is what the date setting section looks like.

And so - the clock setting section (time). At the end, do not forget to click "Finish."

By the way, you can also remove a tick from the "Time Zone Table" item if you are afraid that there will be problems with the transfer of arrows of the clock in spring or autumn, and then set the time zone on your own.

How to change the time and date on Samsung Galaxy?
The principle is the same.
Go to the settings and find the section "Date and Time" section.

Remove the checkbox from the "Automatic Definition of Time" item.

Points "Set the date" and "set time" will be active.

You can change them alternately.


As you can see, nothing complicated.
Setting the date and time for Android. It seemed that it could be easier than to take and change the date and time in Android, but unfortunately there may be problems here. In this article you will learn everything you need to know about the exact dimensional date and time!
Why do you need exact time and date?
Have you known that if your Android will be installed not the correct date and time can be strongly affected by the system? For example, data synchronization will not work correctly, GPS will spend a lot of time to connect to satellites, applications for interruptions can send data, and many sites will ask certificates or indicate that they are outdated, the use of Internet will turn into torment! So that this does not happen to always set the exact time date.
Instruction How to change the date and time in Android?
To do this, you will need to go to the Android settings menu:


If you often have problems with an incorrect date or time, then pay your attention to two parameters " Date and network time"And" Time zone network"If they are turned on, then disconnect them:

After that, you will have the opportunity to personally change the time and date.
Change the date:

We change the system time:

Also do not forget to expose " Timezone"Since later this will help avoid problems with clock transfer for summer and winter time:

That's all! If you have root rights to Android installed, then you can ease your life, performing autosynchronization of time.
Imagine that you just got a new smartphone on the basis of the Android operating system, however, the date and time in it do not coincide with real. This is where the question arises - how to install this data or change?
It should be noted that by default the date and time is synchronized with the server automatically as soon as you connect the Internet. Therefore, we recommend that you include either Wi-Fi, or a mobile Internet, after which the data will be synchronized and do not need to customize anything.

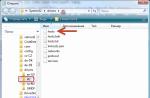
If, after connection, the automatic synchronization has not earned or you do not have the ability to connect to the network, we will change data manually. To do this, go to the settings of your smartphone by clicking on the icon of the same name on the desktop.


But on Xiaomi and the MIUI firmware it is necessary to search for the "System and Devices" section - "Extended Settings".


We go to the section, here by default there should be a check mark "Automatic Definition of the date and time". In this case, the data is synchronized with the server.

If you want to specify other data, remove the checkbox from the "Automatic Definition of Date and Time" item and then the "Set the date" and "set time" items will be active.

By clicking on "Set the Date", specify the necessary data and click OK.

The same is repeated with time.

By the way, if you have any problems with the automatic data definition, it is possible, the case is in the wrong time zone (the clock can fall behind or hurry for an hour or more). Click on the "Select Time Zone" string.

Select the desired time zone.

Setting up the date and time in the Android operating system is a simple thing, but also with her user in some cases may have difficulty. They can be associated both with ignorance of certain things and with the failures of the operating system itself.
How to set up the date and time on Android
The correct date and time not only help the user to be more punctual - few people want to miss the bus due to incorrectly exposed time - they are also important for the work of some applications that when incorrect data can begin to collect and work with errors. Therefore, to set the right date and time on the device is strictly recommended.
The process of setting up the date and time in different versions of Android is about the same: except in new devices the system asks to configure the data at once, even before the use of applications. In addition, the names of the menu items responsible for the time and date may differ slightly from each other in different versions of the OS.

After these simple manipulations, the date and time must change.
Video: Setting time and date
If problems arise
It happens that when setting up the date and time errors occur: changes are not applied, the freshest time and the date is reset, and even from "settings" throws out with an error. The reasons may be many, but the most frequent of them are as follows:
- you have included autosynchronization of time, and therefore the attempts of manual change do not lead to anything. To disable autosynchronization, you need to remove a tick with "Use the Date and Time of Network" in the date and time settings;
- the problem is related to a single failure in the system and should stop after resetting or rebooting;
- marriage in the firmware of the device - in this case, if you are not an experienced user, it will be best to turn to the master to the service center, because when you try to reflash the device yourself is a high risk of damaging it;
- there was a conflict of telephone zones of the phone and the SIM card (most often it happens to the Tele2 operator).
To correct the problem with conflict of time zones and SIM cards, do the following:

Autosynchronization date and time
If you do not want to configure time and date manually, you can use the automatic time synchronization with the network built in Android. Or, if the maximum accuracy is important - its improved version, for the implementation of which root rights will need.
Normal auto shockronization
To synchronize the date and time with the data of the network, you need to mark only one item in the "Date and Time" settings menu. It is usually called "Use the date and time of the network", but options for "automatic data and time", "synchronize with the network" and other similarities are also possible.
After the check mark, the date and time on the phone or tablet will be installed on the phone or tablet, will be synchronized with these networks and will continue to be determined automatically. While this feature is on, manual setting of the date and time is not possible.
 When the checkbox "Use the date and time of the network" is noted, the system itself tastes the date and time with the network
"Smart" synchronization
Standard synchronization is no accuracy and works with an average of 500 milliseconds (this is about half a second). This is due to the fact that with its creation, old and rather slow data transmission protocols were used. As a result, information about current time simply does not have time to come on time and slightly late. This leads to the error that numerous applications are corrected for "advanced" time synchronization.
For normal operation, applications must be interfere in the Android settings, but by default they have no such right. Therefore, to carry out smart synchronization, you need to have a superuser right on your device, or root-right. However, those applications that are most advanced with sin in half, but do without them.
The root access algorithm is unique for each phone model, which is currently hundreds. There is no common way that would allow the superuser's rights on any device: even the most popular applications for "hacking" root rights act with a limited set of models, and whether the specific application will suit you - unknown. To get root-access on a specific device, you need to get acquainted with the technical documentation for its ruting on a specialized resource.
There are several applications for smart sync, and they are all similar to each other. We will analyze work with them on the example of the ClockSync application.

Clocksync can be downloaded from the official page on Google Play. However, this application is one of the most resource-intensive and multifunctional: for example, you can change the server with which the time is checked. If you are not so advanced user, you can use some simpler analogue: for example, Smart Time Sync.
Setting up a clock belt
You can change the time zone defined on the device in the same setting item, Date and Time. The lines "Time Zone" allows you to change the default belt set.
At the time zone, as well as at the date with the time, there is an autosynchronization parameter. You can turn it on if you are not sure about the knowledge of your own time zones, but in the old Android versions this parameter will sometimes fail, so it is recommended to configure it manually.
 To synchronize the time zone with the network, you need to enable the "Use time zone clock zone" parameter
 What time zone is used in your area, you can find out with the help of media in your place of residence, including the Internet. Moscow belt - GMT + 3, in St. Petersburg and the middle lane of Russia is also mainly used. In general, Russia zones from +3 to +12 are used in Russia.
To select the time zone, you need to click on the "Time Zone" button and choose from a huge list that used in your area. After that, the time will be displayed in accordance with the selected belt.
 To select the time zone, just find the desired and click on it
 The time zone is shot
It may be knocked out a time zone in several cases: or incorrectly running auto shockronization (in this case, you need to turn on the manual belt selection), or the wrong exposed region in the phone or tablet settings.

In addition, the cause of the failure may be an error in databases. In this case, only one of the applications for "smart" synchronization will help, which has already been said; The servers you use usually determine the time zone without errors. However, root access is required to use such applications.In the settings of such applications, there is an item "Autosynchronization", the inclusion of which is possible only with the "root". If automatic time zone sync is included, the belt will also be determined by the application automatically - and do it more precisely than the system menu.
 In the main menu of settings ClockSync and similar applications there is a button "Autosynchronization of the time zone"
 Video: "repair" time zone through the application
Tune time and date on Android is simple - if the phone does not require maximum correctness. If you want your watch to be extremely accurate, you have to try. In any case, the correct time is the valuable function of the phone, which is extremely important for its normal operation.
Nowadays, more and more people depart from the use of wristwatches, preferring to them smartphone clock. However, telephone data and time can be knocked out when the device is rebooted or due to the system error. In such cases, you have to change the settings yourself. To make it right, consider some features of the date and time on Android.
Inaccurate date and time on Android can lead to the termination or incorrect work of some applications. This is due to the fact that programs are automatically checked by the expiration date of its license with the date installed on the phone. And if something does not converge, they simply stop working.
How to change the date and time on Android
Now let's get to manual configuration of time parameters.
Video: How to set time and date on Android
Possible problems when setting up time and solutions
After installing new time parameters, you may encounter two problems:
- time settings are constantly reset;
- an entry appears on the device screen "An error occurred in the setup application.
Fix these misunderstandings will help you the following methods.
Reboot
First try to restart the smartphone. This action will start all the processes anew, and, perhaps, the errors will disappear, and the time settings will be saved.

Autosynchronization
If the device restarts did not work properly, you need to turn on autosynchronization. This feature allows the phone to independently update the time settings when connected to the Internet. To enable autosynchronization, follow these steps.

Installing Applications 360Root and Clocksync
If the autosynchronization function is missing in your phone, you will need to do the following steps.

Reset settings to factory
However, after turning on automatic synchronization, the time can still change or extradite the error. In this case, you have to reset the phone settings to the factory.

How to choose, configure or add a new time zone
To find out the time zone of your region, go to the site http://www.gmt.su/city-time/country/sony/ and find the city closest to you. Right page You will see the time zone data. For example, in Kaliningrad it is GMT +02: 00. You will also need to select this information in the settings of your phone.