Select your internet technology:
2. Setting up access to the Internet.
In the left column, select Network, then WAN.
Set WAN Connection Type to DHCP.
Click the Advanced button below.
If you are setting up the router on a computer connected to the router via cable - click MAC Clone (only if the Internet is running on this computer when connected without a router via cable!).
Click the Save button.Reboot the router to confirm the settings.

If you are setting up the router on a device connected to the router via Wi-Fi - in the MAC Address field, enter the MAC address registered under the contract.
After changing the MAC address in the router settings, click the Save button.Reboot the router to confirm the settings.
What MAC address you can enter on the router on the subscriber portal "My Account". After authorization on the subscriber portal, select the item Above, select "Equipment"... In field MAC addresses of devices the MAC address bound under the contract is indicated, which must be registered on the router.

3. Setting up a Wi-Fi network
In the left column, select Wireless then Wireless Settings ( Wi-Fi settings).
In field SSID enter in Latin letters and / or numbers the name of your Wi-Fi networks.
Meaning Authentication Type put WPA / WPA2-PSK.
Meaning Encryption Type select TKIP & AES.
In field Password write down the password for your Wi-Fi network in Latin letters and / or numbers. The password must be at least 8 characters long.
Click the button Save.
Hello! Now we will configure the Netis router.
1. Preparing for setup.
If the router is not new and has already been used before, reset the router to factory settings. To do this, you need to turn on the router and clamp the small hole with something thin for 30 seconds. After that, you need to wait about a minute.
Plug the internet cable into the blue connector. Connect one of the black connectors and the computer using the cable that comes with the router.
If it is not possible to connect the router to a computer, then you need to open the list of wireless networks on your device and connect to the Netis network. If the network asks for a password, enter the word password, this is indicated on the sticker on the bottom of the router.

After connecting to the router, open the Internet browser ( Google chrome; Mozilla Firefox; Opera; Internet Explorer; Safari) in the address bar (not in the search one!) Type 192.168.1.1 and press Enter

You can also see the login information on the sticker on the bottom of the router.
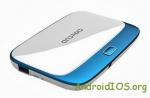
Netis has two almost identical routers. These are the WF2419R and WF2419 models. The only difference between them is the presence of IPTV support in the first model. (which has an R in its name)... I have already told you. You can read my review if you are considering this router for purchase. Well, for those who have already bought one of these routers, I decided to write detailed instructions for setting up. I'll show you how to connect and configure Netis WF2419R and Netis WF2419 using an example. I think there is no point in making separate instructions. Since they will turn out to be the same.
Netis routers have a very simple control panel. I have to enter the web interface, which you can enter through a browser and set all the necessary settings. Moreover, it is in Russian. Also in the kit there is a detailed instruction in different languages, according to which you can easily configure the router. But if something does not work out for you, then you can always perform the setup according to my instructions. Or ask a question in the comments.
A few points:
- Before configuring, it is advisable to find out what type of connection your ISP uses. Does it bind by MAC address. You need to find out the username and password to connect (if you do not have a dynamic IP).
- The factory name of the network, the password and the address for entering the settings are indicated on the bottom of the Netis WF2419R or Netis WF2419 router.
- You do not need an internet connection to enter the router control panel. It will just be enough to connect to the router.
- If you had a high-speed connection set up on your computer, now you don't need it. Once configured, this connection will be established by the router.
First, we connect everything:
Before proceeding to configure Netis WF2419, you must first connect it. We connect power to the router. In the WAN port (blue) you need to connect a cable from your provider or modem.

Next, you need to connect to the router from the device through which you plan to configure. If you have a computer or laptop with a LAN port, it is best to use it. Use the supplied cable to connect your computer to the Netis WF2419.

If it is not possible to connect via cable, or you will configure your Netis from a phone or tablet, then we connect via Wi-Fi. When the router is new, at the factory settings, it distributes a Wi-Fi network with the name indicated on the bottom of the router itself. There is also a password for connecting to this network. The standard password is password.

We just select the network on our device, enter the password and connect.
Resetting the Netis WF2419R router settings
The router may have already been configured. The password, network name has been changed, the password for entering the settings has been set. In this case, so that the old parameters do not interfere with us, you can reset the settings to the factory settings. To do this, hold down the Default button for 15 seconds.

We figured out the connection. As a result, we have the Internet and the device from which we will configure must be connected to Netis. Internet access via a router may not be available. This is normal at this stage.
Quick configuration of a Netis WF2419 or Netis WF2419R router
Let's continue. On the device that is connected to the router, open any browser and go to the address netis.cc... The address must be entered in the address bar of the browser.

The start page should open, where you can set almost all the necessary parameters. Namely: set up an internet connection and a Wi-Fi network.
There are two sections:
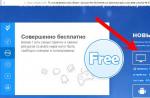
- Internet connection type. You need to highlight the type of connection that your ISP uses. If this Dynamic IP then everything should work right away. Unless your ISP binds by MAC address. In this case (if the router is connected by cable to the computer to which the Internet is tied) put a tick "Clone MAC", or look at the MAC-address on the router and register it with the provider (by phone, or at personal account) . Static IP- very rare. PPPoE Is a popular connection type. You need to set a username and password (they are issued by the provider)... If you have L2TP, or PPTP, then you need to go to the advanced settings (the "Advanced" button) and in the "Network" - "WAN" section configure the required connection.
- Setting up a wireless connection. Here you only need to set a name for your Wi-Fi network and a password. Come up with good password and enter it in the appropriate field. It is also desirable to write it down somewhere.

Save the settings by clicking on the "Save" button. Everything will be saved without rebooting. A network with a new name will appear (if you changed it)... To connect to which you need to use the set password. Internet via our Netis WF2419R should already work. If it doesn't work, then go to the settings and check the connection to the provider.
Advanced Netis Settings
To open the page with all the settings, click on the "Advanced" button.

Everything is simple here. On the "Network" - "WAN" tab, you can configure connection to the provider(to the internet).

Tune Wi-Fi network, you can set or change the password for Wi-Fi, change the channel, etc. on the "Wireless mode" tab. There you can also change the mode of operation of the router to a repeater, client, WDS bridge.

These are all the basic and most necessary settings. I also recommend setting a password that will protect your router's settings page.
Setting a password for the web interface
Go to the "System" - "Password" section. Enter your username (for example, admin) and enter your password twice. Be sure to write down the password so that you do not have to reset the settings later.


The settings are securely protected. And no one will be able to access them.
This is all that is needed for basic router configuration. You probably noticed that the settings page has many different parameters, functions, etc. But as a rule, they are not needed by an ordinary user. And it's better not to change anything there, unnecessarily.
Perhaps you still have some questions about configuring the Netis WF2419R or Netis WF2419 routers. You can always ask me a question in the comments below. You can also share your opinion regarding these routers. Did you like everything, what are the disadvantages, maybe you encountered some problems. There is never too much useful information 🙂
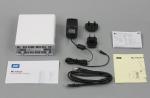
Connect the plug of the power adapter (supplied with the device) to the power socket marked with the letters PWR on the back of the device, plug the adapter into electrical network... Connect the provider's cable (coming from the entrance) to the WAN port on the router (marked in blue). Connect the computer and the router with the cable (patchcord) that comes with the router. One end of the cable must be connected to any of the LAN ports (they are marked in black), and the other to the computer's network card.
2. Configuring the router
To enter the router settings, you need to type the address 192.168.1.1 in the browser address bar (Opera, Mozilla Firefox, Google Chromre, Internet Explorer) and press the Enter key, the router settings will open.

Select the language "Russian" and click the "Advanced" button

Next, select the language "Russian" (if necessary), go to the "Network - WAN" tab, "WAN connection type" select "PPTP / Russia PPTP", in the "Username" and "Password" lines enter your credentials from the contract, "Ip-address / Server name" enter vpn .. ", below select" Connect automatically ", click" Save ".
3. Setting up a Wi-Fi network.

We go to "Wireless mode", "Wi-Fi settings", in the "SSID" field, enter what your wi-fi network will be called (you can leave it by default), "Authentication type" select "WPA / WPA2-PSK", in the " Password "we come up with and enter a password for your wi-fi network (enter 8-63 characters (any combinations a-z, A-Z, 0-9)), (we strongly do not recommend leaving by default!), Click “Save”.
Reboot your router.
P.S. There is a "Default" button on the back panel of the router, this button resets the settings to the factory settings and you will have to configure the router again, therefore, you should not click on it without needing to.
To be honest, until then I was not familiar with Netis routers. I bought the Netis WF2411 model to see what kind of devices they are, and to prepare a few instructions on how to configure these routers on the site. And in this article I will tell you how you can enter the settings of the Netis router. There is nothing difficult, but I have already seen similar questions several times, so I decided to prepare a small instruction on how to get into the Netis control panel. As you already understood, I will show on the example of Netis WF2411. But if you have a different model, then the process itself should not be different.
After entering the settings, you can configure the Internet, Wi-Fi network, set or change the password, etc. By the way, for all these points I plan to prepare detailed instructions, which I think will be useful to many. Compared to other routers, Netis has the same process of entering the settings page at all, so if you already have experience, then there should be no difficulties.
Open the settings of the Netis router at 192.168.1.1
First, we need to connect to the router. If you want to access the control panel from a computer or laptop, you can connect to the router using the supplied network cable. On the router, we connect the cable to the LAN connector, and on the computer to the network card.
You can connect, and go to settings via Wi-Fi network... Just connect to your router's wireless network. If the router is new, or you've just done a factory reset, the default name for a Wi-Fi network will be something like this: "netis_C2323B" (the standard name (SSID) is indicated on the sticker on the bottom of the router)... The default Wi-Fi password, I had "password"... This information is also indicated on a sticker on the bottom of the device. It also contains the address for accessing the settings of the Netis router.

Just connect to this wireless network from your laptop or mobile device.
We go into the settings through the browser
If, after connecting to the Netis router, you see a yellow icon next to the Internet connection icon, and the status "no Internet access", then this is quite normal. It's just that the router has not been configured yet, and you do not need the Internet to enter the settings.
After connecting, open any browser, and in the address bar, type the address 192.168.1.1 , http://netis.cc, or 192.168.1.245 (on new models). As you can see in the screenshot above, there is no 192.168.1.1 address on the router, only http://netis.cc. But on it, the settings open without problems. Type or copy the address and go to it. New devices have an IP address of 192.168.1.245.
The quick settings page will open immediately.

You can change the settings language to Russian. And to open more settings, just click on the button Advanced.

This is how the advanced settings look like:

I really liked the control panel itself. Simple, nothing superfluous, there is Russian (Tp-Link, hello), and an excellent page with the quickest and most important settings, where you can set up your Netis in almost a few clicks. And if necessary, you can go to the advanced settings, and just as quickly return to the quick settings.
netis.cc or 192.168.1.245 and login / password guest
Update: on new models of Netis routers, the web interface (settings page) is already protected by a username and password by default. Login (User Name) - guest and the Web Password is [email protected] ... Where XXXX is the last four characters of the router's MAC address.

A prompt to enter a username and password will appear in the browser after going to the address http://netis.cc or 192.168.1.245.

The IP address itself has changed too. Already in use http://192.168.1.245. Or the old hostname http://netis.cc.

The web interface itself has changed a bit too.

In terms of security, this is not a bad solution. I mean setting the guest login and password at the factory settings. In addition, the password on each router will be different, since each router has a unique MAC address. Previously, by default, the settings of Netis routers were not protected at all. And few people set this password in the process of setting up the router. (although I write about this in every instruction)... And if the settings are not password protected, then anyone who is connected to the router can access the web interface.
But on the other hand, now the process of setting up the router has become a little more complicated. You not only need to connect everything and type the address of the router in the browser, but also enter the username and password. According to my observations, this causes confusion for ordinary users.
What if it doesn't go into Netis settings?
It may be that when you try to open the address 192.168.1.1, 192.168.1.245 or http://netis.cc, you will see a message that "Pages are not available", or "Unable to open the page". A few tips to solve:
- First of all, look at the tips from the article, which was written specifically on this issue:
- Be sure to check if you have set the automatic receipt of the IP address in the connection properties. How to do this, I described in detail in the article, the link to which is above.
- Check if the power of your router is on.
- Check cable connections. It may be that you mistakenly connected the cable not to the LAN connector, but to the WAN.
- If you cannot access the Netis router settings via cable, then try using Wi-Fi. And vice versa.
- Try to open the web interface from another computer, if possible.
- Reset your router and try going to http://netis.cc again.
That's all. Hope you succeed. Good luck!