Below are typical problems and questions on the topic “Portal for the execution of contracts (PIK EASUZ)”
Typical problems
Algorithm for creating a contract card for publishing a purchase
The contract card is a list of obligations under the contract that the Customer and the Contractor must fulfill as part of the execution of the contract.
The contract card is created according to the approved position (lot) of the schedule plan. The schedule plan is approved by the Customer's organization and exported from the EASUZ to the PIK System.
The algorithm for creating a contract card prepared for publication:
1. In the current schedule, find the position of the PPP for which the terms of the draft contract are entered.
Search for a position in the procurement schedule plan
Go to the "Contract Cards" section, this section displays the current plans and schedule of the Customer's organization.
A page can have two display modes:
List of schedule plans.
List of schedule plan items.
The transition to the display mode is carried out by switching the radio switch located in the upper search block.

On the search form, you can specify various combinations of the search for the position of the chart plan and click the "Search" button.
The system displays only those positions that match the given search criteria.
The user must select the required position of the schedule plan and click on the corresponding position in the line, the position number is highlighted in a different color.
When you navigate by the number of the position of the schedule plan, you will see the card of the position of the schedule plan, according to which you can create a contract card prepared for publication of the notice.
2. Go to the "Preparation of the notice" tab and click the "Create conditions information" button, after which the contract card editor will open on the screen. 
3. The tab "Subject and parties to the contract" displays information from the schedule plan- Information about the procurement and contract (from PGZ), Information about the customer, as well as:
Information about third parties to the contract - the third party to the contract is the recipient organization that is not the direct customer (payer) under the contract. To add a third party, click on the Add Party button.
Features of the contract being concluded - in this section, the user can note the features of the contract being concluded, such as:
- Type of contract (Supply of goods, Performance of work, Provision of services, Loan agreement, Lease agreement or other type of agreement)
- It is possible to change the quantity of goods supplied, the volume of work performed, services provided (but not more than 10%)
4. Indicate the presence or absence of Banking or Treasury support
5. On the “Purchase objects” tab, it is possible to specify the objects of purchase of the PPZ for a more detailed presentation. The level of detail of the procurement objects must correspond to the level of detail in the primary accounting documents for the future execution of the contract.
6. On the "Obligations" tab, create the conditions for the execution of the contract or select them from the list of templates:

Add obligations under the contract, indicating the terms of execution and the volume of the procurement object (the procurement object can be omitted).
Add documents indicating the type of document and the procedure for generating and signing the document. For each document, it is required to indicate for which obligations this document is required.
If one document is linked to several obligations, then during the execution of the contract, when providing the results of execution for each of the selected obligations, the system will require a new copy of the document. For example, at this stage of execution planning, it is possible to create a single document on the supply of goods TORG-12 and associate it with all obligations for the supply of goods under the contract.
For acceptance documents, it is allowed to indicate additional documents that are formed in the process of acceptance of the results of fulfillment of obligations (expert opinion, minutes of the commission meeting, etc.).
Add .
Specify the requirements for the calculation of fines and penalties specific to this contract.
For standard draft contracts, there is a mechanism for creating an electronic contract draft using a template. To do this, on the commitments tab, select the appropriate template and click the "Generate from the template" button, the system will display a form for filling in the specific terms of the contract (terms, volumes, etc.) and then generate a draft electronic contract.
Do you have any questions?
Leave a request
The structure of the ECC prepared for publication
An electronic contract card is a contract card created from a schedule plan item. The pre-publication contract card has the following tabs:
Basic information from the schedule plan - this section displays information from the schedule plan (Customer information, procurement planning dates, initial cost, etc.)
Notice Preparation - This section displays created and posted contract cards. Created Contract Cards are custom contract card designs that have not been submitted for posting a notice for bidding. Posted Contract Cards are contract cards that are sent to post a bidding notice.
Contract preparation - this section displays contract cards prepared for the conclusion of a contract.
History - the history of changes to the contract card.

Do you have any questions?
Leave a request to technical support.
Section "Subject and parties to the contract"
The section Subject and parties to the contract provides the following information:
Procurement and contract details - general information about the subject, terms and cost of the contract is displayed. The data is taken from the chart plan.
Customer Information - displays information about the Customer. The data is taken from the chart plan.
Features of the contract being concluded - the features of the contract being concluded include variable conditions from 44-FZ. In this block, the user must set the condition corresponding to the requirements of his contract (Conditions are marked by setting the flag).
The following conditions are possible:
- It is possible to change the quantity of goods supplied, the volume of work performed, services provided (but not more than 10%)
- It is allowed to reduce the price of the contract without changing the quality and quantity and changing other conditions
- Unilateral refusal to execute the contract is possible
- It is mandatory to involve subcontractors, co-executors from among small businesses, socially oriented non-profit organizations in the execution of contracts

Contract card functions:
- Save – save the draft contract card.
- Place - save and send the contract card for publication on the EIS and on electronic platforms. If this functionality is performed, the contract card is not available for making changes. The operation is available in the contract card editing mode.
- Check - check the data entered into the card
- Delete – delete the contract card. This operation is available in the contract card editing mode.
- Make changes - by clicking this button, the user is provided with the functionality of making changes to the published contract cards. If necessary, amending the contract card, including after publication. A modal window will open for the user, where he must indicate the reason for making changes. After that, the functionality of changing the contract card prepared for publication will be provided. This operation is available in the mode of published contract cards.
- Cancel - Remove from placement the contract card prepared for placement, indicating the reason for this operation. This operation is available in the mode of published contract cards.
- Return to the list of conditions - return to the list of contract cards. Switching to the position card of the chart plan.
Do you have any questions?
Leave a request to technical support.
Section "Procurement Objects"
Section "Procurement Objects"
This section provides information about the objects of procurement, with the functionality of detailing.

By pressing the button, (button ). a line is added to detail this procurement object. Fields to fill:
Name - the name of the procurement object;
Unit price, rub. - price per unit of the procurement object;
Quantity - the quantity of this procurement object;
Total cost - the total cost of the item of the procurement object.
Functions:
Add – add a procurement object (button ).
Delete - delete this procurement object (button ).
In obligations - this function is intended to inform the user about the obligations and in what quantity this procurement object is found (button ![]() ).
).
Save - save the specified breakdown by procurement objects.
Cancel - cancel the breakdown of procurement objects, up to the last saved one.
Do you have any questions?
Leave a request to technical support.
Section "Obligations"
Section "Obligations"
To create a contract fulfillment condition (obligation), you need to do the following:
1. Add obligations under the contract, indicating the terms of execution and the volume of the procurement object.
2. Add documents indicating the type of document and the procedure for generating and signing the document. For each document, it is required to indicate for which obligations this document is required.
3. If one document is tied to several obligations, then in the process of contract execution, when providing the results of execution for each of the selected obligations, the system will require a new copy of the document. For example, at this stage of execution planning, it is possible to create a single TORG-12 document and associate it with all obligations for the supply of goods under the contract.
4. For acceptance documents, it is allowed to specify additional documents that are formed in the process of acceptance of the results of the fulfillment of obligations (expert opinion, minutes of the commission meeting, etc.).
5. Add information about the order of payment under the contract

In the obligation section, the conditions for the execution of the contract are indicated, which parties and in what sequence they fulfill them, as well as the deadlines for execution and reporting documents.
On the “Commitments” tab, you can select the option to create obligations by template, in addition, there are 3 blocks:
Information about obligations and documents - this section contains a table containing a list of obligations, deadlines for fulfillment and a list of documents confirming the fulfillment of these obligations.
Information about the acceptance procedure - this section automatically displays the acceptance documents (Act of completion, KS-2, etc.) and documents confirming this acceptance (expert opinions, commission protocols, etc.)
Information about the order of payment under the contract - this section displays payment obligations, on the basis of which documents are made and documents confirming payment
Block "Information on obligations and documents"
This block consists of a tabular part and functionality.
Table fields
Obligations under the contract - names of obligations;
Name of the object of procurement - the name of the object of procurement for which this obligation is fulfilled;
Quantity, pcs. - the volume of the procurement object for which this obligation is fulfilled;
NMTsK, unit, rub. – NMTsK per unit of purchase volume;
NMTsK, rub. - the cost of the object of procurement according to the NMCC, for which this obligation is fulfilled;
The beginning of the calculation of the term is a condition or calendar date indicating the beginning of work on the obligation.
Start Precursor Event - if a condition is specified with an indication of a previous event, then this field indicates the name of the event's predecessor (both an obligation and a document can be specified).
Completion of the calculation of the term - a condition or calendar date indicating the completion of work on the obligation
End predecessor event - if a condition is specified with an indication of the previous event, then this field indicates the name of the event predecessor (both the obligation and the document can be specified).
Conditions for the provision of results - the condition for the provision of results, can be: One-time, Periodically and upon Application
Who fulfills the obligation - the person responsible for the fulfillment of the obligation is indicated (both the Contractor and the Customer can be indicated).
Recipient - specifies the recipient of the completed work. Here, both the Contractor, the Customer, and the third party (the organization in whose interests work is carried out under the obligation) can be indicated.
Document confirming the fulfillment - The name of the document confirming the fulfillment of this obligation. One obligation may have several documents confirming its fulfillment. If an acceptance document is specified, then the name of this document is in bold type.
Registration of documents before sending to the counterparty - a requirement for how long and by whom this document should be provided. The term for issuing a document is determined by the following values:
- Deadline (from the beginning of the reporting event)
- Calendar / work
- Responsible party
Registration of documents after their receipt from the counterparty is a requirement for how long and by whom this document must be signed. The term for signing a document is determined by the following values
- Deadline (from the date of receipt of the document)
- Calendar / work
- Responsible party
This section provides the following functionality:
Add commitment - add commitment,
Add document - add a document to the commitment
Print – formation of a printed form of the tabular part of this section.
Add/Edit Commitment

On the add / edit form, the user will have to sequentially perform the following actions:
In the "General information about the obligation" section, indicate the party responsible for the fulfillment of this obligation, as well as indicate the parties for whom this obligation is being fulfilled (the recipient under the obligation may not be the Customer, but a third party).
In the "Procurement objects" section, it is necessary to set a flag for those procurement objects that participate in the fulfillment of this obligation. It is also required to indicate the volume of the procurement object involved in the fulfillment of this obligation.
In the section "Due date", the terms of fulfillment of the obligation are indicated. The term for the fulfillment of an obligation can be indicated both in calendar dates and in conditional dates (the term depends on the fulfillment of other obligations or documents). This block indicates the beginning and end of the fulfillment of the obligation.
Block “Providing results”, this block indicates how this obligation is being fulfilled, there are 3 types of providing results:
One-time - the obligation is fulfilled once within the specified time period;
Periodically - this obligation is performed periodically (several times), for the period of fulfillment of the obligation.

The provision of results can be selected "Periodic", in the event that the date of the obligation performance date is indicated in calendar dates.
If the flag "Indicate by periods" is set, then the System calculates offers to split the specified volume of the procurement object by periods.
By application - the fulfillment of the obligation occurs in the presence of an application with an indication of the deadline for the fulfillment of the obligation. The number of applications is not limited during the period of fulfillment of the entire obligation and does not exceed the total volume indicated in the applications earlier.

Add/Edit Document

In the form of adding / editing a document, you must sequentially perform the following steps:
In the section "Obligations, the fulfillment of which is confirmed by documents of the reporting event (period)", indicate the obligations for which this document will be a confirmation of the obligation.
In the "Document Overview" section general information about the document:
Party forming the document - choice from the list Customer or Contractor
Document type - selection from the list of documents, after selecting the type of document, the user is prompted to change the name of the document (this is provided for cases where there are several identical types of documents, but with different content).
The flag “Is an acceptance document”, if this flag is set, then the section “Documents of examination” is added to this form. This means that this document is a stage/contract acceptance document and its signing will be carried out after the acceptance activities. Also, for acceptance documents, if they are formed on the side of the Contractor, the Customer, in the process of executing the contract, can form a reasoned refusal or make payment according to the stage / contract.
The “Documents of Expertise” section indicates the documents that are generated in the process of carrying out activities for the acceptance of a stage / contract, with the participation of experts (if external expertise, then the document Expert Opinion is required). This section contains the following information:
Expertise type, radio switch between values: Internal expertise External expertise.
The flag “Examination documents are being generated”, when this flag is set, the user will be prompted to fill in the table of examination documents.
Documents are added by clicking on the "Add Document" button. The user is prompted to fill in the following fields:
- Sequence number - the sequence number of the formation of the document by the Customer during the acceptance procedures. It is allowed to indicate two identical numbers, then these documents are formed simultaneously.
- Examination document type - selection from the list of the type of document involved in the acceptance procedure
- Examination document name – this field is automatically pre-filled when specifying the type of examination document.
- Deadline for signing - the term for signing this document.
Note! When specifying the terms for signing documents, it should be noted that the sum of the terms for signing examination documents (without the formation of documents in one period of time) should not be more than the term for signing the acceptance document
- Days - units of measure signing the document
The section "Procedure for the formation and signing of the document" indicates the terms, the sequence of signing / rejecting the document, taking into account the re-sending of the document for revision.
This section consists of the following blocks:
Radio switch block between the following values:
- Indication of the period of formation from the date of commencement of the fulfillment of the obligation
- Indication of the period of formation from the date of completion of the fulfillment of the obligation
- Indication of the formation period from the date of signing the base document
Indication of the start date for the formation of the document, if the period from the date of signing the document is indicated, then the name of the document is indicated.
tabular part
- Right of rejection - the right to reject the document
- Requires signing - indicates whether the document needs to be signed or not.
- Responsible party - indicates the party (Customer, Contractor, Third Party) with a serial number
- Deadline - the deadline for signing or rejecting the document
- Term for revision / re-consideration after rejection - in case of rejection or sending for revision of the document, this field indicates the period for re-consideration of this document.
- Calendar, working days - list of calendar or working days
Do you have any questions?
Leave a request to technical support.
Information about the order of payment under the contract
Information about the order of payment under the contract

Table fields:
Obligations under the contract - the name of the obligation to pay;
Amount, rub. – the amount of payment, the field may be left blank if the percentage of the contract price or the type of obligation is specified - payment after the fact;
Amount, % of CC – the percentage of the contract price that is required to be paid within the framework of this obligation, may be left blank if a fixed payment amount is specified or the obligation type is payment after the fact.
Execution period - indicates the period of execution of the contract, it can be a calendar date and conditional.
Predecessor event - an event (document) that precedes the occurrence of this payment, may not be filled in if a calendar date is indicated in the "Due date" field.
Document confirming the fulfillment - a document confirming the fulfillment of the obligation to pay, such documents usually include documents confirming the transfer of funds to the Contractor.
Registration of documents before sending to the counterparty - a block of fields defining:
- Formation term - the term for the formation of a document confirming payment
- Calendar/working - you need to specify what type of days calendar or working days are used when calculating the term for generating a document confirming payment
- Responsible party - the party that forms this document (Customer is set by default).
Registration of documents after their receipt from the counterparty - the terms for consideration of the received document after receipt:
- Deadline (from the date of receipt of the document) - the term for consideration, the date can be calendar or conditional
- Calendar/working - specifying calendar or working days.
- Responsible party - the party reviewing this document
Functions of this section:
Add payment – add a payment obligation.
Add document - add a document confirming the fulfillment of the obligation to pay. Such documents usually include documents confirming the transfer of funds to the Contractor (Payment order, bank statement). The form of adding a document for payment is identical to the form of a document for an obligation.
Printing - generating a printed form for the section "Information on the procedure for payment"
Add/Edit Payment Commitment

In the form of adding/editing a payment obligation, you must sequentially perform the following steps:
In the "General information about payment" section, indicate the name of the payment, the party responsible for the fulfillment of this obligation and the type of payment: Advance payment or Payment upon execution.
Payment Names is a text field that contains the name of a specific payment obligation. This field is intended for visual control of payments at the execution stage. Example: two different advance payments - in this case, the difference between them is indicated.
In the "Amount of payment" section, you need to specify which payment algorithm is used, it is displayed as a switch between the following values:
Fixed amount (RUB) – the field below indicates a fixed amount for payment.
Percentage of the contract amount - the field below indicates the percentage of the contract amount
By actual volume - in this case, payment is made according to the actual volume of work performed / services or goods provided. The volume of work performed / services or goods provided is indicated in the acceptance document (for TORG-12 goods, for services and works, this is the Work Completion Certificate). This field is not available for advance payment.
Residual payment - the residual payment is calculated. This field is not available for advance payment.
In the “Accounting forfeit” section, it is necessary to determine how fines/penalties will be paid. This block is available only for payments upon execution.
A payment less a penalty is a payment under an obligation that is made taking into account the deduction of the amount of the penalty.
Payment after payment of the penalty - payment under the obligation is made after the Contractor pays the penalty.
Payment regardless of the penalty - payment under the obligation, regardless of the penalty. Block "Information about obligations" - in this block it is required to indicate the name of the obligation. The value of this field will be pre-populated as follows: “Name of the obligation in the template (name of the object of procurement)”, the terms for the fulfillment of obligations and the volumes for the objects of procurement within this obligation. For SMP, these fields are editable.
Registration in PIK EASUZ
Algorithm for registration and accreditation in PIK EASUZ
Registration and accreditation of an organization in the PIK EASUZ is divided into 2 parts:
1. Registration of the organization in the PIC EASUZ.
2. Accreditation of the organization in PIK EASUZ. The accreditation of an organization in PIC EASUZ implies the signing of a registration form with the EDF Operator PIK EASUZ. After signing the registration form and receiving information about signing in the PIK ECASU, the full functionality for working with the PIC ECASU system opens.
Note! If the registration form is not signed by the EDF Operator PIK EASUZ within 24 hours, then the PIK EASUZ system will delete data about this organization from the PIK EASUZ
The procedure for registering an organization in the PIK EASUZ
1. Go to address http://pik.mosreg.ru .
2. Press the "Organization Registration" button, after which you will see an information letter asking you to register and accredit with the EDI Operator, as well as make sure that you have a qualified EDS. If these steps are completed, then click the "To register" button.
3. Make sure you have:
- qualified electronic signature
- account (login and password) in EDF
- your organization is accredited in EDI
Put the appropriate flags, after which the registration form "Registration of the organization" will open for you.

Specify the role of the organization - the Customer or the Contractor, information about the company, contact information, information about bank details. Additionally, specify information about the first user in the organization, who is automatically assigned the Organization Administrator rights (all other employees of the organization will be started by this user or another employee assigned by him in the system).
4. Set the flag “I confirm sufficient authority to perform legal and actual actions related to registration in the Contract Execution Portal, incl. the right to sign a confirmation of registration in PIK”, confirming that the specified data are correct.
Click on the "Confirm registration" button. The system creates a profile of the organization and the first user in the PIK EASUZ system and offers to create and sign a registration form with the EDF Operator to provide full access to work with the system.
Note! The account of the organization and this user, not confirmed by signing the registration data with the Operator of the EDF PIK EASUZ (Accreditation of the organization in the PIK EASUZ) is valid for 24 hours, after which it will be deleted from the system.
Accreditation of the organization in PIK EASUZ
You accredit the organization in the temporary personal account of the first user from the "Information about the organization" section by clicking on the "Sign application" button. The system will display informational messages indicating that the signing will take place at the Operator of EDF PIK EASUZ, after clicking the "Confirm" button in your browser, a separate tab will open on this document at the Operator of EDF PIK EASUZ, where you click the "Sign and send" button.
After signing the document, within 2-3 minutes information about the signed document will be loaded into the PIK EASUZ system.
For full access to PIK EASUZ, you will need to re-login to the system.


Do you have any questions?
Leave a request to technical support.
Algorithm for registration and accreditation in PIK EASUZ
Registration and accreditation of an organization in the PIK EASUZ is divided into 2 parts:
1. Registration of the organization in the PIC EASUZ.
2. Accreditation of the organization in PIK EASUZ. The accreditation of an organization in PIC EASUZ implies the signing of a registration form with the EDF Operator PIK EASUZ. After signing the registration form and receiving information about signing in the PIK ECASU, the full functionality for working with the PIC ECASU system opens.
Note! If the registration form is not signed by the EDF Operator PIK EASUZ within 24 hours, then the PIK EASUZ system will delete data about this organization from the PIK EASUZ
2. Press the "Organization Registration" button, after which you will see an information letter asking you to register and accredit with the EDI Operator, as well as make sure that you have a qualified EDS. If these steps are completed, then click the "To register" button.
3. Make sure you have:
- qualified electronic signature
- account (login and password) in EDF
- your organization is accredited in EDI
Put the appropriate flags, after which the registration form "Registration of the organization" will open for you.
Specify the role of the organization - the Customer or the Contractor, information about the company, contact information, information about bank details. Additionally, specify information about the first user in the organization, who is automatically assigned the Organization Administrator rights (all other employees of the organization will be started by this user or another employee assigned by him in the system).
4. Set the flag “I confirm sufficient authority to perform legal and actual actions related to registration in the Contract Execution Portal, incl. the right to sign a confirmation of registration in PIK”, confirming that the specified data are correct.
Click on the "Confirm registration" button. The system creates a profile of the organization and the first user in the PIK EASUZ system and offers to create and sign a registration form with the EDF Operator to provide full access to work with the system.
Note! The account of the organization and this user, not confirmed by signing the registration data with the Operator of the EDF PIK EASUZ (Accreditation of the organization in the PIK EASUZ) is valid for 24 hours, after which it will be deleted from the system.
Accreditation of the organization in PIK EASUZ
You accredit the organization in the temporary personal account of the first user from the "Information about the organization" section by clicking on the "Sign application" button. The system will display informational messages indicating that the signing will take place at the Operator of EDF PIK EASUZ, after clicking the "Confirm" button in your browser, a separate tab will open on this document at the Operator of EDF PIK EASUZ, where you click the "Sign and send" button.
After signing the document, within 2-3 minutes information about the signed document will be loaded into the PIK EASUZ system.
For full access to PIK EASUZ, you will need to re-login to the system.
Do you have any questions?
Leave a request to technical support.
INSTRUCTIONS FOR EASUZ-223 USERS 1. Authorization in the system To enter the EASUZ-223, you must specify the System address http://easuz.mosreg.ru in the browser line, then log in (enter your username and password). After registering a new user, entering EACSU-223 for him is possible in 10 minutes. 2. Creating a Procurement Regulation On the "Directories" tab, you need to click on the button (Figure 1). Figure 1 Press the button (Figure 2). Figure 2 Fill in the information in the "Purchase Regulations" card (Figure 3). Figure 3 The following fields are mandatory: Location Registration Number, Location Name, Customer, Placing Organization, Approval Date, Purchase Policy File. For the current procurement regulation, you must set the status to "Registered". Attention! When filling in fields, it is possible to copy and paste values using the key combination "Ctrl+C" and "Ctrl+V". 3. Viewing the procurement plan and searching for procurement in the plan To view the procurement plans, click on the "Register of procurement plans" button in the "Corporate procurement" tab (Figure 4). Figure 4 Select the appropriate plan in the list and click the button (Figure 5). Figure 5 The "Purchase Plan" card opens (Figure 6). Figure 6 To search for purchases, select the "Show search panel" item in the context menu of the "Schedule plan items" table header (Figure 7). Figure 7 In the displayed search bar, enter one of the listed search parameters (Figure 8): * Number; * Subject of the contract; * Method of purchase; * Planned date; * The term of the contract; * Contract price; * Information about the initial (maximum) price of the contract; * Status. After entering the search parameter in the table, the plan positions will be automatically sorted according to the entered parameter (Figure 8). Figure 8 To close the search bar, you need to click on the button, while the plan positions will be automatically sorted by number in the plan. 4. Creating a procurement plan On the "Corporate procurement" tab, you need to click on the button (Figure 9). Figure 9 Fill in the block "Information about the procurement plan" (Figure 10). Figure 10 Note - If a procurement plan for innovative products, high-tech products and medicines is being created, you must check the box in the corresponding field. Fill in the dates of the period of validity of the plan. The validity period of the innovation plan should be 3 years. The name of the Customer is filled in automatically. The field "Justification for making changes to the procurement plan" is filled in if changes were made to the plan. The "Status" field is filled in automatically. Next, fill in the block "Positions of the procurement plan" (Figure 11). Figure 11 To add a plan item, click the button in the "Purchase plan items" block. Fill in the fields of the blocks "Basic information about the position of the procurement plan", "Delivery region" (Figure 12). Figure 12 Add plan position lines in the "Plan position lines" block by clicking on the button (Figure 12). Fill in the form "Procurement plan position line" (Figure 13). Figure 13 Save information about the entered plan position (Figure 14). Figure 14 Check the entered data for correctness and compliance with the required conditions by clicking the "Check data" button (Figure 15). Figure 15 The plan is published by clicking on the button (Figure 16) Figure 16 After sending the procurement plan to the CAB, you need to go to your personal account on zakupki.gov.ru and publish it in the open part of the CAB. After publication, the procurement plan is assigned a registry number. 5. Making changes to the procurement plan To make changes to the published procurement plan, you need to: 1 Open the procurement plan card and click the button on the toolbar (Figure 17). Figure 17 2 In the "Signing" window that opens, click the button (Figure 18). Figure 18 3 In the window for selecting certificates for signing, select the appropriate ES certificate and click the button (Figure 19). Figure 19 4 After signing the procurement plan, the status "Editing" is assigned, the button becomes active, by clicking on which you can make the appropriate changes (Figure 20). Figure 20 6. Loading a purchase plan from an Excel file The ability to load a purchase plan from an Excel file has been implemented (this method is suitable if the purchase plan contains a large number of positions). To do this, on the toolbar of the "Purchase Plan" card, click on the button (Figure 20). The format of the plan loading file is shown in Figure 21. Figure 21 Description of the fields: * "Order number" - number of the plan position, mandatory; * "OKVED code" - obligatory; * "OKDP code" - mandatory; * "Subject of the contract" - obligatory; * "Minimum requirements" - optional; * "OKEI code" - optional; * "Name of unit" - optional, not used in the download; * "Information about quantity" - optional; * "OKATO code" - mandatory; * "Delivery region name" - not used in download; * "Information about the initial maximum price" - optional4 * "Planned placement date" - mandatory; * "Due date" - mandatory; * "Method of purchase" - not used when downloading, not mandatory; * "OOS Procurement Method Code" - mandatory. When loading, validation occurs for the mandatory filling of the listed fields, and if some required fields are not filled, an error message is displayed indicating the error. When loading, validation occurs for the line number of the plan. If there is already an entry for that plan line number, an error is output and the download is not performed. After loading, it is necessary to update the plan position generator so that when adding new positions through the interface, the numbering does not move out. Based on the upload results, purchase plan items are created that contain only one line. 7. Creation of a single lot purchase. In the "Purchase plan" card in the "Purchase plan items" block, you must select the item of the procurement plan, on the basis of which the purchase will be formed, by checking the box in the corresponding line of the plan, and click on the button (Figure 22). Figure 22 A message will appear (Figure 23). Figure 23 Go to the "Purchase Register" and use the search form to find your purchase (Figure 24). Figure 24 Open the "Purchase" card (Figure 25). The form contains the following tabs: "Basic Information", "Lots", "Requirements", "Documents", "Protocols" and "History". Figure 25 Note - Procurement is in the "Documentation" status. To edit the information in the tabs, you must switch to the editing mode by clicking on the button (Figure 25). "Basic information" tab On the "Basic information" tab, you must fill in the missing information in the blocks: "Basic information about the purchase", "Order of the placement of the purchase", "Opening envelopes", "Consideration of bids", "Evaluation and comparison of bids" and "Providing documentation". Tab "Lots" For lots, you must specify the criteria for evaluation and comparison of applications and collateral options. To do this, on the "Lots" tab, select the line with the record of the lot and click on the button (Figure 26). Figure 26 The "Purchase Lot" card will open (Figure 27). Figure 27 To add information about the evaluation criteria and comparison of applications, click on the button in the corresponding block (Figure 27). Then, in the opened form "Criterion for evaluating and comparing applications", select the type of criterion and indicate its significance (Figure 28). Figure 28 Enter information about the security of the application and the contract (Figure 29). Figure 29 Save the entered information. To return to the procurement form, you must click on the button (Figure 27). "Requirements" tab On the "Requirements" tab, you enter the requirements for the procurement procedure (all fields are text), namely (Figure 30): * "Requirements for the characteristics of goods, work, services"; * "Requirements for the content, form, execution and composition of the application for participation in the procurement"; * "Requirements for the description by the procurement participants of the supplied goods, work, services, which is the subject of the procurement"; * "Requirements for participants"; * "The procedure for the formation of the price of the contract (price of the lot)"; * "The procedure for evaluating and comparing applications for participation in the procurement." Figure 30 "Documents" tab Figure 31 Attaching procurement documents is carried out using the button (Figure 31). Adding requirements to the composition of documents is carried out by clicking on the button located in the "Requirements to the composition of documents" block. The corresponding form opens, in which it is necessary to indicate the name of the document and give it a brief description in the "Description" field (Figure 32). Figure 32 In the "Requirements for the composition of documents" block, you must list all the documents that must be available. "Protocols" tab Each of the purchasing methods has its own sequence of adding protocols. For procurement methods: "Open tender" and "Two-stage tender" the following types of protocols are available: * Envelope opening protocol; * Protocol for consideration of applications; * Protocol for evaluation and comparison of applications. For the procurement method "Request for quotations", the Protocol for consideration and evaluation of applications is available. For the "Purchase from a single supplier" procurement method, a Procurement Execution Protocol is available. The following types of protocols are available for the procurement method "Request for Proposals": * Protocol for consideration of applications; * Minutes of debriefing. The following types of protocols are available for the "Open auction" purchase method: * Application review protocol; * Minutes of the auction. For electronic procurement methods (including the "Electronic Auction"), the protocols are not filled out, they are entered on the relevant ETP and integrated into the system automatically. All protocols are created sequentially, in accordance with the above order. Note - Minutes can only be added if the procurement procedure is in the "Commission work" status. This status is assigned to the procedure automatically after the deadline for submission of applications. Envelope opening protocol To add this type of protocol, click the button on the toolbar of the "Protocols" tab (Figure 33). Figure 33 The Minutes page of the Envelope Opening Committee meeting will open (Figure 34). Figure 34 The protocol page consists of the following blocks: * "Minutes of the commission meeting"; * "Information about the procedure"; * "Applications of participants"; * "Information about the commission"; * "Recognition of the purchase failed"; * "Additional Information". Block "Minutes of the meeting of the commission" The block "Minutes of the meeting of the commission" automatically displays information about the type of the meeting of the commission, the registration number of the protocol (appears after the registration of the protocol), the procurement stage, the status and version of the protocol (appears after the registration of the protocol) (Figure 34) . All of this information is non-editable. "Procedure Details" block The "Procedure Details" block displays information about the place of the procurement procedure, the date and time of the procedure - these data are entered at the stage of creating a purchase, the data is subject to editing. The date of signing the protocol is selected from the built-in calendar (Figure 34). Justification for making changes - the field is filled in in case of making changes to the published protocol. Block "Participants' Applications" Information about the procurement participants' applications is added to the "Participants' Applications" block. To add a new application, click on the button (Figure 34). The "Participant Application" page will open (Figure 35). Figure 35 The application page consists of two blocks (Figure 35): * "Participant's application"; * "Documents provided". Note - Fields marked with a sign are mandatory. In the "Participant's application" block, you must specify the following information (Figure 36): * Lot - selected from the list, contains all lots of the procurement procedure; * Application number in the registration log - a numeric field; * Date and time of application - selected from the built-in calendar; * The term of the contract - is selected from the built-in calendar; * Supplier - the supplier is selected using the button; * Supplier price - numeric field; * Currency - (the currency specified in the purchase is displayed by default) to change the field value, click the button; * Sign "It is impossible to specify the price of the supplier" - check box; * The volume of purchased goods, works, services - a text field, * Proposals on the terms of the contract - a text field. The "Supplied Documents" block displays documents whose availability requirements were specified in the purchase. The "Availability indicator" column displays the presence/absence of a document in the participant's application (Figure 36). Figure 36 To save the participant's application, you need to click on the button (Figure 36). To return to the protocol page, click the button (Figure 36). The "Participants' Applications" block of the protocol page will look like the one shown in the figure below (Figure 37). Figure 37 "Commission information" block In the "Commission information" block, you must fill in the following information (Figure 38): * Commission number - text field, * Commission name - text field, * Commission work result - text field. Figure 38 Block "Recognition of the purchase as failed" If the commission recognized the purchase as failed, it is necessary to check the box "Failed purchase" in the block "Recognition of the purchase as failed" (Figure 38). In the field "Reason for recognizing the purchase as failed", you must specify the reason (Figure 38). Block "Additional information" In the block "Additional information" (Figure 39) you must: * in the "Log file" field, attach an electronic image of the protocol by clicking the button; * enter additional information Figure 39 After filling in the fields on the page of the Minutes of the meeting of the commission for opening envelopes, you need to click on the button, then on the button (Figure 38) and confirm sending the ES to the CAB After signing the protocol in the Personal Account at the CAB, it is published in the open part of the CAB As a result, it is assigned a registry number and the status "Published" (Figure 40) Figure 40 Protocol for consideration of applications Notes: 1) For the procurement methods "Open tender" and "Two-stage tender", this type of protocol will be created second, after the protocol of opening envelopes. 2) For the procurement methods "Request for Quotations", "Request for Proposals" and "Open Auction", this type of protocol will be created go first. To add this type of protocol, click on the button on the toolbar of the "Protocols" tab (Figure 30). The page of the Minutes of the meeting of the commission for consideration of applications is shown in Figure 41. Figure 41 Block "Minutes of the meeting of the commission" status and version of the protocol (appears after registration of the protocol) (Figure 34). All of this information is non-editable. "Procedure Details" block The "Procedure Details" block displays information about the place of the procurement procedure, the date and time of the procedure - these data are entered at the stage of creating a purchase, the data is subject to editing. The date of signing the protocol is selected from the built-in calendar (Figure 34). Justification for making changes - the field is filled in in case of making changes to the published protocol. Block "Participants' Applications" This block, by default, displays the participants' applications entered in the Minutes of opening the envelopes, if this type of protocol is the second one. In this case, the information about the applications is not subject to editing. If this protocol is the first, then it is necessary to make applications from participants. The "Application Consideration" block is added to the "Participant's Application" page, in which it is necessary to fill in the following fields: * "Decision of the commission" - the choice of the values "Admitted" / "Not admitted" is carried out from the drop-down list; * "Reason for refusal" - filled in if the participant is not admitted to the bidding procedure (Figure 42). Figure 42 Commission information is automatically transferred from the Envelope Opening Protocol. Description of filling in the fields in the blocks "Recognition of the purchase as invalid" and "Additional information" is given in the paragraph "Protocol of opening envelopes". After filling in the fields on the page of the Minutes of the meeting of the Commission for Consideration of Applications, you need to click on the button, then on the button (Figure 41) and confirm sending the ES to the CAB. After signing the protocol in the Personal Account at the CAB and publishing it in the public part of the CAB, it is assigned a registry number and the status "Published" (Figure 43). Figure 43 Protocol for evaluation and comparison of bids Notes: 1) For the procurement methods "Open tender" and "Two-stage tender", this type of protocol will be the third one after the Protocol for consideration of bids. 2) For the procurement methods "Request for Quotations", "Request for Proposals" and "Open Auction", this type of protocol will be the second one. To add this type of protocol, click the button on the "Protocols" tab (Figure 44). Figure 44 The page of the Minutes of the meeting of the committee for evaluation and comparison of applications is shown in Figure 45. Figure 45 Block "Minutes of the meeting of the commission" procurement stage, status and version of the protocol (appears after registration of the protocol) (Figure 34). All of this information is non-editable. "Procedure Details" block The "Procedure Details" block displays information about the place of the procurement procedure, the date and time of the procedure - these data are entered at the stage of creating a purchase, the data is subject to editing. The date of signing the protocol is selected from the built-in calendar (Figure 34). Justification for making changes - the field is filled in in case of making changes to the published protocol. Block "Bidders' bids" This block by default displays the bids of the participants entered in the Minutes of the opening of envelopes or in the Minutes of consideration of bids, depending on the method of purchase, as well as bids admitted to bidding in the Minutes of consideration of bids. The "Evaluation and consideration" block is added to the "Participant's application" page, in which it is necessary to fill in the following fields (Figure 46): * The result of the participant's application evaluation - a text field; * Member rating - numeric field; * Result - the value is selected from the drop-down list. Figure 46 Commission information is automatically transferred from the Envelope Opening Protocol. Description of filling in the fields in the blocks "Recognition of the purchase as invalid" and "Additional information" is given in the paragraph "Protocol of opening envelopes". After filling in the fields on the page of the Minutes of the meeting of the commission for evaluation and comparison of applications, you need to click on the button, then on the button (Figure 45) and confirm sending the ES to the CAB. After signing the protocol in the Personal Account at the CAB and publishing it in the open part of the CAB, it is assigned a registry number and the status "Published" (Figure 47). Figure 47 Summarizing Protocol The Summing Up Protocol is created after the Application Consideration Protocol and has the form and creation conditions similar to the Applications Evaluation and Comparison Protocol. Minutes of the meeting of commissions for procurement conducted in electronic form Formation of minutes of meetings of the procurement commission for procurement conducted in electronic form is carried out on the electronic trading platform (ETP). After the ETP, the protocols are sent to the CAB, where they are signed using the ES and published in the open part of the CAB. When signing ES protocols, information is transferred to the ETP, and after that, the registry number and the protocol file are sent to the System from the ETP. Commission meeting minutes are displayed on the "Minutes" tab (Figure 48). Figure 48 Clicking on the link in the "Download protocol file" cell will open a printed form of the protocol. 8. Making changes Before sending a notice of purchase to the CAB, you can make changes to the documentation and details of the purchase. To do this, press the button (Figure 49). In this case, the purchase will move to the "Formation of documentation" status. To edit the details, you need to switch to the edit mode by clicking on the button. Figure 49 Attention! Editing fields containing dates and times using the built-in calendar may change the set time. In this case, you can edit the date from the keyboard. To do this, place the mouse cursor in the date field and enter the desired value, using the left and right arrow keys to navigate between "DD", "MM" and "YYYY" (Figure 50). Figure 50 After making all the changes, you need to re-generate the documentation, and the purchase will go into the "Documentation generated" status. 9. Sending a notice of purchase to the CAB Sending a notice of purchase to the CAB is carried out by pressing the button (Figure 51). Figure 51 The "Sign" window will open with the generated draft notice of procurement (Figure 52), in which you must click on the "Sign" button and confirm the sending of the ES. Figure 52 After the notification is sent to the CAB, you need to go to your personal account on zakupki.gov.ru and publish the notification. 10. Placing a purchase in electronic form To place a purchase in electronic form, you must select an electronic trading platform (ETP) (Figure 53). Figure 53 At the moment, the following ETPs are available: * JSC "EETP"; * LLC "RTS-tender". After entering all information about the purchase and transferring it to the "Documentation generated" status, the button will be available (Figure 54). When you click on this button, a notification about the procedure will be sent to the ETP in your personal account. Figure 54 On the ETP, you need to go to your personal account and publish the sent purchase. Attention! To integrate with the ETP, the system must specify the login and password for integration (indicated in the "Customer" card), as well as codes of procurement methods (indicated in the "Procurement Methods" directory). 11. Verification of authorization data for the ETP EACSU-223 implements the ability to verify authorization data for the ETP. To do this, click on the "User data" button on the "Administration" tab (Figure 55). Figure 55 In the opened user card, click on the "Check authorization data" button (Figure 56). Figure 56 Clicking this button opens a window with information about successful/failed verification (Figure 57). Figure 57 12. Creation of a contract into the annual plan or plan for the procurement of innovative products. To view the created contract, go to the "Register of contracts" by clicking on the button (Figure 58). Figure 58 The following data will be transferred from the "Register of Procurement" to the "Register of Contracts": * The term of the contract; * The amount of the deal; * Contract currency; * Subject of the contract; * Method of purchase; * Customer; * OKATO code; * Place of delivery of goods, works, services; * Lot purchase; * Data on the products of the contract; * The basis for the purchase from a single supplier - if the draft contract was created for the purchase from a single supplier; * Information about securing the contract, if the need to secure the contract is indicated; * The supplier is the winning bidder, if the contract was created on the basis of published procurement data. 12.2 Creation of a contract for procurement not included in the annual plan and the plan for the procurement of innovative products (three-year plan) / or for procurement carried out without bidding Note - Contracts created directly from the Register of Contracts are not published on the CAB. To create contracts for procurement not included in the annual plan and the procurement plan for innovative products or for procurement carried out without bidding, you need to go to the "Register of contracts" by clicking on the button on the toolbar (Figure 58). Press the button (Figure 59). Figure 59 Fill in the fields in the contract form (Figure 60). Figure 60 In this case, only the fields with the name of the customer, OKATO code and currency (rubles) will be filled in by default. In the "Basic information on the contract" block, fill in the following fields: * Contract number - text field; * Conclusion date - selected from the built-in calendar; * The term of the contract - is selected from the built-in calendar; * Validity period - selected from the built-in calendar; * Register number - the internal system number of the contract is assigned after saving; * Registration number of the CAB - assigned after the registration of the contract; * Contract status - assigned after saving; * Contract amount - numeric field; * Currency - the default value is "Russian ruble", the choice is made using the button; * Contract advance amount - numeric field; * Securing the contract - a numeric field; * Subject of the contract - text field; * Purchase method - drop-down list; * Customer - by default, the name of the organization is displayed, which is the place of work of the user; * Supplier - selected from the "Register of Suppliers" by the button; * OKATO - by default, the value entered in the customer's data card is set; * Place of delivery of goods, works, services - text field. In the "Products of the contract" block, information about the products of the contract is indicated. To enter information about products, you must click on the button (Figure 60). The form "Contract products" will open for filling (Figure 61). Figure 61 To save information about the products of the contract, you must click on the button. To add information about the stages of execution of the contract, in the "Stages of execution of the contract" block, click on the button (Figure 60) and then fill in the fields in the opened form "Stage of execution of the contract" (Figure 62). Figure 62 To add information about the payment schedule under the agreement, click on the button in the "Payment schedule" block (Picture 60) The "Payment under the agreement" form will open for filling (Picture 63). Figure 63 To save all the entered information, click the button (Figure 60). The button is used to undo the last action (rollback to the last save option) (Figure 60). 13. Attaching files containing contract documentation Adding files containing contract documentation is carried out on the "Documents" tab by clicking the button (Figure 64). Figure 64 In the opened form "Agreement document" it is necessary to fill in the following fields (Figure 65): * Document number - text field; * Document type - selected from the drop-down list; * Document date - filled in from the built-in calendar; * Document file - attached by button. Figure 65 To save the entered information, click the button. 14. Editing the contract Editing the details of the contract is possible when the contract is in the "Editing" and "Registered" statuses. Switching to the contract editing mode is carried out by pressing the button (Figure 66). Figure 66 15. Registration of the contract To register the contract, click the button on the toolbar (Figure 67). Figure 67 After signing the details of the contract using the ES of the responsible person (Figure 68), the contract will be considered registered. The contract status will be set to "Registered". Figure 68 16. Publishing a contract To publish a contract, click the button on the toolbar (Figure 69). Note - Sending a contract for environmental protection is possible only after its registration and only if the purchase associated with the contract is completed. Figure 69 In the "Signing" window that opens, click on the button and confirm sending the responsible person's ES to the CAB (Figure 68). After the contract has been sent to the CAB, it is assigned the status "Sent to the CAB", then "Pending publication". Next, you need to go to your personal account on zakupki.gov.ru and publish the contract in the open part of the OOS. As a result, the contract will be assigned the status "Published". 17. Termination of the contract To register data on the termination of contracts, click on the button on the toolbar (Figure 70). Figure 70 Note - The termination function is only available for contracts that have the "Registered" or "Published" status. In the "Signing" window that opens, click the button and confirm the termination of the ES of the responsible person (Figure 68). After signing the termination information, the contract will be considered terminated. The contract status will be set to "Cancelled" (Figure 71). Figure 71 After that, on the "Documents" tab, you need to attach a file about the termination of the contract. 18. Execution of the contract To enter information about the fulfillment of all obligations under the contract (execution of the contract), click on the button on the toolbar (Figure 70). Then, in the "Signing" window that opens, click on the button and confirm the execution of the ES of the responsible person (Figure 68). After signing the performance information, the contract will be considered executed. The status of the contract will take the value "Completed" (Figure 72). Figure 72 19. Generating a printable containing a list of contracts To generate a printable containing a list of contracts, go to the "Register of Contracts" and click the button on the toolbar (Figure 73). Figure 73 The "Print" window will open, shown in Figure 74. Figure 74 To print this form, click the button. You can flip through the pages using the buttons. 20. Generating a report on contracts To generate a report on contracts, go to the "Register of contracts" and click on the button on the toolbar (Figure 73). The report page will open, shown in Figure 75. Figure 75 To create a report, click the button (Figure 75). Attention! The report must be generated monthly by the 10th day of the month following the reporting one. On the opened page "Report on contracts" fill in the fields (Figure 76): * Customer - filled in by default by the user's organization; * Type of reporting - select from the drop-down list; * Reporting period - by default, the current month and year are displayed (can be changed); * The number of contracts - calculated automatically (the number of contracts in the status "Registered", "Published", "Waiting for publication", "Sent to the CAB", "Sending error", "Executed" and "Cancelled") is taken into account, the possibility of adjusting the data is provided; * The total amount under the contracts - is calculated automatically, the possibility of adjusting the data is provided; * Currency - the default value is "Russian ruble" (non-editable field); * Status - generated automatically; * Date of publication - displayed automatically after the publication of the report on the CAB. Adding the relevant documents is carried out by clicking on the button. Figure 76 After entering the information, you must click on the button, then on the button. Next, in the "Signing" window, click on the button and confirm the sending of information to the CAB using the ES (Figure 77). The report is assigned the status "Submitted to CAB", then "Pending publication". Figure 77 After signing the information in the personal account on the CAB, they are published in the open part of the CAB, the report is assigned the status "Published" (Figure 78). Figure 78 21. Adding an organization to the Register of Suppliers To add an organization to the Register of Suppliers, go to the "References" tab and click the button (Figure 79). Figure 79 The "Suppliers" page opens, on the toolbar of which you need to click the button (Figure 80). Figure 80 In the "Supplier" card, indicate the following information (Figure 81): * Non-resident of the Russian Federation - the checkbox is checked if the suppliers: − individuals who are not residents; − legal entities established in accordance with the legislation of foreign states and located outside of Russia; − organizations that are not legal entities, established in accordance with the laws of foreign states and located outside of Russia; * Type of organization - selection from the list (Legal entity (LE) or Individual (FL)); * Name - the name of the organization (FL) is indicated; * TIN - numeric field (10 characters for legal entities, 12 - for individuals); * KPP - numeric field, filled in for legal entities; * OGRN - numeric field (13 characters for legal entities, 15 characters for FL). Figure 81 Figures 82 and 83 show examples of filling in information for legal entities and individuals, respectively. Figure 82 Figure 83 After filling in the fields, you need to save the information by clicking on the button.
GOVERNMENT OF THE MOSCOW REGION
RESOLUTION
About the subsystem Portal for the execution of contracts of the Unified Automated Procurement Management System of the Moscow Region and amendments to
Government of the Moscow Region
decides:
1. To determine the Main Control Directorate of the Moscow Region as the authorized central executive body of the state power of the Moscow Region to coordinate the information content of the subsystem of the Contract Execution Portal of the Unified Automated Procurement Management System of the Moscow Region (hereinafter referred to as PIK EASUZ).
2. To the Main Control Department of the Moscow Region:
until August 1, 2017, together with the Committee for Competition Policy of the Moscow Region, the Ministry of Economy and Finance of the Moscow Region, the Ministry of Public Administration, Information Technology and Communications of the Moscow Region, ensure the development of the Regulations for the functioning and information interaction of participants in the PIK EASUZ (hereinafter - the Regulations);
until October 1, 2017, together with the Ministry of Public Administration, Information Technologies and Communications of the Moscow Region, the Committee for Competition Policy of the Moscow Region, to ensure the creation of the PIK EASUZ.
3. The Ministry of Public Administration, Information Technologies and Communications of the Moscow Region, by August 1, 2017, in agreement with the Committee for Competition Policy of the Moscow Region, the Ministry of Economy and Finance of the Moscow Region, the Main Control Department of the Moscow Region, approve the Regulations.
4. To the Ministry of Public Administration, Information Technologies and Communications of the Moscow Region together with the State Treasury Institution of the Moscow Region "Moscow Regional Center for Information and Communication Technologies":
until November 1, 2017, to ensure the connection of state and municipal customers of the Moscow region, budgetary institutions of the Moscow region, municipal budgetary institutions, state unitary enterprises of the Moscow region, municipal unitary enterprises to the PIK EASUZ;
ensure the operation, as well as technical support of the participants in the contract system in the field of procurement using the ECASU PIK (state and municipal customers of the Moscow Region, budgetary institutions of the Moscow Region, municipal budgetary institutions, state unitary enterprises of the Moscow Region, municipal unitary enterprises, the Committee for Competition Policy of the Moscow Region , the Main Control Department of the Moscow Region, suppliers (contractors, performers) under state and municipal contracts, civil law contracts of budgetary institutions of the Moscow Region, municipal budgetary institutions, state unitary enterprises of the Moscow Region, municipal unitary enterprises concluded in accordance with the legislation on the contract system in the field of procurement of goods, works and services to meet state and municipal needs).
5. State customers of the Moscow Region, budgetary institutions of the Moscow Region, by October 1, 2017, appoint officials responsible for the exchange of electronic documents in the course of the execution of contracts using the PIK EASUZ, including members of the customer's acceptance committee, responsible persons for signing primary accounting documents upon acceptance goods delivered, services rendered, work performed (its result) in the performance of the contract.
6. Recommend to state unitary enterprises of the Moscow Region, municipal customers of the Moscow Region, municipal budgetary institutions, municipal unitary enterprises until October 1, 2017 to appoint officials responsible for the exchange of electronic documents in the course of the execution of contracts using the PIK EASUZ, including members of the acceptance committee, responsible persons for the signing of primary accounting documents upon acceptance of the delivered goods, services rendered, work performed (its result) in the performance of the contract.
7. Include in the Decree of the Government of the Moscow Region dated December 27, 2013 N 1184/57 "On the procedure for interaction in the procurement for state needs of the Moscow Region and municipal needs" (as amended by the Decrees of the Government of the Moscow Region dated April 2, 2014 N 217/11, dated 02/19/2015 N 62/5, dated 08/23/2016 N 601/30, dated 01/10/2017 N 4/1) (hereinafter - the resolution) the following changes:
1) add paragraph 2_1 with the following content:
"2_1. The Contract Execution Portal is a subsystem of the EASUZ and ensures the exchange of electronic documents during the execution of contracts, as well as monitoring the current fulfillment of obligations by the parties under the contract.";
2) add paragraph 6.1 with the following content:
"6_1. Establish that the Main Control Department of the Moscow Region is the coordinator of the content of the subsystem EASUZ Contract Execution Portal (hereinafter referred to as PI EASUZ).";
3) add paragraph 10_3 with the following content:
"10_3. For state customers, budgetary institutions of the Moscow Region, to exchange electronic documents in the course of the execution of contracts concluded to meet the needs of the Moscow Region, using the PIC EASUZ in accordance with the Regulations for the functioning and information interaction of participants in the PIK EASUZ (hereinafter referred to as the Regulations).".
4) add paragraph 13_6 with the following content:
"13_6. Recommend to the state unitary enterprises of the Moscow Region" municipal customers, municipal budgetary institutions, municipal unitary enterprises to exchange electronic documents in the course of the execution of contracts concluded to meet the state needs of the Moscow Region or municipal needs, using the PIK ECUZ in accordance with the Regulations. .
8. Introduce the following amendments to the Regulations on the procedure for interaction in procurement for state needs of the Moscow Region and municipal needs, approved by the resolution:
1) Clause 1.2 of Section 1 "General Provisions" shall be supplemented with clause 1.2.14_3 of the following content:
"1.2.14_3. Portal for the execution of contracts - a subsystem of the Unified Automated Procurement Management System of the Moscow Region, which ensures the exchange of electronic documents in the course of the execution of contracts, as well as monitoring the current fulfillment by the parties of obligations under the contract.";
2) section 10 "Conclusion, execution, modification, termination of contracts" shall be supplemented with paragraph 10.5 of the following content:
"10.5. Customers ensure the exchange of electronic documents in the course of execution of contracts using the PIC EASUZ in accordance with the Regulations on the functioning and information interaction of participants in the PIK EASUZ.".
9. Financing of measures to create and ensure the functioning of the PIK EASUZ shall be carried out at the expense of the budget of the Moscow Region within the budget allocations provided for by the state program of the Moscow Region "Effective Power" for 2017-2021, approved by Decree of the Government of the Moscow Region dated October 25, 2016 N 781 / 39 "On approval of the state program of the Moscow region "Effective power for 2017-2021" .
10. The Main Directorate for Information Policy of the Moscow Region shall ensure the official publication of this resolution in the newspaper "Daily News. Podmoskovye", "Information Bulletin of the Government of the Moscow Region", placement (publication) on the website of the Government of the Moscow Region in the Internet portal of the Government of the Moscow Region and on " Official Internet portal of legal information" (www.pravo.gov.ru).
11. This Resolution shall enter into force on the day after its official publication, with the exception of subparagraphs 3 and 4 of paragraph 7 of this Resolution.
Subparagraphs 3 and 4 of paragraph 7 of this resolution shall enter into force on November 1, 2017.
12. The provisions of subparagraph 2 of paragraph 8 of this resolution apply to the procurement of goods, works, services to meet state and municipal needs, starting with the procurement of goods, works, services provided for in the procurement schedules for 2018.
13. To impose control over the implementation of this resolution on the Vice-Governor of the Moscow Region Gabdrakhmanov I.N.
Governor
Moscow region
A.Yu.Vorobiev
Electronic text of the document
prepared by Kodeks JSC and verified against:
official website of the Government
Moscow region
www.mosreg.ru, 20.07.2017
About the subsystem Portal for the execution of contracts of the Unified Automated Procurement Management System of the Moscow Region and amending the Decree of the Government of the Moscow Region dated December 27, 2013 N 1184/57 "On the Procedure for Interaction in Procurement for State Needs of the Moscow Region and Municipal Needs"
| Document's name: | About the subsystem Portal for the execution of contracts of the Unified Automated Procurement Management System of the Moscow Region and amending the Decree of the Government of the Moscow Region dated December 27, 2013 N 1184/57 "On the Procedure for Interaction in Procurement for State Needs of the Moscow Region and Municipal Needs" |
| Document Number: | 610/24 |
| Type of document: | Decree of the Government of the Moscow Region |
| Host body: | Government of the Moscow Region |
| Status: | current |
| Published: | Official website of the Government of the Moscow Region www.mosreg.ru, 07/20/2017 Daily News. Moscow region, N 162, 08/31/2017 |
| Acceptance date: | July 20, 2017 |
| Effective start date: | July 21, 2017 |
Delivery from 500 rubles.
The system was created on the basis of a document management system together with RTS-tender. With its help, accounting of contracts for the supply of goods, performance of work and provision of services is carried out in accordance with the requirements of the Federal Law of 05.04.2013 No. 44-FZ "On the contract system in the field of procurement of goods, works, services to meet state (municipal) needs" .
PIK EASUZ users:customers
performers
control bodies
PIK operators
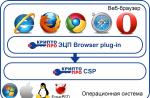
To work with PIK EASUZ, a qualified electronic signature issued by an accredited Certification Center is required.
Stages of registration in PIK EASUZ
- Get a qualified electronic signature for the administrator who will deal with the registration.
- Register an account with the electronic document management operator PIK https://eds-pro.fintender.ru/Account/Register.
- Add your organization to the site www.fintender.ru
- Register an account in PIK EASUZ http://pik.mosreg.ru/#! .
- Sign your application through the OED PIK operator fintender.ru.
- Employees of the organization add their accounts to https://eds-pro.fintender.ru/Account/Register.
- Add an organization in your personal account.
- Administrator to set appropriate roles for employees.
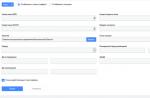
Before registration, you must first register in the electronic document management system (EDF) PIK. Fill in all fields of the form at https://eds-pro.fintender.ru/Account/Register and confirm the e-form address and phone number. It will not be possible to complete the registration procedure without a qualified electronic signature.
After registration, you need to go through the procedure for accrediting the organization in the PIK EDF system. To do this, you need to click the "Add organization" button in your "personal account", fill in the appropriate form fields, sign with your electronic signature and send the application with the corresponding button below.

After completing the above procedures, you can proceed to register the organization in the ECASU PIC. Registration is carried out in two stages. First, the corresponding form is filled out on the page http://pik.mosreg.ru/client/#!/reference/registration .