In some situations, it may be necessary to change the hosts file in Windows 10, 8.1, or Windows 7. Sometimes the reason for this is viruses and malware that make changes to hosts, which makes it impossible to access certain sites, and sometimes you yourself may want to edit this file in order to restrict access to any site.
This instruction details how to change hosts in Windows, how to fix this file and return it to its original state using the built-in system tools and using third-party programs, as well as some additional nuances that may be useful.
Many third-party programs for fixing network problems, tweaking Windows, or removing malware also include the ability to change or fix the hosts file. Here are two examples. In the free DISM++ program for configuring Windows 10 features with many additional features, there is a Hosts Editor item in the Advanced section. 
All he does is launch the same notepad, but with administrator rights and the necessary file open. The user only needs to make changes and save the file. Read more about the program and where to download it in the article.
Considering that unwanted changes to the hosts file are usually the result of malware, it is logical that tools for their removal may also contain functions to fix this file. There is such an option in the popular free scanner AdwCleaner.

It is enough to go to the program settings, enable the “Reset hosts file” item, and then scan and clean it on the main AdwCleaner tab. In the process, hosts will also be fixed. Details about this and other such programs in the review.
Create a shortcut to change hosts
If you often need to fix hosts, then you can create a shortcut that will automatically launch notepad with an open file in administrator mode.

To do this, right-click anywhere on the desktop, select "New" - "Shortcut" and in the "Specify the location of the object" field, enter:
notepad c:\windows\system32\drivers\etc\hosts
Then click "Next" and provide a name for the shortcut. Now, right-click on the created shortcut, select "Properties", on the "Shortcut" tab, click the "Advanced" button and specify that the program run as administrator (otherwise we will not be able to save the hosts file).
 I hope that for some of the readers the instruction will be useful. If something does not work out, describe the problem in the comments, I will try to help. Also on the site there is a separate material:.
Very often, either after a virus attack, after which, for example, a social network to restore access to your page, or after unsuccessful editing, you have to restore the default content. To do this, you need to know what the contents of the original hosts file are. The situation is complicated by the fact that in each operating system from Microsoft Corporation, it is different, although the main thing remains the same. Below is the original contents of the hosts file for some of the currently popular Windows operating systems, which I will list in descending order of their popularity (I personally believe that the most popular system is the newest system. Who says that Windows XP is immortal, and Windows 7 is the most the best creation of Microsoft, people seem to me to be backward in development. I do not want to offend anyone, I will only be glad to hear that I am wrong).
For those who don't know, the Hosts file is used to translate domain names into network . More details about this file are written in the article, the link to which I gave a little higher.
Original Hosts in Windows 8
#
#
#space.
#
#
# For example:
#
#102.54.94.97 rhino.acme.com #source server
#38.25.63.10 x.acme.com #x client host
#127.0.0.1 localhost
# :1 localhost
127.0.0.1 localhost
Original Hosts file in Windows 7
# Copyright © 1993–2009 Microsoft Corp.
#
# This is a sample HOSTS file used by Microsoft TCP/IP for Windows.
#
# This file contains the mappings of IP addresses to host names. each
# entry should be kept on an individual line. The IP address should
# be placed in the first column followed by the corresponding host name.
# The IP address and the host name should be separated by at least one
#space.
#
# Additionally, comments (such as these) may be inserted on individual
# lines or following the machine name denoted by a '#' symbol.
#
# For example:
#
# 102.54.94.97 rhino.acme.com # source server
# 38.25.63.10 x.acme.com # x client host
# localhost name resolution is handled within DNS itself.
# 127.0.0.1localhost
# :1 localhost
The original Hosts file in the Windows Vista operating system
# Copyright © 1993-2006 Microsoft Corp.
#
#
#space.
#
#
# For example:
#
127.0.0.1 localhost:1 localhost
Original Hosts in Windows XP
# Copyright © 1993-1999 Microsoft Corp.
#
# This is a sample HOSTS file used by Microsoft TCP/IP for Windows.
#
# This file contains the mappings of IP addresses to host names. each
# entry should be kept on an individual line. The IP address should
# be placed in the first column followed by the corresponding host name.
# The IP address and the host name should be separated by at least one
#space.
#
# Additionally, comments (such as these) may be inserted on individual
# lines or following the machine name denoted by a '#' symbol.
#
# For example:
#
# 102.54.94.97 rhino.acme.com # source server
# 38.25.63.10 x.acme.com # x client host
127.0.0.1 localhost
Using the templates provided, you can easily replace the current content of the Hosts file with its original content. In addition to the above files, I would like to clarify a little what is what here. The main content of the original Windows Hosts file is a commented manual for using this file in English. In addition to describing the functionality of the Hosts file, here are also various examples of its intended use. And if you still have not figured out where the comments are, and where the functional part of this file is, then get acquainted: the sign # is a special character that means that everything on this line after this character is a comment. And this means that in almost all original Hosts files, the really working part is the last line indicating the loopback interface, which is one of the and point to the computer itself. And based on this, you can completely remove all comments from the Hosts file without losing its performance. That is why the title of the article is Original hosts file in Windows, but not Correct Hosts for Windows. After all, the correct Hosts file will be any rubbish like this:
# In front of you is the most correct of all
# of the most correct Hosts files, which
# ever existed on computers
# on which it has ever been installed
# operating system from known
# Microsoft Corporation!
127.0.0.1 localhost
# As you can see, comments are everywhere!
# And here,
# and there. But from this hosts file
# does not become wrong!
The Windows 7 operating system has such a file through which you can regulate visits to sites on the Internet. Basically, people do not know about such a file, and those who do try to ignore it, so as not to "perform miracles." This file is called hosts. Let's briefly understand why it is needed.
Let it be known to you that by writing the address of a site in the browser line, a special DNS server located on the Internet immediately changes it into a certain sequence of numbers. This digital series is unique for each site, and site names are needed only for ease of remembering. The hosts file is used to speed up the Internet by bypassing queries to the DNS server. In other words, if you write a number in the hosts file corresponding to the name of the site, then you will get to it directly, bypassing the DNS server. You only need to register correctly, otherwise the site will not load, if it does load, then it is not the one that you would like.
"Computer pests" willingly use the hosts file for personal gain. A virus, penetrating a computer, very often changes the hosts file. Therefore, if suddenly you are faced with restricting access to certain sites, first of all scan your computer, viruses may have settled in it, and only then convert the hosts to their original form.
Where is the hosts file in Windows 7?
So, consider in Windows 7 where hosts is located. You can find it in the Windows system folder. It is located on drive C, that is, where the system is installed. Next, we find the “System 32” folder, go to “Drivers” and finally to “Etc”. The file we need is stored in this folder.
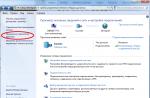
It also happens that you did not find the hosts file, most likely it is simply hidden and the “Do not show hidden files, folders and drives” option is indicated in the settings. In this case, you need to open the "Computer" folder and press "Alt", an additional menu will appear at the top of the window, select "Tools" and "Folder Options" in it.  In the new window, select the "View" tab and find the item "Show hidden files, folders and drives", put a tick on it. Accept the changes by clicking the "OK" button. Now go to the "Etc" folder, the hosts file should be displayed.
Now let's look at how you can change the hosts file. Let's proceed as follows:

Where is the hosts file in Windows 10?
The hosts file in the Windows 10 operating system is located in the same place as in Windows 7, that is, on the system drive. In the “Windows” folder, then follow the “System 32” folder, go to “Drivers” and finally to “Etc”.
To change a file in Windows 10, you must:
- Double click on the hosts file;
- In the window that appeared, we find "Open with";
- We find among the proposed programs "Notepad";
- Click "OK";
- Make changes and save them.
- If you are a layman in this matter, then it is better not to do anything, but ask for help from a qualified specialist.
- If something prompts you to make changes yourself, then before doing so, make a copy of the file and move it to another folder. If something doesn’t work out for you, then you will return a copy of the file back.
- If you have not copied this file and have already made changes, and the computer then started to act up, then the Internet will help you. Download a similar file from the site and replace yours.
- Before you change something, think about whether you really need to do it and how important it is for you.
Hosts (domain database) is a small document located in the Windows system folders. When you surf the Internet, or simply go to a website through your browser bookmarks, Windows first accesses it. The main purpose is to match site names (domains) and their IP addresses, written as numbers. You can go to the site by entering a domain or ip.
It is vulnerable to viruses and other malware that seek to rewrite it
This is done so that you automatically get to advertising and virus sites or to block the ability to download some Internet services. But the benefit is that the contents of Hosts are controlled by the user. A notepad program is enough to enter data into a text editor or save it from unnecessary things. How to change hosts in Windows, read on.
How to open hosts
The database of hosts is in any OS capable of connecting to the Internet. Both on Windows, and on MacOS, and on LInux distributions. But the location is very different. In XP, Vista, 7 and 8, 8.1 and 10 the hosts file is located at C:\Windows\System32\drivers\etc. You can open it directly in the explorer. The system32 folder is right there in Windows.
But it's easier to open a command prompt from the list of standard programs and type this in the window: notepad C:\windows\system32\drivers\etc\hosts and press Enter.
Run the command line with administrative rights, otherwise only the view will open, and the change will be blocked.
It will start in the usual notepad. If the command line was initiated from the admin, then the notepad will open in the same way and you can make edits.
There is a third way to open the hosts file in Windows 7, 8, 10 - for the curious:
- in explorer go to C:\Windows\system32;
- you need notepad.exe;
- right click on it and click on run as admin.
Further, in a simple way: “File” -> “Open” and look for the one you need. In order for notepad to see it, you will need to enable the "All files" option in the lower right corner of the window. So, we figured out how to open hosts as an administrator, it's time to understand how to edit it and why it is needed.
How to change hosts in Windows 8 or 8.1
The content of hosts in Windows 7, 8 and 8.1 is the same and looks something like thisIf you know English well, then at the top you can read a small text about the purpose of the file, but for sure you will have it in Russian. We will edit the lower part, adding or deleting addresses.
The line 127.0.0.1 localhost is the local machine you are working on. If the http server is not running on the computer, you can use the 127.0.0.1 address to block unwanted sites. Add the line 127.0.01 site.ru (address of the blocked resource). You can add as many lines as you like.
Listed sites will not open in any of the web browsers on the local machineThe method is suitable for prohibiting access to sites dangerous for children. For the changes to take effect, you need to save the hosts file. A restart of the computer is required. If you managed to change the hosts file in Windows 7, the added sites will not work until you delete the entries about them and save them. On the contrary, if the malware has added its own entries, you can remove them, thereby opening access to the necessary sites or deleting entries about redirecting to resources that steal passwords, extort money or infect the computer.
Editing hosts in Windows 7
Changing hosts in Windows 7 is no different. It lies at the same address, edited with a notepad through administrator rights. Sometimes it is not possible to change the hosts file. The reason is in viruses: some rewrite and do not allow you to change hosts. Therefore, before trying to overwrite and save, check your computer for viruses. It is desirable to use several programs in turn for an accurate result. There is a large selection of anti-virus scanners on the Internet that do not require installation on a hard drive.
Create a shortcut to edit hosts
- To quickly open the domain database, you can place a launch shortcut on the desktop.
- Right click on an empty desktop.
- Next, select "Create" -\u003e "Shortcut".
It means that the file at the specified address will be opened by Notepad.
- Click on "Next" and give the shortcut a name so that it opens the desired file with administrator rights.
Now you manage domains and IP addresses on your computer.
WATCH VIDEO
Now you know how to change the hosts file in Windows. Ask questions to experts.
The hosts file is responsible for establishing a correspondence between the domain and the site's IP address. Addressing the host takes precedence over sending a query to the DNS servers, and the file is stored on the computer and controlled by the administrator, which makes it an important element in the safe operation of Windows. In some cases, users are faced with the need to restore the hosts file to its original state. You can remove unnecessary entries from it in two ways: manually and automatically, using special software.
Manual recovery
Usually, restoring the hosts file is required after the action of malicious applications that add new entries to it. A typical attack looks like this: you open Odnoklassniki or VKontakte, and the site reports that the account is blocked and asks you to send an SMS to confirm the entry. As a result, money is withdrawn from the phone, and then you will find out that instead of VKontakte, the hosts file redirected you to a fake page.
But the host has nothing to do with it: it just turned out to be a tool in the hands of malicious software. Therefore, after cleaning Windows with an antivirus, you need to start restoring hosts.
Another option is to go to C:\Windows\System32\drivers\et and just open hosts with Notepad. Inside you will see a lot of text in English. You need to make sure that there are no extra entries in the host. By default, the text should end with "#::1 localhost". Everything after it should be deleted, especially if you yourself did not enter anything into the file.
However, this purge may not be complete, so it is highly recommended that you match your host content to the data listed on the support page at https://support.microsoft.com/en-us/kb/972034 . On Windows 7, the contents of hosts should look like this:
To make sure there are no extra entries, delete the old host and create a new file:

Now the old host will not work, and there will definitely be nothing superfluous inside the new one, so you don’t have to worry about the safety of money and personal data.
Automatic recovery
If manual recovery seems difficult, you can fix the host using special utilities. For example, Microsoft technical support in an article about fixing the hosts file on different versions of Windows suggests downloading the Fix It utility, after running which the extra entries will be deleted without user intervention. 
Another way is to use the AVZ antivirus program. It is a powerful tool for researching and repairing Windows, but we will only look at one of its functions - cleaning the hosts file.