O guess the riddle: it stands like a beehive buzzes. But there is no smoke coming from the chimney, because this is not a native factory, but a computer on which the BIOS is damaged. And he buzzes because that's the only thing he is now capable of. Without a bios, it's just a bunch of lifeless iron. Is this worth worrying about? Of course not. After all, now you have a great bedside table!
The system unit as a bedside table? Well, I do not! We know how to make it work. Today we'll talk about how to restore the BIOS if it crashed.
What causes BIOS flashing
B IOS and its “descendant” UEFI, which modern motherboards are flashed with, are special computer programs necessary for initial setup and control of PC devices until the operating system starts. They are stored in special flash memory chips on the motherboard, one of which is shown in the picture above. It seems to be a good storage place, reliable, but sometimes the BIOS gets uncomfortable there and runs away. More precisely, it is damaged and ceases to perform its tasks.
There are not too many reasons for BIOS damage, in some cases they are obvious, in others they are not. Here is a list of the most common:
- During a power outage to the computer.
- The flasher program (flasher) incorrectly interacts with the firmware or flash memory chip.
- Flashed a BIOS version that does not match this motherboard. Yes, .
- If the update is carried out from under a running operating system - a system failure or software interference, for example, blocking by an antivirus.
- Incorrect user actions, for example, restarting the computer before the update is installed.
- Failure of the flash memory chip.
- Hidden BIOS microprogram errors. Sometimes this explains spontaneous "gatherings" that occur for no apparent reason.
- Electrical failure of the motherboard.
How BIOS corruption manifests itself
In most cases, the BIOS firmware is partially damaged, so the symptoms of a failure can be different:- When you press the PC power button, only the cooler turns on, which immediately starts to rotate at maximum speed. Sometimes the LED indicators on the case and keyboard light up.
- One or more seconds after power on, a cyclic reboot begins. Outwardly, this is manifested by a cycle of spin-ups and stops of the cooler, which are repeated as long as power is supplied.
- When turned on, the power indicator lights up, the cooler does not spin.
- The computer shows no signs of life. This happens when the boot block, the BIOS bootloader, is damaged. This is the hardest case.
There is no image on the screen. Even the splash screen of the manufacturer does not appear.

There are other forms of damage to the BIOS, more precisely, its area, which stores the configuration of the ME controller (a component of the chipset) on boards that work with Intel processors - the so-called ME region. If there is a problem in this area, a computer or laptop may:
- Incorrect loading or not turning on at all.
- Turn off or restart at regular intervals.
- It is incorrect to regulate the cooler rotation speed, for example, to turn it at high speed regardless of the load.
The elimination of such failures consists in reading the BIOS dump, replacing the ME region with a clean one and re-flashing it using the programmer. Since this is usually done by repairmen, and not by computer owners, we will not dwell on this. Let's better do what can be done at home without special equipment and the risk of finally sending your "iron pet" to the realm of eternity.
BIOS recovery without a programmer is possible only if the bootloader is saved. It is sometimes possible to determine whether it has been preserved or not by indirect signs: flashing of the screen backlight, beeps from the system speaker, the reaction of the motherboard to turning on without RAM (sound or flashing indicators), etc. If the BIOS bootloader is preserved, the first moments of work computer run normally, the failure appears a little later.
How to restore the performance of a motherboard with a failed BIOS
Asus
Many Asus brand desktop motherboards support USB flashback, which is designed to quickly update and restore the BIOS in the event of a failure. This does not require anything other than a USB flash drive with a capacity of up to 4-16 GB and the BIOS file itself, which must be downloaded from the manufacturer's website from the section about your "mother" model.After downloading the firmware, you need to rename it. For example, the file "Sabertooth X79" (model name) is renamed to "SABERX79.ROM", the file "Sabertooth Z77" to "Z77ST.CAP". Information on how the firmware file should be named for your model is most likely on the Asus website, but if you do not find it, check the forums or support.
Next, save the renamed BIOS to a FAT32-formatted flash drive and plug it into the USB port marked " flashback" or " ROG Connect". It is advisable to turn off the computer before this, this will increase the chance of a successful recovery.

After connecting the flash drive, turn on the PC and press the " BIOS". Hold it down for about 3 seconds until the indicator light on the board starts flashing. Blinking indicates that the file was successfully read and flashed into memory. When the flashing process is completed, the indicator will turn off.
If your board is from a budget segment or not too new, that is, it does not support USB Flashback, most likely you can restore it in another way. If the computer is equipped with a floppy drive or optical drive, write the renamed BIOS file to the root directory of a blank floppy disk or CD, place it in the drive, turn off and then turn on the PC. The firmware will be completed when the drive indicator turns off. If there is no drive, use a USB flash drive.
gigabyte
On Gigabyte boards with Dual (dual) BIOS, failures rarely occur, since in case of damage to the firmware in the main chip ( M ain_ BIOS) the dump from the backup is copied into it ( B backup_ BIOS). As long as the main flash memory is healthy and contains firmware, even damaged, the board remains operational.
Problems with starting a board with Dual_BIOS are possible in the following cases:
- The main chip is missing or has failed.
- The microcode in the main chip is completely erased.
- The contents of both chips are damaged.
Some Gigabyte "mothers" can boot from backup flash memory and use it as the main one. Another group of boards from this manufacturer uses a dedicated area on the hard disk as a BIOS backup medium. This is a less reliable option, but still better than nothing.
Restoring the Gigabyte BIOS from a backup is usually done automatically, but if this does not happen, try unplugging the computer, wait a bit and turn it on again.
MSI and others
Most Micro-Star motherboards use a firmware recovery technology very similar to ASUS's - using a flash drive, floppy disk or CD. Copy the BIOS to blank media, connect it to the PC, press the shutdown button for 4 seconds, hold down the combination on the keyboard leftctrl +Home(or Alt +ctrl +Home) and, without releasing the keys, turn on the computer. The beginning of the firmware process can be judged by the blinking of the flash drive or drive indicator. BIOS on MSI board. On the right is the JSPI1 port for firmware on the programmer
 On MSI motherboards and some other brands that are more than 8-10 years old, the BIOS is flashed from a floppy disk. The instructions for AWARD and AMI BIOS are slightly different.
To restore the AMI BIOS, do the following:
- Rename the BIOS file downloaded from the motherboard manufacturer's website to AMIBOOT.ROM.
- Move it to the root of a clean floppy disk. Insert the floppy disk into the drive of the switched off PC.
- Press left Ctrl + Home on your keyboard and turn on your computer.
To restore the AWARD BIOS:
- Place the flash driver and BIOS files on a floppy disk (usually downloaded in one archive).
- Create a text document on a floppy disk containing the name of the BIOS file with the extension bin. Rename the document to autoexec.bat.
- The next steps are the same as above.
By the way, some motherboard manufacturers post BIOSes on their websites only in exe format - in one bottle with the flash driver for updating from under Windows. Sometimes such a file can be unpacked as an archive, but users often do not understand what exactly of its contents is the firmware. There is no universal solution for such problems. In order not to aggravate the problem, it is better to consult on the specialized forums or in the technical support of the manufacturer.

On some boards, before restoring the BIOS, you also need to remove the real-time clock (RTC) battery from the socket or rearrange (remove) the clear CMOS jumper. It is important to find out these points before starting the procedure.
Features of BIOS recovery on laptops
On laptops, as well as on Gigabyte boards, the BIOS is also often stored in two flash memory chips. But it's not Dual and it has no backups. Both chips contain different parts of the firmware, or one contains the main BIOS, and the other contains the multicontroller program. To prevent the device from turning on, it is enough to damage the microcode in at least one of them.
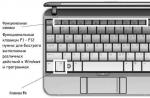
The procedure for recovering a crashed BIOS on laptops is about the same as on desktops. The firmware file downloaded from the manufacturer’s website and the flasher program (the latter is not always needed) are placed on a clean USB flash drive formatted in FAT32 / 16, connected to a de-energized device (simply turning off the laptop is sometimes not enough, you need to disconnect the power supply and remove the battery), insert a charged the battery in place, turn on the device and hold down the key combination. On different laptops, different keyboard shortcuts are used for this, for example:
- Ctrl (left only or both) + Home
- Windows + B (this and other letters are given in the Latin layout)
- Windows+F
- Windows+M
- Windows + Esc
- Fn+B
- Fn+F
- Fn+M
- Fn + Esc.
The main work is to unpack and rename the BIOS files. Again, there is no single rule here. In most cases, you have to get the firmware from exe files, but! Many manufacturers include BIOSes for different revisions of one platform or a whole series of platforms in the program, and it can be very difficult to choose the only file you need from them. In order not to be mistaken, read the instructions for the firmware of your particular model and platform revision on the specialized forums. And feel free to ask questions.
I deliberately do not provide instructions in the article for restoring BIOSes by flashing on a programmer with and without soldering, closing various contacts, hot-swapping removable flash memory, etc., since all these methods are unsafe and require certain knowledge. However, among the readers, there are probably those who have done something similar on their PC and got good results. It will be great if you describe in detail your actions in the comments to the article. Also, stories about negative experiences are welcome so that other readers can avoid mistakes thanks to you. In the comments, be sure to include the model name and revision of your motherboard, as well as the BIOS version you were working with.The basic input/output system is the beginning of the computer's electronic life. In the event of a hardware or software malfunction of the BIOS microchip, the successful launch of the computing device simply becomes impossible. Despite the extreme degree of reliability of the specified element of the computer system, software failures in the basic microsystem (in view of many factors!) Still take place. In most cases, the problem "BIOS does not start: what to do?" is allowed by elementary replacement of the CMOS battery, otherwise it is required to apply a comprehensive diagnostic plan, and only after identifying the cause of the problem, perform a repair (correct!) algorithm of actions, -. details in the article!
Not a short introduction: small BIOS and big consequences...
Indeed, everything depends on a small microcircuit, which contains a set of microprograms in its memory, and in the aggregate is the basic microsystem of a computer! A very rare electronic ailment that occurs in our time is damage to the main BIOS entry of the system (not to be confused with temporary data stored in CMOS memory!), This is a “dead” motherboard. That is, the motherboard becomes completely useless, since it is devoid of a startup control element.

A partial malfunction of the BIOS of a microchip can be accompanied by an incredible variety of surprises, both hardware and software. In general, the beginning of all computing beginnings is a small microcircuit with a certain set of programs. The degree of efficiency of the computer used depends on how correctly you configure the BIOS, directly affecting the overall operational life of the computing device as a whole. If for you, dear reader, all of the above has become news, then it makes sense to think: “Do I follow the manufacturer’s critical instructions regarding operating rules?”.
Why BIOS suddenly stopped starting: a little about all the reasons
Let's move on to the specifics, because the situation "does not start" can look different:
- When you press the "on" button, nothing happens - a black screen and silence.
- The computer turns on, the screen flickers with a black void (not active) - the noise of the fans is heard and the system speaker beeps (BIOS speaker).
- The computing device starts, some message is displayed on the screen - the buttons do not respond, except that ... the restart works.
- The system boots too quickly (and, safely!), But you can’t get into the BIOS.
There is another interpretation of the voiced problem, when a novice user does not correctly understand what exactly is happening and at the same time wonders how to enter the BIOS at all? Let's start with the last one...
How to enter the basic settings of the computer
Depending on the BIOS version (s), as well as the design features of the computer, access to the basic settings can be radically different from the methods that are considered standard.
For example, in most PC modifications, the BIOS is entered by pressing the F2 or Delete function button. Moreover, the activation of one of these buttons is carried out directly at the time of launching the computer system at its initial stage. By the way, there is a special technique for calling the BIOS main menu - pressing the corresponding button multiple times with an interval of two clicks per second of time.
There are other "tactile schemes" for entering the BIOS - some manufacturers supply the devices they produce with special mechanisms, push-button or lever type, when activated, the user enters the service menu of the base microsystem. However, there are more exotic buttons - touch. However, the essence of the listed keys and service gadgets is the same - calling the BIOS Setup menu.
As for the “high-speed resistance” to the moment you enter the basic computer settings menu, there are several solutions here:
- Enter the BIOS menu through Windows OS - use this link to read how it's done.
- Try calling the BIOS using other service keys, for example, "F8".
- Finally, you can get into the basic settings using the System Restore emergency disk or a Windows distribution kit.
Black Screen and Silence: Causes and Solutions

This "electronic incident" has a rather long list of "causes and effects", nevertheless, it is possible to single out the main symptoms of a malfunction, namely, to identify the real culprit of the "silent celebration" as soon as possible.
- With a probability of 99.9%, the power supply failed. Naturally, replacing the component with a known-good power supply unit will correct the situation in the direction of “Problem solved!”.
- The power button is out of order - replacing the switching element or checking the wire for mechanical damage (obvious breakage, wire deformation, oxidation of contacts, etc.), of course, with its subsequent restoration (soldering, cleaning).
- Dust contamination of the inside of the computer case (especially relevant for portable computer equipment - a laptop) - it is necessary to clean all components of the motherboard, as well as the attached modules and strapping equipment, from dust. Do not forget to clean the protective meshes of the air intakes and other structural elements of the case.
The computer turns on, but the monitor screen is "full of black secrets"
As a rule, problems with starting a computer system are always accompanied by a specific sound signal, the tone and sound sequence of which has its own decryption code.

To solve the problem described, you can also try to change the computer's power supply, but more likely this "PC behavior" indicates that the BIOS has detected a faulty component in the system: one of the memory sticks (RAM) has failed, the hard drive has broken, or the processor temperature has reached a critical value. In the latter case, it is necessary to replace the thermal paste and check the cooler of the cooling system for serviceability.
The rest of the user's actions should be as follows:
- Disconnect all peripheral devices (printer, fax machine, webcam, external storage devices, etc.).
- Remove all RAM modules.
- Turn off hard drives.
- Switch to a different graphics mode - change the video scheme from integrated to discrete, or switch to an integrated video chip if you have used an external video card.
If an empty mainland starts up, throw in one of the previously disabled components and carefully monitor the reaction of the microsystem as a whole. In any case, if the BIOS starts up, then you have already achieved a positive result!
By the way, do not forget that a black screen can be the result of a failed monitor. In laptops, the integrity of the connecting cable is often violated, which is constantly subjected to dynamic load when opening / closing the display lid. In the latter case, it is better to contact a laptop repair service center. In both the first and second cases, to check the validity of the assumption, you can always try to connect an external monitor to the VGA connector.
At the end
Here, in brief, is the entire list of instructions on the problem "BIOS does not start: what to do." We hope everything worked out for you and access to the basic settings is restored. Of course, you should not lose sight of another undescribed way to resolve the problem that has arisen - switch the CMOS jumper to the RESET position (then return the contact element to its original position).
And you know, this article has a great continuation, because the BIOS may not start due to swollen capacitors, as well as “dead” transistors ... Don't miss it!
The BIOS is an intermediate link between the digital brain of a computer and the human mind. The basic input-output system provides the conversion of human-readable commands from the keyboard into digital processor codes. And vice versa, after the transfer of the processed information, the internal work of the PC is shown on the monitor screen using the graphical interface of the operating system.
Bios won't load? Then the operating system will not work either. In fact, the error is quite rare. First of all, it is likely to assume that the problem is with the battery of the system. Open the system unit and replace the battery with a new one. If there is nothing to change, you can simply remove and re-insert the battery. This will reset the BIOS to factory settings.
Try restarting your desktop. If it was a dead battery, everything will start working normally.
Cooling the system unit
The next diagnostic step is to check the cooling system. PCs are extremely sensitive to temperature conditions. The slightest deviations lead to the immediate automatic operation of the protective systems.
Check how the coolers work on the motherboard. It is likely that if the equipment has been in operation for a long time, the lubrication of the fans has dried up, and therefore there is no proper cooling effect. The solution is to lubricate the cooler or, which is easier, replace it with a new one. The cost of fans is not high at all. It is easier to replace with a new one for a hundred rubles, in five minutes, than to spend several hours of unpaid work on repairs.

Insufficient cooling of the system unit often occurs after an upgrade, when new modules are connected to the PC. At the same time, there is also a problem with nutrition. If, when expanding the configuration, the increased consumption of electric current and increased heat generation were not taken into account, then the BIOS may not start for these reasons. To check, you need to replace the computer's power supply with a more powerful one.
Motherboard failure
Since the BIOS is located on the motherboard, it is logical to assume that the boot problems are due to malfunctions on the mainland itself. Start with a visual inspection. The presence of swollen electrolytic capacitors clearly indicates a malfunction.

Theoretically, an advanced user can independently replace unusable capacitors. You just need to have the right tools and an electronic parts store somewhere nearby. Otherwise, so much time and money will be spent on self-repair that it would be easier and cheaper to go to a service center.
Another common cause of a motherboard malfunction is burning contacts in bridges or burnout tracks. All this can usually be seen on examination. If damage is found, you can safely carry the device to the workshop.
Malfunction of other computer blocks
The reason that the BIOS does not load can also be malfunctions of other computer blocks. Checking and searching for a causal block is usually done by connecting a computer in the most minimal configuration.
- Motherboard.
- Power Supply.
- Speaker.
- One of the RAM panels.
If, after starting in this state, the BIOS starts up, the problem is in one of the other blocks of the system. The connection starts with the video card, then the hard drives, and so on until the malfunction resumes.

It is likely that, after such manipulations, the problem will disappear by itself, and the culprit will never be found. In this case, it is logical to assume violations in the contact connections. After disconnecting and reconnecting, the contacts were restored and everything started working normally.
If a problem with contact connections is suspected, all that remains is to open the system unit and remove all cables, clean the contacts and remove dust. After the prevention of the next element, you can try to turn on the computer again. So you can more reliably detect the reason for the lack of BIOS loading.
Most often, such problems occur if the user neglects to clean the device from dust. For normal operation, it is necessary to clean the system unit at least once a year. Especially if pets live in the house, then there is a high probability of wool getting into the computer.
Very often, the BIOS does not load due to problems with the hard drive. Although, in this case, some messages will appear on the screen after turning on the computer. If, after disconnecting the hard drive, the BIOS started to boot normally, the problem was with the drives.
The video card also greatly affects the operation of the motherboard and BIOS. Problems with the video card in the first place just lead to the fact that the BIOS will not start.
If the BIOS does not start even in the minimum configuration of the computer, there is a high probability that the processor or the motherboard itself is faulty. There are only two options, either to change to new ones, or to give it to a service center for repair. Unlike a hard drive, the cost of repairing a motherboard is significantly lower than buying a new one.
If the processor is malfunctioning, there may be no beeps. Another possible reason leading to the inoperability of the BIOS is the accumulation of static electricity on the central processor. To remove static, you can carefully run a metal screwdriver along the legs of the processor. Such a simple procedure sometimes restores the normal operation of the BIOS.
The BIOS is a program that is responsible for the initial startup of the operating system as soon as the personal computer is turned on. Its name stands for or "basic input-output system". What is BIOS in a computer? Why is it needed and what functions does it perform?
Its main task is troubleshooting. This is done by testing the device. If everything went well, then the bootloader of the operating system is searched for and its subsequent launch.
Now that we have figured out what BIOS is in a computer and what it is responsible for, we can move on to the question of the reasons for the boot failure.
Signs of Errors
You can be worried about a system problem when one of the following occurs when you start your computer:
- when the power button is activated, there is no reaction (you should also check how it is connected);
- the computer starts, but the screen does not react in any way, and the BIOS itself emits error signals;
- when starting the device, an error message appears; keyboard buttons do not respond;
- the computer starts without errors, but too quickly; without the ability to load the BIOS.
Key entry error
The first thing worth noting is that the hot keys for launching the program are different on each motherboard. And sometimes, the combination required to start the BIOS may not be displayed at all on the screen when the device starts. This greatly complicates the task. Therefore, in order to select the necessary key combinations to enter the BIOS, you will have to choose from:
- Del (on some keyboards - Delete).
In the event that none of them fit, you should search the Internet for the motherboard model. Most often, this characteristic can be found in the description on the manufacturer's website or in various thematic forums.
Port problem
This may be the simplest reason why the BIOS is not loaded. The problem may be that the USB port to which the keyboard was connected stopped working correctly, and, consequently, the device itself stopped responding to any interaction with it.
The solution is extremely simple and obvious - change the keyboard connection port to one that works stably. If we are talking about a desktop computer, you should use the USB located on the motherboard. Unlike those installed in the case, they last longer and are more stable.
Now you can restart your computer and download the BIOS again.
Input device problem or error
Before you start working with this program, you should definitely make sure that the input device is working. And it does not matter whether it is necessary to check some data on the system or install a new BIOS firmware (this will be discussed a little later). If suddenly nothing happens when you press the correct key, you should perform several actions:
- check the performance of USB ports (described above);
- make sure that the keyboard itself, as well as the necessary keys, work stably.
There are also various ways on how to enter the BIOS without a keyboard. It is also worth noting that when working with the BIOS, it is not advisable to use a wireless keyboard. Only if there is no wired device, although this is not so critical.
There are situations when the BIOS firmware is too old and does not support the USB interface for the input device. To fix this, you will have to use a keyboard with a PS / 2 connector. You can also purchase an appropriate adapter for a modern port.
Errors in working with devices

In a specific case, the problem is that one of the devices connected to the computer does not work correctly and leads to errors. Because of the latter, the BIOS just does not load.
As a check for a startup error, it is worth doing the following:
- turn off all drives, solid state drives and hard drives;
- remove all devices connected to the motherboard;
- disable discrete graphics card.
In the event that the problem is solved, it is worth starting to connect all the devices one by one. This will help determine why the BIOS is not loaded. Once the faulty part is identified, a repair service can be contacted to find out if it can be fixed or not.
Sound prompts
The following often happens: the computer starts up, the BIOS is called, but signals are emitted instead, and the program does not work. In this case, you need to record the type of signal and turn to the Internet for help.
There you can find tables that list all the signals that the system can emit in such a situation. Next, you just need to find your signals among the rest and find out what problem they report and how else to solve.
Problem with program settings
A similar error occurs when the user of the device makes any changes to the BIOS itself. One solution to the problem may be to return the program to factory settings. You can do this in the following way:
- Open the system unit or unscrew the bottom cover of the laptop.
- Find the CMOS button on the motherboard (located next to the battery). By default it is in position 1-2.
- Switch it to position 3-4. Hold it for about 30 seconds.
- Return to the previous state.

Motherboard errors
This part is the most important part in any device. In fact, she is a computer. In the event that there is a suspicion that the BIOS is not loaded precisely because of it, it is worth performing several important operations:
- Examine the motherboard. It can appear various physical damage. It is also worth checking it for oxidation and changes in capacitors.
- If no changes in the structure of the part were found, it is necessary to carry out diagnostics. To do this, all devices that were connected to it are turned off. You only need to leave the processor and speakers to control the audio signals. Connect only the monitor and the power cable from the system to the system unit.
- Now you need to reset the settings. To do this, you need to remove the battery. After about 10 seconds, insert it into its original place.
- You can start the device. If beeps appear at the same time, the motherboard is functioning. Otherwise, consider replacing.

In the event of a breakdown of such an important part, it is worth contacting the service center. Perhaps it can be brought into working condition.
Is it possible to update BIOS from a flash drive?

The BIOS installation procedure itself is necessary when the computer has an outdated version that needs to be updated. Also, the cause may be a conflict of the connected device or the system data was damaged by a virus.
Now let's analyze the algorithm of how to update the BIOS from a USB flash drive.
Determining the Board Model
It is worth noting that this is not so much a BIOS update as the installation of new drivers on the motherboard. You can define a model in the following ways:
- if an expensive and professional part was purchased, then its full name will be indicated on the packaging, as well as in the attached instructions;
- the same applies to boards of the middle price category; their type is indicated on the front side of the box;
- in the event that the part came in a simple cardboard package or was installed in advance, you should turn to software tools:
- to find out the motherboard model and BIOS version on Windows 10, call the Run command window by pressing the Win and R keys;
- in the line enter "msinfo32";
- press "OK";
- in the window that appears, find the line that will contain information about the system, as well as the BIOS version.
You can also use the program "AIDA64 Extreme". It is paid, but has a trial period of 30 days. Can I find out the model of the board with it? by going to the "Summary Information" section. It will be in the list on the left. After that, you need to select the item with information about the system board.
Where to get the firmware?

To update an outdated BIOS version on Windows 10, you must perform the following sequence:
- enter the motherboard model in the search engine and go to the manufacturer's resource;
- find the download section and select the necessary software;
- in the new section, select the latest firmware, which has the mark "Instant Flash"; download;
- unzip the downloaded file to a formatted USB flash drive;
- insert it into the device that needs to be reinstalled and restart it.
The process of installing BIOS from a USB flash drive
Now you need to carefully follow the further algorithm of actions in order to install a new firmware without any problems:
- As soon as the computer starts to start, press the BIOS activation button. It can be (F1, F2, Del (Delete)).
- Now you need to go to the "Instant Flash" section. The firmware version and the source of its storage (flash drive) will be automatically recognized by the system.
- Next, the drive with the recorded BIOS source is selected, as well as the firmware file itself.
- Press the enter key and wait for the program to install.
It is also worth noting that sometimes it becomes necessary to boot from the drive that stores the installer. To do this, you need:
- when starting the device, press the keys to activate the BIOS;
- find the BOOT tab;
- find Boot Device Priority in it; This menu sets the boot priority for devices connected to the computer. By standard, the hard drive on which the operating system is installed always comes first;
- now you need to select this line;
- then a flash drive with an installed file is selected and the input button is activated;
- now you need to press the F10 key and leave the program menu, while saving the settings.
- after the computer restarts, the installer written to the USB flash drive will be launched.
Important Points

There are several rather serious remarks regarding the work with the BIOS program parameters. They are listed below:
- It is undesirable to reinstall if the computer is stable. There is always a risk of harming the system, and therefore, you should not resort to such serious actions if you are not sure that you can do everything correctly. Or that it is really necessary.
- When downloading BIOS firmware, you need to pay attention only to the full versions, and not alpha or beta.
- During installation or error correction, do not turn off the computer from the power supply. Otherwise, irreparable problems may occur. It is also worth getting an uninterruptible power supply.
- Before installing a new version of the program, read the motherboard firmware instructions. Often it comes with a part.