We continue to improve our site. In this lesson, your task is to change the appearance of the site (theme, template). You can find templates for WordPress by entering in the search engine Yandex, Google request "WordPress themes", upon request you will find a huge number of topics for your favorite "brainchild" and you can create the desired design for your website or blog.
How to choose a theme (template for the site)
Honestly choose a template it will be difficult, since there is plenty to choose from. When looking for a template, be guided by your feeling like you don't like (if you like it yourself, it means you will like it and someone else), download the theme you like and continue searching. I have a collection of downloaded themes for WordPress is 73 pieces. As you type your collection, choose from it the most suitable option for you.
The main thing is not to rush to choose a template. I advise: take the time, find really what you really like, and then you will not want to change... Also, do not forget that after all, they are first greeted by their clothes, and only afterwards they are escorted through the mind (most of us buy goods in beautiful high-quality packaging and only after that they look at what is in it).
I will say a little for parting words. When choosing, don't forget the preview function used on theme sites. Using it, you will roughly know how this or that template will look on your site or blog, be sure to pay attention to whether the site navigation is clear and convenient. Happy pattern hunting.
How to install a template on WordPress
And so, you have chosen a template for WordPress, we will now consider how to load a template:
1. Downloaded the theme, checked for viruses and unzipped, now repeat the same steps that you performed when copying plugins. Start Total Commander, in the left window find the folder with the theme, for the right window, establish an FTP connection. Copy the theme folder to the address: public_html / wp-content / themes... Folder "Themes" on, open and transfer the folder of your chosen theme from yours. Anything can go out of Total.
2. Now you need to activate the selected template. To do this, go to the admin panel (console). You can log in as described in (pp. 2, 3.), or through bookmarks (if you have bookmarked the admin panel in your browser). Next, click on the "Appearance" tab, and the "Themes" button:
3.Here you activate the theme you copied by clicking the "Activate" button:

4. If the theme asks for updates, you can update, but remember that if you made any settings for the template, all settings will be lost during the update.
That's all! Now the template you have selected on your WordPress site is activated. Agree, even interesting? Now you can look at how your site or blog looks like (remember, in the address bar of your browser, type in the domain name of your site and press Enter).
Checking the theme (template) for code with other people's links or we are not stupid and also know how to do something.

This means that you have installed the template, but it can hide its own surprises. These surprises are that the topic may contain links to other people's sites. Any author (usually in the theme footer - the footer.php file) places a link to his or her sponsors' sites. This is quite normal: it was not just that it worked. You have the right to decide what to take off, you can remove it, or you can leave it or put your own in their place.
But, unfortunately, there are such "craftsmen" who take ready-made themes (although they have nothing to do with creating a template), edit links (insert their own), encode a section of the file with links and insert into the template, and then put the theme for free download. We do not see these links, but search robots immediately notice and can draw wrong conclusions. Thus, the "craftsmen" are trying. Agree, it looks pretty sneaky. By choosing a template on the official website of the manufacturer, you can avoid encoded links (though not always, anything can happen).
If, nevertheless, you come across a template and you really like it, but it contains a code, do not rush to change it, first you can try to decode and remove links. Consider below, how to find the code in the topic and how to decode code in a WordPress template.
To discover whether there is a in the subject codeYou need a plugin TAC (Theme Authenticity Checker)... It should be located on your site if you have downloaded and installed everything on your site. The TAC plugin looks for unnecessary links and codes in the WordPress theme, it is very easy to work with it:
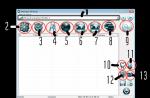
1. We enter the console (admin panel) and find: Appearance -\u003e TAC:

2. The plugin automatically detects whether the template is in a "normal" state. And if the code is found, then something like the following should come out:

If it says "Theme OK!" on a green background, then, in principle, everything is fine, you can proceed to reading the next article, and if the red background is "Encrypted Code Found!" as in my screenshot (picture), then click "Details".
3. Here the plug-in shows that the code has been found (in the gibberish frame), and above the window with the code, the address of the file in which it is located is indicated. I have it at the address and in the folder in the file wp-content / themes / your theme (template) /functions.php... We remember the path and file.

You may have it in another file, but the following steps are fine for removing code from any file in your theme. It's just that I will decode my file, you are yours, and repeating the steps after me to decrypt the code and remove hidden links, you can cut off all unnecessary and leave useful without damaging the theme you like.
You cannot simply delete the hidden code, since not everything bad is encoded there, and if you simply delete it, the template will not work on the site.
The process of decoding the code in the template
1. I have determined where the encoded text is "Functions.php",
then go to Appearance -\u003e Editor:

2. I find the theme on the right in the editor and click on "Theme functions, functions.php", You find yours. Next, I find the code and highlight it.

3. Copy the highlighted code to one of the services offered below:
a). We go to the service using this link and put only the contents of the apostrophes in the decryption field:
4. On the picture is the third service (you will figure it out for yourself in the first two, paste the code, press “decode” and copy the result). On the third service, you also paste the code into the window and click "Send!"

5. On the page that opens, click "Get file", a download request will pop up, download the file (download a small file quickly).

6. Open the downloaded file. The decrypted code looks like in the picture, select the decoded code and copy it.

7. Now we return to the theme editor and paste it into the selected non-decoded code. Find the line in the inserted and decoded text: "Fclose ($ fd); if (strpos ($ c, $ l) \u003d 0) " It will look something like this:

8. In construction, change the value " 0 " on " 1 ", Which will allow us to change or remove links "Fclose ($ fd); if (strpos ($ c, $ l) \u003d 1) " ... And click update at the bottom of the editor:
9. Now we re-find the copied text and delete the links, I have four of them (sometimes more). After deleting the links, click update.

10. That's it, go to Appearance -\u003e TAC and see the result of our work:

If you don't feel like digging into the codes, just change your WordPress template. Moving on to the final part of bringing appearance site in working view, remains.
It's no secret that many dummies, novice bloggers, after installing a template, dream of changing its appearance, but not everyone knows how to do it.
And someone is simply afraid to climb into this jungle, therefore either they leave the standard appearance of the template, or use paid services of professionals in order to change WordPress template design... But believe me, everything is not as scary as it seems at first glance)
So, after in the last lesson we figured out the php structure of our template, it's time to go directly to the design.
Most of the settings for the appearance of html pages are stored in the CSS stylesheet - files responsible for displaying the elements of our page.
This tutorial assumes a basic knowledge of CSS. If you want to learn what style sheets are and how to work with them then you are welcome. . There you will find free CSS and html tutorials that will introduce you to the basics.
Now let's see in practice what we can do with our theme by editing the CSS rules.
For example, I chose the standard Twenty Ten template, it should be included with the installed WordPress.
If you don't want to waste time on training, you can start right away with your theme. I just warn you right away that there can be significant differences in different templates.
From the tools we need:
- Browser
- Install the plugin on Mozila.
- For editing, you can use the usual text editor, but it is better to do this with the help, there is a highlighting of the code, and the ability to change the encoding, so download it too.
How to change the design of a WordPress template
After everything is downloaded and installed, open our website in Mozil and launch the firebug plugin by clicking on the beetle icon.
The plugin panel will open below, with which we will work. By default, on the tabs on the left, we see the html code of our page, on the right, the CSS style of the selected element.
Now, in order to make changes to some element of our theme, we need to find out where it is, what it is called and what styles are written in it. The firebag will help us with this.
For example, we have a page like this, and we want to change the color of the navigation bar.

It is not always possible to do this from the theme settings, but it can be done manually in the stylesheet.
Click on this cursor icon of our plugin, and now we can select any element of the page and get a detailed description for it. We can also test how it will be displayed if we change something in the code.
Now moving the cursor over the page, we see that the selected blocks are highlighted with a frame. We click on our navigation bar in which we want to change the color, and in the tab Html and Style there have been changes - the current element is highlighted.
Now we see that in the code, the block we selected is div with identifier “ access”On the right side of the plugin, in the style tab, we have all the properties for this identifier displayed. It belongs to the file style.css and the rule for this element is at 375 th line of this file.

The line is responsible for the background properties background, specifically for the color in the abbreviated notation this particular paragraph #000000 Don't be alarmed, this is just a black hexadecimal code 🙂
By clicking on it with the mouse, you can edit the value at your discretion and see right there in the browser window how the page element will change. For example, I will enter # 3E6A97 to get the dirty blue color of this panel.
It is very easy to select colors and codes for them using a program ColorMania there is even an eyedropper that lets you choose any color on your monitor screen.
You can experiment with different values \u200b\u200band elements. Do not be afraid - changes made in the plugin window will not affect your page on the server in any way- they are only valid in the current cache of your browser. When you refresh the page, all settings will be reset.
And how do we make sure that these changes are saved for the page on the server, you ask?
Very simple. We go through FTP client to our site, go to the folder with our theme, in this case it is the folder wp-content / themes / twentyten / and find the file there style.css.
This is the style sheet, which stores the main settings for the appearance of our template. We open it with Notepad ++, find the one we need 375 th line with the rule for the identifier access and replace black with the one we need # 3E6A97.

Save the file (don't forget about UTF_8 encoding without BOM), upload the modified file to the server, refresh the browser page and enjoy the results)
What can be changed in a WordPress template?
Yes, almost everything 🙂 This way you can change:
- displaying text - select the text with a firebug and look for its properties in the styles, for example font-size: 14px this is the font size, color is the color of the test, the font-family is the font family, etc.
- width and height dimensions of elements length and height,
- border framework.
- img pictures and icons usually come with links
- margin and padding outer and inner indents
- positioning elements
- background background properties
- And much more, you can write your own styles for any element of your page.
The list can be long, with the help of CSS styles you can change the design of the page beyond recognition in a few minutes. A complete list of all properties and their description is available.

Sometimes it happens that styles for individual elements are not written in style.css, and in other css files, you can easily see their name and location in Firebug and easily edit these elements.
It is also possible that rules for individual elements can be written in the html code itself in the style attribute. In this case, you need to edit the php file. we learned from the previous lesson.
Attention! Before making any changes to your theme, I highly recommend doing backups all files in your themeso that in case of errors you can roll back the changes. And of course it's better to learn CSS first \u003d)
Of course, I could not cover everything here, I just tried to show the principle of editing the design of the template, and suggest tools that facilitate this task.
If you still have not figured out the intricacies of the layout of your template or do not want to spend your time on this lesson, then you can contact me, for a modest reward I can edit your template to suit your needs. Write to email
For those who are already familiar with CSS, the theme may seem too chewed, for beginners, it is too complicated, so if you have any questions about your templates or something is not clear, do not hesitate to contact us in the comments 🙂
Well, now it's time to come close and find out how they are installed.
In this article, we will look at how to edit the appearance of a template. Joomla.
Any person who creates a site wants to make his site unique, or at least not similar to others.
Now almost all templates for Joomla are publicly available, everyone can download and install them on the site.
Let's take an example of modifying a standard template. Beez5.
Change the background of the template (background)
I use chrome browser, press F12 or right-click on the desired location and click "View Element Code".
As you can see in the figure, the tag is responsible for the background of the template. body with style background.
Styles have a background color #EEE and background image (path to it). It is these parameters that give us the background of the site.

To change them, you just need to replace these parameters (specify a new color and a path to a new picture).

All changes are made in the file specified in the developer panel, here it is beez5.css, after the colon there is a line in which you need to change the parameter, we have this line 19.
The path to the file can be viewed by hovering over the name with the cursor.
Changing the site logo
Changing the logo is very easy and there are several ways to do it.
Method 1:
As in the first method, hover the cursor over the logo, right-click and click View item code. All we need to find out is the address (path) to the logo. Now we make our own logo, give it the same name (fruits.gif) and just replace the old logo with it.

Method 2:
This method is the easiest, but not found in all templates. Go to: Template Manager - Beez5 (style) - Specify the logo.

Method 3:
We do everything the same, only we replace the path to the logo, not the file. As you can see in the picture, the picture is inserted after html, not through css... Therefore, you need to change source template. This is done easily: Template Manager - Beez5 - Change the template of the main page. We are looking for a line with
and change the path to the logo to the desired one. In this template, the path is written to php, as there is option number 2. Therefore, it is better to use option # 1 or # 2.

Change width of template and blocks
Find the main block - div... As you can see in the picture, this Individual blocks are edited in the same way. Find the block, look at it and change the style. All this is done the same way. Right-click on the text and click View Item Code. We will be shown the block and block style responsible for the text parameters. The color of the text and links is set by the - color parameter. All files can be edited through editors like notepad ++ or through the standard Joomla "editor". Template Manager - The template you want. Here you are given a list of files (index.php, 404 page template, print page template, styles.). That's all. Your opinion is important to us. Write your comments. To change the template site first go to the page editor and select "General settings" there. Opposite the line “Design site"Click" Select design "and a selection window will open in front of you. Now just choose the design you like, install it on your site and start editing. For example, let's change the header image site... Graphic images used in design are described in the style.css file or html page template. For images written in CSS. In the top bar select "Design", then "Design Management". Next, a style file will open in the window, look for a line like #header (background: url (‘/ ee.jpg’) no-repeat-height: 182px;….), Which will be the header address. Please note that in different templatex is different, so look for which picture relates to what. For pictures written in the template. Just as in the first case, in the top panel, select the line "Design", then "Design Management", then look for the view line in the window that opens. Now choose the picture you like. To draw a new header, remember that if it is of a different size than the original one, or you want to place it in a different place, make the necessary adjustments in the template or style file. Save the header to the root directory, for this use the file manager, also change the address of the old image to the new one and save. Do the same with all the pictures of the design, or create a new design for the entire page at once and attach it to the site. The easiest way to create a website is using a template. However, for the resource to stand out, you need to change the default layout. And here you cannot do without basic knowledge of html and css. Find the website template that suits you best on the Internet. Pay attention to its capabilities, the ability to adapt to the size of the monitor, the features of the menu and the layout of the columns. Download the version you like to your computer, unpack the archive. Check its performance by uploading the files to the site root. Perhaps the template contains errors and will not install correctly, then there will be no point in working with it in the future. Even if you are not going to completely redo the template, replace most of the images, especially those that are located as a logo. Replace each picture in this way: Open the graphic file in Photoshop- Thus, instead of one image, another should appear. Once you have changed all the pictures, zip the files folder (in the case of Joomla) and upload it through the site admin panel in the "Extensions" menu. See if the theme displays correctly with the new illustrations. Change the rest of the parameters in style.css. Moreover, it is much more convenient to do this not through the admin panel, but on a computer. It is reasonable to use localhost (Denver) to see the result of the transformations as soon as possible. This will avoid the need to upload the result to the server each time in order to view the results after the next edit. Download the free FireBug plugin for Mozilla Firefox... After installation, a yellow bug icon will appear in the upper right corner of the browser. Click on it or press the F12 key and at the bottom of the screen, the page code will appear in a minimized version. It can be opened by hovering the mouse over the plus signs. And if you click on the line of an element, it will be highlighted at the top of the screen. On the right side of the window with the code, you will find styles indicating the lines that are responsible for the appearance. And it will immediately become clear where you need to edit the style file to change the design. Open style.css in Notepad ++. You can use other programs designed to edit the code, but for this purpose you cannot use the standard Notepad, otherwise there will be errors due to the encoding. Use FireBug to find the parameters you want to change and edit them in Notepad ++ at the same time. Save the final css and upload the file to the server. note So let's start the lesson: replacing the ucoz template. The first step is to go to the Site Control Panel - Settings - General Settings. In the line Site design, you see the number of the installed template, then you should replace it with a new one. Replacing only the pattern number with a new one. Then we save and look at the result. If everything worked out, then congratulations, you were able to change the ucoz template. Useful advice How can I change the default template to uCoz and can I do it? Answer: Yes, the standard templates can be modified. Today, there are 254,258 templates. You can read below how to change the standard templates. For each template, 3 questions were asked: -How to change the header? -How to change pictures in blocks? -How can I change the background in the template? All interesting After installing and setting up an account in Ucoz, the user proceeds to create his own website. First, most webmasters set the design for the site header, which determines the structure of the future resource. To create quality ... The easiest way to create a website is using a template. However, for the resource to stand out, you need to change the default layout. And here you cannot do without basic knowledge of html and css. Instructions 1 On the Internet, find a website template that you need more ... When creating sites, ready-made templates found on the net are often used. They are sometimes downloaded by users thousands of times, the resources created on their basis are very similar in appearance. For the site to have an individual design, its template ... Content management system Ucoz offers its users a wide selection of standard background templates, consisting of 246 units. However, not always even such an amount can satisfy all tastes of people, therefore, this system contains ... When creating your site on ucoz, you can choose a design from standard templates, which are very diverse, but this is sometimes not enough, especially if you want to emphasize the individuality of your site. In this case, you can ... Modern CMS allows the user, without programming knowledge, to manage almost all the parameters of his own site. For beginners in site building and organizers of their own blogs, it is often enough to be able to add their own ... It is not always possible to order a design from professionals. The uCoz system provides opportunities for writing design in html and css literally from scratch, but it's hardly worth spending time and effort when you can create a unique style based on a ready-made ... CMS Ucoz is currently the most popular content management system among webmasters due to its functionality and variety of available templates. However, newcomers to site building often have a desire to change ... The easiest way for a beginner to create a website is using a standard template. The uniqueness of the resource can be achieved by introducing a number of cosmetic and organizational changes in the standard design. You will need - site template; - Photoshop program; - extension for ... The ucoz system is a set of tools for creating your own website, even for those users who do not have design and layout skills. It contains a huge number of templates and blanks. You will need-… Hello dear blog readers. I want to show you how to change the template, wordpress theme from the standard one to the one we need. In general, what is a topic? A theme is a site shell, a skeleton. It can look however you want and customize it. The second name is template. Templates can be found on the Internet, there are many of them, both paid and free. The choice of theme depends on your wishes and. The novice webmasters, respectively, have no money :) Therefore, the free option will suit us. I also use a free theme, there is nothing to worry about. We decided on the topic of the site, let's say “Healthy image”. Visually sketched how you want to see your site: how many columns, menu layout, etc. Go to Google or Yandex and type "free WordPress themes" in the search bar, go to the sites and choose the theme you like. I found a universal theme After downloading, you get such a file - Sensation.zip. Now you need to install this theme. This can be done in several ways, depending on where you are installing the theme, on a local server or on a real hosting. To begin with, I will give an example, that is, to my computer. Go to the local folder, I have this C: \\ WebServers \\ home \\ localhost \\ www \\ global \\ wp-content \\ themes Open the archive with the theme "sensation.zip" and drag the folder from the archive to the folder with your themes "themes" Go to the WordPress admin panel, it is located at localhost / global / wp-admin, enter your data: username and password. Then go to the blog itself and refresh the page. That's all. In such an easy way, the theme of the design on WordPress is changed. M you can also use the internal theme loader. To do this, go to the vodpress control panel, the "Appearance" section, the "themes" category, the "Install themes" tab and use the "Download" button, uklocate the downloaded theme and download it. After successful loading, activate the theme, go to the site and refresh the page. The topic should change to yours. If you still have questions, ask them in the comments. Subscribe to blog updates and build it right! You can also read useful articles. Best regards, Mihed Aleksadr

Change the color of text and links


Instructions

Instructions
- in the menu "Image" - "Image size" look at its parameters -
- open a new sheet with exactly the same dimensions -
- create desired image using application tools
- flatten all layers and save (not for web) a new picture under the same name and in the same folder, setting the original format.
Attention, only TODAY! How to change template, theme to WordPress?