Use the command Transformation(path: Editing (Edit) - Transforming (Transform)).
Let's consider all operations separately.
How to rotate an image in Photoshop?
There are 2 ways to rotate the image. The first method is carried out using the commands Image - Rotate Canvas - 180 °, 90 ° clockwise, 90 ° counterclockwise or arbitrarily (Arbitrary):

In this case, the whole image with all layers is rotated.
To rotate the image by an arbitrary degree, you need to select the Arbitrary item ... and in the window that appears, enter the required degree of rotation and indicate clockwise or counterclockwise you need to rotate:

Using the second method (Editing - Transforming - Rotating), you can rotate a separate image layer or even a selected object in the picture:

In this example, I created a new layer with a man on a transparent background for clarity and rotated the man on the top layer. It should be noted that for the background (layer with a lock) the transform function is not active in the program. If we want to rotate the whole image with its help, we must first select everything (Ctrl + A) or remove the lock from the background, for which we are. When you select the “Rotate” function from the “Transform” group of commands, such a square selection along the contour of the image with anchor points will appear, by dragging which you can rotate the object:

Photoshop is the most powerful image editor, and there are no analogues like it in the whole world. However, some novice users of the program face many difficulties when working with it. This is due to certain reasons, but the main one is an incomprehensible interface. And in fact, compared to an editor like Pait, Photoshop is intimidating with its tools. But this is only at the beginning.
This article will walk you through four simple functions. We will learn how to flip an image in Photoshop, enlarge it, cut it and place text in it. These seemingly simple operations may seem rather complicated to newly arrived users of the program, but the detailed instructions that will be indicated in the article will help you easily figure everything out.
Flip the image
So, first of all, we will learn how to flip an image in Photoshop. So, in order not to rant for a long time, let's get down to the point right away.
The first thing to do is, of course, open the picture itself. This can be done in two ways. The first, and more understandable for beginners, implies clicking on the File item on the top panel, followed by clicking Open. The second way reduces the time spent. You must press the key combination Ctrl + O. In any case, a dialog box will appear in front of you. In it, pave the way to the desired picture, after which, having selected it, click "Open".

So, the picture is open, but before you can flip the image in Photoshop, you must first select it. How to do it? You can select a picture either completely or in a separate area. To do this, the toolbox contains the following objects: Rectangular / Elliptical Marquee Tool, Tool. But if you need to flip the whole image, then use the keyboard shortcut Ctrl + A.
Now you need to turn the picture over. To do this, you need to use tools such as Edit, Transform and Rotate 180˚. Once you have selected the desired tool, you can use the mouse to set the angle of rotation. Once you've decided on the angle, press Enter to apply the changes. It remains only to save the picture itself. To do this, press Shift + Ctrl + S. Specify the path where you want to save the file and click "OK". That's all, now you know how to flip an image in Photoshop.
Changing the scale of the image
Now let's talk about how to enlarge an image in Photoshop. Since you already know how to open it, we will skip this step. So, the image is in front of you. If you want to enlarge it to make it easier to work with small objects, you can use the Zoom Tool. You can also use a combination of hot keys: Ctrl + "+" - to zoom in, or Ctrl + "-" - to zoom out.

If you want to enlarge the drawing itself, then you need to use the Free Transform tool in the Edit menu. You can also call this function by pressing Ctrl + T. The hot corners mesh now appears on the image. To resize, move the cursor over the nodule and drag the mouse to specify a new size. In the event that you want the size to change proportionally, hold down the Shift key.
Cut out the image
Now I will talk about how to crop an image in Photoshop. To do this, you will need to use the Crop tool. It is located in the sidebar on the left, third in the list. Selecting it and holding LMB, select the required area on the image for cutting. After selection, the area can be edited by stretching in width or height. It remains to press only Enter. Now the excess that was outside the selection area has disappeared.
Insert text into an image
It is very easy to insert text into an image. To do this, use the Horizontal Type or Vertical Type tools, whichever location you want to see.

Now click LMB where you want to insert the image. After that, you need to enter your text in the field. At this stage, you can ignore its font, color or size. Now in the menu you need to open the "Window" section, in it select "Symbol". In the window that appears, you can modify your inscription as you like. Once you have made all the adjustments, you can safely save the image.
How to rotate in Photoshop?


Adobe Photoshop is an excellent image processing program with a wide variety of functions. Very often, when working with an image, it becomes necessary to reorient it. In Photoshop, you can easily rotate a picture, layer or other object without losing quality.
How to rotate an image in Photoshop
Often the photograph is taken with the camera turned, so that the image is lying on its side. This problem can be easily dealt with using a command from the menu.
Select the tab above "Image". A drop-down menu opens. There we find the item "Image rotation" and select the desired action. The editor will offer to rotate the drawing 180 degrees, 90 degrees clockwise or counterclockwise.
Usually, to position the photo as desired, rotate it 90 degrees counterclockwise.
If we rotate the image 180 degrees, we get a mirror image.
If, to create a collage, the author needs to rotate the image by some intermediate angle, there is such an item in the same menu: "Freely". There you can select any desired angle. When executing these commands, the editor will rotate the drawing around its center by the specified angle without the slightest distortion.
The Rotate Canvas commands are selected if the drawing itself does not occupy the entire area of the open file, and you need to rotate not only the drawing, but the entire file. When you choose the Rotate Canvas Horizontally command, the image will be mirrored.
How to rotate an object in Photoshop
If there is a need to rotate not the whole picture, but only a part of it, you will first need to select this very object.
- Find the Select tool on the left panel. If you right-click on it, you can select a rectangular or oval area. With the selected tool, select the part of the picture that you want to rotate.
- If, which happens more often, you need to rotate an area with a more intricate shape than a rectangle or an oval, then you need to select the Lasso tool from the panel on the left.
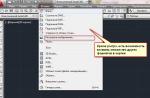
- Having selected the object that you want to rotate, use the tab from the top menu - "Editing".
- Pressing "Edit", we find the item "Transformation" or "Transform the contour", but not "Free transformation".
- In the drop-down menu, select the "Rotate" command.
- Move the mouse pointer to the selected area so that it takes the form of an arc with arrows at the ends. Rotate the selected area with the mouse by the required number of degrees.
This method is good for clarity: you can immediately see what happens. It should only be borne in mind that when you rotate a part of the drawing, most likely, in places from under the rotated part, a background will appear that does not coincide with the drawing.
How to rotate a layer in Photoshop
One of the advantages of Photoshop is the ability to work with layers. The layers are formed by themselves when a fragment is inserted into the picture. Many such fragments can be inserted. When adding a new fragment on top of the existing ones, the first ones remain unchanged. They can be transformed individually without affecting the background or other layers.
For the convenience of work, you can make all layers that are currently unnecessary to be temporarily invisible. To do this, you need the "Layers" panel, which is usually located at the bottom right. It displays all the layers in the picture and their sketches. An eye is drawn to the left of each sketch.
If you click on an eye, it will “close”, and the corresponding layer will become invisible in the drawing. He has not disappeared anywhere, just temporarily moved away.
To rotate one layer, you need to select it in the panel, make it active. Then follow steps 4-6 from the previous chapter. The layer will rotate.
Photoshop: how to rotate text
First, we type the text to be rotated. To do this, in the toolbar on the left, find the "Text" tool - the letter "T", press it. In the picture, mark the area where the text will be placed, type it.
In the menu at the top there is a tab "Text", and in it the item "Orientation". With its help, you can place the typed text vertically or horizontally.
If you need to rotate the text by an arbitrary angle, you should proceed in the same way as with the layer. Actually, the typed text forms a new layer. Therefore, you can work with the text in exactly the same way as described in the previous chapter: rotate it using the "Transform" command.
How to rotate a brush in Photoshop
Photoshop has a wide range of different brushes. To see it, you need to click on the tool in the left panel "Brush". If there is no such tool, right-click on the Pencil box in the same panel and select Brush.
At the top, under the main menu, click on the icon “Turn on / off the brushes panel. A panel with a new menu will appear. Select "Brushprint Shape", a window will open with a set of various brush sketches. Among them, there is probably a suitable one. One problem: many brushes are asymmetrical, and it is possible that you need exactly the same brush as this, only oriented differently.
No problem. There are several useful options under the brushes window. Having selected the desired brush in the window, you can flip it along the X-axis, along the Y-axis, or rotate it to the desired angle. In this case, the shape of the brush will be preserved, only the orientation in space will change.
After the brush is selected and rotated in the desired direction, you need to click on the icon under the menu "Turn on / off the brushes panel". The panel will disappear, and the selected brush will remain "in hand" and it will be possible to paint with it.
In this program, it is also quite often necessary to select different parts of the picture in order to cut them out, replace them or rotate them. The article, Selecting Objects in Photoshop, describes various ways on how to do this.
Now let's figure out what you can do if you need to flip the image in Photoshop mirrored or a few degrees. This will come in handy if the picture or photograph stored on the computer is rotated 90 degrees clockwise or counterclockwise, due to the fact that during the shooting the person was holding the camera or phone at the wrong angle. Or you need to make a collage of several photos or pictures. Then the frames rotated at different angles will look more interesting on it.
How to rotate a photo through the menu
Open the image you want to work with in Photoshop. Then click on the "Image" menu item at the top and select "Image Rotation" from the list. There will be several different items in the additional menu.
Here you can choose to rotate 180 degrees or 90 degrees clockwise ("CW") or counterclockwise "CCW". "Flip Canvas Horizontal" - used if you want to flip flip. Accordingly, "Flip Canvas Vertical" is a vertical reflection of the picture.
Selecting the item "Arbitrary" (Arbitrary) will appear such a window. In it, specify the exact angle to rotate the picture or photo in the "Angle" field. Then use a marker to mark in which direction to rotate: "CW" - clockwise, "CCW" - counterclockwise. Click OK.

The picture will be flipped by the specified angle: exactly 90 or 180 degrees, or by an arbitrary value.

Using Free Transform
You can also rotate the image in the following way. But before activating this mode, you need to make sure that the layer with the picture that we will twist is not blocked - there should not be a lock opposite it.
In the example, the layer is locked. To remove the lock, double-click on the layer. A window like this will appear. There is no need to change anything in it, just click "OK".

Now press "Ctrl + T" on the keyboard. A frame with markers will appear around the object. Move the mouse cursor outside the picture to any marker. When the cursor changes to an arrow, press the left mouse button and rotate the drawing. After turning, release the button.
In free transform mode, you can rotate the image as you want, or specify the exact value of rotation in the corresponding field of the top menu.
If, while rotating the picture with the mouse, press and hold "Shift" on the keyboard, then the rotation will occur at a clearly specified step: each time plus 15 degrees. That is: 15, 30, 45, 60, 75, 90 degrees, and so on.

By activating free transform, you can rotate the active layer separately or a previously selected area on this layer. To exit the mode, press the "ESC" button.
Rotate a layer with the Rotate View tool
Another method that you can use is the Rotate View Tool button. You can select the appropriate menu item on the toolbar, or you can use hotkeys and press "R".

After that, move the cursor over the picture. Click on it with the left mouse button and, without releasing it, rotate. An arrow similar to a compass arrow will appear. When you rotate the image to the desired angle, release the mouse button.

Choose a method suitable for you to rotate the desired image layer. Rotation through the "Image" menu is suitable if you have one layer: a picture or a photo. If you are making a collage, then it is better to use free transform, so that you can rotate a certain layer or selected object in the picture in Photoshop. Use Rotate View to see how the layer will look from a specific angle.
Rate article:We are looking for the word "Image" on the top panel, it is on the third line from the left. Click on it with the left mouse button. And what do we see? A menu appears in which there are buttons such as "Crop" "Trimming" "Canvas size" and so on. We need to find a button here, like "Rotate Canvas", it is the ninth one from the bottom and from the top. Remember, if a small triangle is drawn next to such a button on the right, it means that a menu will drop out of it. And so we press the button "Rotate the canvas" and see in it such actions as "180 degrees", "90 degrees clockwise", "90 degrees counterclockwise", "Arbitrary" about. There are two more points, but we'll deal with them later.
If we press "180 degrees", then the image that we opened at the beginning of the task is turned upside down.
If we press "90 degrees clockwise", then our image is rotated to the right edge to the bottom.
If we press "90 degrees counterclockwise", then the image is rotated left edge down and right up.
There is another interesting item "Freely" here. Having selected it, we have a window in which we can independently set the degree of rotation. Also in this window you can choose in which direction the turn will be made.
With this we figured out. Let's move on to those mysterious two buttons that I talked about earlier, "Flip Canvas Horizontally" and "Flip Canvas Vertically." If you want to make a mirror image of this picture, then these two magic keys will just help us. Let's select the item "Flip the canvas horizontally" and what did we get? Such an effect, as if a mirror was substituted for our picture on the right.
We will see the same effect only the mirror will no longer be on the right, but on top, if we select the item "Flip the canvas vertically".
But remember that in these ways we rotated the entire canvas. And in order to rotate only the selected image in the "Layers" window, you need to go to the "Edit" - "Transform" menu. In this menu you will find everything the same as in the canvas rotation menu. It is worth remembering that you cannot rotate a pinned image like this. The pinned image has a lock next to the mini-icon in the "Layers" window. In order to unblock it, you need to click on the thumbnail in the "Layers" window and, in the window that appears, click "OK".
Hooray, we figured out the first way of turning. We will continue to explore the boundaries of image rotation in the next lessons. You can watch them right now. In the article "you can find another way to rotate an image. See you soon!