Once you've signed up with Google, it's time to go to your account settings. Actually, there are not so many settings, they are needed for a more convenient use of Google services. Let's consider them in more detail.
Sign in to your Google account.
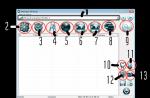
Click on the round button with a capital letter of your name in the upper right corner of the screen. In the window that appears, click "My Account".

This will open the page for account settings and security tools. Click on "Account Settings".

There are only two relevant sections in the Language and Input Methods section. Click on the "Language" button. In this window, you can select the language that you want to use by default, as well as add other languages \u200b\u200bthat you want to use to the list.

To set the default language, click the pencil icon and select a language from the drop-down list.

Click the Add language button to add more languages \u200b\u200bto the list. Then you can switch languages \u200b\u200bwith one click. To go to the "Language and input methods" panel, click on the arrow on the left side of the screen.


By clicking on the "Text Input Methods" button, you can assign input algorithms to the selected languages, for example from the keyboard or using handwriting. Confirm the setting by clicking on the "Finish" button.

Special abilities
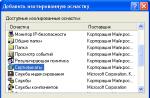
In this section, you can activate Narrator. Go to this section and activate the function by setting the point to "ON". Click Finish.
Google Drive capacity
Every registered Google user has access to free file storage, 15 GB. To increase the size of Google Drive, click the arrow as shown in the screenshot.

Increasing the volume up to 100 GB will be paid - click the "Select" button under the tariff plan.

Disabling services and deleting an account
In Google settings, you can delete some services without deleting the entire account. Click "Remove services" and confirm the login to your account.

To delete a service, just click on the icon with the trash can opposite it. Then you need to enter your mailbox address emailnot linked to a Google account. He will receive a letter confirming the deletion of the service.


Here, in fact, are all the account settings. Adjust them for the best experience.
We continue to publish instructions of the "Android for dummies" genre, and today the topic of the instructions sounds like this: "How to add, set up and delete a Google account".
When turning on any smartphone for the first time, the user will have to create a new account or add an existing one. And if iPhone has AppleID, then Android has Google accounts. Today we will talk about why this is needed, how to add an "account", configure it or remove it.
Why do I need a Google account?
Despite the fact that we, in fact, create an email address in the corresponding system, we have much more functionality. Let's list the main services that can be used after registering a google account:
1) Gmail. It is convenient to use it in Google Phones due to the fact that it is integrated into the software environment. In fact, to work with mail after purchasing a new smartphone, you will not need anything other than initial login (adding an account to the device);
2) Contacts. When adding contact phones to a smartphone, there is an option to save them “In Google-account”. Thus, we no longer need to write down the same phone number ten times on different devices or transmit it via, say, Bluetooth. Now it's enough to simply add the corresponding google account to the required devices and enable synchronization of contacts;
3) Google play... From a gaming point of view, this item is a priority. To install applications, games, download books and music from this service, the presence of an active account certainly. Paid applications will also be tied to it, so you will need to take care of such an account over time like the apple of your eye;
4) Google chrome... Such a handy little thing was introduced by the developers especially for those people who have given their preference to using this browser, whether on a smartphone, or on a PC or laptop. In fact, the use of the same account of what is there, what is there gives us the ability to quickly synchronize the bookmarks of web pages;
5) Google Drive. The company's cloud service now allows you to store files of various types in it. These can be text records, music, videos, tables. In general, anything you like. To quickly exchange files between a smartphone and a PC, I recommend installing the service on a computer;
6) Youtube. In general, Youtube refers to applications (services) that can work without active accounting. You can watch the video while doing this. But if we talk about such functionalitylike likes and dislikes, comments on videos and so on, they will all be disabled;
7) Google Plus. I don't think you need to talk about what to use social network from Google without having a proper account is simply impossible. Everything is clear here.
8) Other Google apps as well as third party apps
How do I create a Google account?
Disclaimer: example shown on Android 6.0 with Flyme proprietary shell. First, let's try to add an existing email address.
1. If you turned on your smartphone for the first time, then regardless of android version and the shell, you will be prompted to enter your Google account information or create a new one. If you need to add an account to an already working smartphone, go to the settings and look for the item with accounts, where we select the add function. If you are launching a brand new smartphone out of the box, this step will be one of the first by default;


6. We are waiting for the verification of the data and, if successful, add the payment data (optional, needed for purchases on Google Play);

7. Voila! Account added to our device!
Now let's look at a more complex situation. Let's assume that we have not yet been registered with Google. Then you need to do the following:
1. Again we turn to the settings, if the device is already working, if this is the first turn on, then go to step 2.


7. If necessary, add a phone number (for password recovery, for example);


In fact, after adding an account, there is no need to carry out any tricky manipulations with it. Mail is configured separately, and it is advisable to do this through a browser on a PC. And we'll see what can be configured specifically on a smartphone. For this:
1. Go back to the settings, to the category with accounts and select the desired account;
2. We see a list of synchronized services;
3. Mark the necessary boxes;
4. In the upper right corner, select the synchronization function.

As you can see, between two or more devices, you can sync data from the Google Fit app, other apps, calendar, and contacts. As for other programs ... It can be, for example, games. In the same Last Day on Earth You can restore progress by adding a Google account to which this progress was directly linked.
2. Go to the item with accounts;
3. Select the required account;
4. Using the context menu, select the “delete” function;
5. We confirm the deletion.

To install applications from Play Market, save all kinds of documents on the "cloud", as well as use many other useful functions from Google, you need to create an account. Most users have only one account, but sometimes it becomes necessary to change accounts in order to log in from another. Many users are interested in how to change an account on Android. You can accomplish this task using standard smartphone functions.
When is it necessary to change your account
The first option is that you need to sync some data with your phone. These can be numbers, calendar dates, photographs, and more. For this purpose, you will have to log out of your account and then log in to another one that stores all this information.
Another case will be useful when you need to install any paid application. It can be purchased from your friend on his account, so you just need to log into his account and then install the desired program on your phone. It is not uncommon for you to simply forget the password for your old account. If it did not have any important data, it is much easier to create a new Google account, therefore, do not bother with the password recovery procedure.
Step-by-step instructions for changing your account
So, your phone is currently synchronized with one entry, and you need to log into another Google account. It's easy enough to do this on Android, but you'll need to delete your old account first. This can be done thanks to the following instructions:
- Go to your gadget's settings.
- Find the section "Accounts" (may be called "Personal Data").
- It will present all the systems in which you are authorized. You need to select Google.

- You will be taken to the settings window, where the synchronization of various data is activated. You need to press the function key of the gadget or the icon with three dots on the right side of the screen.

- Select "Delete account" from the dropdown menu The system will ask you to confirm your choice. Do it.

- If you installed the security system, then before that the phone will ask you to enter a password or pattern.

This completes half of the task. How do I change my account? Now you just need to add a new account. This is done in the same settings section on the phone:

Now you know how to change your account on Android in just a couple of steps. If you need to create a new one, then you can select the "Create account" menu in the mail entry window. You will have to go through the entire procedure again: enter your first name, last name, date of birth, come up with a mail and password.
Google is actively improving the security of the Android OS and introducing such "anti-theft" protection as linking the device to a Google account. This article explains how to bypass your Google account after a reset.
Before you start re-reading the article! Read the comments first, and then carefully the whole article!
A little background
Google with each new release of Android is trying to raise the level of security of this mobile operating system and introduces all new protection mechanisms.
So from the version of Android 5.1 Lollipop, a new anti-theft mechanism has been added, the essence of which is as follows: the owner of a smartphone or tablet after purchase binds the device to his Google account. If the device is suddenly stolen and the attacker erase all the data, then he will run into the protection of Google Device Protection called Factory Reset Protectionor FRP.
But not everything went as smoothly as you wanted, if you bought a phone from your hands or forgot your account and performed a reset, then naturally you fall into the FRP protection. You need to reset your Google account!
Workarounds
Google account after reset
If viewed globally, then there are two options for resetting protection:
- Official
- Unofficial (Factory Reset Protection Bypass)
Let's first look at the official version of resetting FRP or how not to get into this problem when resetting, and then we'll look at all the ways to bypass Factory Reset Protection.
Official Reset / Bypass FRP
- Enter the login and password from the Google account that was before the reset, if the device was purchased from hand, then ask for this information
- From your computer, go to your Google account settings and
- If you have receipts and warranty coupons, contact the service center
- When replacing key modules or the motherboard of a smartphone or tablet
To completely disable Factory Reset Protection / FRP

If Andoid Doesn't Accept Password After Reset
If you try to enter your Google account after resetting Android settings, but you can't go further, then most likely you recently reset your password, if so, then wait 24-72 hours, then try again.
Factory Reset Protection / FRP Bypass Or How To Bypass Google Account? (Unofficial)
Below we will suggest many methods of how to unofficially bypass FRP protection, you just have to try each one to get a working Android in the end.
Option 1 bypass Google account after reset
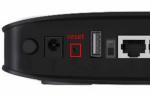
- Insert a SIM card into the device on which you want to delete a Google account
- Call on given android device
- Accept the call and click the add new call button
- In the dialers, write any numbers and "Add a number to an existing account"
- Enter your Google account details
- Save contact in your account
- Restart Android
Option 2 bypass Google account after reset
- Insert SIM Card into Locked Android
- Call this device
- Accept the call and create / add a new call
- In the dialers, we dial the following engineering code * # * # 4636 # * # *
- After typing, your Android should automatically be redirected to the advanced settings menu
- Press the back button and find yourself in the settings menu
- Go to the section " Recovery and reset" or " Archiving and Restoring«
- Disable "Data backup" and everything related to data recovery
- Resetting the settings
- When setting up the device for the first time, we enter our account
Option 3 bypass Google account after reset
If your android device supports Fastboot, you can try to reset FRP through it.
For this you need:
- A computer
- Installed
- per device
- Transfer device to
Then you can enter the following commands:
fastboot oem clean_frp
or execute a command like this
fastboot erase persistent
fastboot erase frp
fastboot erase config
Option 4 bypass Google account after reset
After the reset, you need to try to enter the settings menu and then you will need:
- A computer
- Installed
- per device
- Connect Android to Computer and Run ADB RUN
Then enter the following commands:
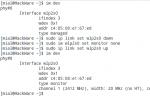
adb shell content insert --uri content: // settings / secure --bind name: s: user_setup_complete --bind value: s: 1
adb shell am start -n com.google.android.gsf.login /
adb shell am start -n com.google.android.gsf.login.LoginActivity
For this method you need official firmware for installation using a computer. This firmware must contain a scatter.txt file.

Option 7 bypass Google account after reset
- We install the SIM card, turn on Android and get to enter the Google account
- From another phone we call the installed Sim in the locked Android, accept the call, hold the center key until Google Now appears, end the call from another device.
- Click on the button Back to, in the search bar, enter the word "settings" and go to them
- Next, we move to the "recovery and reset" section and turn off all the checkboxes and reset Android settings
Option 8 bypass Google account after reset

Option 9 bypass Google account after reset
For this method, you need to have:
- Ability to install an SD card
- Download and dump file to memory card
Then put Android into Recovery mode and flash the FRP-False.zip file.
Option 10 bypass Google account after reset
- We connect to Wi-FI
- When the network check starts, we go back
- Choose another Wi-FI network, no matter what
- In the field for entering the password, type absolutely any characters, then select them, and click on three dots (additional menu) and "Show hints"
- In Google we write "SETTINGS" and open the phone settings
- Next, select "Restore and reset" -\u003e "Reset DRM licenses"
- We return to the Wi-Fi connection, connect and enter a new account
Option 11 reset FRP. For Xiaomi
- Choosing a language
- Select region (country of residence)
- Connect via Wi-Fi to the Internet
- Go back to the beginning with the back key
- Hold on the welcome page with 2 fingers, until incl. TalkBack
- Draw an L on the screen
- Select TalkBack settings
- Hold down the volume keys at the same time and turn off TalkBack
- Scroll to the bottom and select "Help Feedback"
- Start the video clip and go to YouTube (when switching, click three dots)
- We find a video with a link to the description (almost all videos are Android +1)
- Click on the link and then three dots, launch Chrome
- We enter Chrome, skip the login
- We type in the search " quickshortcutmaker «
- Download the found application
- Start Installing App\u003e Allow Installing Apps
- Download the app again and install it
- Run the application
- Turn on voice search and find "Settings"
- Select view
- Go to the settings in the "About phone" menu
- Press quickly seven times on the item "Miui Version" 7 times
- Come back
- Go to "Advanced Settings"\u003e "For Developer"
- Select "factory unlock"
- Come back
- menu "Recovery and reset" and reset
Do you still have additional questions? Write them in the comments about what you did or vice versa!