Hello friends!
This is another material on working with images.
In it, you will learn how to reduce the size of an image without losing quality using Paint, Photoshop and an online service.
Moreover, you will learn how to do it in two aspects. After all, the size of the image has 2 meanings:
- Size in pixels, that is, the height and width of the picture;
- Size in kilobytes, that is, the weight of the image on a computer or other medium.
This material is suitable for everyone who is interested in reducing the size of their images, photographs, and so on. And it will be very useful for site owners, since it is categorically not recommended to place large-sized and heavy pictures in their materials.
Let's start with a little consideration of the need for all of the actions discussed below.
With regards to changing the height and width of the picture, there are many options: you need the required size for printing, for placement on the site, to reduce the same weight of the picture, since when the size is reduced, it decreases.
Weight reduction may be required to save weight on the media (hard drive, flash drive, etc.), to quickly load images on the site, and so on.
There are actually a huge number of options. In order not to torment, we begin to practice.
By tradition, I give a detailed video lesson in which I showed everything clearly.
Now for those who like text instructions.
Resizing in Paint
To change the dimensions of the height and width, I do not recommend using any online services, since this can be done using the standard set of programs and even the standard editor of the Windows operating system - Paint.
We open the image in Paint and on the "Home" tab there is an item "Resize".
By clicking on it, we can change the size without losing quality (if we reduce it) and without losing proportion. To do this, be sure to activate the setting to maintain proportions.

By changing the horizontal and vertical dimensions, you adjust the width and height of the image accordingly. Select the necessary parameters, click on the "Ok" button, and then save the resulting file to your computer.

This is the end of the image resizing in Paint.
By the way, changing the width and height parameters also affects the weight of the image. Therefore, take note of this.
Now let's look at the option using Photoshop.
Resizing in Photoshop
Open our image in the program and move to the item "Image - Image size".

In the next window, the change occurs in the same way as in Paint. Make sure that there is a check-box to maintain the proportions and set the necessary parameters for the height or width.

After clicking on the "Ok" button, the size parameters will be applied and you can save the file.

These methods are quite enough for resizing the height and width of images.
Now we will look at 2 ways how you can reduce the weight of images.
But before that I want to note that you already know one way. If you do not need images that are oversized, then you can reduce their height and width, thereby reducing the weight by several, or even tens of times.
Reduce weight in Photoshop
This method will be very useful for site owners, since the less the page weighs, the faster it loads. And this is very important. The method is also suitable for any needs.
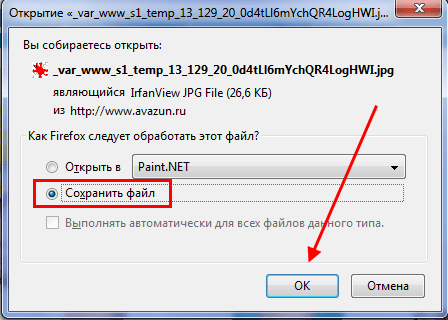
After opening the image in Photoshop, you need to immediately save it, but not usually, but for the web and devices.

In the next window, you need to set the image quality parameters:
- The quality is high (60-70). Adjust the value to suit your needs;
- The format is jpeg. If you need to preserve transparent areas in the image, then you need the png format;
- Also set the setting to "Progressive".

You can also resize right in this window, and not separately through the item "Image - image size", as I showed it in the paragraph earlier. It is very convenient.
After setting the parameters, save the settings (see the screenshot above).
Only in this way I was able to reduce the weight of the image from 116 kb to 75 kb without changing the dimensions (the height and width remained the same).
In this way, you can play with the quality value. It all depends on why you need to reduce the weight of the image. It is quite possible that you can set the parameter and smaller, making the weight even less.
Now let's look at how to reduce weight using an online service.
Online service for optimization
This method is very useful already for reduced images. For example, if I have already reduced the picture earlier in Photoshop, then with the service we can finish the size completely.
The service has a name krakin.io... Let's go to it. I gave the link directly to the image selection page.
On this page, you first need to decide on the compression ratio of the image. There are 2 parameters responsible for this:
- Lossy - strong compression (default);
- Lossless - less compression.

You can only determine this parameter by testing them. Therefore, try to compress the picture this way and that, and then select the desired option.

The image is immediately optimized and we will see a report on the work done under the area for selecting a file.
It can be seen that the original file size was 77 kb, and after optimization it became 59 kb. It also shows how much was compressed in kilobytes (18 kb) and in percentage (23.8%).
To save the compressed image, you need to click on the "Download this file" button in the last column "Status". We will be transferred to a new tab, where the final image will open so that we can evaluate it. To save, you need to right-click on the image and select "Save Image As".

If you watched the video at the beginning of the article, where I clearly showed the process and all the nuances of this article, then you know that only these methods can reduce an image from 360 kb to 40 kb. And this is not the limit.
This material has come to an end. All the methods described in the article, as an ordinary Internet user, you will be with your head.
In the comments below, I will be interested to know some of your ways to reduce the weight of images. Maybe there is something simpler, but effective. Therefore, I am waiting for you below near the comment form.
Best regards, Konstantin Khmelev!
Image size too large? Doesn't fit into a letter or a website? Now let's quickly figure out how to make him lose weight! Probably everyone at least once faced the need to reduce the size of the image. After all, pictures from digital cameras and even from mobile phones are not at all small.
It's not hard to master a couple of tricks. To do this, it is not at all necessary to put such a monster as Photoshop. This can be done using standard Windows 7/8/10 tools or using third-party utilities.
How does it work at all?
Before reducing images, it is useful to understand how it works, which way to go and how much you can compress the image. Several image formats are used in everyday life:
- BMP - uncompressed images, very large
- JPG or JPEG - compressed images, the most common format
- PNG and GIF are also compressed images. Weigh more than JPG, but have additional features like transparent background or animation (gifs)
There are also a million more formats, but it's important to understand that:
- BMP can always be reduced tenfold by simply converting it to JPEG
- PNG and GIF - can also be compressed, but not by tens, but by 1.5-3 times, while losing the transparent background or animation, if any.
- If the file is already JPEG, then you can compress it by reducing the resolution and / or quality
Resolution is the number of horizontal and vertical dots in an image. For example, a camera with a 10.1 megapixel matrix has a photo resolution of 3648 × 2736 pixels. It may need to be reduced to 640x480 pixels, for example. That is, you can reduce the size of a photo by converting it to another format or reducing the image resolution.
INTERESTING: if your file is with the BMP extension, then it can be reduced many times by simply resaving it in JPEG. If you use 100% quality, then the difference will not be noticeable by eye. How? Read below.
How to reduce image size using standard Windows 7/8/10 tools
For this we need the standard Paint image editor. You can watch the video or read the article:
Action point by point:


- And enter in percentage how much to reduce the picture, or specifically in pixels. By the way, in Windows XP you can only enter a percentage. If you leave the "Maintain aspect ratio" checkbox selected, the image will not be squished or stretched.

- Save the image as JPEG.

The only thing that cannot be done in Paint is to change the saving quality in JPEG (compression quality), but this can be done in third-party utilities. By the way, the Paint program is still useful for you.
Compressing photo sizes using Irfan View
The Irfan View program is one of the most popular, very lightweight, allows you to correct the photo in different ways. Worldwide, about 1 million people download it a month! Download the wonderful and free IrfanView program on the official website from the Download section.

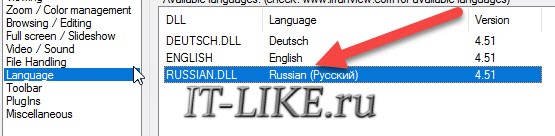
During installation, you can click "Next" all the time. To apply the Russifier, you need to enter the menu at the first start "Options -> Change language ..." and select "RUSSIAN.DLL".
After installing the program, in the context menu of images will appear "Open with -> IrfanView"... We select it.
Go to the menu Image -> Resize Image

The window provides the ability to change the size at your discretion, as it is convenient for anyone. You can enter the desired size in pixels, centimeters or inches, you can use a percentage, you can choose one of the standard sizes, or just click the "Halve" button

I also recommend choosing the "Lanczos (slowest)" conversion algorithm. This is the highest quality algorithm, and the slow speed will be noticeable only when batch converting tens and hundreds of images (this function is also in the program).
Now we save the file in the menu "File -> Save As" and select the type JPEG. Here you can select the JPEG compression quality. The higher the better. The loss of quality from 90% is almost imperceptible, and at 100% there is almost no loss of quality, but the file size increases. For large images intended for uploading to the site, it makes sense to check the "Progressive JPG format" checkbox. In this case, the image will not load from top to bottom, but first a blurry silhouette will appear, and then the full version. I think you've seen this on the Internet.

I just want to send an email in Outlook!
And if the task is simply to reduce the size of the attachment in Microsoft Outlook, then in the message editing window, click "Attachment Options ..." and select "Reduce picture" ("Select picture size:") and the preferred size. You can set "Large (1024 × 768)" ("Large") if there are few images in the attachment.

Now you can easily save pictures with the desired resolution for a website, mail, or without installing Photoshop. Share this helpful tip with your friends using the social media buttons!
Often, the user may need to reduce graphic files, both their resolution and size in general. Such actions are most often required when posting photos on Internet resources or sending by mail ...
How do I reduce the size of an image?
Let's consider a couple of the most primitive ways to reduce the weight of a photo or picture. The simplest is to use the capabilities of the standard Windows graphics editor - Paint.
- Open the selected image with Paint
- Click the "Menu" item on the top bar and select "Save as ..." from the context list.
- In the window that appears, change the name of the file so that the original image remains unchanged.
- A little below you can change the format for the file, the best option would be - JPEG
- Click save and you can compare the size of the original file and that obtained by saving in Paint. I got that the compression is about 5 - 10%
Most likely, such a difference in size is obtained due to a certain encoding of the file when saving. As I have seen in practice, such a solution does not always work, and the result is best seen in the original photographs. So for example, you will not notice the difference when saving a small image up to 150 Kilobytes in size and a resolution of no more than 800 x 600.
Compressing photo size with Microsoft Picture Manager
The second method of weight reduction is more intuitive. In order to use it we need a graphic editor - Microsoft Picture Manager. This program is supplied as part of, and is found in almost all versions of this product.
You can find the program along the path: Start - Programs - Microsoft Office - Microsoft office tools; or by right-clicking on the original image - select "Open with" and click the program you are looking for.
- Open the photo in Microsoft Picture Manager
- At the top of the main program window, find the "Change" button - click it.
- After that you will have a side toolbar of settings.
- After that, find the last two items in the panel that appears, which are responsible for the size of the image.
- Depending on the change in the photo, select the item. If you need to reduce the resolution of the photo - "Resize", if you want to reduce the file weight, then "compress pictures".
- Let's use the first point and reduce the resolution of the photo. Find the Percentage of original width and height "select and set a value between 1 and 99 percent, values above 100 will increase the resolution.
- I decided to reduce my photo by exactly half, which will be equal to 50% of the original resolution. Below you can see the preliminary calculations of the resolution.
- In order to save the desired result, you need to click the "OK" button at the end of the sidebar.
- After the changes, you should save the resulting photo in a separate file so as not to affect the original image. Click the "File" item at the top and select "Save As ..." from the context
- Change the file name or storage location!
- "Compressing Pictures" is nothing complicated, just open a photo or picture for editing, go to the last item "Compress Pictures".
- and from the proposed list of compression patterns, select the required one.
- I chose compression for "web pages"
- As well as in resizing, you can observe how the image is resized, in my case it has decreased by almost 11 times.


- In order to save the result, do not forget to click the "OK" button at the bottom of the sidebar.
- In order not to affect the original photo, follow point 9 - 10 of this instruction.
Instead of an afterword
Simple actions for editing graphic files helped us to make our image several times smaller. And the main thing is that we do not need special knowledge and programs to complete it. Remember that most often, after such changes, the image loses its original quality.
Photos, pictures and screenshots on your site are needed to illustrate the written, attractiveness and stand out from other sites. In addition, we love to share the photo with friends via email or upload it to social networks for everyone to see.
A problem arises of how to reduce the weight of a photo without deteriorating the quality in order to quickly upload it to a social network, send it by e-mail or post it on a blog. How to optimize images for better promotion of your website?
Small-sized photos do not load your hosting server, they allow you to increase the speed of your blog and speed up its promotion. I will tell you about the 2 fastest ways to reduce the weight of your photos.
How to reduce the weight of photos in Microsoft Office Picture Manager.
The fastest way to reduce the weight of a photo is to use the existing programs included in the Microsoft Office suite, for example, the image processing manager Microsoft Office Picture Manager.
1 Way how to optimize pictures


Compress for documents. In this case, the photos are saved in a size of 1024x768, this is a fairly good quality and the weight of a photo from 6.7 MB is reduced to 478 KB

Compress for web pages. In this case, a photo of medium quality is obtained in the size of 448x336 pixels and the original size is reduced from 6.7 MB to 91.5 KB

Compress for email messages. Now the biggest reduction in size to 160x160 and weight from 6.7 MB to 11.6 KB is taking place.

Do not forget Save as, it is better than Save, because the original file does not disappear in the best "heavy" quality.
In addition to photographs, you can also optimize pictures.
2 How to optimize pictures

We use standard width and height. We put a point, then press the black triangle. In the drop-down menu, select the desired option (for example, web small 448x336 pixels) OK

The size of the picture is optimized to 448x336 pixels, and the weight can be viewed after saving. In my case, the weight of the photo has decreased from 6.7 MB to 123 KB.
We use arbitrary width and height. We put a point, set the desired width and height - OK - Save as

The size will be 400x300 pixels, respectively, and the weight is 103 KB
Use the percentage of original width and height option. We put a check-box, select a percentage (for example 10) - OK - Save as.

It turns out a new size of 397x298 pixels and a new weight of 103 KB
Sometimes you need to reduce the size of photos to send to email or upload to a dating site, or to your favorite social network.
The fact is that modern cameras take photos in high resolution, which is of course very cool, but at the same time such photos have an impressive size. Up to several tens of megabytes.
Of course, on sites such a large photo will take a very long time to open, and those with a slow Internet connection may not wait at all until it is fully loaded.
What then is to be done? It's simple, we can reduce the photo or shrink it. At the same time, this will not be noticeable on the site - the photo will still be as natural.
There are many programs for reducing the size of pictures and photos, and there are sites that allow you to do this online.
In this article, we let's look at a few programs first and then provide a link to a site that will reduce the image online.
We use the standard Paint program
Paint is included by default in Windows 7 and other versions. In order not to search for it for a long time, you just need to click on the "Start" icon and enter "Paint" into the search bar:
The program we are interested in is in the list of found budens. We launch it.

There will be a document-shaped icon on the left.

When you click on it, a menu drops out from which we select "Open".

We find a photo on the computer, which we will reduce.

Then, in the program menu, click on the inscription "Image" and "Resize"

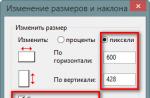
Switch the button to "Pixels" and enter the number you need. Please note that if the "Maintain proportions" checkbox is checked, then when you enter a value horizontally, the vertical value will also automatically change.
If you want your value both there and there, then uncheck the box, but then the image will be distorted: stretched or compressed (if it is not proportional).


Disadvantages of Paint is that we cannot influence the compression force. Therefore, we will look at a very similar program Paint.NET.
Resizing and compressing the image with Paint.NET
Paint.NET provides us with the ability to influence the force of compression and the size of the output photo. Therefore, we recommend using it.
This program is also usually already installed on the computer. Try again to press start and enter Paint.NET already.
If you find it, run it, if not, then follow this link http://paintnet.ru/download/ you can download it. The program is free. Install it and run it.
As well as in the program described above, open the file on the computer, and then in the menu "Image"> "Resize", or the keyboard shortcut Ctrl + R.

We also set the parameters we need.


Free SmallFoto Batch Image Processing Software
This program is very easy to use, with a free license, and allows not only to reduce and compress images, but also to overlay a watermark, process and rename several images at once, i.e. batch processing is supported - whole folders.
SmallFoto program appearance:

Selecting "Source"- a folder on your computer with your original images (the folder can contain any number of images or photos);
Also select "recipient folder" where the reduced copies will be saved. You can create it in advance.
Select the size, format and quality you need by clicking on the appropriate buttons and pressing "Start". That is, everything is very simple. The same photos will appear in your "Destination Folder", only with the new size that you wanted.
Reducing the size of photos online
Nowadays, there are many sites that you can go to, upload a photo and get a thumbnail copy of it.
This means that you do not even need to launch any programs to resize the photo. Of course, online sites have much less opportunities than programs provide, but if it is important for you to quickly reduce something in width and length, then why not use them.
Such an opportunity will not be provided by the website www.avazun.ru, but the exact link of the tool http://www.avazun.ru/tools/razmer/

Click, select a photo on your computer. After downloading, a window will appear with the ability to set the dimensions, and the download button.

Download the resulting image to your computer.