To make the procedure for creating a screenshot faster, there are special programs and extensions. They can be installed both on a computer and in a browser. The essence of such applications is that they help to take screenshots faster by manually selecting the desired area, and then upload images to their own hosting. The user only needs to get a link to the image or save it to his PC.
Extensions
This method is especially relevant if you mainly use one browser and you do not need a whole program for your computer. Among the extensions, you can find several interesting ones, but we will focus on a simple extension called Lightshot.
The list of extensions, if you want to choose something else, you can browse.
Install Lightshot
It differs from the extension in that it is always launched, and not only while working in Yandex Browser. This is very convenient if you take screenshots at different moments of working with your computer. Otherwise, the principle is the same: first, start the computer, select an area for the screenshot, edit the image (if desired) and distribute the screenshot.
By the way, you can also look for another program for taking screenshots in our article:
This is how you can easily create screenshots while using Yandex Browser. Dedicated apps can help you save time and make your screenshots more informative with a variety of editing tools.
Techsmith Snagit is a very interesting extension for the Google Chrome browser that can take a screenshot of any area of the screen, add text, highlight the desired area using an ellipse and a square, and record a video in your browser. As soon as I learned about his remarkable abilities, I immediately studied his possibilities and began to use in my work.
Download extension ( approx. before it was possible) in the online store of extensions Chrome Web Store.
After installation, an icon will appear in the browser, when you click on it, the control panel appears on the right side of the screen. Techsmith Snagit can:
- capture any area of the screen
- the entire visible area of the screen
- make a scroll of the entire page (the plugin scrolls the page itself and takes a snapshot)
- add text to the image,
- select text using arrows, ellipse, square
- record video of the screen moving to any web page
How to take a screenshot
To take a screenshot of any part of the page, click Region and select an arbitrary region. Even after you have selected an area, you can move it anywhere by simply holding down the mouse cursor. Then we press the camera icon (in the lower left corner), or on the cross, if we change our mind.

If this is your first time after installing the extension, Techsmith Snagit will prompt you to sync with Google Drive, which means that all snapshots and videos will be stored in a safe place and can be easily found and viewed on Google Drive if needed.
After you click on the camera icon, a picture opens in a new window, which can be edited:
- write the file name in the upper field
- select text in available ways

To learn how to take a screenshot of a scrolling page, the following image is shown graphically:

A Techsmith folder will be automatically created in your Google Drive - the application library, in which all the pictures will be saved, and which you, in the future, can share or use as intended. This folder can be accessed directly from the extension's control panel by clicking My captures at the bottom of the panel.
How to make a video with Techsmith Snagit
The motivating factor for installing this extension for me was the ability to make a video very easily and quickly. I know that not everyone can decide to record a video with their own voice, and this is a certain psychological barrier for me too, including one that I try to overcome.
And the first step towards overcoming my complex was the installation of the expansion and the setting of the task. I completed the task, but the reality turned out to be much worse than I expected - I did not like everything about him. Now I'm analyzing my mistakes, and the next step is to record a video according to a prepared script. First, I write the lyrics, read and develop confidence in my voice. And so, until I can do without a test. I believe that a video lesson is well received by viewers if it sounds clear, clear and confident in speech.
Nevertheless, the thirty-second video, nevertheless, turned out, and you can watch the video yourself, which was made using the Techsmith Snagit extension.
How to record a video
In order to record a video, click the Screen icon in the control panel of the extension, and if you want to record a video without sound, then click on the microphone below, if you need sound, then you do not need to click on the microphone. You will be prompted to select a video recording format, I usually choose full screen mode.


- watch video
- save video to google docs
- upload video to Youtube
- convert video to GIF format and download to your computer (example above)

And one more note: it happens that when using the Google Chrome browser there are some web pages that will not allow us to open the panel when we click on the extension icon. In this case, do not worry, as a pop-up window will appear instead of the control panel, which will offer you either to take a screenshot or record a video.

I would like to add a fly in the ointment to all the indisputable advantages of Techsmith Snagit: unfortunately, I was unable to record the entire process of creating a video from start to finish. If someone knows how to do this, please write in the comments.
Let's summarize
This extension is very useful, because it allows you to very quickly and visually take a screenshot of any part of the page, mark important elements on it, add text, and send a link to the image to a friend or colleague, as well as record a video tutorial, make a presentation for a future event and save the video in video.avi and gif formats.
What's more, Techsmith Snagit can be successfully used for any educational activity and teamwork, thanks to the integration of Snagit for Google Chrome with Google Drive. For successful work, you do not need to install heavy or paid software on your computer, and using and managing the extension is easy and straightforward.
If by your occupation you need a tool for creating and quickly editing screenshots and videos, then I think this is the very case when you can safely replenish your toolbox with another wonderful plug-in for your browser and appreciate the abilities of an amazing extension for Chrome - Techsmith Snagit.
There are several ways to take a screenshot - a screenshot of the screen.
With the help of special programs for taking screenshots, built-in plug-ins into the browser, and using the standard method using hotkeys.
Let's start in order - a screenshot in the Yandex browser can be made using a special "Screenshot" plugin. To install it;
- In the Yandex browser, click on the sandwich in the upper right corner;

- In the menu that opens, select the "Add-ons" item;
- Scroll to the end of the list to the link "Add-ons for Yandex browser", click on it;

- In the search bar, on the site of extensions for the Yandex browser, write the query "Screenshot" and click Enter;
- Choose from the proposed options the add-on "Screenshot for Listick.ru";

- The plugin installation page will open - click on the green "Add to Yandex browser" button;
- Next, click "Install extension";
An icon in the form of a small camera will appear in the upper right corner of the Yandex browser; to activate the add-on, you need to click on it. A window with initial user settings will appear.
- Press the button "Continue".

Screenshots can be stored in the cloud
For further work with the extension, you need to register on the cloud, click "Create an account" or "Login" if you already have an account on this resource. After registration, you can enter the cloud through social networks by clicking on the corresponding icon.
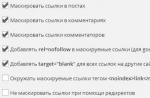
This extension has a number of advantages, you can save your pictures not on your computer, but on the cloud, sort them, change them, create notes, and links to your screenshots.
- Move saved screenshots: you can move your screenshots across the cloud storage window and arrange them as you like;
- Download to computer;
- Share them on social networks;
- By clicking on the screen, automatically open the page where the screenshot was taken;
- In the storage, you can create notes and upload previously created screenshots or any images and photos.
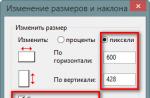
When you need to create a screenshot, just click on the icon with the camera, resize the image by grabbing any angle with the mouse cursor and drag the area that needs to be saved by dragging. Then click "Continue", the file is automatically uploaded to the repository, where you can do whatever you want with the snapshot.


You can take screenshots directly in the browser
The latest versions of Yandex browser already have built-in functions for taking screenshots, which only need to be activated in the settings.
- In order to activate the Yandex browser extension for taking screenshots of the Lightshot, click on the sandwich in the upper right corner of the Yandex browser;
- Select the "Add-ons" item;
- In the window that opens, opposite the "Lightshot Screenshot" add-on, set the value to "on".

An icon in the form of a purple pen will appear in the panel of active add-ons, clicking on which automatically turns on the screenshot function, select the area you want to capture with the mouse cursor.

Useful software - a program for screenshots
And you can also install a special program for taking screenshots, it will not only work in the Yandex browser, but also in any other browser, and you can simply take screenshots of any screen state regardless of the active application or program.
- Downloading the Lightshot program from the official website - https://app.prntscr.com/ru/
- Open the folder with the downloaded file, and double-click to launch the installation by selecting the "Open" item;
- We pick up the language;
- We accept the terms of the license agreement and click "Next";
The program is installed: now, in order to take a screenshot, you need to click on the program icon in the lower right corner of the screen, in the tray. Select an area for a screenshot, and save it. Or press the PrintScreen key on the keyboard and do the same manipulations.

As you can see, there are enough ways to take screenshots: third-party software, built-in plugins and extensions, and standard methods. Such as the PrintScreen key, with which, in order to take screenshots, you do not need to install any software.
It is enough to press the button at the right moment and save the screen, having previously edited it in the standard Paint program.
Screenshot is a typical snapshot of all or part of what is currently displayed on the monitor. In fact, it is a very functional tool that is used in various areas of the user's life.
Why do you need a screen:
- To describe the essence of the problem. When contacting the forums for help, it is always better to demonstrate the problem: an error, a crash, incorrect program behavior. Screenshots help illustrate the problem;
- To save information. Often there are funny pictures or important parts of a video. Having created a screenshot, we can always access it directly via the network or from the computer's memory;
- To create images. Suppose you have a large picture from which you want to cut out a separate part of the image. We can follow the path: download the photo, launch Paint and crop the borders of the image. A simple way is to immediately capture only a part of the image with a screenshot.
There are a lot of areas for using screenshots, but the essence is already clear - saving data from the screen. At the same time, we can save not only the entire screenshot. Numerous applications and extensions support the creation of a screenshot of both the entire screen and a separate fragment of it.
How to take a screenshot of the screen in Yandex browser?
We can start taking a screenshot in the Yandex browser in different ways:
- Using a standard Windows function. Although the method does not require the use of additional programs, it is the most inconvenient to implement;
- Through extensions. The fastest and most affordable method, you only need to install the add-on, it will take less than a minute;
- Using programs. Among other methods, it is the most functional, with the help of applications we can make screenshots in all programs. To use it, you have to install a special utility.
How to take a screenshot of a Yandex browser page using built-in Windows tools
The classic method is to take a picture of the screen using the Print Screen (Prt sc) button. It's located right on the keyboard, usually to the right of the F12. 
Advantages of the method:
- You don't need to install anything;
- The screenshot captures the entire page of the site in the Yandex browser at once.
Disadvantages:
- You will have to perform a lot of unnecessary actions: launch a graphics editor, insert an image, save it;
- There is no function to automatically upload a screenshot to the server. You will have to manually upload the screenshot to the server;
- To cut out a separate fragment of the screenshot, you will have to use an image editor.
Screenshot process:

How to get a screenshot in Yandex browser using the extension?
Plugins allow you to take a screenshot in the Yandex browser in a few clicks. Due to the ease of creating snapshots, many users use this method.
Advantages of the method:
- Large selection of extensions;
- The ability to configure instant uploading screenshots to the server;
- We can take a snapshot of any part of the page;
- More useful functions for creating screenshots and flexible customization;
- There is a built-in screenshot editor for making elementary changes.
There are several disadvantages of this method:
- It is impossible to take a screenshot in other applications;
- You need to install the extension.
There are a lot of extensions that allow you to get a screenshot in the Yandex browser. It makes no sense to consider all plugins, we will pay attention only to the best.
The best add-ons for creating screenshots in Yandex browser:
- Joxi. Differs in the simplest interface in which we can choose: create a screenshot of the entire page or a fragment of it. The extension fully fulfills the tasks assigned to it. Both the plus and the minus of the plugin - it works only over the network. All screenshots are immediately uploaded to the server, but for this you first have to log into your own account. We can log in through social networks. The extension also has a built-in photo editor. A small drawback of the plugin - you can make and upload screenshots of 1 GB. However, it is not easy to exhaust this limit;

- Fireshot. Quite simple and functional extension. After installing it, all that remains is to click on the plugin image and select the type of screenshot: visible area, entire page or a fragment of the screen. If you select the "Capture entire page" option, the extension automatically scrolls the entire web page and takes a snapshot of it. By clicking on the "Capture visible area" button, you will be able to capture only the fragment of the page that is now visible on the screen. The "Capture Region" button is responsible for creating a screenshot from a part of the page;

- Nimbus. Another good app that lets you do the same thing as Fireshot. There are even more features in the Nimbus add-on. Additional features include: creating a fragment with the ability to scroll through the page, snapshot of the entire screen, screenshot with a timer, a form for uploading your own pictures, etc.;

- Screenshot Extension. In addition to the standard functions for creating screenshots, there is an opportunity to take a screenshot from the webcam.

The principle of operation of all extensions is approximately identical: click on the plugin image, indicate the type of screen creation and choose where to save it.
How to take a screenshot of the screen in Yandex web browser using programs?
Today we can take a screenshot in dozens of different applications. The most popular of them are free programs that do not need extra settings to work properly.
Advantages of the method:
- We can use it in all applications, including the Yandex browser;
- The choice is available: immediately upload the screenshot to the server or save it to the computer;
- There are all the necessary functions for working with screens.
The programs have no significant drawbacks. Among the minor ones: you have to register and install the program, but it will take 1-2 minutes.
Choice of programs:

If you need to take a screenshot in the Yandex browser, we recommend using one of the proposed plugins or programs. They allow you to create a screenshot, edit it and upload it to the server in just a couple of clicks. It makes sense to use the standard method of taking a screenshot only if we want to take a screenshot only once, because in this case there is no point in installing an extension or application.

If you often wondered how to take a screenshot in Google Chrome, then we can please you. There is a special extension that allows you to do this in just a few clicks. And you no longer have to use any incomprehensible and resource-intensive programs to create screenshots in the browser.
How to take a screenshot in Google Chrome
This extension is called Lightshot and it is very popular among Chrome browser users. This is due to its ease of use and the large number of features and settings.
Lightshot does more than take screenshots. They can also be edited later. Therefore, if you did not manage to take a screenshot of the screen, as you wanted, or you need to change it, then the developers have prepared special functions for this. Everything is done very simply, no bells and whistles, but only the most necessary options.
After taking a screenshot in your browser, you can save it on your computer, or upload it to the cloud.
The application is actually very useful, because now you do not need to use various programs, or take pictures the old fashioned way using the Prt Scr button, and then save it through some photo editors. Everything will become much easier - pressed a button, took a screenshot, saved. Everything, and nothing else!
Another big plus of Lightshot is that it is very light and fast, works even on slower computers and does not hinder your actions. Moreover, it contains only the most necessary functions, so even a child can figure out how to manage it.